Table of Contents
Advertisement
Quick Links
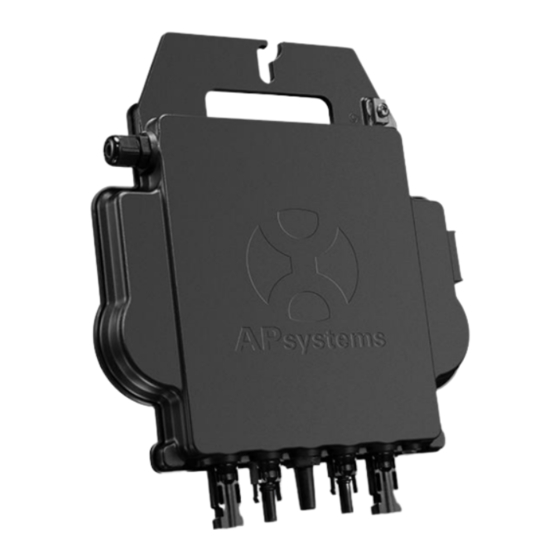
APsystems Microinverter Installation manual
ALTENERGY POWER SYSTEM Inc.
emea.APsystems.com
APsystems
Karspeldreef 8, 1101 CJ, Amsterdam, The Netherlands
EMAIL: info.emea@APsystems.com
APsystems
244c rue du Point du Jour 01000 Saint Denis lès Bourg, France
EMAIL:info.emea@APsystems.com
© All Rights Reserved
DS3-S, DS3-L, DS3-M, DS3, and DS3-H Microinverters
APsystems DS3 series
(For EMEA)
Please scan this QR code to have
access to our APPs and Products
information
Advertisement
Table of Contents

Related Manuals for APsystems DS3-M


Summary of Contents for APsystems DS3-M
- Page 1 APsystems Microinverter Installation manual APsystems DS3 series DS3-S, DS3-L, DS3-M, DS3, and DS3-H Microinverters (For EMEA) ALTENERGY POWER SYSTEM Inc. emea.APsystems.com APsystems Karspeldreef 8, 1101 CJ, Amsterdam, The Netherlands EMAIL: info.emea@APsystems.com Please scan this QR code to have access to our APPs and Products...
-
Page 2: Table Of Contents
4.3.4 Step 4 - Ground the system .......................10 4.3.5 Step 5 - Connect the APsystems microinverter to AC bus cable ............10 4.3.6 Step 6 - Install a Bus Cable End Cap at the end of AC bus cable ............11 4.3.7 Step 7 - Connect APsystems Microinverters to the PV Modules ............12... -
Page 3: Important Safety Instructions
Do NOT disconnect the PV module from the APsystems Microinverter without first disconnecting the AC power. Be aware that the body of the APsystems Microinverter is the heat sink and can reach a temperature of 80°C. To reduce risk of burns, do not touch the body of the Microinverter. -
Page 4: Radio Interference Statement
1. Important Safety Instructions 1.2 Radio Interference Statement EMC Compliance:The APsystems Microinverter can radiate radio frequency energy. If not installed and used in accordance with the instructions, it may cause harmful interference to radio communication. APsystems Microinverter complies with EMC regulations, which are designed to provide reasonable protection against harmful interference in a residential installation. -
Page 5: Symbols In Lieu Of Words
EMC and is authorized to energize, ground, and tag equipment, systems, and circuits in accordance with established safety procedures. The inverter and photovoltaic system may only be commissioned and operated by qualified personnel. APsystems Microinverter DS3 series Installation manual... -
Page 6: Apsystems Microinverter System Introduction
2. APsystems Microinverter System Introduction The APsystems Microinverter is used in utility-interactive grid-tied applications, comprised of three key elements: APsystems Microinverter APsystems Energy Communication Unit (ECU) APsystems Energy Monitor and Analysis (EMA) web-based monitoring and analysis system... - Page 7 Simple to install APsystems Microinvertes are compatible with most of 60 and 72 cell PV modules or 120 and 144 half-cut cells PV modules. (In order to confirm compatibility of PV module with APsystems microinverter, feel free to check our online “E-decider”...
-
Page 8: Apsystems Microinverter Ds3 Series Introduction
799VA, 880VA, or 960VA to adapt to today’s larger power module. With 2 independent MPPT, encrypted ZigBee signals, the DS3-S, DS3-L, DS3-M, DS3, and DS3-H benefit from an entirely new architecture and are fully backwards compatible with the QS1 and YC600 microinverters. -
Page 9: Apsystems Microinverter System Installation
4. APsystems Microinverter System Installation A PV system using APsystems Microinverters is simple to install. Each Microinverter easily mounts on the PV racking, directly beneath the PV module(s). Low voltage DC wires connect from the PV module directly to the Microinverter, eliminating the risk of high DC voltage. -
Page 10: Installation Procedures
4.3.3 Step 3 - Attach the APsystems Microinverters to the Racking a. Mark the location of the microinverter on the rack, with respect to the PV module junction box or any other obstructions. -
Page 11: Step 4 - Ground The System
Microinverter Grounding lug Figure 3 4.3.5 Step 5 - Connect the APsystems microinverter to AC bus cable Insert the microinverter AC connector into the trunk cable connector. Make sure to hear the “click” as a proof of robust connection... -
Page 12: Step 6 - Install A Bus Cable End Cap At The End Of Ac Bus Cable
4.3.6 Step 6 - Install a Bus Cable End Cap at the end of AC bus cable A. Strip cable jacket. B. Insert the cable end into the seal. C. Rotate the nut with 3.3N·m until the latching mechanism meets the base. Figure 8 APsystems Microinverter DS3 series Installation manual... -
Page 13: Step 7 - Connect Apsystems Microinverters To The Pv Modules
4. APsystems Microinverter System Installation 4.3.7 Step 7 - Connect APsystems Microinverters to the PV Modules Figure 9 When plugging in the DC cables, the microinverter should immediately blink green ten times. This will happen as soon as the DC cables are plugged in and will show that the microinverter is functioning correctly. -
Page 14: Step 8 - Connect Apsystems Microinverters To Grid
When AC extension cable is needed, users could connect the AC bus cable and AC extension cable in a junction box or use a pair of male/female AC connectors that APsystems provides as optional accessory. APsystems Microinverter DS3 series Installation manual... -
Page 15: Step 10 - Complete The Apsystems Installation Map
4. APsystems Microinverter System Installation 4.3.10 Step 10 - Complete the APsystems installation map a. Each APsystems Microinverter has 2 removable serial number labels. b. Complete the installation map by sticking the ID label of each microinverter in the right location. -
Page 16: Apsystems Microinverter System Operating Instructions
Alternatively, LED sequences could be an indicator of microinverters status (see section 6.1) Once the ECU has been commissioned properly, the APsystems Microinverters will start to send performance data to the ECU. The time required for all of the Microinverters in the system to report to the ECU will vary depending on the number of Microinverters in the system. -
Page 17: Troubleshooting
Please contact your local APsystems Technical Support. 6.2 ECU_APP APsystems ECU_APP (available in the EMA Manager APP) is the recommended tool to do on-site troubleshooting. When connecting the ECU_APP to the ECU hotspot (please check ECU User Manual for more detailed information), installer can check every microinverter status (production, communication) but also ZigBee signal strength, grid profile and other insightful data helping the troubleshooting. -
Page 18: Apsystems Technical Support
②. Always disconnect AC power before disconnecting the PV module wires from the APsystems Microinverter. ③. The APsystems Microinverter is powered by PV module DC power. AFTER disconnecting the DC power, when reconnecting the PV modules to the Microinverter, be sure to watch for the quick red light followed by ten short green LED flashes. -
Page 19: Replace A Microinverter
7. Replace a microinverter Follow the procedure to replace a failed APsystems Microinverter A. Disconnect the APsystems Microinverter from the PV Module, in the order shown below: 1. Disconnect the AC by turning off the branch circuit breaker. 2. Disconnect the inverter AC connector from the AC Bus. -
Page 20: Technical Data
①. Be sure to verify that the voltage and current specifications of your PV module are compatible with the range allowed on APsystems Microinverter. Please check the microinverter datasheet. ②. DC operating voltage range of the PV module must be within allowable input voltage range of the APsystems Microinverter. -
Page 21: Ds3 Series - Wiring Diagram
SOLAR PANEL BROWN - L BLUE - N YELLOW GREEN - PE AC JUNCTION BOX BUS CABLE END CAP INSTALL AT THE END OF AC BUS CABLE ENERGY COMMUNICATION UNIT DISTRIBUTION PANEL Figure 14 APsystems Microinverter DS3 series Installation manual... -
Page 22: Apsystems Microinverter Installation Map
10. APsystems Microinverter Installation Map The APsystems Installation Map is a diagram of the physical location of each microinverter in your PV installation. Each APsystems microinverter has two serial number labels. Peel the one label and affix it to the respective location on the APsystems installation map.
Need help?
Do you have a question about the DS3-M and is the answer not in the manual?
Questions and answers