Advertisement
TECHNICAL DATA
| OXYPRO | 150 | 300 |
| Voltage/Frequency | 230 V / 50 Hz | |
| Power | 2 W | 4 W |
| Output | 150 l/h | 300 l/h |
| Pumping depth | 200 cm | 200 cm |
| Weight | 430 g | 698 g |
| Product code | 111144 | 111172 |
PRODUCT DESTINATION AND PROPERTIES
We ask you to read the instruction manual carefully before using the product to avoid any potential problems.
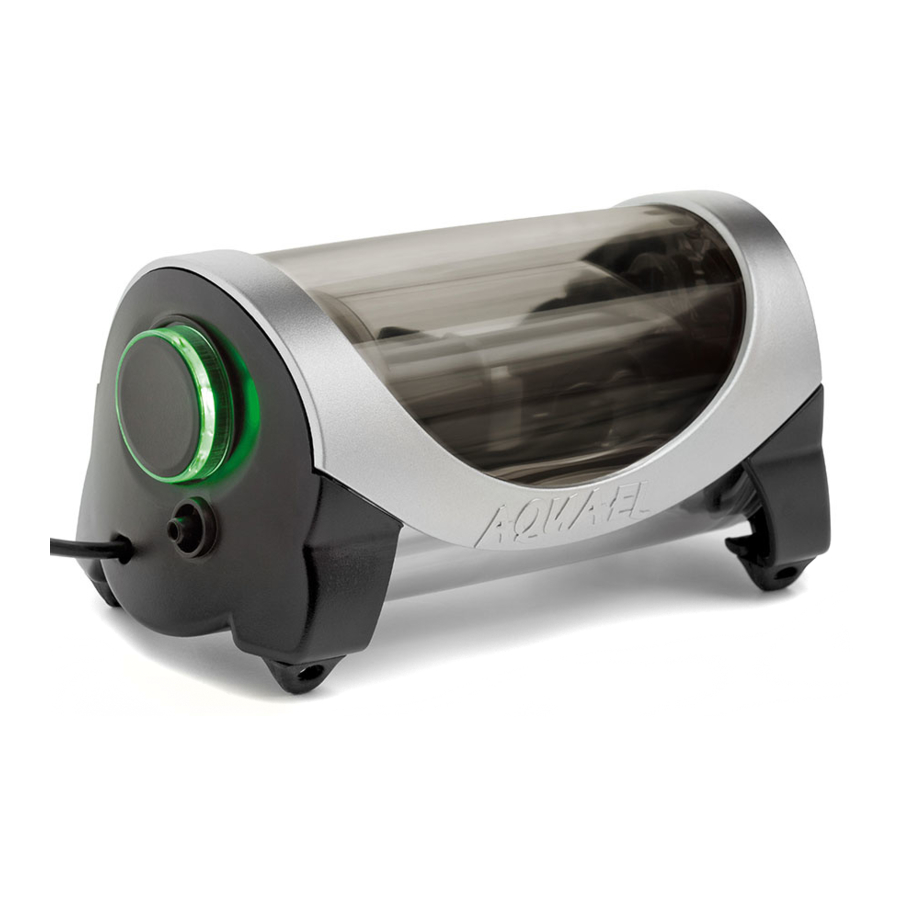
The new generation of aerators from the OXYPRO series is designed to aerate the water and power the traditional sponge and undergravel filters in freshwater aquaria, as well as the tubular protein skimmers in small marine aquaria. Unlike the classic "buzzers" they are practi- cally inaudible. This effect has been achieved thanks to the special construction of the elec- tromagnet and the double walls of the casing. Any vibrations are deadened by its body con- sisting of several independent yet precisely connected elements. They not only dampen the noise but also the vibrations making the OXYPRO quiet as well as stable, that is not changing its position due to the emitted vibrations (which is a common problem of many aerators' models). In practice, the operation of the new OXYPRO is signalled only with a diode and a column of air bubbles floating in the aquarium. The efficiency of the aerator can be easily modified with a large, ergonomic knob adjusting the intensity of its operation to the needs of the specific aquarium. What's more, the OXYPRO aerators are designed to work in the par- ticularly deep tanks – they are able to pump the air even at 2 m below the water surface! Another advantage of OXYPRO is their modern look: through their transparent double body, it is possible to see the inside of the device including the operating membrane. And all this has been achieved while keeping the compact size of the device combined with its extremely low power consumption.
The OXYPRO aerators are the perfect solution for the aquarium hobbyists who appreciate the superior comfort of usage of the aquarium equipment and its excellent quality combined with the innovative technical solutions.
LIST OF PARTS
The packaging should contain:
- OXYPRO aerator.
- Product manual.
- Safety valve (for OXYPRO 150 – 1 pc; for OXYPRO 300 – 2 pcs.
ADDITIONAL ACCESSORIES
- Membranes 2 pcs (100986).
CONDITIONS OF SAFE USAGE
The devide you purchased was manufactured in conformity with all safety standards cur- rently in force on the area of European Union. For long lasting and safe usage please read the safety conditions below:
- The device is designed for usage only indoors and accordingly to its destination.
- The device can be powered from a power grid of voltage stated on the device.
- A device that is damaged or has a damaged power cord must not be used. The condition of the power cord should be checked prior to every start-up of the device. The power cord must not be repaired, replaced or have any additional elements installed. In case of dam- aging the cord the entire device should be replaced.
- Prior to placing hand in the water, all of the electric devices present in the tank should be unplugged from power.
- This appliance is not intended for use by persons (including children) with reduced physi- cal, sensory or mental capabilities, or lack of experience and knowledge, unless they have been given supervision or instruction concerning use of the appliance by a person respon- sible for their safety. Children should be supervised to ensure that they do not play with the appliance.
INSTALLATION AND START UP
Place the aerator on a flat surface, most suitably above the water level in the tank. Install the safety valve included in the packaging on each aeration tube (note: if the aerator is placed below the water level in the tank, in case of the power outage (e.g. due to the power cut), lack of the safety valve threatens to damage the device and flooding your house as a result of the water moving back in the aeration tube). The hose pumping the air to the aeration cube, the filter or the protein skimmer should be connected tightly to the aerator outlet. Being con- nected to the power supply, the device starts to operate. Its efficiency can be adjusted by turning the efficiency regulation knob placed on the aerator's wall clockwise (increasing the efficiency) or anticlockwise (decreasing the efficiency).
MAINTENANCE
The device does not require any special maintenance. If dusted, it is enough to clean its sur- face with a dry soft cloth.
MEMBRANE REPLACEMENT
(FIG. 1-3)


Over the time, the aerator's work may lead to wearing out the membrane being the opera- tional element. The broken membrane results in decrease of device efficiency or even its complete lack of it. The membrane can be replaced by the manufacturer's service centre or personally by the user. In order to do this, unplug the power cord and follow the steps below:
- remove the gray frame (a) from the outer body of the device (b);
- unscrew the two screws (c) securing one of the side walls of the device and located just above its legs on its inner side;
- remove the opposite wall (d) of the device turning it counterclockwise;
- release the two rubber shock absorbers (e) of the mechanism pulling them gently out and removing from the slot in the casing (see fig. 2);
- remove the outer body of the device (b);
- dismantle the inner body of the device (f) by holding its lid (g) located next to the side wall of the aerator and turning the body counterclockwise (see fig. 3);
- remove the broken membrane (h) gently prying its edges with your fingers (do not use any sharp tools for this purpose!);
- remove the membrane arm (i) together with the membrane;
- replace the membrane (h) by removing the old one and mounting the new unit (spare part index 100986);
- mount the membrane arm (i) together with the new membrane (h);
- mount the membrane (h) gently pressing its edges
- put the inner body of device back together (f) turning it clockwise;
- mount the outer body of the device (b);
- mount the two rubber shock absorbents of the device (e) pulling them gently and slipping them into the slot in the casing;
- mount the side wall of the device (d) turning it clockwise (make sure that the gasket (j) lo- cated there stays in the groove);
- unscrew the two screws (c) securing the second back wall of the device located just above its legs on its inner side;
- mount the grey frame (a) to the casing of the device.
DISASSEMBLY AND DISPOSAL
 It is forbidden to dispose of used electric and electrical equipment in a trash bin. Segregat- ing and proper utilization of this kind of waste leads to conserving the resources of natural environment The user is responsible for delivering the used product to a specialized collection point where it will be accepted free of charge. You can obtain information about such a facility at the local authorities at the product seller.
GUARANTEE CONDITIONS
The manufacturer grants a 24 month guarantee beginning on the date of purchase. The guar- antee covers defects arising from manufacturer fault i.e. defective materials or assembly errors. It does not cover damage due to user's fault caused by improper handling of the device or us- ing the device for purposes discordant its destination.

any modification or disassembly attempt exceeding normal usage and maintenance cause the guarantee void. In case of noticing improper operation of the device send it with filled out warranty card to the manu- facturer or distributor address. The conformity of the production date stamped on the product and written in the guarantee card is a prerequisite for accepting the guarantee. The following warranty conditions do not exclude, limit or suspend user's rights derived from discrepancy of the merchandise with the agreement. The guarantee is limited to repair or replacement of the unit only and does not cover consequential loss or damage to animate or inanimate objects.

AQUAEL Janusz Jankiewicz Sp. z o.o.
PL, 02-849 Warszawa, ul. Krasnowolska 50
www.aquael.com, e-mail: service@aquael.com

Documents / Resources
References
Download manual
Here you can download full pdf version of manual, it may contain additional safety instructions, warranty information, FCC rules, etc.
Advertisement


Need help?
Do you have a question about the OXYPRO and is the answer not in the manual?
Questions and answers