Advertisement
Introduction


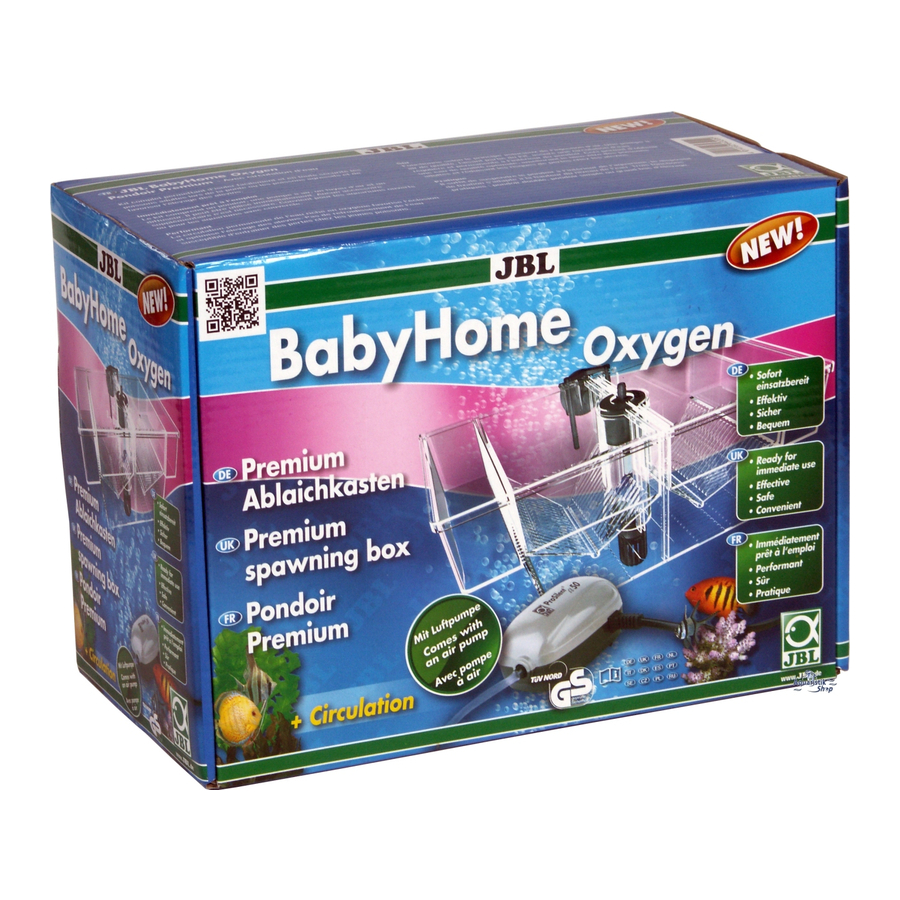
How to use


How it works
Air is introduced to the spawning box through a riser tube in the middle. The air rises to the top and pushes the water upwards through the circular water outlet. This outlet distributes the water evenly inside the spawning box.
Safety instructions for the air pump
Please note:
Basic safety precautions including the following should be observed to protect you from injury and electric shock
- Read and follow all safety advice.
- Make sure that the operating voltage indicated on the nameplate complies with the mains voltage.
- Do not place the air pump on or over the aquarium. If the appliance falls into the water, do not try to retrieve it! Pull the power plug fi rst and then remove the appliance.
- The aquarium and the appliance should be positioned next to a wall socket in such a way that no water can splash onto the socket or the plug. The power cable of the appliance should form a drip loop to prevent water running along the cable from getting into the socket.
- Never pull the plug if the socket or plug is wet! First, turn off the circuit that the appliance is connected to by using the fuse switch, and then pull the plug. Check the socket and the plug for water.
- Children must not play with the appliance
- Cleaning and user maintenance must not be carried out by children without supervision.
- The appliance may be used by children over the age of 8 and by persons with reduced physical, sensory or mental capabilities or lack of experience and knowledge. Beforehand they need to be given an introduction into the safe use of the device and to understand the hazards involved.
- Always disconnect the appliance from the power supply when not in use, before installing or removing parts or before cleaning. Never disconnect the plug by pulling on the cable, instead always grasp the plug and pull it out. Never pull the plug with wet hands!
- The appliance should not be used for any purpose other than its intended one. The use of accessories not recommended by the manufacturer can lead to hazardous situations.
- Do not operate or store the appliance in places with a risk of frost.
- Never carry the appliance by the cable!
- Before using the appliance for the fi rst time, make sure it has been installed safely.
- The appliance may only be used indoors. Only intended for aquatic purposes.
- Do not use the appliance if the cable, power plug or housing is damaged!
- If the power cable is damaged, it must be replaced by the manufacturer or its customer service or a similarly qualifi ed person in order to prevent hazards.
![]()
Before performing maintenance work, switch off all the appliances in the aquarium or pond or disconnect the power plug. Working on the open device may only be carried out by the manufacturer, its customer service or similarly qualifi ed persons.![]()
Unplug or switch off all electrical appliances in the aquarium or pond before carrying out maintenance.- Avoid electric shock by NEVER immersing the appliance, mains plug or mains cable in water or any other liquid.
- Keep these instructions in a safe place!


Disposal: Do not dispose of this appliance in the normal household waste. Please follow the local disposal regulations for electrical appliances.
Installation
- Mount the suction basket (1) with a quarter turn clockwise onto the opening in the bottom of the spawning box (2).
- Put the circular water outlet (3) with air stone into the upper end of the riser stem in the middle of the spawning box.
- Connect the air hose (supplied) with the air connection at the water outlet (4).
- Place the spawning box in the aquarium in the position you have chosen. The variable bracket (5) ensures that the spawning box always remains in position while following minor fl uctuations in water level.
- Insert the other end of the air hose into the air connection of the air pump (supplied) and connect the air pump to the power supply. A gentle and continuous water fl ow creates optimal living conditions inside the spawning box.
- The spawning box is equally suitable as:
- a double spawning box, with both funnel shaped inserts (6) and both partition walls (7) inside the spawning box
- a single spawning box, simply: replace the funnel shaped inserts and partition walls with the big V insert (8)
- a large double (with partition walls) or single (without partition walls) breeding container
Always place both covers (9) on the spawning box.
Note:
Air stones and other air driven articles can become blocked through limescale deposits etc. Please check the air stone in the riser stem of the spawning box from time to time and replace it, if necessary. Possible replacements are JBL Aeras Micro S3.
Replacing the diaphragm in the air pump:
Before carrying out any work on the air pump always disconnect the power supply! Figure 2) a - h
Guarantee (Air Pump)
For this device we off er a guarantee of 2 years from the date of purchase to cover defects in workmanship and material. This guarantee does not cover unreasonable use, water damage and soiling. The diaphragm and other replaceable parts subjected to wear are not covered under this guarantee. In the event of a guarantee claim, please contact your specialist retailer with a proof of purchase.
JBL GmbH & Co. KG
Abt. Service
Wattstr. 4 67141 Neuhofen
www.JBL.de
Germany

Documents / Resources
References
Download manual
Here you can download full pdf version of manual, it may contain additional safety instructions, warranty information, FCC rules, etc.
Advertisement


Need help?
Do you have a question about the Babyhome Oxygen and is the answer not in the manual?
Questions and answers