Table of Contents
Advertisement
Quick Links
Advertisement
Table of Contents

Related Manuals for EPH Controls CDC2


Summary of Contents for EPH Controls CDC2
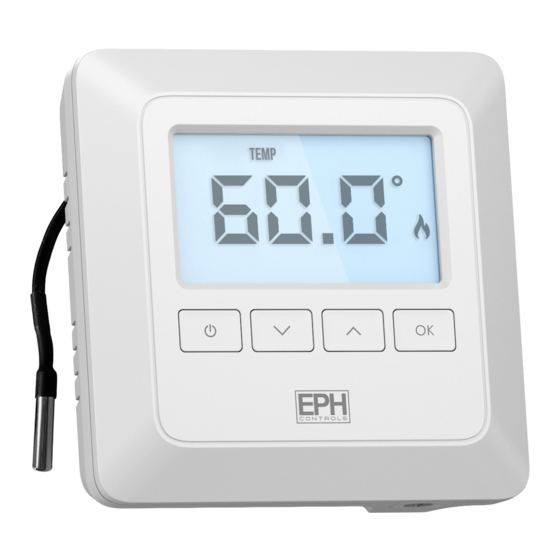
- Page 1 CDC2 Cylinder / Room Thermostat Installation and Operation Guide...
-
Page 2: Table Of Contents
LCD Display Buttons Wiring Mounting & Installation Mounting of Temperature Sensor Operating Instructions Quick introduction to your CDC2 Thermostat On / Off Function & Adjusting the Target Temperature Locking the Keypad / Backlight Menu Function P01 Operating Mode Normal Mode (Nor) -
Page 3: Installation Instructions
Mains operated non-programmable Cylinder / Room Thermostat Installation Instructions... -
Page 4: Factory Default Settings
5˚C HYS OFF: 0˚C Temperature selection range: CyL (Hot Water Parameters) Temperature sensor: Connected Note: Frost protection is built into this thermostat. It will only be activated when the thermostat is in OFF position and the temperature reaches 5˚C. CDC2... -
Page 5: Specifications
External Temperature sensor: NTC 10K Backlight: White IP rating: IP20 Pollution degree: Automatic action: Temperature range: Hot Water 5 … 90˚C Heating 5 … 35˚C Hysteresis (Switching differential) Hot Water 0 … 20°C (0.5°C increments) Heating 0 … 1°C (0.1°C increments) EPH Controls Ltd. -
Page 6: Lcd Display
Displays when thermostat is in the OFF mode. [10] Displays when setting HIGH and LOW temperature limit. [11] Displays during calibration mode. [12] Displays when setting hysteresis. set room temp mode cyc p band HYS calibrate high low limit off [12] [11] [10] CDC2... -
Page 7: Buttons
Buttons Reset Button OK Button Standby Button Down Button Up Button EPH Controls Ltd. -
Page 8: Wiring
Wiring Terminal Connections Neutral Live OFF - N/C Normally closed connection COM - Common connection ON - N/O Normally open connection CDC2... -
Page 9: Mounting & Installation
Before commencing installation, the thermostat must be first disconnected from the ƒ mains. This thermostat can be mounted in the following ways: 1) Directly mounted on wall 2) To a recessed conduit box 3) To a surface mounting box EPH Controls Ltd. - Page 10 Screw the backplate onto a back box or directly to the surface. Ensure the temperature sensor is free from obstruction. Close the front housing and tighten the screw on the bottom of the thermostat. Note: For side entry of the temperature sensor, please use breakout provided. CDC2...
- Page 11 45 113 EPH Controls Ltd.
-
Page 12: Mounting Of Temperature Sensor
Secure the temperature sensor to the pocket using the foil tape provided. 2. Pipe Remove any insulation on the pipework to reveal the pipe. Attach the temperature sensor to the surface of the pipe using the foil tape provided. CDC2... - Page 13 Mount the NTC sensor housing 1.5 meters above floor level. Ensure the temperature sensor is secured tightly in the NTC sensor housing. Note: NTC sensor housing can be purchased as an accessory from EPH Controls. Product code: NTC-Housing EPH Controls Ltd.
-
Page 14: Operating Instructions
Mains operated non-programmable Cylinder / Room Thermostat Operating Instructions... -
Page 15: Quick Introduction To Your Cdc2 Thermostat
Quick introduction to your CDC2 Thermostat: The CDC2 thermostat is a Mains operated, non-programmable thermostat which can control either Hot Water or Heating applications. The easily accessible menu will allow you change from Hot Water to Heating temperature ranges at the push of a button. - Page 16 ‘OFF’ . Adjusting the Target Temperature Press to increase the target temperature. Press or wait 5 seconds. The target temperature is now saved. Press to decrease the target temperature. Press or wait 5 seconds. The target temperature is now saved. CDC2...
-
Page 17: Locking The Keypad / Backlight
The backlight is permanently on. To adjust the backlight setting, press and hold for 10 seconds. ‘AUt’ appears on the screen. to change the mode between AUTO, ON and OFF. Press to confirm selection and to return to normal operation. EPH Controls Ltd. - Page 18 The default setting is Normal. Press and hold the together for 5 seconds, ‘P01’ will appear on the screen, Press to select. to select between Nor (Normal mode) dS (delay start mode) tPi (Time proportional integral mode) Press to confirm the mode. CDC2...
- Page 19 When the temperature rises above the target temperature, will disappear, and the thermostat will cancel the demand for heat. Graph (17.1): On / O Control Temp 22˚C Target Temperature 21˚C 20˚C 19˚C 18˚C 17˚C Time Minutes EPH Controls Ltd.
- Page 20 E.g: If the temperature is 6˚C below the thermostat target, the thermostat will call for heat immediately. If the temperature is 2˚C below the target, the thermostat will not call for heat for 32 minutes. Temperature below thermostat setting °C CDC2...
- Page 21 24 minutes. If the difference is 6°C or more then the thermostat will be switched on immediately. The time delay will change if the temperature drops from the original calculation. EPH Controls Ltd.
- Page 22 CyC – Number of Heating Cycles per hour 6 Cycles This value will decide how often the thermostat will cycle the heating on and off when trying to achieve the target temperature. You can select 2/3/6 or 12. Pb -Proportional Bandwidth 2°C CDC2...
- Page 23 TPI control. You can set this temperature from 1.5°C to 3.0°C in 0.1°C increments. Graph (21.1): TPI Control Temp 22˚C 21˚C Target Temperature 20˚C Proportional Bandwidth 19˚C 18˚C 17˚C Time Minutes Heating On Heating O EPH Controls Ltd.
- Page 24 ‘LOW LIMIT’ will appear on the screen, the temperature will begin to flash. to select the low limit for the thermostat. Press to confirm. Press to return to normal operation. When this setting is enabled, ‘LIMIT’ will appear permanently on the screen when the High or Low Limits have been changed. CDC2...
- Page 25 ‘P01’ will appear on the screen. until ‘P03 & HYS’ appears on the screen. Press Press ‘HOn’ will appear on the screen. Press and the differential temperature will begin to flash. & to select the ‘HOn’ temperature, press to confirm. EPH Controls Ltd.
- Page 26 P03 Hysteresis HOn & HOFF HOn 5°C HOFF 0°C ‘HOF’ will appear on the screen. Press and the differential temperature will begin to flash. & to select the ‘HOFF’ temperature. Press to confirm. Press to return to normal operation. CDC2...
-
Page 27: P04 Calibrate
‘P04 & CALIBRATE’ appears on the screen. Press Press to select. ‘CALIBRATE’ and the actual temperature will appear on the screen. Press to calibrate the temperature. Press to confirm the temperature. Press to return to normal operation. EPH Controls Ltd. -
Page 28: P05 Temperature Range Selection
‘CyL’ will appear on the screen. Press to select ‘Htg’ mode. Press to confirm the mode. Press to return to normal operation. Note: Heating parameters have now been applied to Temperature Range, Hysteresis and High & Low Limit settings. CDC2... - Page 29 Press the reset button and release it. ‘rSt’ will appear and ‘nO’ will flash on the screen. Press ‘YES’ will flash on the screen. Press to confirm. The thermostat will restart and revert to its factory settings. EPH Controls Ltd.
- Page 30 Notes...
- Page 31 Notes...
- Page 32 EPH Controls IE technical@ephcontrols.com www.ephcontrols.com T +353 21 434 6238 EPH Controls UK technical@ephcontrols.com www.ephcontrols.co.uk T +44 1933 626 396...
Need help?
Do you have a question about the CDC2 and is the answer not in the manual?
Questions and answers