Table of Contents
Advertisement
Advertisement
Table of Contents

Subscribe to Our Youtube Channel
Related Manuals for EPH Controls CP4M


Summary of Contents for EPH Controls CP4M
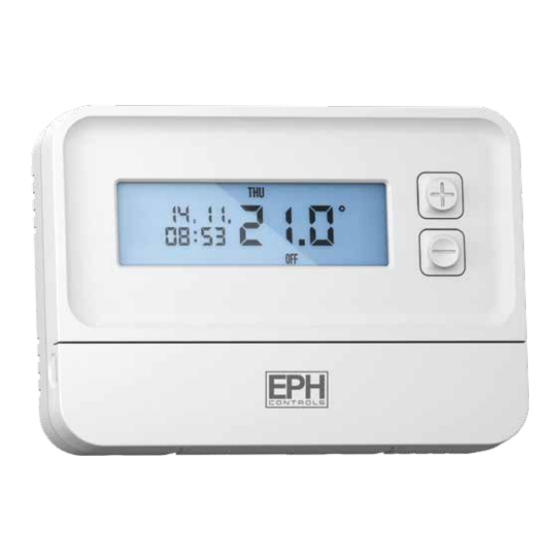
- Page 1 CP4M Mains Operated Programmable Thermostat Installation and Operation Guide...
-
Page 2: Table Of Contents
Table of contents Installation Instructions How your Programmable Thermostat works Factory Default Settings Specifications Wiring diagram Mounting & Installation Operating Instructions LCD Symbol Description Button Description Resetting the thermostat Keypad lock and unlock Setting the date, time and programming mode Factory Program Setting Programming Modes Adjust the program setting in 5/2 Day mode... - Page 3 Backlight mode selection Installer menu PO 1 Operating Mode Normal Optimum Start PO 2 Setting high & low limits PO 3 Hysteresis HON and HOFF (Differential) PO 4 Calibration PO 5 Frost Protection PIN Function Exit Installer menu (with OpenTherm® connected) PO 6 Setting DHW temperature PO 7 OpenTherm®...
-
Page 4: Installation Instructions
Mains Operated Programmable Thermostat Installation Instructions... -
Page 5: How Your Programmable Thermostat Works
Example: If P1 is set to be 21˚C at 6am, and if P2 is set to be 10˚C at 8am, the thermostat will look for the temperature to be 21˚C between 6am and 8am. EPH Controls Ltd. -
Page 6: Factory Default Settings
In built frost protection: 5˚C - Not adjustable Switching differential: 0.4˚C Specifications Power supply: 200 - 240 Vac, 50-60 HZ Power consumption: 630 mW Temp. control range: 5 … 35˚C Ambient temperature: 0 … 50˚C Admissible ambient humidity: 5 - 95% RH CP4M... - Page 7 3 months Battery: LIR2032 Backlight: Blue IP Rating: IP20 Backplate: British System Standard Pollution degree: Pollution Degree 2 Rated impluse voltage: 2,500V as per EN 60730 Automatic action: Type 1.C Software: Class A Ball pressure test temperature 70˚C EPH Controls Ltd.
-
Page 8: Wiring Diagram
Wiring diagram 200-240Vac CONTACT RATING: 250Vac~/7A 50Hz-60Hz If mains voltage output is required, terminal L & 1 must be electrically linked. The cable link is provided with this thermostat. CP4M... -
Page 9: Mounting & Installation
Prior to setting the thermostat, it is necessary to complete all required settings ƒ described in the section. This thermostat can be mounted in the following ways: 1) To a recessed conduit box 2) Directly mounted on wall EPH Controls Ltd. - Page 10 Choose the mounting location to prevent direct exposure to sunlight or other heating / cooling sources when mounted. Fix the mounting plate directly to the wall with the screws provided. Attach the thermostat to the mounting plate. CP4M...
- Page 11 EPH Controls Ltd.
-
Page 12: Operating Instructions
pMains Operated Programmable Thermostat Operating Instructions... -
Page 13: Lcd Symbol Description
LCD Symbol Description Current program Day of the week Day / Month Temperature Current Time Heating on symbol (Boost to time) Keypad lock symbol Operating mode EPH Controls Ltd. -
Page 14: Button Description
Holiday mode O mode Program mode Time / date Automatic mode Set Time/Date Set point increase AUTO TIME Manual mode Holiday mode Set point decrease Off mode Copy function Confirm button COPY Program mode Boost mode Reset button PROG BOOST CP4M... -
Page 15: Resetting The Thermostat
To lock the keypad, press and hold the buttons for 10 seconds. will appear on the screen. The keypad is now locked. To unlock the keypad, press and hold the buttons for 10 seconds. will disappear from the screen. The keypad is now unlocked. EPH Controls Ltd. -
Page 16: Setting The Date, Time And Programming Mode
5/2d to 7d or 24h mode. Press the buttons to turn DST (Day Light Saving time) On or Off. Press the button or wait 5 seconds and the thermostat will return to AUTO normal operation. CP4M... -
Page 17: Factory Program Setting
17:30 22:00 Mon-Fri 21˚C 10˚C 10˚C 10˚C 21˚C 10˚C 08:00 10:00 12:00 14:00 17:30 23:00 Sat-Sun 21˚C 10˚C 10˚C 10˚C 21˚C 10˚C 24 Hour 06:30 08:00 12:00 14:00 17:30 22:00 Everyday 21˚C 10˚C 10˚C 10˚C 21˚C 10˚C EPH Controls Ltd. -
Page 18: Programming Modes
Programming Modes The CP4M Main Operated Programmable Thermostat has the following programming modes available: 5/2 Day mode Programing Monday to Friday as one block and Saturday and Sunday as a 2nd block. Each block can have 6 different times and temperatures. -
Page 19: Adjust The Program Setting In 5/2 Day Mode
AUTO While in PROG Mode pressing the button will jump from P1-P2 etc PROG without changing the temperature. While in PROG Mode pressing the button will jump to the next day TIME (block of days). EPH Controls Ltd. -
Page 20: Copy Function
The next day will begin to flash on the top of the screen. Press the button to copy the times and temperatures to that day. Press the button to skip a day. You can copy to multiple days using the button. Press the button when copying has been completed. CP4M... -
Page 21: Temporary Override And Permanent Override
Press or after 5 seconds the thermostat will operate in this permanent override. To cancel permanent override, press the buttton and then press button to return to the automatic mode. AUTO EPH Controls Ltd. -
Page 22: Boost Function
5 seconds for the boost to activate. ‘BOOST TO’ will now be displayed on the screen with the time that it is activated to displayed above this text. Press the button again to deactivate the boost. BOOST CP4M... -
Page 23: Holiday Function
Press Press the buttons to adjust the hour. Press The thermostat will now return to the mode it was in before the Holiday settings were entered. To cancel Holiday mode, press the button. EPH Controls Ltd. -
Page 24: Backlight Mode Selection
The backlight is permanently ON. To adjust the backlight setting, lower the cover on the front of the unit. Press the button for 5 seconds. Press either the buttons to select the OFF, AUTO or ON mode. Press the button. CP4M... -
Page 25: Installer Menu
Installer menu To access the installer menu, you must hold for 5 seconds. PROG When in the installer menu, press to navigate and select. to go back a step. AUTO P0 1: Mode (Normal / Optimum Start / TPI) P0 2: Hi Lo (limiting the thermostat) P0 3: Hysteresis (differential) -
Page 26: Po 1 Operating Mode
10, 15, 20, 25 or 30. This will allow the thermostat 10, 15, 20, 25 or 30 minutes to increase the room temperature by 1°C. Ti can be set when OS is selected in the installer menu. 20˚C CP4M... -
Page 27: Optimum Start
Optimum Start Time (OST) and its maximum value is 3 hours = 180 mins. This is subtracted from the start time. As the temperature increases the thermostat will recalculate the OST if the temperature is increasing too quickly. EPH Controls Ltd. - Page 28 Example when Ti = 10 Program 1 on the thermostat is 21°C for 06:30am and the room temperature is 18°C. The thermostat will start the heating at 06:00am to reach 21°C for 06:30am @ Ti=10. Target Temperature Di erence ˚C CP4M...
-
Page 29: Tpi
TPI Control. You can set this temperature from 1.5˚C to You can select 2/3/6 or 12. 3.0˚C in 0.1˚C increments. EPH Controls Ltd. - Page 30 18°C. The thermostat will start the heating at 06:30am and the room temperature will start to increase then but will switch itself off before it reaches temperature and allow the room temperature to increase naturally – this cycle may begin again if the thermostat isn’t reaching temperature. CP4M...
-
Page 31: Po 2 Setting High & Low Limits
HOn is the fall in temperature – Default – 0.4°C. This will allow a fall of 0.4°C from the setpoint before the thermostat turns on again. HOFF is the rise in temperature – Default – 0.0°C. This will allow the temperature to rise 0°C above its setpoint. EPH Controls Ltd. -
Page 32: Po 4 Calibration
This menu allows the user to put a PIN lock on the thermostat. The PIN lock will reduce the functionality of the thermostat. The user will have two options to choose from: 01: All buttons will be disabled. 02: The only modes available are the AUTO & OFF. CP4M... - Page 33 PIN digit. When the last digit of the PIN is set, Press The PIN is now verified, and the PIN lock is activated. If the verification PIN is entered incorrectly the user is brought back to the menu. EPH Controls Ltd.
- Page 34 PIN digit. When the last digit of the PIN is set. Press The PIN is now unlocked. If a PIN has been unlocked on the thermostat, it will automatically reactivate if there is no button pressed for 2 minutes. CP4M...
-
Page 35: Exit
AUTO 20 seconds. Exit This menu allows the installer to return to the main interface. It is also possible to exit the installer menu by pressing AUTO whilst in the installer menu. EPH Controls Ltd. -
Page 36: Installer Menu (With Opentherm® Connected)
The temperature can be set in 0.5°C increments by pressing the buttons. Press the button to select the desired temperature. This menu is only available when the thermostat is connected to OpenTherm® and DHOP is ON (P08 OT installer menu). CP4M OpenTherm® Instructions... -
Page 37: Po 7 Opentherm® Information
Flue gas temperature Dependent on boiler tESt Outdoor temperature Dependent on boiler nOdU Modulation percentage This is only visible if DHOP FLOr Water flow is On (P08 OT Installer menu) PrES Water pressure Dependent on boiler EPH Controls Ltd. -
Page 38: Po 8 Dhop
This menu allows the installer to configure the OpenTherm® parameters. To access the menu please enter the password “08” with the buttons. Press to confirm. The parameters that can be set are outlined in the table below. CP4M OpenTherm® Instructions... - Page 39 This is the target setpoint for your CH flow HHCH Max temperature. HHbO t-5 >=ID57 85˚C Note: this value must be within the range >=LLCH Min of HHCH and LLCH. Press OK button to turn back to main Exit interface. EPH Controls Ltd.
-
Page 40: Exit
PO 9 Set OpenTherm® Parameters (Continued) Climatic Curve Exit This menu allows the installer to return to the main interface. It is also possible to exit the installer menu by pressing AUTO whilst in the installer menu. CP4M OpenTherm® Instructions... -
Page 41: Service Interval
When the Service Interval is activated ‘SErv’ will appear on the screen which will alert the user that their annual boiler service is due. For details on how to enable or disable the Service Interval, please contact customer service. EPH Controls Ltd. - Page 42 Notes...
- Page 43 Notes...
- Page 44 EPH Controls IE technical@ephcontrols.com www.ephcontrols.com/contact-us T +353 21 471 8440 EPH Controls UK technical@ephcontrols.co.uk www.ephcontrols.co.uk/contact-us T +44 1933 322 072...
Need help?
Do you have a question about the CP4M and is the answer not in the manual?
Questions and answers