Huawei SmartLogger3000 User Manual
Hide thumbs
Also See for SmartLogger3000:
- Quick start manual ,
- User manual (454 pages) ,
- Configuration manual (27 pages)

Related Manuals for Huawei SmartLogger3000


Summary of Contents for Huawei SmartLogger3000
- Page 1 SmartLogger3000 User Manual Issue Date 2022-08-20 HUAWEI TECHNOLOGIES CO., LTD.
- Page 2 Notice The purchased products, services and features are stipulated by the contract made between Huawei and the customer. All or part of the products, services and features described in this document may not be within the purchase scope or the usage scope. Unless otherwise specified in the contract, all statements, information, and recommendations in this document are provided "AS IS"...
-
Page 3: About This Document
About This Document About This Document Purpose This document introduces the SmartLogger3000 (SmartLogger for short) and SmartModule1000 (SmartModule for short) in terms of installation, electrical connections, system operation and maintenance, and troubleshooting. Understand the SmartLogger and SmartModule features, functions, and safety precautions provided in this document before installing and operating the SmartLogger and SmartModule. - Page 4 6.7.2 Setting Active Power Control. Updated 6.7.3 Setting Reactive Power Control. Updated 7.3 Alarm List. Updated 7.4.4 Exporting Device Logs. Updated 7.4.11 Force Start. Issue 09 (2022-01-07) Updated 2.1.2 Networking. Updated 2.2.2 Networking. Issue 10 (2022-08-20) Copyright © Huawei Technologies Co., Ltd.
- Page 5 6.2.1 Preparations and WebUI Login. Added 6.2.3 Commissioning Using Deployment Wizard (V800R021C10). Updated 6.3.1 Setting User Parameters. Updated 6.3.2 Setting Parameters for Connecting to the Management System (V300R001C00). Added 6.3.9 Setting PCS Parameters. Issue 10 (2022-08-20) Copyright © Huawei Technologies Co., Ltd.
- Page 6 (V300R001C00). Updated 6.3.8.1 Running Parameters.6.3.8.1 Running Parameters Updated 6.3.8.2 Tracking System. Updated 6.3.16.1 Setting DL/T645 Power Meter Parameters. Updated 6.3.16.2 Setting Modbus-RTU Power Meter Parameters. Updated 6.3.17.1 Setting Modbus-RTU EMI Parameters. Issue 10 (2022-08-20) Copyright © Huawei Technologies Co., Ltd.
- Page 7 Added the description about the SmartModule. Issue 02 (2019-12-18) Updated 6 WebUI Operations. Updated 9.1 Technical Specifications of the SmartLogger. Issue 01 (2019-09-24) This issue is used for first office application (FOA). Issue 10 (2022-08-20) Copyright © Huawei Technologies Co., Ltd.
-
Page 8: Table Of Contents
4.1 Connecting Cables to the SmartLogger........................38 4.1.1 Preparing Cables................................38 4.1.2 Connecting a PE Cable..............................39 4.1.3 Connecting an RS485 Communications Cable......................39 4.1.4 Connecting an MBUS Cable............................41 4.1.5 Connecting a DI Signal Cable............................44 Issue 10 (2022-08-20) Copyright © Huawei Technologies Co., Ltd. - Page 9 6.3.5 Setting Parameters for the Slave SmartLogger....................111 6.3.6 Setting GOOSE Communications Parameters....................... 113 6.3.7 Setting MBUS Parameters............................114 6.3.8 Setting Inverter Parameters............................120 6.3.8.1 Running Parameters..............................121 6.3.8.2 Tracking System................................137 Issue 10 (2022-08-20) Copyright © Huawei Technologies Co., Ltd. viii...
- Page 10 6.7.7 Setting DRM Parameters.............................. 224 6.7.8 Setting Remote Shutdown............................226 6.7.8.1 Setting Dry Contact Remote Shutdown.......................226 6.7.8.2 Setting NS Protection Remote Shutdown......................227 7 Device Maintenance......................230 7.1 Routine Maintenance................................ 230 Issue 10 (2022-08-20) Copyright © Huawei Technologies Co., Ltd.
- Page 11 9 Technical Specifications..................... 276 9.1 Technical Specifications of the SmartLogger......................276 9.2 Technical Specifications of the SmartModule......................281 A Product User Lists....................... 283 B Domain Name List of Management Systems...............285 C Port No. List..........................286 Issue 10 (2022-08-20) Copyright © Huawei Technologies Co., Ltd.
- Page 12 SmartLogger3000 User Manual Contents D Certificate Management and Maintenance..............288 D.1 Preconfigured Certificate Risk Disclaimer ........................ 288 D.2 Application Scenarios of Preconfigured Certificates....................288 E Acronyms and Abbreviations....................290 Issue 10 (2022-08-20) Copyright © Huawei Technologies Co., Ltd.
-
Page 13: Safety Information
The "NOTICE", "CAUTION", "WARNING", and "DANGER" statements in this document do not cover all the safety instructions. They are only supplements to the safety instructions. Huawei will not be liable for any consequence caused by the violation of general safety requirements or design, production, and usage safety standards. -
Page 14: Personnel Requirements
Huawei' s intellectual property, or disclose any device software performance test results. Personal Safety ●... -
Page 15: Electrical Safety
Before making electrical connections, switch off the disconnector on the upstream device to cut off the power supply if people may contact energized components. ● Before connecting a power cable, check that the label on the power cable is correct. Issue 10 (2022-08-20) Copyright © Huawei Technologies Co., Ltd. -
Page 16: Installation Environment Requirements
Ensure that the ladder is securely positioned. The recommended angle for a ladder against the floor is 75 degrees, as shown in the following figure. An angle rule can be used to measure the angle. Issue 10 (2022-08-20) Copyright © Huawei Technologies Co., Ltd. -
Page 17: Commissioning
When the equipment is powered on for the first time, ensure that professional personnel set parameters correctly. Incorrect settings may result in inconsistency with local certification and affect the normal operation of the equipment. Issue 10 (2022-08-20) Copyright © Huawei Technologies Co., Ltd. -
Page 18: Maintenance And Replacement
If the equipment is faulty, contact your dealer. ● The equipment can be powered on only after all faults are rectified. Failing to do so may escalate faults or damage the equipment. Issue 10 (2022-08-20) Copyright © Huawei Technologies Co., Ltd. -
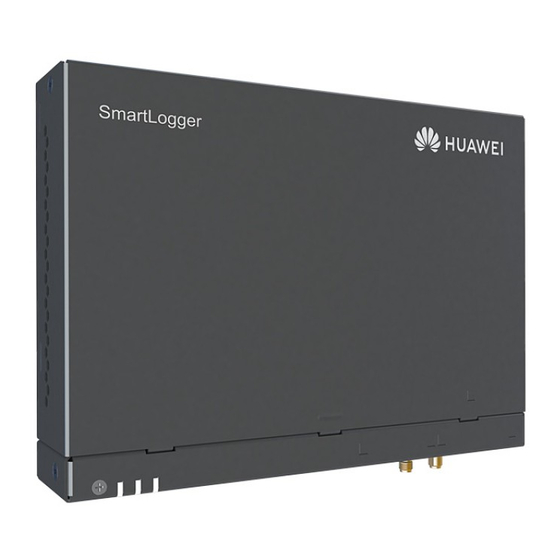
Page 19: Product Overview
This document covers the following SmartLogger models: ● SmartLogger3000A01CN ● SmartLogger3000B01CN ● SmartLogger3000B03CN ● SmartLogger3000A01EU ● SmartLogger3000A03EU ● SmartLogger3000B02EU ● SmartLogger3000A01NH ● SmartLogger3000B00NH ● SmartLogger3000A01KR ● SmartLogger3000A01AU ● SmartLogger3000A00GL Figure 2-1 Model Issue 10 (2022-08-20) Copyright © Huawei Technologies Co., Ltd. - Page 20 ● CN: China ● EU: Europe ● NH: Japan ● KR: South Korea ● AU: Australia ● GL: Global Model Identification You can view the SmartLogger model and communication mode on the nameplate. Issue 10 (2022-08-20) Copyright © Huawei Technologies Co., Ltd.
-
Page 21: Networking
Local operations on the SmartLogger using the mobile phone app through the built-in WLAN ● RS485 networking, which enables the SmartLogger to connect to: – Huawei devices such as solar inverters and PID modules Issue 10 (2022-08-20) Copyright © Huawei Technologies Co., Ltd. - Page 22 Ethernet networking, which connects to the solar inverter, Smart Power Control System (Smart PCS), Smart String Energy Storage System (ESS), MBUS CCO, and STS. ● MBUS networking, which enables the SmartLogger to connect to Huawei solar inverters and PID-PVBOXs that support MBUS communication ● Connection to management systems: –...
- Page 23 1000M optical module). The maximum communication distance is 100 m when an Ethernet cable is used for connection. ● The SmartLogger supports the following wireless networks: 4G/3G/2G networking and LTE dedicated networking. Issue 10 (2022-08-20) Copyright © Huawei Technologies Co., Ltd.
- Page 24 SmartLogger3000 User Manual 2 Product Overview Figure 2-5 4G networking Issue 10 (2022-08-20) Copyright © Huawei Technologies Co., Ltd.
- Page 25 ● The WAN port of the SmartLogger connects to the customer-premises equipment (CPE) through the power over Ethernet (PoE) module and PoE SPD. ● The IP addresses of the SmartLogger and CPE must be on the same network segment. Issue 10 (2022-08-20) Copyright © Huawei Technologies Co., Ltd.
-
Page 26: Appearance
(13) 12 V output power port (14) AI ports (15) DO ports (16) COM ports (17) 24 V input power port (18) 12 V input power port (19) Protective ground point Issue 10 (2022-08-20) Copyright © Huawei Technologies Co., Ltd. - Page 27 Dial-up through the 4G/3G/2G then off for 1s) network is successful. Blinking green fast (on for 0.125s and The 4G/3G/2G network is not then off for 0.125s) connected or the communication is interrupted. Issue 10 (2022-08-20) Copyright © Huawei Technologies Co., Ltd.
- Page 28 ● If RSTP is used, fiber ring protection can be completed within 10 seconds. If STP is used, fiber ring protection can be completed within 60 seconds. ● The SFP1 and SFP2 ports are Ethernet optical ports and work on the same network segment as the WAN port. Issue 10 (2022-08-20) Copyright © Huawei Technologies Co., Ltd.
- Page 29 12 V 12 V 12 V 12 V ● AI ports: analog input ports, which are used to connect to AI power grid scheduling commands or environment monitoring sensors. Issue 10 (2022-08-20) Copyright © Huawei Technologies Co., Ltd.
- Page 30 SmartLogger, such as firmware upgrade and data export. ● COM ports: RS485 communications port, supporting three independent RS485 channels and the access of devices that comply with the Modbus-RTU, IEC103, or DL/T645 protocol. Issue 10 (2022-08-20) Copyright © Huawei Technologies Co., Ltd.
- Page 31 Select the intermediate relay with a free-wheeling diode in the coil. Otherwise, the device may be damaged. Appearance Output Power Port Description 12 V output Power supply– power port 12 V Power supply+ Issue 10 (2022-08-20) Copyright © Huawei Technologies Co., Ltd.
-
Page 32: Smartmodule
60s to restart the SmartLogger and 60s. restore factory settings. Dimensions Figure 2-8 Dimensions 2.2 SmartModule 2.2.1 Model Model description This document covers the following SmartModule model: ● SmartModule1000A01 Issue 10 (2022-08-20) Copyright © Huawei Technologies Co., Ltd. - Page 33 Figure 2-10 Nameplate (1) Trademark, product model, and power (2) Communications mode rating (3) Compliance symbols (4) Company name and place of manufacture NO TE The nameplate figure is for reference only. Issue 10 (2022-08-20) Copyright © Huawei Technologies Co., Ltd.
-
Page 34: Networking
● RS485 networking, which enables the SmartModule to connect to: – Huawei devices such as solar inverters and PID modules – Third-party solar inverters, environment monitoring instruments (EMIs), Smart Transformer Stations (STSs), and power meters that use the Modbus-RTU protocol –... -
Page 35: Appearance
(6) 12 V power output port (7) AI ports (8) PT ports (9) Protective ground point (10) 12 V power input port (11) 24 V power input port (12) GE ports (13) RST button Issue 10 (2022-08-20) Copyright © Huawei Technologies Co., Ltd. - Page 36 SmartLogger to one GE port of the SmartModule using an Ethernet cable. The SmartModule obtains an IP address from the DHCP server and automatically registers with the SmartLogger. The SmartLogger can use all communications ports of the SmartModule. Issue 10 (2022-08-20) Copyright © Huawei Technologies Co., Ltd.
- Page 37 12 V 12 V 12 V 12 V ● AI ports: analog input ports, which are used to connect to AI power grid scheduling commands or environment monitoring sensors. Issue 10 (2022-08-20) Copyright © Huawei Technologies Co., Ltd.
- Page 38 DL/T645 protocol. Appearance COM Port Description COM1, RS485A, RS485 differential COM2, and signal+ COM3 – RS485B, RS485 differential signal– Power Ports ● Input power ports: There are two input power ports. Issue 10 (2022-08-20) Copyright © Huawei Technologies Co., Ltd.
- Page 39 Select the intermediate relay with a free-wheeling diode in the coil. Otherwise, the device may be damaged. Appearance Output Power Port Description 12 V output Power supply– power port 12 V Power supply+ Issue 10 (2022-08-20) Copyright © Huawei Technologies Co., Ltd.
- Page 40 RST button for more than 60s to restart the 60s. SmartModule and restore factory settings. Dimensions Figure 2-13 Dimensions Issue 10 (2022-08-20) Copyright © Huawei Technologies Co., Ltd.
-
Page 41: Device Installation
If any component is missing or damaged, contact your dealer. 3.2 Tools Type Tool Hammer drill Diagonal pliers Wire stripper Crimping tool Installation RJ45 crimping Flat-head Torque Rubber mallet tool screwdriver screwdriver Issue 10 (2022-08-20) Copyright © Huawei Technologies Co., Ltd. -
Page 42: Installation Requirements
● Do not install the SmartLogger in areas with flammable and explosive materials and direct sunlight. ● The SmartLogger should be installed at a proper height to facilitate operation and maintenance. Issue 10 (2022-08-20) Copyright © Huawei Technologies Co., Ltd. -
Page 43: Installing The Smartlogger
● When wall-mounting the SmartLogger, ensure that the cable connection area faces downwards for ease of cable connection and maintenance. ● You are advised to use the tapping screws and expansion tubes delivered with the SmartLogger. Issue 10 (2022-08-20) Copyright © Huawei Technologies Co., Ltd. - Page 44 ● Has sufficient length for securing the SmartLogger. The recommended effective length is 230 mm or greater. ● Has been secured before you install the SmartLogger. Figure 3-3 Guide rail-mounted installation Issue 10 (2022-08-20) Copyright © Huawei Technologies Co., Ltd.
-
Page 45: Installing The Smartlogger And Smartmodule
If the SmartLogger and SmartModule have been combined before delivery, skip this step. Figure 3-4 Connecting the SmartLogger to the SmartModule using a connecting plate Step 2 Install the SmartLogger and SmartModule. Issue 10 (2022-08-20) Copyright © Huawei Technologies Co., Ltd. - Page 46 Ensure that the SIM card slot on the SmartLogger is not blocked. Figure 3-6 Guide rail-mounted installation Guide Rail-mounted Installation (Combined) Prepare a 35 mm standard guide rail by yourself. Ensure that the guide rail: Issue 10 (2022-08-20) Copyright © Huawei Technologies Co., Ltd.
- Page 47 You do not need to use a connecting plate to connect the SmartLogger and SmartModule. Figure 3-7 Connecting the SmartLogger to the SmartModule using a connecting plate Step 2 Install the SmartLogger and SmartModule. Issue 10 (2022-08-20) Copyright © Huawei Technologies Co., Ltd.
-
Page 48: Installing A Power Adapter
It is recommended that the power adapter be installed on the right side of the SmartLogger. Keep the AC power cable port upward. WARNING Avoid drilling holes into the water pipes and power cables buried in the wall. Figure 3-9 Wall-mounted Installation (Mode 1) Issue 10 (2022-08-20) Copyright © Huawei Technologies Co., Ltd. - Page 49 ● Ensure that the adapter is securely installed. Step 2 Plan the cable route of the power adapter to ensure that the SIM card can be installed properly. Figure 3-11 Flat surface-mounted installation ----End Issue 10 (2022-08-20) Copyright © Huawei Technologies Co., Ltd.
-
Page 50: Cable Connections
Cat 5e or higher specifications and shielded RJ45 connectors. (Optional) 24 V Two-core cable with a cross-sectional area of 0.2–1.5 mm or 24–16 AWG input power cable Issue 10 (2022-08-20) Copyright © Huawei Technologies Co., Ltd. -
Page 51: Connecting A Pe Cable
PID over the COM port. ● Ensure that RS485+ is connected to COM+ of the SmartLogger and RS485– is connected to the COM– of the SmartLogger. Procedure Step 1 Connect an RS485 communications cable. Issue 10 (2022-08-20) Copyright © Huawei Technologies Co., Ltd. - Page 52 ● You are advised to connect fewer than 30 devices to each RS485 route. ● The baud rate, communications protocol, and parity mode of all devices on an RS485 cascading link must be the same as those of the COM port on the SmartLogger. Issue 10 (2022-08-20) Copyright © Huawei Technologies Co., Ltd.
-
Page 53: Connecting An Mbus Cable
MCB and a knife fuse switch need to be installed to prevent device damage in the case of short circuits. NO TICE The rated power of the PV system connected to the MBUS port on the SmartLogger must be greater than 75 kW. Issue 10 (2022-08-20) Copyright © Huawei Technologies Co., Ltd. - Page 54 SmartLogger3000 User Manual 4 Cable Connections Figure 4-4 MBUS networking Procedure Step 1 Connect an MBUS cable. Figure 4-5 Connecting an MBUS Cable Table 4-1 Components Component Specifications Quantity Busbar L1/L2/L3 Issue 10 (2022-08-20) Copyright © Huawei Technologies Co., Ltd.
- Page 55 500 V and less than or equal to 800 V, the rated current should be greater than or equal to 32 A; number of poles: 3 Issue 10 (2022-08-20) Copyright © Huawei Technologies Co., Ltd.
-
Page 56: Connecting A Di Signal Cable
DI ports. It can only receive passive dry contact signals. It is recommended that the signal transmission distance be less than or equal to 10 m. Procedure Step 1 Connect a DI signal cable. Issue 10 (2022-08-20) Copyright © Huawei Technologies Co., Ltd. -
Page 57: Connecting The Output Power Cable
12 V output power port. It is recommended that the transmission distance be less than or equal to 10 m. Procedure Step 1 Connect the output power cable. Issue 10 (2022-08-20) Copyright © Huawei Technologies Co., Ltd. -
Page 58: Connecting The Ai Signal Cable
The SmartLogger can receive AI signals from EMIs over AI ports. It is recommended that the signal transmission distance be less than or equal to 10 m. Procedure Step 1 Connect the AI signal cable. Figure 4-8 Connecting the AI signal cable Issue 10 (2022-08-20) Copyright © Huawei Technologies Co., Ltd. -
Page 59: Connecting The Do Signal Cable
NO/COM is a normally open contact. It is recommended that the signal transmission distance be less than or equal to 10 m. Procedure Step 1 Connect the DO signal cable. Issue 10 (2022-08-20) Copyright © Huawei Technologies Co., Ltd. -
Page 60: Connecting The Ethernet Cable
Step 1 Connect the Ethernet cable. NO TE When crimping the network cable, ensure that the shielding layer of the cable is securely connected to the metal shell of the RJ45 connectors. Issue 10 (2022-08-20) Copyright © Huawei Technologies Co., Ltd. -
Page 61: Connecting Fiber Jumpers
When inserting an optical module into the SFP2 port, verify that the side with a label faces downward. Step 2 Connect the fiber jumpers delivered with the optical module to the ports of the optical module. Issue 10 (2022-08-20) Copyright © Huawei Technologies Co., Ltd. -
Page 62: Installing A Sim Card And A 4G Antenna
LUNA2000-(5-30)-S0. If other devices are connected to the SmartLogger in the network, the monthly traffic of the SIM card needs to be increased as required. Issue 10 (2022-08-20) Copyright © Huawei Technologies Co., Ltd. - Page 63 ● Press the SIM card in place to lock it. In this case, the SIM card is correctly installed. ● When removing the SIM card, push it inward to eject it. Step 2 Install an antenna. Issue 10 (2022-08-20) Copyright © Huawei Technologies Co., Ltd.
-
Page 64: Connecting The 24 V Input Power Cable
24 V input power port functions as the 12 V output power port to supply power to devices. Procedure Step 1 Connect the input power cable. Figure 4-13 Connecting the input power cable ----End 4.2 Connecting Cables to the SmartModule Issue 10 (2022-08-20) Copyright © Huawei Technologies Co., Ltd. -
Page 65: Preparing Cables
PT100/PT1000. (Optional) 24 V Two-core cable with a cross-sectional area of 0.2–1.5 mm or 24–16 AWG power input cable 4.2.2 Connecting the PE Cable Procedure Step 1 Connect the PE cable. Issue 10 (2022-08-20) Copyright © Huawei Technologies Co., Ltd. -
Page 66: Connecting The Ethernet Cable
Step 1 Connect the Ethernet cable. NO TE When crimping the network cable, ensure that the shielding layer of the cable is securely connected to the metal shell of the RJ45 connectors. Issue 10 (2022-08-20) Copyright © Huawei Technologies Co., Ltd. -
Page 67: Connecting The 12 V Power Input Cable
24 V power input port of the SmartLogger functions as the 12 V power output port to supply power to the SmartModule. Procedure Step 1 Connect the 12 V power input cable. Figure 4-16 Connecting the 12 V power input cable ----End Issue 10 (2022-08-20) Copyright © Huawei Technologies Co., Ltd. -
Page 68: Connecting The Rs485 Communications Cable
● You are advised to connect fewer than 30 devices to each RS485 route. ● The baud rate, communications protocol, and parity mode of all devices on an RS485 cascading link must be the same as those of the COM port of the SmartModule. Issue 10 (2022-08-20) Copyright © Huawei Technologies Co., Ltd. -
Page 69: Connecting The Di Signal Cable
DI ports. It can only receive passive dry contact signals. It is recommended that the signal transmission distance be less than or equal to 10 m. Procedure Step 1 Connect the DI signal cable. Figure 4-19 Connecting the DI signal cable Issue 10 (2022-08-20) Copyright © Huawei Technologies Co., Ltd. -
Page 70: Connecting The Output Power Cable
10 m. Procedure Step 1 Connect the power output cable. Figure 4-20 Connecting the power output cable (1) Intermediate relay ----End Issue 10 (2022-08-20) Copyright © Huawei Technologies Co., Ltd. -
Page 71: Connecting The Ai Signal Cable
Supports 0–10 V input voltage. Support 0–20 mA or 4–20 mA input current. NO TE AI ports 1, 2, 3, and 4 are for AI+ signals, and the GND port is for AI– signals. ----End Issue 10 (2022-08-20) Copyright © Huawei Technologies Co., Ltd. -
Page 72: Connecting The Pt Signal Cable
When a PT port needs to be connected to a two-wire PT100/PT1000, use a short- circuit cable to short-circuit GND and – of the port. Procedure Step 1 Connect the PT signal cable. Figure 4-22 Connection to a three-wire PT100/PT1000 (1) PT100/PT1000 temperature sensor Issue 10 (2022-08-20) Copyright © Huawei Technologies Co., Ltd. -
Page 73: Connecting The 24 V Power Input Cable
24 V power input cable functions as the 12 V power output port to supply power to a device. Procedure Step 1 Connect the power input cable. Issue 10 (2022-08-20) Copyright © Huawei Technologies Co., Ltd. - Page 74 SmartLogger3000 User Manual 4 Cable Connections Figure 4-24 Connecting the power input cable ----End Issue 10 (2022-08-20) Copyright © Huawei Technologies Co., Ltd.
-
Page 75: System Operation
● The rated input voltage of the power adapter is 100–240 V AC, and the rated input frequency is 50/60 Hz. ● Select an AC socket that matches the power adapter. Issue 10 (2022-08-20) Copyright © Huawei Technologies Co., Ltd. - Page 76 DC power supply. Step 2 When MBUS is used for communication, turn on all the upstream switches of the MBUS port. ----End Issue 10 (2022-08-20) Copyright © Huawei Technologies Co., Ltd.
-
Page 77: Webui Operations
● Only professionals are allowed to set the power grid scheduling parameters of the SmartLogger. Incorrect settings may cause the PV plant to fail to connect to the power grid as required, which affects the energy yield. Issue 10 (2022-08-20) Copyright © Huawei Technologies Co., Ltd. -
Page 78: Webui Layout
Alarm icon Displays the severities and number of active system alarms. You can click a number to access the alarm page. Display language Selects the display language or chooses to log out. Issue 10 (2022-08-20) Copyright © Huawei Technologies Co., Ltd. - Page 79 If the result is negative, the value is zero. Revenue (Total energy yield – Total power supply from grid) x Revenue coefficient. If the result is negative, the value is zero. Issue 10 (2022-08-20) Copyright © Huawei Technologies Co., Ltd.
- Page 80 Daily supply Current total positive active energy of the feed-in meter – Total from grid positive active energy at 00:00 on the current day Total energy Total energy yield of inverters yield Issue 10 (2022-08-20) Copyright © Huawei Technologies Co., Ltd.
- Page 81 Total energy yield of inverters and Smart PCSs of the current day current day Today's power Total power supplied from the grid to inverters and Smart PCSs supply from grid of the current day Issue 10 (2022-08-20) Copyright © Huawei Technologies Co., Ltd.
- Page 82 – Today's power supply from grid Daily supply from Current total positive active power of the feed-in meter – Total grid positive active power at 00:00 on the current day Issue 10 (2022-08-20) Copyright © Huawei Technologies Co., Ltd.
-
Page 83: Icon Description
● The PID is in Running state. The device is in The inverter and Disconnection state. Smart PCS are in Loading state. If a device is in Disconnection state, its parameters cannot be set. Issue 10 (2022-08-20) Copyright © Huawei Technologies Co., Ltd. -
Page 84: Webui Menus
You can set deployment parameters, connect devices, and connect to the management system according to the wizard. Overview Plant Running Info. Queries PV plant information. Active Alarm Queries active alarms. Issue 10 (2022-08-20) Copyright © Huawei Technologies Co., Ltd. - Page 85 Queries or exports performance data. Data Yield Queries the energy yield. Running Param. Sets running parameters. Tracking Sets tracking system parameters. System Battery Queries or sets battery parameters. Characteristic Sets the characteristic curve. Curve Issue 10 (2022-08-20) Copyright © Huawei Technologies Co., Ltd.
- Page 86 Sets running parameters. About Queries the version information. Running Info. Queries the running information. Performance Queries or exports performance data. Data Yield Queries the energy yield. Running Param. Sets running parameters. Issue 10 (2022-08-20) Copyright © Huawei Technologies Co., Ltd.
- Page 87 Running Param. Sets the running parameters of the DL/T645 power meter. Active Alarm Queries active alarms. About Queries communication information. Running Info. Queries the running information. Active Alarm Queries active alarms. Issue 10 (2022-08-20) Copyright © Huawei Technologies Co., Ltd.
- Page 88 Save Period Sets the save period of performance data. Comm. Param. Wireless ● Sets parameters for the built-in Network WLAN. ● Sets mobile data (4G/3G/2G) parameters. Wired Network Sets wired network parameters. Issue 10 (2022-08-20) Copyright © Huawei Technologies Co., Ltd.
- Page 89 Remote over dry contacts. Shutdown NS Protection Sets remote shutdown parameters for Remote NS protection. Shutdown DI Port Configures the DI port function. Configuration Startup Delay Set the startup delay time. Issue 10 (2022-08-20) Copyright © Huawei Technologies Co., Ltd.
- Page 90 ● Sets adjustment deadband. ● Enables or disables DER-AVM access. Maintenance Firmware Upgrade Upgrades the firmware of the SmartLogger, solar inverter, MBUS, or PID. Product Information Queries product information. Issue 10 (2022-08-20) Copyright © Huawei Technologies Co., Ltd.
- Page 91 Add, modify or delete a user. Device Mgmt. Connect Device ● Adds or removes a device. ● Imports or exports configurations. SmartModule ● Removes the SmartModule. ● Sets the authentication password. Issue 10 (2022-08-20) Copyright © Huawei Technologies Co., Ltd.
-
Page 92: Device Commissioning
Browser: Chrome 52, Firefox 58, or Internet Explorer 9, or a later version is recommended. ● The SmartLogger allows a maximum of two users to log in to the WebUI at the same time. Issue 10 (2022-08-20) Copyright © Huawei Technologies Co., Ltd. - Page 93 LAN, do not cancel the proxy server settings. Open Internet Explorer. Choose Tools > Internet Options. Click the Connections tab and then click LAN settings. Clear Use a proxy server for your LAN. Issue 10 (2022-08-20) Copyright © Huawei Technologies Co., Ltd.
- Page 94 Otherwise, the security risk warning will still be displayed during login. Figure 6-7 Security risk warning Select a desired language. Select the User Name and enter the Password according to the following table, and then click Log In. Issue 10 (2022-08-20) Copyright © Huawei Technologies Co., Ltd.
-
Page 95: Commissioning Using Deployment Wizard (V300R001C00)
– Protect the password by changing it periodically, and keep it secure. If you lose the password, the device must be restored to its factory settings. Huawei will not be held liable for any losses resulting from improper password management. -
Page 96: Commissioning Using Deployment Wizard (V800R021C10)
Context The deployment wizard allows you to set basic SmartLogger parameters, connect Huawei devices, power meters, and EMIs, configure Smart PCS, Huawei NMS, and third-part NMS, and implement interworking with third-party devices. After the SmartModule communicates with the SmartLogger properly, the SmartLogger automatically identifies the SmartModule. - Page 97 6 WebUI Operations Complete settings on the Basic parameters page. Figure 6-9 Setting basic parameters After Huawei devices are connected, click Search for Device to check cable connections, identify the topology, and rectify alarms. Figure 6-10 Cable connection detection NO TE –...
- Page 98 6 WebUI Operations Figure 6-11 Setting power meter parameters Connect to the EMI. Figure 6-12 Setting EMI parameters Set the battery working mode. Figure 6-13 Working modes Connect to Huawei NMS. Issue 10 (2022-08-20) Copyright © Huawei Technologies Co., Ltd.
- Page 99 User Manual 6 WebUI Operations Figure 6-14 Huawei NMS Connect to a third-party NMS, select IEC104. Figure 6-15 Third-party NMS Connect to third-party devices. Figure 6-16 Third-party device Complete the configuration. Issue 10 (2022-08-20) Copyright © Huawei Technologies Co., Ltd.
-
Page 100: Commissioning Using Deployment Wizard (V300R023C00 And Later Versions)
During parameter setting, click Previous, Next, or Skip as required. Set basic parameters. Figure 6-18 Setting basic parameters After Huawei devices are connected, click Search for Device to check the cable connections and allocate addresses. After searching for devices, set the Issue 10 (2022-08-20) - Page 101 ▪ After a device is added or deleted, you need to click Search for Device again. Otherwise, the system topology will not update. Connect to power meters. Issue 10 (2022-08-20) Copyright © Huawei Technologies Co., Ltd.
- Page 102 Figure 6-20 Setting meter parameters Connect to EMIs. Figure 6-21 Setting EMI parameters Set the energy storage working mode for energy storage control. Figure 6-22 Working modes Connect to the Huawei NMS. Issue 10 (2022-08-20) Copyright © Huawei Technologies Co., Ltd.
- Page 103 Connect to a third-party NMS. Select IEC104. Figure 6-24 Third-party NMS Connect to third-party devices. Figure 6-25 Third-party devices Set Array startup/shutdown based on the site requirements. The configuration is complete. Issue 10 (2022-08-20) Copyright © Huawei Technologies Co., Ltd.
-
Page 104: Parameter Settings
Local time zone Select a time zone based on the region where the plant is located. DST enable Set this parameter as required. NOTE This parameter is unavailable for zones without DST. Issue 10 (2022-08-20) Copyright © Huawei Technologies Co., Ltd. - Page 105 Revenue NO TE This parameter can be set only in the PV scenario. Parameter Description Currency Set this parameter as required. The value can be EUR, GBP, USD, CNY, or JPY. Issue 10 (2022-08-20) Copyright © Huawei Technologies Co., Ltd.
-
Page 106: Setting Parameters For Connecting To The Management System (V300R001C00)
Step 1 Set up a network connection. ● Method 1: When the SmartLogger connects to the management system over the 4G/3G/2G network, set mobile data parameters and click Submit. Figure 6-28 Setting mobile data parameters Issue 10 (2022-08-20) Copyright © Huawei Technologies Co., Ltd. - Page 107 APN user password ● Method 2: When the SmartLogger connects to the management system over a wired network, set the wired network parameters and click Submit. Figure 6-29 Setting wired network parameters Issue 10 (2022-08-20) Copyright © Huawei Technologies Co., Ltd.
- Page 108 Secondary DNS server In normal cases, you can ignore this parameter. If the primary DNS server cannot resolve the domain name, the secondary DNS server is used. Step 2 Set management system parameters. Issue 10 (2022-08-20) Copyright © Huawei Technologies Co., Ltd.
- Page 109 Submit. NO TE After a Huawei NMS or a third-party NMS is connected to the SmartLogger in Management System, another third-party NMS can be connected through Management System-1 to obtain data from the SmartLogger and configure the SmartLogger.
- Page 110 ● Method 2: When the SmartLogger connects to a third-party management system using the unencrypted Modbus TCP protocol, set Modbus TCP parameters and click Submit. Figure 6-32 Setting Modbus TCP parameters Issue 10 (2022-08-20) Copyright © Huawei Technologies Co., Ltd.
- Page 111 (non-secure protocol). Users are advised to take measures at the PV plant level to reduce security risks, or use Huawei management system to mitigate the risks. To use this function, set this parameter to Enable(Limited) or Enable(Unlimited).
- Page 112 ● If this parameter is set to Enable(Unlimited), the SmartLogger can connect to a maximum of five third-party management systems with a valid IP address. Public IP address Set these parameters as required. Issue 10 (2022-08-20) Copyright © Huawei Technologies Co., Ltd.
-
Page 113: Setting Parameters For Connecting To The Management System
Step 1 Set up a network connection. ● Method 1: If the SmartLogger connects to the management system over a 4G/3G/2G network, choose Settings > Comm. Param. > Wireless Network, set mobile data parameters, and click Submit. Issue 10 (2022-08-20) Copyright © Huawei Technologies Co., Ltd. - Page 114 APN user password ● Method 2: If the SmartLogger connects to the management system over a wired network, choose Settings > Comm. Param. > Wired Network, set wired network parameters, and click Submit. Issue 10 (2022-08-20) Copyright © Huawei Technologies Co., Ltd.
- Page 115 After the SmartLogger connects to the SUN2000 app or FusionSolar app, tap More > Settings > Comm. Param. > Ethernet to access the Ethernet parameter setting screen and set DHCP to Enable. Issue 10 (2022-08-20) Copyright © Huawei Technologies Co., Ltd.
- Page 116 Submit. NO TE After a Huawei NMS or a third-party NMS is connected to the SmartLogger in Management System, another third-party NMS can be connected through Management System-1 to obtain data from the SmartLogger and configure the SmartLogger.
- Page 117 Figure 6-35 Setting management system-1 parameters Table 6-5 Management System-1 Parameter Description Server Set this parameter to the IP address or domain name of Management System-1. Issue 10 (2022-08-20) Copyright © Huawei Technologies Co., Ltd.
- Page 118 ● Method 2: When the SmartLogger connects to a third-party management system using the unencrypted Modbus TCP protocol, set Modbus TCP parameters and click Submit. Figure 6-36 Setting Modbus TCP parameters Issue 10 (2022-08-20) Copyright © Huawei Technologies Co., Ltd.
- Page 119 (non-secure protocol). Users are advised to take measures at the PV plant level to reduce security risks, or use Huawei management system to mitigate the risks. To use this function, set this parameter to Enable(Limited) or Enable(Unlimited).
- Page 120 ● If this parameter is set to Enable(Unlimited), the SmartLogger can connect to a maximum of five third-party management systems with a valid IP address. Public IP address Set these parameters as required. Issue 10 (2022-08-20) Copyright © Huawei Technologies Co., Ltd.
-
Page 121: Setting Rs485 Communications Parameters
IEC104. If IEC104 Push Data Period is set to 0s, there is no limit on the interval at which the SmartLogger sends IEC104 data. ----End 6.3.4 Setting RS485 Communications Parameters Set RS485 parameters and click Submit. Figure 6-38 Setting RS485 parameters Issue 10 (2022-08-20) Copyright © Huawei Technologies Co., Ltd. - Page 122 NOTE The start and end addresses have no impact on the devices that have been connected. Night Comm. Settings If device information query is not required at night, enable Night silent. Issue 10 (2022-08-20) Copyright © Huawei Technologies Co., Ltd.
-
Page 123: Setting Parameters For The Slave Smartlogger
Submit. Figure 6-39 Setting Modbus TCP parameters Parameter Description Link setting Set this parameter to Enable(Limited). Client N IP Address Set this parameter to the IP address of the master SmartLogger. Issue 10 (2022-08-20) Copyright © Huawei Technologies Co., Ltd. - Page 124 SmartLogger, and click Add Devices. Figure 6-40 Setting access parameters Parameter Description Device Type Set this parameter to SmartLogger. IP address Set this parameter to the IP address of the slave SmartLogger. ----End Issue 10 (2022-08-20) Copyright © Huawei Technologies Co., Ltd.
-
Page 125: Setting Goose Communications Parameters
Note [1]: The GOOSE fast scheduling function is mutually exclusive with the fast scheduling function of the Modbus TCP interface. The fast scheduling function of only one protocol takes effect at a time. Issue 10 (2022-08-20) Copyright © Huawei Technologies Co., Ltd. -
Page 126: Setting Mbus Parameters
The CID file is exported at the same time if it has been imported successfully. 6.3.7 Setting MBUS Parameters Procedure Step 1 Set access parameters. ● Set parameters for the built-in MBUS and click Submit. Issue 10 (2022-08-20) Copyright © Huawei Technologies Co., Ltd. - Page 127 Figure 6-42 Setting access parameters for an external MBUS Parameter Description Device type Set this parameter to MBUS. Port number Set this parameter to the serial number of the COM port connected to the MBUS. Issue 10 (2022-08-20) Copyright © Huawei Technologies Co., Ltd.
- Page 128 MBUS signals. A larger value indicates a higher transmit power and better networking capability. The default value is 8 (NA is displayed). You can set this parameter based on actual requirements. Issue 10 (2022-08-20) Copyright © Huawei Technologies Co., Ltd.
- Page 129 Note [2]: SmartMBUS V100R001C00SPC212 and later versions support the setting of the fast control frame type. ● Set parameters for the external MBUS networking. Figure 6-44 Setting the external MBUS networking Issue 10 (2022-08-20) Copyright © Huawei Technologies Co., Ltd.
- Page 130 MBUS signals. A larger value indicates a higher transmit power and better networking capability. The default value is 8 (NA is displayed). You can set this parameter based on actual requirements. Issue 10 (2022-08-20) Copyright © Huawei Technologies Co., Ltd.
- Page 131 Note [1]: SmartMBUS V100R001C00SPC212 and later versions support the setting of the transmit mode. Note [2]: SmartMBUS V100R001C00SPC212 and later versions support the setting of the fast control frame type. ----End Issue 10 (2022-08-20) Copyright © Huawei Technologies Co., Ltd.
-
Page 132: Setting Inverter Parameters
Step 2 Choose Monitoring > Inverter > Running Param. and set running parameters, click Submit. NO TICE Before setting the running parameters of the solar inverter, ensure that the DC side of the solar inverter is energized. ----End Issue 10 (2022-08-20) Copyright © Huawei Technologies Co., Ltd. -
Page 133: Running Parameters
Grid reconnection frequency lower limit, the inverter is not allowed to reconnect to the grid. Issue 10 (2022-08-20) Copyright © Huawei Technologies Co., Ltd. - Page 134 Specifies the level-N grid overfrequency protection duration. (ms) Level-N UF protection (Hz) Specifies the level-N grid underfrequency protection threshold. Level-N UF protection time Specifies the level-N grid underfrequency protection duration. (ms) Issue 10 (2022-08-20) Copyright © Huawei Technologies Co., Ltd.
- Page 135 In this case, if the inverter is required to work properly, set this parameter to Enable. Power quality If this parameter is set to Enable, the optimization inverter output current harmonics will be mode optimized. Issue 10 (2022-08-20) Copyright © Huawei Technologies Co., Ltd.
- Page 136 If PID running mode is not set off-grid repair nighttime off-grid repair. to Disable, the parameter can be set. PID daytime off- Specifies whether to enable the PID grid repair daytime off-grid repair. Issue 10 (2022-08-20) Copyright © Huawei Technologies Co., Ltd.
- Page 137 DC arc detection function. AFCI detection Adjusts the sensitivity of arc detection. This parameter is displayed only adaptive mode when AFCI is set to Enable. AFCI self-test Send the AFCI self-check command manually. Issue 10 (2022-08-20) Copyright © Huawei Technologies Co., Ltd.
- Page 138 After the PV to poor sunlight. power supply recovers and the activation conditions are met, the inverter automatically activates the upgrade. Issue 10 (2022-08-20) Copyright © Huawei Technologies Co., Ltd.
- Page 139 (ms) failure. After the fault is rectified, the inverter output power needs to be quickly restored. Issue 10 (2022-08-20) Copyright © Huawei Technologies Co., Ltd.
- Page 140 0, the increment of positive-sequence reactive current generated by the solar inverter is 0 regardless of how much the AC voltage decreases during LVRT. Issue 10 (2022-08-20) Copyright © Huawei Technologies Co., Ltd.
- Page 141 Threshold for Specifies the threshold for triggering HVRT. This parameter is displayed triggering HVRT The threshold settings should meet the when HVRT is set to Enable. local grid standard. Issue 10 (2022-08-20) Copyright © Huawei Technologies Co., Ltd.
- Page 142 Specifies whether to enable the active protection islanding protection function. Passive islanding Specifies whether to enable the passive This parameter is displayed if protection islanding protection function. the Japanese grid code is selected. Issue 10 (2022-08-20) Copyright © Huawei Technologies Co., Ltd.
- Page 143 CT anomaly If this parameter is set to Enable, the detection inverter automatically checks whether CT cables are disconnected or connected in reverse polarity and reports an alarm to the SmartLogger. Issue 10 (2022-08-20) Copyright © Huawei Technologies Co., Ltd.
- Page 144 When this parameter is set valid duration (s) scheduling instruction. to 0, the scheduling instruction takes effect When this parameter is set to 0, the permanently. scheduling instruction takes effect permanently. Issue 10 (2022-08-20) Copyright © Huawei Technologies Co., Ltd.
- Page 145 Specifies the time for filtering the grid filtering time (s) voltage in the PF-U curve. Reactive power Specifies the adjustment time for the adjustment time (s) reactive power to reach the target value during reactive power adjustment. Issue 10 (2022-08-20) Copyright © Huawei Technologies Co., Ltd.
- Page 146 (Hz) exiting overfrequency derating ≤ Frequency Cutoff frequency of Specifies the frequency threshold for for triggering overfrequency derating cutting off overfrequency derating. overfrequency derating (Hz) < Cutoff frequency of overfrequency derating. Issue 10 (2022-08-20) Copyright © Huawei Technologies Co., Ltd.
- Page 147 Enable. Active power output Specifies the derating value of the limit for fail-safe (%) inverter active power by percentage. Apparent power Adjusts the apparent output baseline of baseline (kVA) the inverter. Issue 10 (2022-08-20) Copyright © Huawei Technologies Co., Ltd.
- Page 148 Specifies the exit frequency of underfrequency rise Underfrequency rise power. power (Hz) PV String Access Detection ● PV string access detection applies to large-scale commercial ground PV plants with PV strings facing the same direction. Issue 10 (2022-08-20) Copyright © Huawei Technologies Co., Ltd.
-
Page 149: Tracking System
V300R001C00SPC050. The screenshots are for reference only. ● If a PV string uses a tracking system with a controller, set tracking system parameters on the Tracking System tab page. Issue 10 (2022-08-20) Copyright © Huawei Technologies Co., Ltd. - Page 150 NO TE This section uses Other vendors as an example. Figure 6-46 Setting tracking system controller On the Tracking System tab page, select Config Para. Figure 6-47 Setting configuration parameters (tracking system) Issue 10 (2022-08-20) Copyright © Huawei Technologies Co., Ltd.
- Page 151 When Tonking is selected, this parameter can be controlled motors set. Time zone The time zone can be set. Sensor measurement When Tonking is selected, this parameter can be range set. Issue 10 (2022-08-20) Copyright © Huawei Technologies Co., Ltd.
- Page 152 ● If Working mode in Config Para is set to Manual control, you can manually set parameters such as Starting, Stop, Clr Fault, and Azimuth in Support System. Figure 6-48 Support system (tracking system) Issue 10 (2022-08-20) Copyright © Huawei Technologies Co., Ltd.
-
Page 153: Characteristic Curves
2. Configure this characteristic curve based on the power grid standard. ----End 6.3.8.4 Battery This section describes how to query or set battery parameters when the inverter is connected to a battery. Issue 10 (2022-08-20) Copyright © Huawei Technologies Co., Ltd. - Page 154 Offline, Idle, Running, Faulty, or Hibernating. Rated capacity Total amount of energy discharged by the battery unit in normal conditions. Voltage Voltage of the battery unit. Current Current of the battery unit. Issue 10 (2022-08-20) Copyright © Huawei Technologies Co., Ltd.
- Page 155 Indicates the highest temperature detected in the temperature battery module. Lowest Indicates the lowest temperature detected in the temperature battery module. Power status of the battery module. Total Total energy discharged from the battery module. discharge Issue 10 (2022-08-20) Copyright © Huawei Technologies Co., Ltd.
- Page 156 When the SOC reaches this value, the forced charge and discharge stops automatically. It is displayed when Charge setting mode is set to Target SOC. Discharged energy Current charged energy in the forced charge/ discharge mode Issue 10 (2022-08-20) Copyright © Huawei Technologies Co., Ltd.
-
Page 157: Setting Pcs Parameters
According to the standards of certain countries and regions, initial grid (V) for grid connection connection is not allowed when the grid voltage is higher than the maximum voltage for grid connection. Issue 10 (2022-08-20) Copyright © Huawei Technologies Co., Ltd. - Page 158 Specifies the device protection threshold when the power grid voltage is unbalanced. Phase protection threshold (°) The Japanese standard requires that during passive islanding detection, the protection should be triggered if an abrupt voltage phase change is detected. Issue 10 (2022-08-20) Copyright © Huawei Technologies Co., Ltd.
- Page 159 Specifies the level-N grid underfrequency protection threshold. Level-N UF protection time Specifies the level-N grid underfrequency protection duration. (ms) NO TE N can be 1, 2, 3, 4, 5, or 6. Issue 10 (2022-08-20) Copyright © Huawei Technologies Co., Ltd.
- Page 160 This parameter is limit when displayed when the communication Protection in the case fails of communication failure is set to Enable and Active power threshold when communication fails is set to a percentage. Issue 10 (2022-08-20) Copyright © Huawei Technologies Co., Ltd.
- Page 161 Hibernate at The device performs the monitoring function at night night. If this parameter is set to Enable, the monitoring function of the device will hibernate at night to reduce power consumption. Issue 10 (2022-08-20) Copyright © Huawei Technologies Co., Ltd.
- Page 162 LVRT threshold Specifies the threshold for triggering LVRT. The This parameter is threshold settings should meet the local grid displayed when LVRT is standard. set to Enable. Issue 10 (2022-08-20) Copyright © Huawei Technologies Co., Ltd.
- Page 163 Deactivate grid Specifies whether to shield the undervoltage This parameter is voltage protection function during LVRT or HVRT. displayed when LVRT or protection HVRT is set to Enable. during HVRT/ LVRT Issue 10 (2022-08-20) Copyright © Huawei Technologies Co., Ltd.
- Page 164 Enable. ● The value of Voltage rise suppression active derating point must be greater than that of Reactive power adjustment threshold for voltage rise suppression. Issue 10 (2022-08-20) Copyright © Huawei Technologies Co., Ltd.
- Page 165 Specifies the upper limit for active power limit of adjustment of frequency modulation. frequency- based control Delay response Specifies the delay response time of frequency time of modulation. frequency- based control Issue 10 (2022-08-20) Copyright © Huawei Technologies Co., Ltd.
- Page 166 Hysteresis of Specifies whether to enable overfrequency derating frequency- hysteresis. based active power derating Issue 10 (2022-08-20) Copyright © Huawei Technologies Co., Ltd.
- Page 167 Microgrid compatibility is set to Enable, the grid- connected current source PCS supports a higher ratio of PV to energy storage in addition to the feature of the original country grid code. Issue 10 (2022-08-20) Copyright © Huawei Technologies Co., Ltd.
- Page 168 VSG excitation The default value is 0. Specifies the time required time constant for the excitation of the virtual synchronous generator to reach the rated voltage. Issue 10 (2022-08-20) Copyright © Huawei Technologies Co., Ltd.
- Page 169 For example, if the rated output frequency is 50 Hz and the output frequency needs to be adjusted to 50.5 Hz, the adjustment value is 0.5/50 x 100%. Issue 10 (2022-08-20) Copyright © Huawei Technologies Co., Ltd.
- Page 170 The device outputs reactive power reactive power based on this value if there is no remote scheduling command, Reactive power at night is set to Enable, and the DC input is disconnected. Issue 10 (2022-08-20) Copyright © Huawei Technologies Co., Ltd.
- Page 171 The device adjusts the output power characteristic curve factor cosφ in real time based on P/ Pn(%). cosφ-P/Pn triggering Specifies the voltage threshold for voltage triggering reactive power compensation based on the cosφ-P curve. Issue 10 (2022-08-20) Copyright © Huawei Technologies Co., Ltd.
-
Page 172: Characteristic Curve
The SmartLogger supports only the curve configuration for LVRT that lasts no more than 60s. If a power grid standard requires that LVRT be longer than 60s, LVRT characteristic curve is not displayed for the grid code. Issue 10 (2022-08-20) Copyright © Huawei Technologies Co., Ltd. -
Page 173: Setting Cmu Parameters
If the exhaust fan does not meet the exhaust function requirements, the system cannot start. Issue 10 (2022-08-20) Copyright © Huawei Technologies Co., Ltd. -
Page 174: Setting Esu Parameters
6.3.11 Setting ESU Parameters This section does not apply to V300R001C00. Procedure Choose Monitoring > ESS > ESU > Running Param., set running parameters and click Submit. Issue 10 (2022-08-20) Copyright © Huawei Technologies Co., Ltd. -
Page 175: Setting Esc Parameters
To ensure device safety, the device detects the insulation resistance protection threshold of the DC side to the ground when it starts a self-check. If the detected value is less than the preset value, the device does not start. Issue 10 (2022-08-20) Copyright © Huawei Technologies Co., Ltd. -
Page 176: Setting Esr Parameters
Calibrate the total discharged energy. calibration 6.3.14 Setting HVAC Parameters This section does not apply to V300R001C00. Procedure Choose Monitoring > ESS > HVAC > Running Param., set running parameters and click Submit. Issue 10 (2022-08-20) Copyright © Huawei Technologies Co., Ltd. - Page 177 Set the lower threshold for the AC input voltage of the air threshold conditioner. NOTE This parameter applies only to air conditioners in the battery cabin of the LUNA2000-2.0MWH Series Smart String ESS. Issue 10 (2022-08-20) Copyright © Huawei Technologies Co., Ltd.
-
Page 178: Setting Pid Module Parameters
MBUS. ● If the PID uses RS485 for communication, set this parameter to the COM port connected to the PID. Address Set this parameter to the communications address of the PID. Issue 10 (2022-08-20) Copyright © Huawei Technologies Co., Ltd. -
Page 179: Pid Module Running Parameters
PID module is positive. ● If the PV module type is N, set this parameter to N-type. In this case, the output voltage of the PID module is negative. Issue 10 (2022-08-20) Copyright © Huawei Technologies Co., Ltd. - Page 180 Periodic IMD runtime Specifies the operating time segment of the IMD when the PID module and IMD operate in cycle mode. The PID module is standby when the IMD is operating. Issue 10 (2022-08-20) Copyright © Huawei Technologies Co., Ltd.
- Page 181 You can set an alarm threshold for the impedance between the AC grid and ground for the PID module. If the detected impedance is below the threshold, the PID module will generate an alarm. Issue 10 (2022-08-20) Copyright © Huawei Technologies Co., Ltd.
-
Page 182: Pid-Pvbox Running Parameters
● Set this parameter to Automatic after ensuring that the PID module works normally. Output voltage (manual) Specifies the output voltage when the PID module works in commissioning mode. Repair time Set the recovery time for each day. Issue 10 (2022-08-20) Copyright © Huawei Technologies Co., Ltd. -
Page 183: Pid-Ssc Running Parameters
(manual) be set to a value greater than 250 V. 6.3.16 Setting Power Meter Parameters 6.3.16.1 Setting DL/T645 Power Meter Parameters Procedure Step 1 Set access parameters and click Add Devices. Figure 6-52 Setting access parameters Issue 10 (2022-08-20) Copyright © Huawei Technologies Co., Ltd. -
Page 184: Setting Modbus-Rtu Power Meter Parameters
External production meter: third-party PV output meter. Multiple external production meters can be connected. ----End 6.3.16.2 Setting Modbus-RTU Power Meter Parameters Procedure Step 1 Set access parameters and click Add Devices. Issue 10 (2022-08-20) Copyright © Huawei Technologies Co., Ltd. - Page 185 ● Set this parameter to 1 when the power meter uploads a value once. Current change ratio ● When the power meter uploads a value twice, set this parameter based on the actual transformer ratio. Issue 10 (2022-08-20) Copyright © Huawei Technologies Co., Ltd.
- Page 186 If the Signal address, Number power meter cannot collect a signal, set Signal address for of Registers, Gain, Data the signal to 65535. Type, and Unit. ----End Issue 10 (2022-08-20) Copyright © Huawei Technologies Co., Ltd.
-
Page 187: Setting Emi Parameters
Environment Data NOTE When this parameter is set to Enable, the SmartLogger transmits the wind speed and direction data to the solar inverter in a PV plant with the tracking system. Issue 10 (2022-08-20) Copyright © Huawei Technologies Co., Ltd. - Page 188 ● If multiple EMIs are connected to the SmartLogger and these EMIs are set to slave mode, the performance data of the first connected EMI is displayed in both the inverter performance data and plant performance data pages. Issue 10 (2022-08-20) Copyright © Huawei Technologies Co., Ltd.
- Page 189 Set this parameter to Integer or Floating point based on the protocol adopted by the vendor. Word ordering Set this parameter to Big endian or Little endian based on the protocol adopted by the vendor. Issue 10 (2022-08-20) Copyright © Huawei Technologies Co., Ltd.
-
Page 190: Setting Ai Emi Parameters
Set this parameter to AI. Address Set this parameter to the communication address of the EMI. Step 2 Choose Monitoring > EMI > Running Param., set running parameters and click Submit. Issue 10 (2022-08-20) Copyright © Huawei Technologies Co., Ltd. -
Page 191: Setting Sts Parameters
If the STS is connected over FE, the SmartLogger automatically identifies the STS. Procedure Step 1 (Optional) If the STS connects to the SmartLogger over RS485, click Add Device and set access parameters. Issue 10 (2022-08-20) Copyright © Huawei Technologies Co., Ltd. -
Page 192: Setting Iec103 Device Parameters
6.3.19 Setting IEC103 Device Parameters Description An IEC103 device supports two data transmission modes: ● Transparent transmission mode: When connecting to the management system, the SmartLogger transparently transmits the IEC103 device Issue 10 (2022-08-20) Copyright © Huawei Technologies Co., Ltd. - Page 193 The protocol information points vary depending on vendors. Therefore, you need to obtain a protocol information file in .cfg format from Huawei and import the file into the SmartLogger for successfully connecting to a custom device.
- Page 194 Set this parameter to the COM port connected to the IEC103 device. Address Set this parameter to the communication address of the IEC103 device. Step 3 Set device monitoring parameters and click Submit. Issue 10 (2022-08-20) Copyright © Huawei Technologies Co., Ltd.
-
Page 195: Setting Parameters For A Custom Device
The supported device types are custom device 1 to custom device 10. The corresponding configuration file names are modbus_equip_custom_1.cfg to modbus_equip_custom_10.cfg. Multiple devices of the same type can be connected. Issue 10 (2022-08-20) Copyright © Huawei Technologies Co., Ltd. - Page 196 Set this parameter to the number of the COM port connected to the custom device. Address Set this parameter to the communications address of the custom device. Step 3 Set device monitoring parameters and click Submit. Issue 10 (2022-08-20) Copyright © Huawei Technologies Co., Ltd.
-
Page 197: Setting Iec104 Device Parameters
Multiple devices of the same type can be connected. Procedure Step 1 Configure a protocol information point file in .cfg format and import the file to the SmartLogger. Issue 10 (2022-08-20) Copyright © Huawei Technologies Co., Ltd. - Page 198 Set this parameter to the common address of the IEC104 device. Address Set this parameter to the communications address of the IEC104 device. Step 3 Set device monitoring parameters and click Submit. Issue 10 (2022-08-20) Copyright © Huawei Technologies Co., Ltd.
-
Page 199: Setting Parameters For Poverty Alleviation Monitoring Center
SmartLogger. ● Method 2: The SmartLogger directly connects to the poverty alleviation monitoring center. Method 2: Based on the PV plant information configuration package provided by the poverty alleviation monitoring center, Issue 10 (2022-08-20) Copyright © Huawei Technologies Co., Ltd. - Page 200 Device SN: poverty alleviation monitoring center. PV plant ID This object indicates the name of a CA certificate file. Forwarding Solar inverter table ----End Issue 10 (2022-08-20) Copyright © Huawei Technologies Co., Ltd.
-
Page 201: Smart Tracking Algorithm
FIT subsidy is low or unavailable. ● Excess energy is stored in batteries. When PV power is insufficient or no PV power is generated at night, batteries discharge to supply power to the loads, Issue 10 (2022-08-20) Copyright © Huawei Technologies Co., Ltd. - Page 202 30 days, the SOC automatic calibration is performed. The SOC automatic calibration is performed in battery racks. During calibration, the cut-off SOC settings will be ineffective. ● Disable: Automatic SOC calibration is disabled. Issue 10 (2022-08-20) Copyright © Huawei Technologies Co., Ltd.
- Page 203 Japanese grid code ● Disable: Maximizes the inverter/ is selected. Smart PCS output power. However, the output power is still affected by parameters such as external scheduling. Issue 10 (2022-08-20) Copyright © Huawei Technologies Co., Ltd.
- Page 204 Maximum grid Control the maximum target grid power power during when the grid-connection point has zero battery power. discharge Adjustment Allowed fluctuation of the target grid deadband power for the grid-connection point Issue 10 (2022-08-20) Copyright © Huawei Technologies Co., Ltd.
- Page 205 PV power is used to charge the batteries. Issue 10 (2022-08-20) Copyright © Huawei Technologies Co., Ltd.
-
Page 206: Setting Capacity Limit
ESSs. Procedure Choose Settings > Battery control > Capacity Limit to set the capacity limit. Figure 6-68 Setting Capacity Limit Issue 10 (2022-08-20) Copyright © Huawei Technologies Co., Ltd. - Page 207 Specifies the active power limit of the inverter when the feed-in limit when meter communication is abnormal. You can manually change power meter the active power percentage of the inverter as required. fails Issue 10 (2022-08-20) Copyright © Huawei Technologies Co., Ltd.
-
Page 208: Setting Ems Control Parameters
PV system and the self-sufficiency rate of residential energy, and reducing electricity costs. ● The SmartLogger performs energy storage scheduling based on the external scheduling power limit and the preceding policies. Issue 10 (2022-08-20) Copyright © Huawei Technologies Co., Ltd. - Page 209 You need to enable Fed to grid in Battery control page. When the electricity price is low at night, the power grid charges the batteries. When the electricity price is high, the batteries discharge to supply power to the loads. Issue 10 (2022-08-20) Copyright © Huawei Technologies Co., Ltd.
- Page 210 You can set a cycle by week by clicking the buttons corresponding to Mon. through Sun. Charge/Discharge in the Repeat box. The buttons are blue by default, indicating selected. After you click it, the color turns gray. Issue 10 (2022-08-20) Copyright © Huawei Technologies Co., Ltd.
-
Page 211: Power Grid Scheduling
According to standard requirements, the SmartLogger can reliably adjust power for the connected solar inverters/Smart PCS in real time to ensure that the plant can respond to requirements of the power grid company in a timely manner. Issue 10 (2022-08-20) Copyright © Huawei Technologies Co., Ltd. -
Page 212: Setting Active Power Control
Active power control If this parameter is set to Unlimited, the inverter mode operates at full load, and the Smart PCS limits the power based on the energy storage control policy. Issue 10 (2022-08-20) Copyright © Huawei Technologies Co., Ltd. - Page 213 Parameter Description Active power control Set this parameter to Percentage fixed-value mode limitation (open loop) to control the maximum output power of the devices by time segment. Issue 10 (2022-08-20) Copyright © Huawei Technologies Co., Ltd.
- Page 214 As the Remote communication scheduling mode has a higher priority, the SmartLogger automatically changes Active power control mode to Remote communication scheduling after receiving a scheduling command from the upper-layer management system. Issue 10 (2022-08-20) Copyright © Huawei Technologies Co., Ltd.
- Page 215 Enable, the SmartLogger shuts down the device when exceptions the communication between the SmartLogger and the scheduling backend is interrupted for a period longer than the set value of Time for communication exception detection. Issue 10 (2022-08-20) Copyright © Huawei Technologies Co., Ltd.
- Page 216 Active power scheduling timeout threshold for triggering solar inverter power limiting, the SmartLogger limits the active power of the inverter based on the set value of this parameter. Issue 10 (2022-08-20) Copyright © Huawei Technologies Co., Ltd.
- Page 217 ● Single-phase power: controls the power of each phase at the grid-tied point to limit the power fed to the power grid. Issue 10 (2022-08-20) Copyright © Huawei Technologies Co., Ltd.
- Page 218 ● Click Switch off and check that the circuit breaker is switched off properly. ● Click Switch on and check that the circuit breaker is switched on properly. ----End Issue 10 (2022-08-20) Copyright © Huawei Technologies Co., Ltd.
- Page 219 Remote output Set this parameter to the IP address or control server domain name of the server. Enable certificate Determine whether to import and enable a certificate based on the actual situation. Issue 10 (2022-08-20) Copyright © Huawei Technologies Co., Ltd.
-
Page 220: Setting Reactive Power Control
Step 1 Choose Monitoring > Inverter/PCS > Running Param. > Power Adjustment. On the displayed page, check that Remote power schedule is set to Enable. Step 2 Set the parameters for reactive power control and click Submit. Issue 10 (2022-08-20) Copyright © Huawei Technologies Co., Ltd. - Page 221 ● SmartLogger+SmartModule scenario: Before setting this function, ensure that the SmartModule is properly connected to the Ripple Control Receiver. Table 6-7 SmartLogger scenario Parameter Description Reactive power control Set this parameter to DI reactive scheduling. mode Issue 10 (2022-08-20) Copyright © Huawei Technologies Co., Ltd.
- Page 222 ● In the scenario where the SmartLogger and SmartModule are combined, if the SmartModule is removed and the scheduling signal needs to be connected to the SmartLogger, delete the DI configuration and reconfigure it. Issue 10 (2022-08-20) Copyright © Huawei Technologies Co., Ltd.
- Page 223 The SmartLogger delivers the values configured for the characteristic curve to the solar inverter, which then operates according to the configuration. The SmartLogger no longer adjusts the values. Issue 10 (2022-08-20) Copyright © Huawei Technologies Co., Ltd.
- Page 224 Smart PCS, which then operates according to the configuration. The SmartLogger no longer adjusts the values. NO TICE Configure the characteristic curve under instructions from professionals to ensure that the solar inverter or Smart PCS works properly. Issue 10 (2022-08-20) Copyright © Huawei Technologies Co., Ltd.
- Page 225 The final value should be in the form of Q/S. Parameter Description Reactive power control Set this parameter to Q-U hysteresis curve(CEI0-16). mode Reactive power Specifies the change interval of the reactive power at adjustment time the grid-connection point. Issue 10 (2022-08-20) Copyright © Huawei Technologies Co., Ltd.
- Page 226 PV plant and delivers the data to all devices connected to the SmartLogger. Issue 10 (2022-08-20) Copyright © Huawei Technologies Co., Ltd.
- Page 227 SmartLogger and the solar inverter power scheduling backend is abnormal. If the limiting (s) communication is interrupted for a period longer than the set value, reactive power limiting protection is started. Issue 10 (2022-08-20) Copyright © Huawei Technologies Co., Ltd.
- Page 228 Specifies the interval for sending adjustment commands by the SmartLogger. Adjustment deadband Specifies the adjustment power factor precision. NOTICE This parameter is valid only when the power factor of the power meter is greater than 0.9. Issue 10 (2022-08-20) Copyright © Huawei Technologies Co., Ltd.
- Page 229 0.9. Reactive compensation Specifies the delay time for starting the distributed delay power factor compensation if the current power factor is lower than the target power factor. Issue 10 (2022-08-20) Copyright © Huawei Technologies Co., Ltd.
- Page 230 The SmartLogger delivers the values configured for the characteristic curve to inverters or Smart PCSs, which then operates according to the configuration. The SmartLogger does not adjust the values. Issue 10 (2022-08-20) Copyright © Huawei Technologies Co., Ltd.
-
Page 231: Setting Parameters For Shutdown At High Feed-In Power
Step 1 Set parameters for shutdown at high feed-in power and click Submit. Figure 6-73 Shutdown at high feed-in power ----End Issue 10 (2022-08-20) Copyright © Huawei Technologies Co., Ltd. -
Page 232: Setting Export Limitation Parameters
● Scenario without a circuit breaker: The reverse current feeding into the power grid can be eliminated by sending a command from the SmartLogger to adjust the inverter/Smart PCS output power. Issue 10 (2022-08-20) Copyright © Huawei Technologies Co., Ltd. - Page 233 12 V power output port on the SmartLogger to power the relay coils. You can also prepare a 12 V power supply. Figure 6-75 Network diagram (with a circuit breaker) Issue 10 (2022-08-20) Copyright © Huawei Technologies Co., Ltd.
- Page 234 2. Choose Maintenance > Device Mgmt. > Connect Device on the master SmartLogger to add slave SmartLoggers. 3. Set parameters for Power Meters, Inverter Parameters, and Export Limitation Parameters on the master SmartLogger by referring to this section. ----End Issue 10 (2022-08-20) Copyright © Huawei Technologies Co., Ltd.
-
Page 235: Setting Parameters For Smart Reactive Power Compensation
Reactive power control mode to Power factor closed-loop control and set the target power factor correctly. NO TE For details about the running parameters of power meters, see 6.3.16.2 Setting Modbus- RTU Power Meter Parameters. Issue 10 (2022-08-20) Copyright © Huawei Technologies Co., Ltd. -
Page 236: Setting Drm Parameters
Figure 6-78 Setting parameters for smart reactive power compensation (Power Meter) ----End 6.7.7 Setting DRM Parameters Context According to an Australian standard, the inverters must comply with demand response modes (DRM). Figure 6-79 Wiring diagram for the DRM function Issue 10 (2022-08-20) Copyright © Huawei Technologies Co., Ltd. - Page 237 Reactive Power Control Mode is set to No output, and connection port for Remote Shutdown is set to No. Step 2 Set DRM parameters and click Submit. Figure 6-80 Setting DRM parameters Issue 10 (2022-08-20) Copyright © Huawei Technologies Co., Ltd.
-
Page 238: Setting Remote Shutdown
SmartLogger shuts down the inverter over OVGR signals. Figure 6-81 Networking NO TICE When setting this function, ensure that the user-defined DI port is not occupied. Otherwise, the setting will fail. Issue 10 (2022-08-20) Copyright © Huawei Technologies Co., Ltd. -
Page 239: Setting Ns Protection Remote Shutdown
AI1 port voltage is 0 V, and the inverter shuts down. When the NS protection device is connected again, the AI1 port voltage is 12 V, and you need to start the inverter manually. Issue 10 (2022-08-20) Copyright © Huawei Technologies Co., Ltd. - Page 240 If only one inverter is connected to the SmartLogger, connect the COM1 port on the SmartLogger to the RS485-1 port on the inverter, and connect the COM2 port on the SmartLogger to the RS485-2 port on the inverter. Issue 10 (2022-08-20) Copyright © Huawei Technologies Co., Ltd.
- Page 241 Because there are many types of inverters, the RS485-1 port may be named RS485_1, 485B1, or 485A1. The RS485-2 port may be named RS485_2, 485B2, or 485A2. Figure 6-85 Setting RS485 parameters Issue 10 (2022-08-20) Copyright © Huawei Technologies Co., Ltd.
-
Page 242: Device Maintenance
AC socket. connected to the AC socket. 4. The power adapter is faulty. 4. Replace the power adapter. 5. The SmartLogger is faulty. 5. Contact the dealer or Huawei technical support. Issue 10 (2022-08-20) Copyright © Huawei Technologies Co., Ltd. - Page 243 Then restart the automatic search. 5. Check the network cable connection. If the cable is loose, reconnect it firmly. 6. Contact the dealer or Huawei technical support. 1. The solar inverter and 1. Check whether the solar inverter communicat SmartLogger do not support and SmartLogger support MBUS.
- Page 244 3. The management system 3. Check that the management parameters are incorrectly set. system parameters are correctly set. Issue 10 (2022-08-20) Copyright © Huawei Technologies Co., Ltd.
- Page 245 5. Power on the SmartLogger and its connected device. 6. Check the RS485 communications parameter settings. 7. Contact the dealer or Huawei technical support. The 4G 1. The SIM card is not inserted or it 1. Insert or replace the SIM card.
-
Page 246: Alarm List
DI signal configuration combinations mapping table. Contact the that are not power grid company and configured. verify that the combination configurations in the table are complete and meet the requirements of the company. Issue 10 (2022-08-20) Copyright © Huawei Technologies Co., Ltd. - Page 247 Change the local address or the Address communicati address of the device to be Conflict on address of connected. the the current device conflicts with that of the device to be connected. Issue 10 (2022-08-20) Copyright © Huawei Technologies Co., Ltd.
- Page 248 Replace the faulty power module. 1116 WebUI Server Warning WebUI Server Check the time or change the Certificate Digital digital signature certificate. Invalid Signature Certificate Invalid Issue 10 (2022-08-20) Copyright © Huawei Technologies Co., Ltd.
- Page 249 System System certificate in time. Certificate to Digital Expire Signature Certificate to Expire 1122 Management Major Management Change the digital signature System System certificate immediately. Certificate Digital Expired Signature Certificate Expired Issue 10 (2022-08-20) Copyright © Huawei Technologies Co., Ltd.
- Page 250 Center Digital Certificate to Signature Expire Certificate to Expire 1128 Poverty Major Poverty Change the digital signature Alleviation Alleviation certificate immediately. Monitoring Monitoring Center Center Digital Certificate Signature Expired Certificate Expired Issue 10 (2022-08-20) Copyright © Huawei Technologies Co., Ltd.
- Page 251 DC and AC switches in the LV panel. Wait for 5 minutes. Verify that no electricity is present using a multimeter before checking the DC bus cable connection of the battery. Issue 10 (2022-08-20) Copyright © Huawei Technologies Co., Ltd.
- Page 252 Contact the microgrid controller time vendor to correct the sequence sequence. of black start instructions. Issue 10 (2022-08-20) Copyright © Huawei Technologies Co., Ltd.
- Page 253 ESS failed. ESS and the SmartLogger is normal. 2. View the ESS alarms of the array, determine the failure cause, and rectify the fault according to the corresponding handling suggestions. Issue 10 (2022-08-20) Copyright © Huawei Technologies Co., Ltd.
-
Page 254: Webui Maintenance Operations
You can upgrade the software of the SmartLogger, inverter, Smart PCS, Smart String ESS, MBUS module, or PID module on the WebUI. Procedure Step 1 Perform an upgrade. Figure 7-1 Upgrade Issue 10 (2022-08-20) Copyright © Huawei Technologies Co., Ltd. -
Page 255: Setting Security Parameters
Disable to prevent the SmartLogger from communicating with the SmartModule to ensure network security. Enables or disables the TLS1.0 and 1.1 function. WEB TLS Setting Issue 10 (2022-08-20) Copyright © Huawei Technologies Co., Ltd. -
Page 256: Sending A System Maintenance Command
Exercise caution when deciding to perform this operation. Clear Data Clears all historical data of the SmartLogger. Full profile export Before replacing the SmartLogger, export the SmartLogger configuration file to a local PC. Issue 10 (2022-08-20) Copyright © Huawei Technologies Co., Ltd. -
Page 257: Exporting Full Configuration Files
Encryption password of the exported file in the Re- authentication dialog box. Figure 7-4 Exporting full configuration files After the export is successful, click Confirm. Click Save under Full profile export to save the full configuration files. Issue 10 (2022-08-20) Copyright © Huawei Technologies Co., Ltd. -
Page 258: Importing Full Configuration Files
Decryption password of the imported file in the Re-authentication dialog box when importing the files. ● When a faulty SmartLogger3000 is replaced, certificate-related files are not exported. After the full configuration files are imported, you need to reload a third-party certificate if required. -
Page 259: Exporting Device Logs
After an inverter is put into use, you need to periodically check its health to detect potential risks and problems. Procedure Step 1 Start an onsite test. Figure 7-7 Onsite test Issue 10 (2022-08-20) Copyright © Huawei Technologies Co., Ltd. -
Page 260: Managing Licenses
SmartLogger. The matching between the SN of a device and a license is unique. Issue 10 (2022-08-20) Copyright © Huawei Technologies Co., Ltd. - Page 261 2. Click Export License Appli File. 3. Purchase a license from Huawei and obtain the license file from Huawei technical support engineers. License loading Loads the 1. Click Upload License.
-
Page 262: Managing The Smartmodule
● You can add, modify, and delete users after logging in as installer. Procedure Step 1 Add a user. Figure 7-9 Adding a user Issue 10 (2022-08-20) Copyright © Huawei Technologies Co., Ltd. -
Page 263: Collecting Performance Data
Context You can re-collect performance data of the solar inverter, Smart PCS, CMU, and ESU as well as daily, monthly, and yearly energy yields (also referred to as data re- collection). Issue 10 (2022-08-20) Copyright © Huawei Technologies Co., Ltd. -
Page 264: Adjusting The Total Energy Yield
SmartLogger delivers a force start command at an interval of 5 minutes to ensure that the devices can identify the force start state. ----End 7.5 Device Disposal Issue 10 (2022-08-20) Copyright © Huawei Technologies Co., Ltd. - Page 265 SmartLogger3000 User Manual 7 Device Maintenance If the service life of the SmartLogger expires, dispose of the SmartLogger according to the local disposal act for waste electric appliances. Issue 10 (2022-08-20) Copyright © Huawei Technologies Co., Ltd.
-
Page 266: Faq
● Mobile phone operating system: Android 4.0 or later ● Access the Huawei app store (https://appstore.huawei.com), search for SUN2000 or FusionSolar, and download the app installation package. Issue 10 (2022-08-20) Copyright © Huawei Technologies Co., Ltd. - Page 267 Step 1 Log in to the app. (Connecting the SmartLogger to the FusionSolar Hosting Cloud) Open the FusionSolar app, log in to intl.fusionsolar.huawei.com as installer account, and choose Me > Device commissioning to connect to the WLAN hotspot of the SmartLogger.
-
Page 268: How Do I Set Ftp Parameters
● The FTP function is used to access a third-party NMS. The SmartLogger can report the configuration information and running data of the managed PV plant system through FTP. A third-party NMS can access Huawei devices after being configured. ●... - Page 269 0x1002 Configure the FTP server 0x1003 1. Check whether the DNS address. server address is correctly configured. 2. Check whether the domain name of the third-party FTP server is correctly configured. Issue 10 (2022-08-20) Copyright © Huawei Technologies Co., Ltd.
-
Page 270: How Do I Set Email Parameters
Set this parameter to the user name for logging in to the SMTP server. Password Set this parameter to the password for logging in to the SMTP server. Email language Set this parameter to the language for sending emails. Issue 10 (2022-08-20) Copyright © Huawei Technologies Co., Ltd. - Page 271 SMTP server are correct. name and the IP address of the SMTP server are correct. 3. Check whether the network communication between the management system and the DNS server is normal. Issue 10 (2022-08-20) Copyright © Huawei Technologies Co., Ltd.
-
Page 272: How Do I Change The Ssid And Password Of The Built-In Wlan
Huawei Service Center. 8.4 How Do I Change the SSID and Password of the Built-in WLAN? Procedure Step 1 Choose Settings > Wireless Network, set parameters for the built-in WLAN, and click Submit. Issue 10 (2022-08-20) Copyright © Huawei Technologies Co., Ltd. -
Page 273: How Do I Use Di Ports
For details about DI active scheduling, DI reactive scheduling, DRM and remote shutdown, see 6.7 Power Grid Scheduling. NO TICE Before setting the corresponding function, ensure that the DI port is not set for other purposes. Otherwise, the setting will fail. Issue 10 (2022-08-20) Copyright © Huawei Technologies Co., Ltd. -
Page 274: How Do I Use Do Ports
3G router. Step 1 Cut off a DC power cable of the router, and connect the DC power cable to a DO port on the SmartLogger. Issue 10 (2022-08-20) Copyright © Huawei Technologies Co., Ltd. -
Page 275: How Do I Use The Usb Port
----End 8.7 How Do I Use the USB Port? The SmartLogger has a USB port, which provides 5 V/1 A power supply. Issue 10 (2022-08-20) Copyright © Huawei Technologies Co., Ltd. - Page 276 The power station deployment deployment configuration file is configuration file has imported through Offline been saved in the root Configuration, the directory of the USB SmartLogger flash drive. automatically completes the deployment configuration. Issue 10 (2022-08-20) Copyright © Huawei Technologies Co., Ltd.
- Page 277 Connecting to a USB Flash Drive for Device Upgrade You can upgrade the SmartLogger, solar inverter, MBUS module, or PID module using a USB flash drive. Step 1 Save the device upgrade package to the USB flash drive. Issue 10 (2022-08-20) Copyright © Huawei Technologies Co., Ltd.
-
Page 278: How Do I Change A Device Name
----End 8.9 How Do I Change the Communications Address? The SmartLogger allows you to change the communications addresses of Huawei devices on the Connect Device or Device List page. Changing the Communications Address on the Connect Device Page Step 1 Choose Maintenance >... -
Page 279: How Do I Export Inverter Parameters
Step 1 Choose Maintenance > Device Mgmt. > Clear Alarm. Step 2 Select the name of the device whose alarms are to be cleared, click Submit, and choose All, Locally synchronized alarms, or Alarms stored on devices to clear alarms. Issue 10 (2022-08-20) Copyright © Huawei Technologies Co., Ltd. -
Page 280: How Do I Enable The Ai1 Port To Detect Spd Alarms
RS485 bus of the power meter. For details, see the user manual of the power meter. BackUp-CT Supported CHNT DTSU666 DTSU666-H Supported Elster A1800ALPHA GAVAZZI EM210 Issue 10 (2022-08-20) Copyright © Huawei Technologies Co., Ltd. - Page 281 Mitsubishi ME110NSR-MB Mitsubishi ME110SR-MB Mitsubishi ME110SSR-MB Mitsubishi M8FM-N3LTR Mitsubishi ME110SSR-4APH NARUN PD510 Netbiter CEWE People RM858E REAL ENERGY PRISMA-310A SYSTEM Schneider PM1200 Schneider PM2xxx Schneider PM5100 Schneider PM5300 SFERE PD194Z Issue 10 (2022-08-20) Copyright © Huawei Technologies Co., Ltd.
- Page 282 Total irradiance, ambient RS485TC RS485TC temperature, PV module temperature, and wind speed Kipp&Zonen SMPx series Total irradiance and ambient temperature Lufft WSx-UMB Total irradiance, ambient temperature, wind direction, and wind speed Issue 10 (2022-08-20) Copyright © Huawei Technologies Co., Ltd.
- Page 283 Total irradiance, ambient temperature, PV module temperature, wind direction, and wind speed Sensor ADAM NOTE The sensor-type EMI (current-type or voltage- type) communicates with the SmartLogger through the ADAM analog-to- digital converter. Issue 10 (2022-08-20) Copyright © Huawei Technologies Co., Ltd.
-
Page 284: How Do I Check The Sim Card Status
The used traffic exceeds 80% of the monthly traffic package, and the remaining traffic is insufficient. Used up The used traffic exceeds the monthly traffic package. Traffic is used up. Top up the SIM card account immediately. Issue 10 (2022-08-20) Copyright © Huawei Technologies Co., Ltd. -
Page 285: How Do I Use Mobile Network Sharing
SIM card) in the address box, and press Enter. The login page is displayed. ----End Sharing a Mobile Network with Other Devices NO TE A 4G SmartLogger supports the sharing of the built-in 4G network with other devices for Internet access. Issue 10 (2022-08-20) Copyright © Huawei Technologies Co., Ltd. -
Page 286: Webui Allows Login Only In Chinese And Prompts To Switch To Chinese
8.16 WebUI Allows Login Only in Chinese and Prompts to Switch to Chinese If the WebUI uses a language other than Chinese and the SmartLogger detects that an inverter sold only in Chinese Mainland is connected, a message is Issue 10 (2022-08-20) Copyright © Huawei Technologies Co., Ltd. - Page 287 WebUI allows login only in Chinese and the language will be switched to Chinese after login. Figure 8-6 WebUI allows login only in Chinese Figure 8-7 WebUI prompts to switch to Chinese Issue 10 (2022-08-20) Copyright © Huawei Technologies Co., Ltd.
-
Page 288: Technical Specifications
1 m intervals) ● Optical fiber (single-mode, 1310 nm optical module): 10,000 m (with the 1000M optical module); 12,000 m (with the 100M optical module) Issue 10 (2022-08-20) Copyright © Huawei Technologies Co., Ltd. - Page 289 1 PCS; supports a maximum AC input voltage of 800 V RS485 (COM) port 3 PCS; supported baud rates: 1200 bit/s, 2400 bit/s, 4800 bit/s, 9600 bit/s, 19,200 bit/s, and 115,200 bit/s Issue 10 (2022-08-20) Copyright © Huawei Technologies Co., Ltd.
- Page 290 SmartLogger3000A03EU support the following frequency bands: ● LTE FDD: B1, B3, B5, B7, B8, B20 ● LTE TDD: B38, B40, B41 ● WCDMA: B1, B5, B8 ● GSM: 900 MHz/1800 MHz Issue 10 (2022-08-20) Copyright © Huawei Technologies Co., Ltd.
- Page 291 880–915 MHz 925–960 MHz GSM 1800 1710–1785 MHz 1805–1880 MHz LTE Band 1 1920–1980 MHz 2110–2170 MHz LTE Band 3 1710–1785 MHz 1805–1880 MHz LTE Band 5 824–849 MHz 869–894 MHz Issue 10 (2022-08-20) Copyright © Huawei Technologies Co., Ltd.
- Page 292 LTE Band 3 ±2 LTE Band 5 ±2 LTE Band 7 ±2 LTE Band 8 ±2 LTE Band 20 ±2 LTE Band 38 ±2 LTE Band 40 ±2 LTE Band 41 ±2 Issue 10 (2022-08-20) Copyright © Huawei Technologies Co., Ltd.
-
Page 293: Technical Specifications Of The Smartmodule
● Including mounting ears: 160 mm x 179 mm x 59 mm ● Without mounting ears: 160 mm x 125 mm x 44 mm Net weight 1 kg Operating temperature –40°C to +60°C Issue 10 (2022-08-20) Copyright © Huawei Technologies Co., Ltd. - Page 294 3-wire or 2-wire PT100/PT1000 temperature sensor Analog input (AI) port 4 PCS; AI1: supports 0–10 V voltage (passive); AI2–AI4: support 4–20 mA or 0– 20 mA input current (passive) Issue 10 (2022-08-20) Copyright © Huawei Technologies Co., Ltd.
-
Page 295: A Product User Lists
00000a (same as the V300R023C00 or mobile app login password) later admin Changeme Factory version installer None. You need to set a V300R023C00 or password upon the initial later login. Issue 10 (2022-08-20) Copyright © Huawei Technologies Co., Ltd. - Page 296 Table A-3 Operating system user list User Name Initial Password enspire Changeme root Changeme prorunacc No initial password No initial password daemon No initial password nobody No initial password sshd No initial password Issue 10 (2022-08-20) Copyright © Huawei Technologies Co., Ltd.
-
Page 297: B Domain Name List Of Management Systems
Public IP address Partner management system re-ene.kyuden.co.jp Public IP address Remote output control server of Kyushu Electric Power Company re-ene.yonden.co.jp Public IP address Remote output control server of Shikoku Electric Power Company Issue 10 (2022-08-20) Copyright © Huawei Technologies Co., Ltd. -
Page 298: C Port No. List
● 16100: used to query and set data between the SmartLogger and the management system. ● 2121, 2122 and 10000–12000: used to upload and download data or files between the SmartLogger and the management system using FTPS. Issue 10 (2022-08-20) Copyright © Huawei Technologies Co., Ltd. - Page 299 ● If the SmartLogger connects to a remote output server of Japan Electric Power Company over HTTPS, the common port No. is 443, which is used to synchronize the scheduling table with the electric power company. Issue 10 (2022-08-20) Copyright © Huawei Technologies Co., Ltd.
- Page 300 1. Preconfigured Huawei-issued certificates are used only in the deployment phase, for establishing initial security channels between devices and the customer's network. Huawei does not promise or guarantee the security of preconfigured certificates. 2. The customer shall bear consequences of all security risks and incidents arising from using preconfigured Huawei-issued certificates as service certificates.
- Page 301 /mnt/log/cmu_ca.crt Authenticates the validity of the peer /mnt/log/cmu_client.crt CMU for communication through Modbus-TCP. /mnt/log/ca_new.crt Authenticates the validity of the peer /mnt/log/client_new.crt STS, PCS, or inverter for communication through Modbus-TCP. Issue 10 (2022-08-20) Copyright © Huawei Technologies Co., Ltd.
- Page 302 SmartLogger3000 User Manual E Acronyms and Abbreviations Acronyms and Abbreviations Alternating Current Analog Input Analog Output Application Battery Monitoring Unit Communication Customer Premises Equipment Central Monitoring Unit Direct Current Digital Input Issue 10 (2022-08-20) Copyright © Huawei Technologies Co., Ltd.
- Page 303 Ethernet Energy Storage Unit Smart Rack Controller Battery Rack Battery Pack Gigabit Ethernet Ground HVAC Heating, Ventilation and Air Conditioning Local Area Network Light-emitting Diode Long Term Evolution MBUS Monitoring bus Issue 10 (2022-08-20) Copyright © Huawei Technologies Co., Ltd.
- Page 304 Normally Closed Normally Open Power over Ethernet Power Control System Reset RSTP Rapid Spanning Tree Protocol Small Form-factor Pluggable Spanning Tree Protocol Temperature Control Unit Universal Serial Bus Wide Area Network Issue 10 (2022-08-20) Copyright © Huawei Technologies Co., Ltd.
- Page 305 SmartLogger3000 User Manual E Acronyms and Abbreviations WEEE Waste Electrical and Electronic Equipment Issue 10 (2022-08-20) Copyright © Huawei Technologies Co., Ltd.
Need help?
Do you have a question about the SmartLogger3000 and is the answer not in the manual?
Questions and answers