Huawei FusionCharge SmartLogger3000 Manual
- User manual (454 pages) ,
- Configuration manual (27 pages) ,
- Quick manual (21 pages)
Advertisement
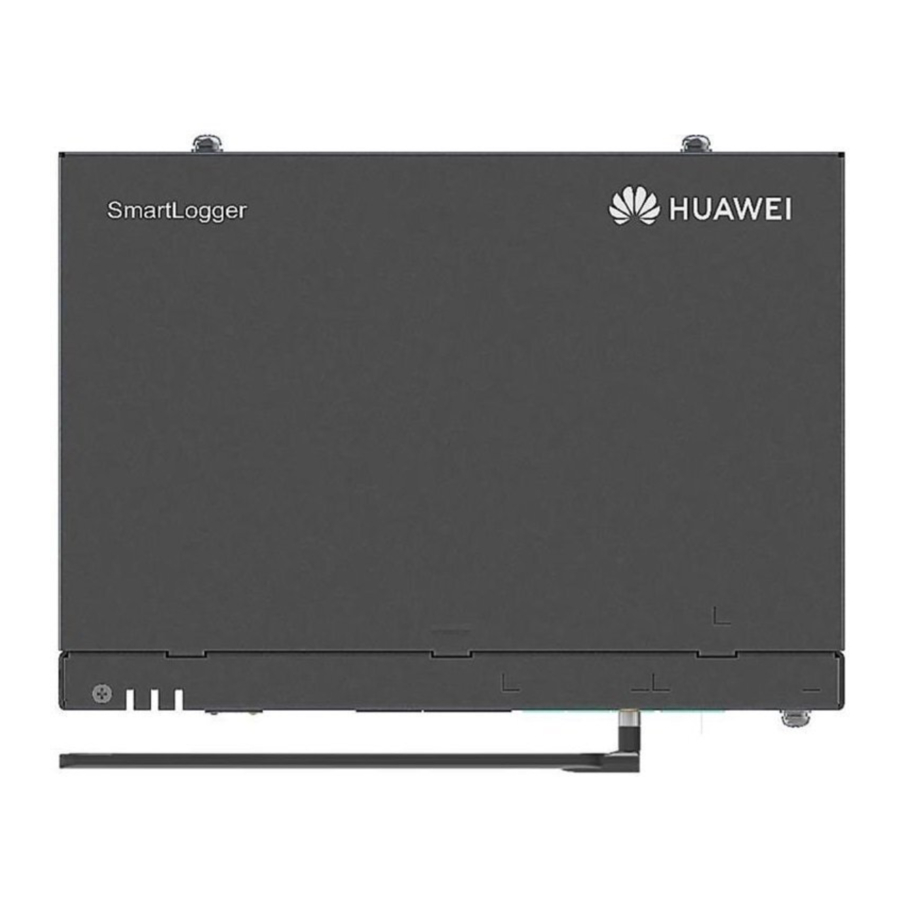
Overview

- LED indicators (RUN, ALM, 4G)
- SIM card slot (SIM)
- Mounting ear
- Guide rail clamp
- MBUS port (MBUS)
- GE port (WAN)
- SFP ports (SFP1, SFP2)
- 4G antenna port (4G)
- RST button (RST)
- USB port (USB)
- GE port (LAN)
- DI ports (DI)
- 12 V output power port (12V/GND)
- AI ports (AI)
- DO ports (DO1, DO2)
- COM ports (COM1, COM2, COM3)
- 24 V input power port (DC IN 24V, 0.8A)
- 12 V input power port (DC IN 12V, 1A)
- PE terminal
Device Installation

Installing the SmartLogger Behind the Main Control Front Door of the Power Unit
Electrical Connections
NOTICE
- Connect cables in accordance with the installation laws and regulations of the country or region where the project is located.
- Before connecting cables to ports, leave enough slack to reduce the tension on the cables and prevent poor cable connections.
Preparing Cables
| Type | Recommended Specifications |
| PE cable | Outdoor copper cable with a cross-sectional area of 4–6 mm or 12–10 AWG |
| RS485 communications cable | Two-core or multi-core outdoor shielded cable with a cross-sectional area of 0.2–2.5 mm 2 or 24–14 AWG |
| 12 V input power cable | Supplied with the solution package |
| Ethernet cable | Supplied with the SmartLogger |
| MBUS cable (optional) | Supplied with the SmartLogger |
Connecting the PE Cable
 NOTE
NOTE
To enhance the corrosion resistance of the PE terminal, apply silicone grease or paint on it after connecting the PE cable.

Connecting the RS485 Communications Cable
NOTE
- The recommended RS485 communication distance is less than or equal to 1000 m.
- The SmartLogger can connect to RS485 communications devices, such as a solar inverter, an environmental monitoring instrument (EMI), and a power meter over the COM port.
- Ensure that the RS485+ and RS485– terminals are respectively connected to the COM+ and COM– ports on the SmartLogger.

| Port | Identifier | Description |
| COM1, COM2, COM3 | + | RS485A, RS485 differential signal+ |
| – | RS485B, RS485 differential signal– |
Connecting the Output Power Cables

Connecting the Ethernet Cable
NOTE
- The SmartLogger can connect to an Ethernet switch, router, or PC over a WAN port.
- The SmartLogger can connect to a SmartModule or PC over a LAN port.
- If the delivered Ethernet cable is too short, you are advised to prepare one of Cat 5e or higher specifications and shielded RJ45 connectors. The recommended communication distance is less than or equal to 100 m. When crimping the Ethernet cable, ensure that the shielding layer of the cable is securely connected to the metal shell of the RJ45 connectors.

- White-and-orange
- Orange
- White-and-green
- Blue
- White-and-blue
- Green
- White-and-brown
- Brown
Installing the SIM Card and 4G Antenna
NOTE
- Prepare a standard SIM card (size: 15 mm x 25 mm; capacity ≥ 64 KB).
- Install the SIM card in the direction shown by the silkscreen on the SIM card slot.
- Press the SIM card in place to lock it. In this case, the SIM card is correctly installed.
- When removing the SIM card, push it inward to eject it.

- Open the door of the heat exchange compartment of the power unit, remove the protective cover upward, and remove the sealing putty so that a cable can be routed into the electrical compartment through the cable box.
- Route the cable of the newly installed antenna from the cable hole on the top into the power unit along the original antenna cable route.
- Seal the cable hole using sealing putty.
Check Before Power-On
| No. | Criterion |
| 1 | The SmartLogger is installed correctly and securely. |
| 2 | All cables are connected securely. |
| 3 | Routing of power cables and signal cables meets the requirements for routing strong-current and weak-current cables and complies with the cable routing plan. |
| 4 | Cables are bound neatly, and cable ties are secured evenly and properly in the same direction. |
| 5 | There is no unnecessary adhesive tape or cable tie on cables. |
Powering On the System
- Connect to the power supply.
Check that the cable between the DC power supply and the SmartLogger is correctly connected. Then, turn on the upstream power switch of the DC power supply. - Observe the LED indicators to check the running status of the SmartLogger.
| Indicator | Status | Meaning | |
| Running indicator (RUN) | Green off | The SmartLogger is not powered on. | |
| Blinking green slowly (on for 1s and then off for 1s) | The communication between the SmartLogger and the management system is normal. | ||
| Blinking green fast (on for 0.125s and then off for 0.125s) | The communication between the SmartLogger and the management system is interrupted. | ||
| Alarm/Maintenance indicator (ALM) | Alarm status | Red off | No system alarm is generated. |
| Blinking red slowly (on for 1s and then off for 4s) | The system generates a warning alarm. | ||
| Blinking red fast (on for 0.5s and then off for 0.5s) | The system generates a minor alarm. | ||
| Steady red | The system generates a major alarm. | ||
| Maintenance status | Green off | No local maintenance is in progress. | |
| Blinking green slowly (on for 1s and then off for 1s) | Local maintenance is in progress. | ||
| Blinking green fast (on for 0.125s and then off for 0.125s) | Local maintenance failed or the SmartLogger is waiting to connect to the app. | ||
| Steady green | Local maintenance is successful. | ||
| 4G indicator (4G) | Green off | The 4G/3G/2G networking function is not enabled. | |
| Blinking green slowly (on for 1s and then off for 1s) | The 4G/3G/2G dialup is successful. | ||
| Blinking green fast (on for 0.125s and then off for 0.125s) | The 4G/3G/2G network is not connected or the communication is interrupted. | ||
NOTE
If an alarm and local maintenance occur concurrently, the alarm/maintenance indicator shows the local maintenance state first. After local maintenance is complete, the indicator shows the alarm state.
WebUI Deployment
NOTE
The WebUI screenshots are for reference only.
- Set the IP address for the PC in the same network segment as the SmartLogger IP address.
| Port | IP Settings | SmartLogger Default Value | Example of PC Settings |
| LAN port | IP address | 192.168.8.10 | 192.168.8.11 |
| Subnet mask | 255.255.255.0 | 255.255.255.0 | |
| Default gateway | 192.168.8.1 | 192.168.8.1 | |
| WAN port | IP address | 192.168.0.10 | 192.168.0.11 |
| Subnet mask | 255.255.255.0 | 255.255.255.0 | |
| Default gateway | 192.168.0.1 | 192.168.0.1 |
NOTE
- When the IP address of the WAN port is in the network segment from 192.168.8.1 to 192.168.8.255, set the default gateway to 192.168.8.1 and the IP address of the LAN port to 192.168.3.10. If the connected port is a LAN port, adjust the network configuration of the PC accordingly.
- It is recommended that the PC be connected to the LAN port on the SmartLogger or the GE port on the SmartModule. When the PC is connected to the GE port on the SmartModule, adjust the network configuration of the PC to the configuration mode when the PC is connected to the LAN port on the SmartLogger.
- Enter https://XX.XX.XX.XX in the address box of the browser (XX.XX.XX.XX is the IP address of the SmartLogger). If you log in to the WebUI for the first time, a security risk warning is displayed. Click Continue to this website.
- Select a desired language.
- Specify the User Name and Password according to the following table, and then click Log In.
| If... | Then... |
| On the login page, the User Name is admin by default. |
|
| On the login page, the User Name is empty by default. | Select installer in User Name, set the login password as prompted, and click Log In. |
NOTE
- Protect the password by changing it periodically, and keep it secure. If you lose the password, the device must be restored to its factory settings. The Company will not be held liable for any losses resulting from improper password management.
- You will be locked out for 10 minutes after five failed password attempts in 5 minutes.
- A dialog box with recent login information is displayed after login. Click OK.
- Update the SmartLogger software as required. Contact the Company's engineers to obtain the update package and guide and complete the update accordingly.
- On the Deployment Wizard page, set parameters as prompted. For details, see Help on the page.


NOTE
During parameter settings, click Previous, Next, or Skip as required.
- After the parameters are configured, click Finish.
FAQs
The Unit Cannot Find Devices
- Check the RS485 communications cable and AC power cable connection. If any cable is loose, disconnected, or reversely connected, rectify the connection.
- Check the RS485 communications parameter settings. Ensure that the baud rate and communication address are set correctly and that the device address is within the search address range of the SmartLogger.
- Check whether the devices that do not support automatic identification, such as the EMI and power meter, have been manually added.
- Check whether the devices connected to the SmartLogger are powered on.
The 4G Communication Is Abnormal
- Check whether the SIM card is properly installed.
- Check whether the SIM card is damaged or in arrears.
- Check whether the 4G antenna is loosely connected or damaged.
- Check whether the management system parameters and wireless network parameters are set correctly.
The Unit Cannot Communicate with the Management System
- If a wired network is used, check whether the WAN port or SFP port of the SmartLogger is connected correctly.
- If a wireless network is used, check whether the SIM card and antenna are installed correctly.
- Check whether the parameters of the wired or wireless network are set correctly.
- Check whether the management system parameters are set correctly.
How Do I Set Export Limitation Parameters
- Log in to the WebUI, and choose Settings > Power Adjustment > Export Limitation.
- Set corresponding parameters as prompted. For details, see Help on the page.
RST Button
| Operation | Function |
| Hold down the button for 1s to 3s. | When WLAN is set to OFF in idle state, hold down the RST button for 1s to 3s to power on the WLAN module. The alarm/maintenance indicator (ALM) then blinks green fast for 2 minutes (other indicators are off) and the SmartLogger waits for connecting to the app. If the app fails to be connected, the WLAN module is automatically powered off after it is powered on for 4 hours. |
| Hold down the button for more than 60s. | Within 3 minutes after the SmartLogger is powered on, hold down the RST button for more than 60s until all indicators are off and then wait until the RUN indicator is on. The SmartLogger restarts and restores to its factory settings. |
Huawei Technologies Co., Ltd.
Huawei Industrial Base, Bantian, Longgang
Shenzhen 518129 People's Republic of China
e.huawei.com
Documents / Resources
References
Download manual
Here you can download full pdf version of manual, it may contain additional safety instructions, warranty information, FCC rules, etc.
Advertisement


Need help?
Do you have a question about the FusionCharge SmartLogger3000 and is the answer not in the manual?
Questions and answers