Table of Contents
Advertisement
Quick Links
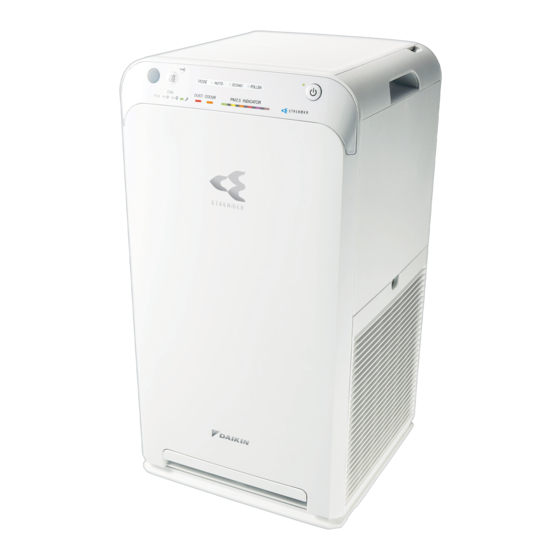
Air purifier
Floor standing or desktop type
Floor standing or desktop type
Model
MC55VBFVM3
• Thank you for purchasing this air purifier.
• Please read the operation manual carefully and follow it for correct use.
• Please read the "Safety Precautions" section before use.
Please keep the operation manual in a safe place for later reference.
Air Purifier
OPERATION MANUAL
►Page 3, 4
For internal
use only
3P629501-6
Advertisement
Table of Contents
Troubleshooting

Related Manuals for Daikin MC55VBFVM3


Summary of Contents for Daikin MC55VBFVM3
- Page 1 Floor standing or desktop type Floor standing or desktop type Air Purifier Model MC55VBFVM3 OPERATION MANUAL • Thank you for purchasing this air purifier. • Please read the operation manual carefully and follow it for correct use. • Please read the “Safety Precautions” section before use.
-
Page 3: Table Of Contents
Read First Contents Read First Safety Precautions ............Names of Parts and Operations ........Preparation Before Operation .......... Using the Air Purifying Operation ........10 Operation Changing the Airfl ow Rate ..........10 Operating the Unit in a MODE ........11 AUTO FAN / ECONO / ANTI-POLLEN Useful Functions Using the Child Proof Lock .......... -
Page 4: Safety Precautions
Read First Safety Precautions „ Observe these precautions in order to prevent property damage or injury. „ The consequences of incorrect use are categorised as follows: WARNING CAUTION Failure to follow these instructions properly may Failure to follow these instructions properly result in property damage or personal injury, which may result in personal injury or loss of life. - Page 5 Read First WARNING Observe in order to prevent fire, electric shock or severe injury. „ Concerning the remote controller • Do not place the remote controller in places that can be reached by small children. (Bodily harm may result from misoperation of the unit or accidental ingestion of the battery) • Make sure not to put the battery in the wrong polarity (+/-) orientation.
-
Page 6: Names Of Parts And Operations
Read First Names of Parts and Operations CAUTION Do not lift up the unit holding the grip on the deodorising fi lter unit. (Injury may result from the unit falling) Front Back Operating/Indicator panel ►Page 6, 7 Air outlet Active plasma ion generation unit Grip (for carrying the unit) Inside the air outlet. Deodorising fi lter unit Model name / Production no. - Page 7 Read First Operating/Indicator panel When a lamp is blinking ►Page 21 MODE lamps [green] ON/OFF lamp [green] Child proof lock lamp [orange] Indicate the MODE in operation. Lamp will light up when the power is ON. Lamp will be lit when the Child proof lock active. FAN lamps [green] Streamer lamp [blue] Indicates the active FAN setting (4 settings: Quiet, Low, Standard, Turbo).
- Page 8 Read First Names of Parts and Operations Operating/Indicator panel Signal receiver FAN/MODE button ON/OFF button Press to cycle between FAN settings Press to turn the power ON or OFF. Receives signals from the remote controller. ►Page 10 and MODEs. ►Page 10-12 Receiving tones sound when signals are received, confi rming successful reception. • Operation start...2 short beeps • Setting change...1 short beep • Operation end...1 long beep...
-
Page 9: Preparation Before Operation
Read First Preparation Before Operation Positioning the unit Before installation, peel off Pointers for good positioning the tape fixing the power • Choose a position from where airflow can reach all areas of the room. supply cord to the bottom • Place on a stable surface. If the unit is placed on an unstable of the unit and draw out the surface, vibrations from the unit may be amplified. - Page 10 Read First Preparation Before Operation Preparing the remote controller Replacing the battery Attach the remote controller holder. • Insert the hook on the remote controller holder into Move the catch on the cover at the bottom of the the notch in the back of the unit. remote controller in the direction of the arrow.
-
Page 11: Operation
Operation WARNING Operation Do not turn off the unit by unplugging it from the power socket. (Fire or an electric shock may result from heating) Operation Detailed settings can be made Remote controller Unit using the remote controller. Operation via remote controller. Operation via operating/indicator panel on unit. -
Page 12: Operating The Unit In A Mode
Useful Functions Useful Functions Remote controller Unit Operating the Unit in a MODE Select a MODE specifi c to your needs. Airfl ow is adjusted automatically when the unit is running in a MODE. Remote controller Press • Each press cycles between the MODE lamps [green]. (AUTO FAN) (ECONO) (ANTI-POLLEN) Unit Press • Each press cycles between the MODE lamps [green] and FAN lamps [green]. MODE (AUTO FAN) (ECONO) - Page 13 Useful Functions MODE Usage and Function Automatic airflow rate adjustment FAN setting (Quiet, Low, Standard, High) is automatically adjusted according to the degree of air impurity. AUTO FAN Purifying capacity increases as airflow rate rises. • Degree of air impurity corresponds to the volume of dust and the intensity of odours in the ambient air. Saving energy In Power saving mode within ECONO MODE, the FAN setting automatically switches between Quiet and Low only.
-
Page 14: Using The Child Proof Lock
Useful Functions Useful Functions Remote controller Unit Using the Child Proof Lock Button operation is restricted preventing misoperation by small children. Remote controller Unit Hold down for about 2 Cannot be set from unit. seconds. • Hold down for 2 seconds again to turn off child lock. • When Child proof lock is active, operations will be restricted. -
Page 15: Streamer Output Settings
Advanced Settings Advanced Settings If the hissing sound generated by the streamer discharge or the smell of ozone bother you *Setting at time of purchase Streamer Output Settings Regular* Setting procedures Remote controller Hold down for about 3 seconds when the unit is off. • Each time are held down for about 3 seconds, the setting switches between Regular and Low. -
Page 16: Setting Dust/Pm2.5 Sensor Sensitivity
Advanced Settings Advanced Settings When the sensitivity of the dust/PM2.5 sensor does not meet your preferences *Setting at time of purchase Setting Dust/PM2.5 Sensor Sensitivity High Normal* High Normal* Setting procedures Remote controller Unit Hold down on the unit for about 5 seconds and when a short beep sounds, press on the remote controller while pressing on the unit. -
Page 17: Settings Of Modes Within Econo Mode
Advanced Settings If you wish to turn Monitoring mode (within ECONO MODE) OFF *Setting at time of purchase Monitoring Monitoring Monitoring Monitoring Settings of Modes within ECONO MODE Setting procedures Remote controller Unit Hold down on the unit for about 5 seconds and when a short beep sounds, press on the remote controller while pressing on the unit. -
Page 18: Maintenance
Maintenance WARNING Maintenance Before cleaning and maintenance work, make sure to unplug the unit. (An electric shock or injury may result) Outfl ow grille Wipe Wash/Rinse When dirt becomes an issue Removing • Wipe up dirt with a soft damp cloth and rinse with water. - Page 19 Maintenance WARNING • Do not use petrol, benzine, thinner, polishing compound, paraffin, alcohol, etc. (An electric shock, fire, or cracking may result) • Do not wash the main body of the unit with water. (An electric shock, fire, or malfunctioning/breakage may result) Deodorising filter unit When concerned about odours or dirt Removing Hold the lever and grip of the deodorising filter Vacuum clean Do not use water unit and remove. • Remove from the unit together with the frame Lever and remove dust using a vacuum cleaner. • If odour becomes an issue, wet the surface lightly with an atomiser etc., and then leave the part to dry in a shaded area with good ventilation.
-
Page 20: Replacing The Streamer Unit
Maintenance WARNING Maintenance Before cleaning and maintenance work, make sure to unplug the unit. (An electric shock or injury may result) Replacing the Streamer Unit If the streamer lamp blinks The streamer unit will not need to be replaced. However, depending on where the unit is used (places where oils are present, or dust and humidity is abundant, or sprays and chemical agents ►Page 21 are used, etc.) replacement may become necessary. -
Page 21: Separately Sold Part
Maintenance Separately Sold Part Contact the place of purchase. Replacement part Dust collection filter (electrostatic HEPA filter) ( 1 piece Model: KAFP080B4E • Replace about every 10 years. • Catches dust and pollen. • Failure to maintain part properly may result in: • Reduced air purifying capacity. • Reduced deodorising capacity. -
Page 22: About The Indicator Lamps
Troubleshooting About the Indicator Lamps Operating/Indicator panel Check the indicator lamps and respond as indicated below. Indicator lamp Cause/Solution Odour sensor lamp is blinking. This lamp blinks if the deodorising filter unit has become detached or is not attached properly. ... -
Page 23: Faqs
Troubleshooting FAQs Please check the following before contacting the place of purchase. Q: The dust/PM2.5 sensor seems to have poor sensitivity... Perform periodic cleaning of the dust/PM2.5 sensor as dirt on its lens can lead to ►Page 17 poor sensitivity. In addition, the response time of the dust/PM2.5 sensor varies depending on room size. Make adjustments in accordance with the procedure for setting dust/PM2.5 ►Page 15... -
Page 24: Troubleshooting
Troubleshooting Troubleshooting „ Before making an inquiry or a request for repair, please check the following. If the problem persists, contact the place of purchase. „ In the event of malfunction during operation If the indicator lamps light up abnormally, or become inoperable, due to a lightning strike etc., remove the power supply plug, wait at least 5 seconds then reinsert the power supply plug and turn the unit on again. - Page 25 Troubleshooting Phenomenon Check points All the FAN lamps ( (Quiet), • Are the pre-fi lter, outfl ow grille, and dust collection fi lter attached? These lamps may blink if the unit is operated without a part attached. (Low), (Standard), and (Turbo)) blink together [If one or more parts are not attached]...
- Page 26 Troubleshooting Troubleshooting „ Air purifying function Phenomenon Check points Air purifying capacity is reduced • Is the unit positioned in a place where airfl ow cannot reach or surrounded by obstacles? Choose a position that is obstacle-free and from where airfl ow can reach all areas of the room. •...
-
Page 27: Specifications
Troubleshooting Specifications Model name MC55VBFVM 3 Power supply Single phase 50Hz 220-240V / 60Hz 220-230V Air Purifying Operation mode Turbo Standard Quiet Power consumption (W) Operating sound (dB) Airflow rate (m³/h) Coverage area (m²) External dimensions (mm) 500(H)× 270(W)× 270(D) Weight (kg) Power supply cord length (m) • These specification values are applicable to both 50Hz 220–240V and 60Hz 220–230V. •... - Page 28 02̲TW̲3P549981-1C.indd 1 02̲TW̲3P549981-1C.indd 1 2020/04/17 16:17:14 2020/04/17 16:17:14...
- Page 29 目 次 前言 前 前 言 言 安全須知 各部位名稱與功能 運轉前的準備 運 運 轉 轉 想要空氣清淨運轉時 運轉 想要改變風量時 方 方 便 便 想要切換運轉模式時 的 的 風量自動 節電 花粉 機 機 方便的機能 能 能 想要使用兒童安全鎖時 想改變指示燈的亮度時 閃流的輸出設定 詳 詳 細 細 主動離子的輸出設定 設 設...
- Page 30 安全須知 請務必 遵守 謹請遵守說明的內容,以防止對人身造成危害或對財產造成損害。 ■因錯誤操作以致發生的內容區分如下: 警告 注意 表示 「有死亡或重傷之虞的內容」 。 表示 「有受傷或財物損害之虞的內容」 。 警告 為防止火災、觸電或嚴重受傷,敬請遵守。 電源插頭或電源線 請勿在以下場所使用 使用油或可燃氣體等的場所、 ■運轉中勿拔除電源插頭。 或有外漏之虞的場所。 (否則將因發熱而引發火災或觸電) (否則將因著火或吸入至本機內而起火或冒煙, 禁止 禁止 或因樹脂劣化或龜裂而受傷) ■切勿以濕手插拔電源插頭。 (否則將導致觸電) 有腐蝕性氣體或金屬塵埃的場所。 (否則將因著火或吸入至本機內而起火或冒煙) ■超過插座或配線器具的額定使用方式或交流 浴室等高溫、高濕或有水的場所。 220-240V 以外的電源,請勿使用。 (可能因漏電而發生火災或觸電) (當延長線等超過額定時,將因發熱而引發火災) 嬰幼兒伸手可及處。 ■請勿拉扯電源線來拔下插頭。...
- Page 31 ■ 謹請遵守的內容種類,以 「圖案記號」 區分說明。 前 前 代表 「禁止從事的內容」 。 代表 「務必從事的內容」 。 言 言 注意 為防止漏電或受傷以及保障身家財產等,敬請遵守。 使用時 ■本機不預期供生理、感知、心智能力、 ■與燃燒器具一同使用時, 經驗或知識不足之使用者 ( 包含孩童 ) 使用, 請注意充分通風。 運 運 除非在對其負有安全責任人員之監督或 本產品的運轉並不能取代通風。 轉 轉 禁止 務必實施 指導下安全使用。 (否則將導致一氧化碳中毒) 本產品無法去除一氧化碳。 下述人士使用時,亦請周遭的人多加注意。 嬰幼兒、孩童、年長者、患病者、身障者 ...
- Page 32 注意 各部位名稱與功能 搬運時,請勿抓取脫臭濾網模組把手處提 起本體。 (否則將因掉落而受傷) 前 面 背 面 操作 顯示面板 出風口 6、7 頁 主動離子 把手 產生裝置 (用於提起搬運本機) 在出風口的內部。 脫臭濾網模組 機種名 製造編號 臭味感知器 在本機的內部。 灰塵 電源線 PM2.5感知器 在回風口 (左側) 的內部。 6、15∼17 頁 電源插頭 回風口 前面與側面 可拆卸的主要零件 注 意 為避免造成故障,請務必在安裝好所有零件的狀態下運轉。 事 項...
- Page 33 指示燈閃爍時 頁 操作 顯示面板 兒童安全鎖指示燈 (橙色) 模式指示燈 (綠色) 開 關 指示燈 (綠色) 前 前 言 言 運轉 「開」 時會亮燈。 在兒童安全鎖設定中會亮燈。 顯示設定中的運轉模式。 運 運 轉 轉 閃流指示燈 (青色) 風量指示燈 (綠色) 風量設定以4段 (靜音、弱、標準、強力) 顯示。 輸出閃流運轉時會亮燈。 方 方 灰塵 PM2.5感知器指示燈 臭味感知器指示燈 便 便 的...
- Page 34 各部位名稱與功能 操作 顯示面板 信號接收部位 模式 風量 按鈕 開 關 按鈕 接收遙控器的信號。接收信號時, 可選擇喜好的風量、模式。 按下即運轉, 將以信號接收音來確認接收。 再按一次就停止。 10∼12 頁 頁 •運轉開始…嗶嗶 •設定變更…嗶 •運轉停止…嗶- 遙控器 開 關 按鈕 信號發送部位 按下即運轉,再按一次就停止。 對本機發送信號。 窗簾等有時會阻擋信號而無法接收。 頁 可發送的距離為直線約6 m。 模式按鈕 風量按鈕 可選擇喜好的模式。 可選擇喜好的風量。 11、12 頁 頁 指示燈亮度按鈕 兒童安全鎖按鈕...
- Page 35 運轉前的準備 1 設置於房間 前 前 設置前,請撕下本機下方用 良好的設置方法 言 言 來固定電源線的膠帶,並取出 電源線。 請選擇室內整體通風最佳的場所。 ● 請設置在穩定的場所。若設置在不穩定的場所,有時本機的振動會 ● 變大。 在本機內部的電源迴路、電線影響下,電視影像出現雜訊或收音機、 電源線 ● 音響發生雜音時,請將本機與上述電器距離2 m以上。無線電話、 膠帶 (藍色) 電波時鐘也一樣。 運 運 為避免牆面髒汙,請參考圖的設置尺寸設置。但由於本機 ● 注 距離天花板 轉 轉 會吸入髒空氣,因此視牆面的種類而定,有時即使已依照 意 100cm以上 圖的設置尺寸,本機周圍的牆面仍可能變髒。如遇此狀況, 事 使用時請與牆面保持充分的距離。 項 長時間在相同場所使用時,自本機下部所吸進的空氣可能 ●...
- Page 36 運轉前的準備 遙控器的準備 如何更換電池 安裝遙控器底座。 將遙控器底座的爪鈎插入本機背面的插扣部。 ● 將遙控器背面的電池蓋朝箭頭方向推。 鈎掛部位 拉出電池蓋。 確實插到底。 爪鈎 更換電池。 撕下遙控器的透明膠膜。 蓋上電池蓋。 只要撕下透明膠膜即可使用。 ● 電池已預先裝入遙 控器 透明膠膜 將電池的+側對準電池 電池 蓋的+側安裝 爪鈎 (CR2025) 使用方法 請將遙控器的信號發送部位對準本機的信號接收部位。 ● 有窗簾等可能阻擋信號的物品時,可能會無法接收。 關於電池 可發送的距離為直線約6m。 ● 電池請勿放在孩童伸手可及之處。萬一不慎誤吞電池時, ● ﹝俯視圖﹞ 請立即就醫。 信號接收 為避免因漏液或破裂造成故障或受傷,長期間不使用時, ● 部位...
- Page 37 警告 運轉 運轉中切勿拔除電源插頭停止運轉。 (否則將因發熱而發生火災或觸電) 關於操作方法 遙控器可進行細部設定。 本機 遙控器 前 前 以遙控器操作。 以本機 顯示面板的操作。 言 言 運 運 轉 轉 想要空氣清淨運轉時 (想要運轉或停止時) 方 方 便 便 的 的 清淨房間裡的空氣。 機 機 本機 能 能 遙控器 按下 。 按下 。 再按一次就停止。 ● 注...
- Page 38 方便的機能 遙控器 本機 想要切換運轉模式時 可選擇符合用途的模式,進行最佳運轉。 模式切換後會自動調整風量。 遙控器 按下 。 隨著每次按下,切換模式指示燈 (綠色) 會依序切換。 ● (風量自動) (節 電) (花 粉) 本機 按下 。 隨著每次按下,模式指示燈 (綠色) 或風量指示燈 (綠色) 會依序切換。 ● 模式 (風量自動) (節 電) (花 粉) (強力) (標準) (弱) (靜音) 風量 02̲TW̲3P549981-1C.indd 11 02̲TW̲3P549981-1C.indd 11 2020/04/17 16:17:19 2020/04/17 16:17:19...
- Page 39 模式 使用場合與機能內容 前 前 言 言 想要自動調整風量時 視空氣髒汙的程度,自動調整風量 ( 「靜音」 、 「弱」 、 「標準」 與 「強」 ) 。 風 清淨能力會隨風量增強而提高。 量 空氣髒汙的程度將以灰塵的多寡與臭味的強度判斷。 ● 自 動 運 運 轉 轉 想要節約電費時 節電模式內的 (eco節電模式) ,風量僅能自動切換 「靜音」 或 「弱」 ,以減少耗電量 (※1) 與降運轉音進行運轉。 空氣乾淨狀態維持一陣子後,會自動切換為監控運轉模式。 方...
- Page 40 方便的機能 遙控器 本機 想要使用兒童安全鎖時 可限制使用按鈕,防止錯誤操作。 遙控器 本機 按下 約2秒。 無法在本機上設定。 再次按下 約2秒即可取消。 ● 在兒童安全鎖設定中,操作將受到限制,即使按下其他按鈕也會出現 「嗶嗶嗶」 音,防止兒童錯誤操作。 ● 通知 在兒童安全鎖設定中拔下電源插頭時,兒童安全鎖即取消。 ● 設定後,兒童安全鎖指示燈 (橙色) 會亮燈。 ● 想改變指示燈的亮度時 可調節本機指示燈的亮度。 遙控器 本機 按下 。 無法在本機上設定。 隨著每次按下,本機指示燈亮度會依序切換。 ● 明 暗 關 通知 在臥室等在意亮度的場合中,可方便調整指示燈亮度。 ● 即使將開 關 指示燈設為 「關」 ,燈也不會熄滅。亮度變成 「暗」 。 ●...
- Page 41 詳細設定 ※購買時的設定 使用場合與機能內容 設定項目 步驟 前 前 前 言 言 言 在停止運轉狀態下,按下 與 約3秒。 切換成設定 「低」 時 切換成設定 「通常」 時 每次按下 與 「嗶」 音響起,閃流指 「嗶」 音響起,閃流指 ● ● 閃流 約3秒即切換。 示燈閃爍約5秒 。 示燈亮燈約5秒 。 ※ 通常 在意閃流放電 「咻-」 的響聲 閃爍 亮燈...
- Page 42 詳細設定 ※購買時的設定 使用場合與機能內容 設定項目 步驟1 步驟2 灰塵 PM2.5感 知器敏感度 高 本機 本機 遙控器 遙控器 待響起 「嗶」 聲後,放 按下本機的 約5秒, 灰塵 PM2.5感知器的敏感度 開本機的 與遙 待響起 「嗶」 聲後,持續 不符所需時 控器的 。 按著本機的 ,同時 灰塵 PM2.5感 灰塵 PM2.5感 知器敏感度 按下遙控器的 。 風量指示燈 ( 「 (弱) 」 、 「 (標 ●...
- Page 43 步驟3 步驟4 前 前 言 言 本機 遙控器 變更設定後,按下遙控 按下本機的 ,變更敏感度設定。 器的 。 運 運 風量指示燈會隨著每次按下按鈕即進行切換,即可變更敏感度。 ● 轉 轉 「嗶」 聲響起,設定的內容會閃爍。 ● 想要調高敏感度時 請在保持顯示閃爍的狀態下,拔 將風量指示燈設為 高 感知器反應靈敏。 (強力) 掉電源插頭,等候5秒以上後再次 「 (強力) 」 。 插入電源插頭。 如此即完成設定。 (標準) 普通 購買時的設定 想要調低敏感度時 完成設定後,請拔除插頭,待5秒後 ●...
- Page 44 警告 保養 保養前務必停止運轉,並拔下電源插頭。 (否則將導致觸電或受傷) 出風格柵 本機 在意髒汙時 在意髒汙時 拆卸方式 手指插入本機上部的凹處拆卸。 擦拭 水洗 擦拭 使用沾濕的軟布擦拭髒汙並水洗。 使用沾濕的軟布擦拭髒汙。 ● ● 切勿使用硬毛刷等用具。 髒汙嚴重時,以沾有廚房專用中性洗潔 ● ● (否則將導致損傷) 精的布巾擦拭髒汙。 髒汙嚴重時,以溶入廚房專用中性洗潔 切勿使用硬毛刷等用具。 ● ● 安裝方式 精的溫水或水浸泡,確實沖洗以避免洗 (否則將導致損傷) 注意方向確實安裝。 潔精殘留,接著充分陰乾。 灰塵 PM2.5感知器 約3個月1次 如有灰塵等堆積 吸塵器 擦拭 ①拆下預濾網 (左側) 。 拆下預濾網...
- Page 45 警告 請勿使用汽油、揮發油、去漬油、 光粉、煤油、酒精等。 (否則將導致龜裂、觸電或起火) ● 本機請勿水洗。 (否則將導致觸電、火災或故障) ● 脫臭濾網模組 在意異味或髒污時 拆卸方式 前 前 請抓取脫臭濾網模組的壓桿與把手拉出。 言 言 吸塵器 不可水洗 壓桿 連同外框自本機拆下,以吸塵器吸除灰塵。 ● 在意臭味時,表面以噴霧稍微噴濕後在通風 ● 良好的陰涼處陰乾。 (約1天) 表面勿刮。 ● 把手 切勿水洗。 (水洗會導致變型而無法使用。 ) ● 安裝方式 頁 請將脫臭濾網模組押到最底。 運 運 脫臭濾網切勿 轉 轉 自外框上拆下...
- Page 46 警告 保養 保養前務必停止運轉,並拔下電源插頭。 (否則將導致觸電或受傷) 閃流組件的更換 閃流指示燈閃爍時 雖然閃流組件可以不用更換,但仍會因為使用的場所 (例如有油性成分瀰漫的場所、 灰塵多或濕氣重的場所、使用噴霧或化學藥品的場所等) 不同,而有可能必須更換。 頁 請洽原購買經銷店。 拆下從機體背面看過去,左側的預濾網。 安裝新的閃流組件。 頁 ① 將閃流組件從左側開始放入,並押至右側的卡榫發出 「喀嘰」 的響聲為止。 掀起保護外蓋,拆除閃流組件外蓋。 「喀嘰」 在卡榫處以手指往自己的方向拉 閃流組件外蓋 保護外蓋 卡榫 ② 注意方向使夾扣朝向右側,並將連接器插到底。 背面視圖 拆卸閃流組件。 安裝閃流組件外蓋。 ① 拆卸閃流組件的連接器。 1. 押下連接器上的卡榫。 押到發出 卡榫 2. 押住卡榫的同時將其拉出。 「喀嘰」 音為止 如果沒有押下卡榫就不會解鎖。...
- Page 47 另售品 請洽原購買經銷店購買。 更換用 前 前 言 言 集塵濾網 (靜電 HEPA 濾網) (1 個) 品號:KAFP080B4E 更換參考值約 10 年 ● 捕捉灰塵或花粉。 ● 運 運 在各項零件髒汙的狀態下持續使用時 轉 轉 ● •無法獲得空氣清淨效果。 •無法獲得脫臭效果。 •有時會產生臭味。 集塵濾網 (材質:聚酯 / 聚丙烯) 請依照居住地區的垃圾分類辦法進行處分。 ● 長期不使用時 方 方 便 便 的...
- Page 48 指示燈出現以下狀況時 操作 顯示面板 確認指示燈,依照以下內容因應處理。 指示燈 原 因 因 應 臭味感應器指示燈會 閃爍。 請正確安裝脫臭濾網模組。 拆除脫臭濾網模組或未正確安裝時,指示燈會閃爍。 頁 閃流指示燈會閃爍。 就是該更換閃流組件的時候。 頁 3個模式指示燈會 同時閃爍。 請洽原購買經銷店。 電器零件故障。 風量自動模式指示燈 會閃爍。 忘了安裝零件時 是否已安裝預濾網、出風格柵 電器零件故障。 以及集塵濾網? 拆下零件運轉時,指示燈有時 請拔下電源插頭,重新安 會閃爍。 忘了安裝零件時 裝零件之後再運轉。 未堆積灰塵時 4個風量指示燈會 電器零件故障。 預濾網是否堆積了灰塵? 同時閃爍。 請拔下電源插頭, 保養 堆積灰塵時 預濾網後再運轉。 頁 出風口未阻塞時...
- Page 49 常見問題 諮詢前請先確認。 灰塵 PM2.5感知器的敏感度變差了… 前 前 灰塵 PM2.5感知器鏡片髒汙時,可能會使敏感度變差,請定期進行保養。 頁 言 言 另外,灰塵 PM2.5感知器的反應時間視房間大小而異。 請依照灰塵 PM2.5感知器的敏感度設定來調節。 15、16 頁 將風量設定為 「強力」 或是以 「風量自動模式 (強) 」 運轉時,灰塵 PM2.5感應器的反應有 時會變差。 風量強,灰塵會在到達灰塵 PM2.5感知器前就從回風口吸走, 灰塵 PM2.5感知器 此狀況並非異常現象。 運 運 集塵濾網可以保養嗎? 轉 轉 無法保養。請勿以吸塵器清理或水洗。 (否則將降低集塵濾網性能) 髒汙嚴重時,請加以更換。 集塵濾網一下子就變黑了… 雖然集塵性能不變,但若在意的話,請加以更換。...
- Page 50 疑似故障時? 委託修理或諮詢前,請先確認以下內容。 確認後仍有異常時,請洽原購買經銷店。 有以下情形時, 請進行確認。 不 遙控器的電池是否已耗盡? ● 運 請更換電池。 頁 轉 是否按著電視或錄影機等遙控器的按鈕? ● 請使用本機搭配的專用遙控器,使用時請對準本機進行操作。 按下遙控器的 房間內有無朝向其他方向、有無具有接收遙控器信號機能的機器? ● 電視喇叭等也屬於具備用上述機能的機器。 也不運轉 房間內有這類機器時,可能會因來自該機器的 信號與來自遙控器的信號互相干涉而無法接收。 為保護系統,本機可能在遇到突然的大電壓波動時停止運作。 ● 如果在此時操作,本機會在電壓變為正常後自動恢復運作。 電壓保護範圍:180V-264V 有安裝閃流組件蓋嗎? ● 若未安裝,安全開關就會啟動,無法運轉。 無法運轉 請正確安裝閃流組件外蓋後,重新運轉。 頁 出 閃流的運轉在進行時,會從閃流組件發出 「咻ー」 的閃流放電聲。 ● 現 視使用條件而定,有時聲音會變小或變成 「啪唭啪唭」 、 「嘰-」 、 聲...
- Page 51 ■運轉中錯誤動作時 運轉中因打雷等因素,使本機顯示部異常亮燈或無法操作時,請先拔下電源插頭,待經過5秒以上之後, 再次插入電源插頭進行運轉。 有以下情形時, 請進行確認。 指 所有風量指示燈 ( 「 (靜音) 」 、 如果電壓突然下降,指示燈可能會閃爍。 ● 示 前 前 「 (弱) 」 、 「 (標準) 」 、 一旦電壓恢復正常,指示燈就會回到先前狀況。 燈 言 言 電壓保護範圍:180V-264V 「 (強力) 」 ) 同時閃爍 灰塵 PM2.5感知器用空氣進風口或其周邊是否堆積了灰塵? ● 請使用吸塵器將附著在空氣進風口的灰塵吸除乾淨。 頁 灰塵...
- Page 52 疑似故障時 ? 有以下情形時, 請進行確認。 其 他 進入節電模式運轉中、監控運轉模式時, ● 送風扇會在運轉與停止間反覆動作。 頁 運轉中風扇停止 是否在預濾網、出風格柵以及集塵濾網卸除的狀態下運轉? ● 忘了安裝零件時,基於保護電器零件,有時風扇會停止。 忘了安裝時,請拔下電源插頭,正確安裝零件後再行運轉。 依據空氣的髒污程度,閃流的運轉可能會停止。 ● 頁 聽不見閃流放電的聲響 閃流輸出是否設定為 「低」 ? ● 頁 是否在本機的2m內設置電視、收音機,或是在本機的附近使用室內天線? ● 電視的畫面有雜訊 本機的附近是否有電視機、收音機的電源線、天線的配線? ● 請將本機儘可能遠離電視、收音機與天線。 是否在電源故障或發生突然的電壓波動時,或是為了移動本機拔出電源插頭, ● 插入電源插頭即開始運作 或在上次運作期間拔出電源插頭? 自動重新啟動功能會自動恢復運作。 02̲TW̲3P549981-1C.indd 25 02̲TW̲3P549981-1C.indd 25 2020/04/17 16:17:29 2020/04/17 16:17:29...
- Page 53 規格 規格 MC55VBFVM 3 機 種 名 前 前 電 源 單相 50Hz 220-240V / 60Hz 220-230V 言 言 運 轉 模 式 強力 標準 弱 靜音 耗 電 量 (W) 運 轉 音 (dB) 風 量 (m /h) ※ 1 適...
- Page 54 MEMO 27 27 02̲TW̲3P549981-1C.indd 27 02̲TW̲3P549981-1C.indd 27 2020/04/17 16:17:30 2020/04/17 16:17:30...
- Page 55 28 28 02̲TW̲3P549981-1C.indd 28 02̲TW̲3P549981-1C.indd 28 2020/04/17 16:17:30 2020/04/17 16:17:30...
- Page 56 For manufacturing use only 3P629480-6...
Need help?
Do you have a question about the MC55VBFVM3 and is the answer not in the manual?
Questions and answers