Advertisement
Available languages
Available languages
Quick Links
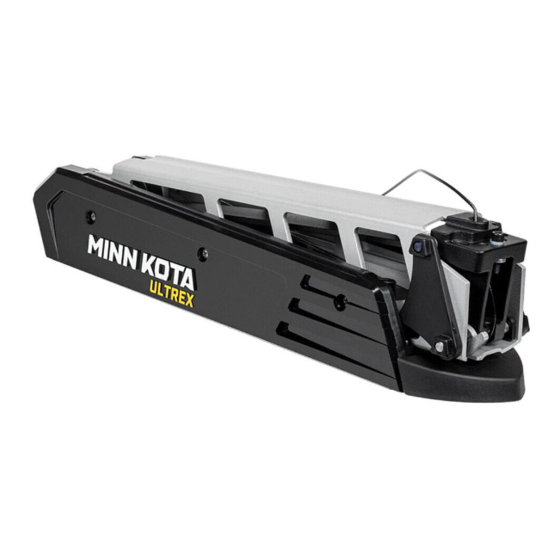
Designed to provide improved lift assist for Ultrex motors equipped with both a Humminbird® MEGA 360 Imaging
Imaging TargetLock
TM
.
Item /
Part #
Description
Assembly
2991677 MNT ASM UTX 80/45"
2
2991674 MNT ASM UTX 80-112/52"
2991675 MNT ASM UTX 112/45"
A
2994887 BAG ASM,FORTREX/ULTREX
Items 4-8
MNT HDW
SCREW-1/4-20X2.5" S/S
4
2263468
PPH
6
2263103 NUT-1/4-20 NYLOCK SS
8
2261713 WASHER-1/4 FLAT 18-8 SS
SCREW-1/4-20 X 3/4 SS
10
2373434
PPMS
INSTALL GUIDE,M360/TL
p
2297172
MNT
STRAP-HLDDWN,33",
12
2263806
HOOK&LP
TOOLS AND RESOURCES REQUIRED
• 1/4" Allen Wrench
• Torque Wrench
• #2 Phillips Screwdriver
• Two #3 Phillips Screwdriver
MOUNTING CONSIDERATIONS
Mounting considerations for the installation of a new mount are very similar to the installation of a brand new motor. It is recommended
that the new mount be installed as close to the keel or centerline of the boat as possible. Make sure the area under the mounting location
is clear to drill holes and install nuts and washers. Minn Kota requires the use of all 6 mounting holes. Make sure the motor rest on the
mount is positioned far enough beyond the edge of the boat. The motor must not encounter any obstructions as it is lowered into the
water or raised into the boat when stowed and deployed. Consider a quick release or adapter bracket with the installation of your new
mount. To view a list of accessories, please visit minnkotamotors.com.
The Ultrex Accessory Mount provides improved lift assist for Ultrex motors when installed with both Humminbird MEGA 360 Imaging
and MEGA Live Imaging TargetLock. When installing this Mount, complete the installation of the Humminbird accessories. Please
refer to Humminbird for instructions for the Humminbird accessory installed on the motor. If using this Mount without the use of the
Humminbird accessories, Minn Kota recommends using your original mount.
1 | minnkotamotors.com
MEGA 360 ULTREX ACCESSORY MOUNT
Notes
Qty.
Mount Assembly
1
for 1854080
Mount Assembly
1
for 1854081
Mount Assembly
1
for 1854082
1
6
6
6
p
2
✖
1
1
• Drill
• 9/32" Drill Bit
• Pencil or similar marking tool
• 7/16" Box End Wrench
MEGA LIVE TARGETLOCK AND
1854080, 1854081 & 1854082
4 4
6 6
8 8
Not shown on Parts Diagram.
This part is included in an assembly and cannot be ordered individually.
• A second person to help
with the installation
• 5/64 Allen Wrench
• Hack Saw
©2022 Johnson Outdoors Marine Electronics, Inc.
and MEGA Live
TM
10
10
A A
2 2
12
12
Advertisement

Related Manuals for MINN KOTA MEGA LIVE


Summary of Contents for MINN KOTA MEGA LIVE
- Page 1 Make sure the area under the mounting location is clear to drill holes and install nuts and washers. Minn Kota requires the use of all 6 mounting holes. Make sure the motor rest on the mount is positioned far enough beyond the edge of the boat.
- Page 2 REMOVAL OF CURRENT MOUNT To install the Ultrex Accessory Mount, remove the current Mount from the trolling motor. This installation requires disconnecting the gas spring, removing the Steering Module from the Mount, and uninstalling the Mount from either the deck of the boat or a Quick Release Bracket.
- Page 3 Remove Motor From Mount With the gas spring disconnected, place the motor in the deployed position. WARNING Moving parts can cut or crush. The gas assist lift mechanism is under pressure. Disconnect gas spring before removing motor from mount. Do not engage the Pull Grip and Cable until gas spring is disconnected.
- Page 4 Quick Release Bracket. If new hardware is required Plate Plate to install the Ultrex Accessory Mount to the MKA-42 or MKA-52/62 Quick Release Bracket, Minn Kota Nylock Nut Nylock Nut recommends purchasing a new Bag Assembly (Part #2994829) online at minnkotamotors.com.
-
Page 5: Item(S) Needed
Strap Strap to install the Mount Kit to the MKA-23 or RTA-19 Quick Inboard Inboard Buckle Buckle Release Bracket, Minn Kota recommends purchasing Bag Assembly (Part #2994854) on line at Nylock Nylock Flat Washer Flat Washer minnkotamotors.com. Depending on the bolt pattern used to install... - Page 6 In addition, it may be necessary to change the installation placement from the original mounting location of the trolling motor on the deck of the boat. Minn Kota requires the use of all six mounting holes. If a Quick Release Bracket is used, Minn Kota requires the use of all six mounting holes to install the bracket to the Boat Deck.
- Page 7 Gas Spring does not get damaged by keeping it inside the Outer Arm of the Mount. Place the Hold Down Strap (Item #12) under the This motor weighs approximately 55 lbs. Minn Kota NOTICE: Base Extrusion so that it is below the Mount when recommend having a second person help with the installation.
- Page 8 Once the Mount is in position, determine which bolt pattern to use. The bolt pattern selected will depend Pattern 1 Pattern 1 on the deck space available on your boat. Minn Kota requires the use of all six mounting holes. Pattern Pattern Mark all six mounting holes.
- Page 9 NOTICE : Slide Slide Kit to the MKA-42 or MKA-52/62 Quick Release Bracket, Plate Plate Minn Kota recommends purchasing Bag Assembly (Part #2994829) online at minnkotamotors.com. Nylock Nut Nylock Nut To prevent seizing of the stainless steel NOTICE: hardware, do not use high-speed installation tools.
- Page 10 Installing the Gas Spring Use the Pull Grip and Cable to disengage the Latch Pull Grip Pull Grip Bar on the Mount. Mount Mount and Cable and Cable With the help of a second person, loosen the Depth Collar and position the motor halfway between the stowed and deployed position so that the Lower Unit rests on the Motor Ramp.
- Page 11 Adjusting the Pull Grip and Cable The length of the Cable on the Pull Grip and Cable can be adjusted based on personal preference. Before beginning the adjustment, the Gas Spring must be disengaged and the Steering Module must be removed. Please refer to the Removal of the Steering Module section and follow the procedure to Disconnect the Gas and Remove Motor from Mount.
- Page 12 Aluminum Arm Pull Cable Clamp Pull Cable Clamp For warranty information, please visit minnkotamotors.com. 121 Power Drive Minn Kota Consumer & Technical Service Johnson Outdoors Marine Electronics, Inc. Mankato, MN 56001 PO Box 8129 Phone (800) 227-6433 ©2022 Johnson Outdoors Marine Electronics, Inc.
- Page 13 Assurez-vous que la zone sous l’emplacement de montage est dégagée afin de pouvoir percer les trous et installer les rondelles et les écrous. Minn Kota nécessite l’utilisation des 6 trous de montage.
- Page 14 RETRAIT DU SUPPORT ACTUEL Pour installer le support pour accessoire Ultrex, retirez le support actuel du moteur de pêche à la traîne. Cette installation nécessite le débranchement du ressort à gaz, le retrait du module de direction du support et la désinstallation du support soit du pont du bateau, soit du support à...
- Page 15 Enlevez le moteur du support Lorsque le ressort à gaz est déconnecté, placez le moteur en position déployée. AVERTISSEMENT Les pièces mobiles peuvent couper ou écraser. Le mécanisme de remontage au gaz est sous pression. Vous devez déconnecter le ressort à gaz avant de retirer le moteur du support.
- Page 16 Nylock est nécessaire pour installer le support pour accessoire Ultrex sur le support à dégagement rapide MKA-42 ou MKA-52/62, Minn Kota recommande d’acheter un Pour prévenir le grippage de la quincaillerie en AVIS : nouvel assemblage de sac (pièce no 2994829) en ligne acier inoxydable, n’utilisez pas d’outils haute vitesse...
- Page 17 à dégagement rapide MKA-23 En-bord En-bord Boucle Boucle ou RTA-19, Minn Kota recommande d’acheter un nouvel assemblage de sac (pièce no 2994854) en ligne Rondelle Rondelle Écrou Écrou à...
- Page 18 De plus, il peut être nécessaire de modifier l’emplacement de l’installation à partir de l’emplacement de montage d’origine du moteur de pêche à la traîne sur le pont du bateau. Minn Kota requiert l’utilisation des six trous de montage. Si un support à dégagement rapide est 18 | minnkotamotors.com...
- Page 19 Minn Kota exige l’utilisation des six trous de montage pour installer le support sur le pont du bateau. Vérifiez l’emplacement du moteur de pêche à la traîne comme il doit être installé. Si le moteur de pêche à la traîne est installé avec un support à dégagement rapide, le support doit être utilisé...
- Page 20 Boulonnage 1 Boulonnage 1 quel boulonnage utiliser. Le boulonnage choisi dépendra de l’espace disponible sur le pont du bateau. Minn Kota requiert l’utilisation des six trous Boulonnage Boulonnage de montage. Marquez les six trous de montage. Percez le pont du bateau à...
- Page 21 Si de la nouvelle quincaillerie est nécessaire pour coulissante coulissante AVIS : installer le kit de montage sur le support à dégagement rapide MKA-42 ou MKA-52/62, Minn Kota recommande Écrou Nylock Écrou Nylock d’acheter l’assemblage de sac (pièce no 2994829) en ligne à minnkotamotors.com.
- Page 22 Utilisez un tournevis nº 2 pour retirer la plaque installer le kit de montage sur le support à dégagement latérale droite si nécessaire. rapide MKA-23 ou RTA-19, Minn Kota recommande d’acheter l’assemblage de sac (pièce no 2994854) en ligne à minnkotamotors.com.
- Page 23 Installer le ressort à gaz Utilisez la poignée de traction et le câble pour Poignée et Poignée et dégager la barre de verrouillage sur le support. Support Support corde corde de traction de traction À l’aide d’une deuxième personne, desserrez le collier de réglage de la profondeur et positionnez le moteur à...
- Page 24 Ajustement de la poignée et de la corde de traction Il est possible d’ajuster la longueur de la poignée et corde de traction selon ses propres préférences. Avant de commencer l’ajustement, il faut libérer le ressort à gaz et déposer le module du gouvernail. Veuillez vous référer à la section Dépose du moteur du gouvernail et suivre la procédure pour déconnecter le gaz ainsi que déposer le moteur du support.
- Page 25 Bras en aluminium Serre-câble de traction Serre-câble de traction Pour obtenir des renseignements sur la garantie, visiter minnkotamotors.com. 121 Power Drive Minn Kota Consumer & Technical Service Johnson Outdoors Marine Electronics, Inc. Mankato, MN 56001 PO Box 8129 Phone (800) 227-6433 ©2022 Johnson Outdoors Marine Electronics, Inc.
Need help?
Do you have a question about the MEGA LIVE and is the answer not in the manual?
Questions and answers