
Subscribe to Our Youtube Channel
Related Manuals for NTI VEEMUX Series


Summary of Contents for NTI VEEMUX Series
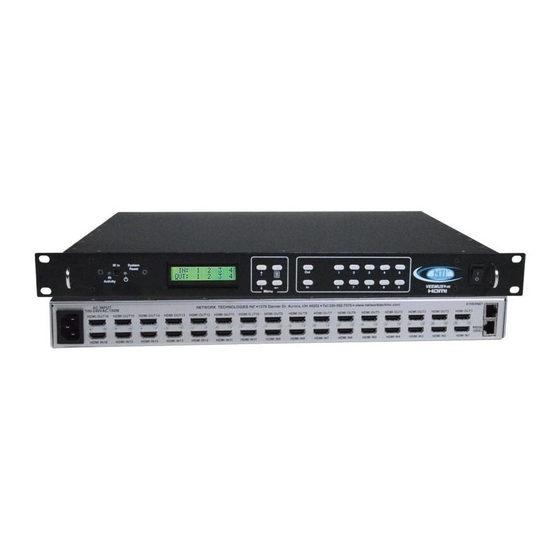
- Page 1 ® VEEMUX Series SM-16X16-HD4K HDMI 4K Video Matrix Switch Installation and Operation Manual Front and Rear View of SM-16X16-HD4K Rear View of SM-16X16-HD4K with cable tray installed MAN319 Rev Date 9/27/2022...
- Page 2 TRADEMARK VEEMUX and the NTI logo are registered trademarks of Network Technologies Inc in the U.S. and other countries. All other brand names and trademarks or registered trademarks are the property of their respective owners. COPYRIGHT Copyright © 2010-2022 by Network Technologies Inc. All rights reserved. No part of this publication may be reproduced, stored in a retrieval system, or transmitted, in any form or by any means, electronic, mechanical, photocopying, recording, or otherwise, without the prior written consent of Network Technologies Inc, 1275 Danner Drive, Aurora, Ohio 44202.
-
Page 3: Table Of Contents
RS232 Control................................11 Baud Rate................................11 Command Protocol ..............................12 Autostatus................................13 NTI Switch Control Program For Windows 9X, NT, 2000, XP, Vista, 7, 8,10 and 11 ..........13 SerTest- RS232 Interface Test Program ........................14 Main Options................................14 Matrix Operations..............................14 Ethernet Operations.............................. - Page 4 Changing Ports ............................... 43 Channel Surfing..............................43 Jump To Input..............................44 Jump To Output..............................44 Connect All ................................44 Save and Recall..............................45 Multiple Switch Control ............................45 Canceling a Command ............................45 Technical Specifications For IRT-UNV ........................46 Troubleshooting the IRT-UNV ........................... 46 Troubleshooting the VEEMUX...........................
-
Page 5: Introduction
NTI VEEMUX HDMI 4K VIDEO MATRIX SWITCH INTRODUCTION The VEEMUX HDMI 4K Video Matrix switch (VEEMUX) provides non-blocking access to 16 4k x 2k video sources from 16 displays. Locate computers up to 20 feet away from 4K @ 60Hz displays or 50 feet from 1080p @ 60Hz displays, enabling easy access to multiple servers in various locations. -
Page 6: Materials
NTI VEEMUX HDMI 4K VIDEO MATRIX SWITCH MATERIALS Materials supplied with this kit NTI SM-16X16-HD4K HDMI 4K Video Matrix Switch Power Cord- country specific CT6182 DB9 Female-to-RJ45 Female adapter CB4352- 5 foot CAT5 patch cable ... -
Page 7: Features And Functions
NTI VEEMUX HDMI 4K VIDEO MATRIX SWITCH FEATURES AND FUNCTIONS (Rear view shown without cable tray) Item Type Description For indicating when an infrared signal is being received from the IR remote control IR LED IR Receiver this receives the IR signal from the infrared remote control (IRT-UNV sold separately) -
Page 8: Installation
NTI VEEMUX HDMI 4K VIDEO MATRIX SWITCH INSTALLATION This NTI switch was designed to be mounted to a rack. It includes rack mount flanges to make attachment to a rack easy and a cable tray to easily secure attached cables to prevent disconnection. -
Page 9: Make All Connections
NTI VEEMUX HDMI 4K VIDEO MATRIX SWITCH Make All Connections 1. Connect a HDMI male cable between each video source and an “HDMI INx” connector on the rear of the VEEMUX. Figure 2- Connect video sources to VEEMUX 2. Connect a HDMI male cable between each display device and an “HDMI OUTx” connector on the rear of the VEEMUX. -
Page 10: Figure 4- Connect Rs232 Control Terminal To Veemux
NTI VEEMUX HDMI 4K VIDEO MATRIX SWITCH 3. If the VEEMUX will be controlled using RS232, then make a connection between the “RS232” port on the VEEMUX and a serial port on a PC. A DB9M-to-RJ45F adapter and 5 foot CAT5 patch cable have been provided to help with this connection if needed. -
Page 11: Figure 6- Attach Ac Power Cord To Veemux
NTI VEEMUX HDMI 4K VIDEO MATRIX SWITCH 5. Connect the powercord to the VEEMUX and plug it in. Figure 6- Attach AC power cord to VEEMUX 6. Power ON all components. (In any order, which ones are first and which are last does not matter.) -
Page 12: Operating The Veemux
No software is involved (see Infrared Control on page 41). With the RS232 option, there are no external devices to be purchased. NTI provides software commands as well as a test program to ensure the RS232 functions properly (see page 11 –... -
Page 13: Lcd Menus
NTI VEEMUX HDMI 4K VIDEO MATRIX SWITCH To quickly change a connection , simply press the associated port number and then the “In” or “Out” button to designate the video source or the display (respectively). Alternatively, the “In” or “Out” button can be pressed, then the port number, followed by the “Enter”... -
Page 14: Save And Load (Recall) Config
NTI VEEMUX HDMI 4K VIDEO MATRIX SWITCH DDC Menu DDC enables the video source to get EDID information from the display device. This enables the video source to automatically select the optimal resolution for the display by receiving, at power up, information from the display device concerning its resolution specifications. -
Page 15: Rs232 Control
NTI VEEMUX HDMI 4K VIDEO MATRIX SWITCH RS232 CONTROL RS232 enables the VEEMUX to be remotely controlled via RS232. To control the VEEMUX via RS232 the user has four options: write a program that runs on a PC using the Command Protocol (page 12) ... -
Page 16: Command Protocol
NTI VEEMUX HDMI 4K VIDEO MATRIX SWITCH Command Protocol CPU controller commands supported by the unit are defined below. All commands must be terminated with a <CR> (carriage return). When a command is sent, the entire string is echoed back along with a response from the addressed unit as shown in the Command Definitions table (below). -
Page 17: Autostatus
Follow the instructions on the screen The NTI Switch Control Program performs best on monitors set to a screen resolution of at least 800 X 600. Instruction for using the NTI Switch Control Program is available by opening "MSCP Help" in the "NTI" program group once the program has been installed and is open on the screen. -
Page 18: Sertest- Rs232 Interface Test Program
SerTest- RS232 Interface Test Program This software allows a user to test the functions of an NTI server switch, matrix switch or Multi-user/Multi-platform switch RS232 interface. The SerTest program is automatically loaded when installing the NTI Switch Control Program as described above. The... -
Page 19: Setup Options
NTI VEEMUX HDMI 4K VIDEO MATRIX SWITCH Setup Options Selection Description select Com port current: - select PC serial port (COM1:) - the current PC serial port is displayed in parentheses select Baud rate current: - select PC serial port baud rate... -
Page 20: Ethernet Control
NTI VEEMUX HDMI 4K VIDEO MATRIX SWITCH ETHERNET CONTROL Telnet Interface-Port 2000 The Telnet Interface enables the user to control the switch using telnet client through an Ethernet connection. The telnet server (telnet must be enabled- see page 26) listens on ports 2000 and 2005. Port 2000 is for an operator telnet session while port 2005 is intended for a software control type session (see page 18 for more on Port 2005 control). - Page 21 NTI VEEMUX HDMI 4K VIDEO MATRIX SWITCH Command Reply Description Read set Scanning Sequence dwell time value (dwt) for specific *<CR> Gs nn Output (nn) in seconds (see also "Scanning Sequences" on page dwt<CR> Sa nn,mm *<CR> Set scan list of individual output nn to all inputs mm Sc nn *<CR>...
-
Page 22: Telnet Interface-Port 2005
NTI VEEMUX HDMI 4K VIDEO MATRIX SWITCH Telnet Interface-Port 2005 For a software control type of telnet interface session (versus operator telnet control through port 2000 as described on page 16), connect to the VEEMUX through the current IP address at port 2005. Use the command set below to control and acquire information from the VEEMUX. -
Page 23: Command Detail
NTI VEEMUX HDMI 4K VIDEO MATRIX SWITCH Command Detail RU-Read Unit Size Command: Byte 1 Byte2 Byte3 ‘R’ ‘U’ <CR> (0x52) (0x55) (0x0D) Response: Byte 1 Byte 2 Byte 3 Byte 4 Byte 5 Byte 6 Byte 7 Byte 8 Byte 9 ‘r’... -
Page 24: Ss_01- Enable Auto Status Mode
NTI VEEMUX HDMI 4K VIDEO MATRIX SWITCH SS_01- Enable Auto Status Mode Command: Byte 1 Byte 2 Byte 3 Byte 4 Byte 5 Byte 6 ‘S’ ‘S’ Space ‘0’ ‘1’ <CR> (0x53) (0x53) (0x20) (0x30) (0x31) (0x0D) Response: Byte 1 Byte 2 <CR>... -
Page 25: Terminate Telnet Session
NTI VEEMUX HDMI 4K VIDEO MATRIX SWITCH Terminate telnet session Command: Byte 1 Byte 2 Byte 3 ‘X’ ‘X’ <CR> (0x58) (0x58) (0x0D) Response: Byte 1 Byte 2 <CR> ‘’ (0x0D) (0x2A) The unit will respond with ‘*’<CR> and close the connection, terminating the telnet session. The unit is then available for future... -
Page 26: Web Interface
To open a SSL-encrypted connection, type: Address https://192.168.1.30 You will be prompted to accept a certificate. Accept the NTI certificate. A "Login Page" will appear. Figure 7- Web interface Login page Enter the Password The cursor will be flashing inside the username box. -
Page 27: Main Menu
NTI VEEMUX HDMI 4K VIDEO MATRIX SWITCH With a successful login, the main menu and Video Switch page will appear. Main Menu The VEEMUX main menu provides control over all functions of the switch. The administrative menu includes options not available to other users with limited privileges. -
Page 28: Video Switch Page
NTI VEEMUX HDMI 4K VIDEO MATRIX SWITCH Video Switch Page The Video Switch page (Figure 9) displays the active connections (shown in orange) and enables the user to control the video connections of the VEEMUX. Up to 100 different connection configurations can be saved and later recalled by any connection method. -
Page 29: Administration
NTI VEEMUX HDMI 4K VIDEO MATRIX SWITCH Administration The Administration section provides links to pages for all configuration options in the VEEMUX switch. Only the user ROOT and users with administrative privileges have access to this section. The administration section is broken up into 10 topics:... -
Page 30: Network Configuration
NTI VEEMUX HDMI 4K VIDEO MATRIX SWITCH Network Configuration ON the Network Configuration page, under Administration, the administrative user can configure the VEEMUX web interface connection. This will provide access to control of the VEEMUX from any web-accessible computer. Figure 11- Network Configuration page Mode –... -
Page 31: X509 Certificate
NTI VEEMUX HDMI 4K VIDEO MATRIX SWITCH If telnet is going to be used to control the VEEMUX, place a checkmark in the “Enable Telnet” block. If you wish to disable non-secure web access to the VEEMUX, remove the checkmark from “Allow HTTP Access”. - Page 32 NTI VEEMUX HDMI 4K VIDEO MATRIX SWITCH Note: HTTP access can be enabled/disabled from web page under Administration -> Network -> Server Settings -> Allow HTTP Access (page 26). Do not disable http access until you verify certificate verification works properly for https connection.
-
Page 33: Video Input Names
NTI VEEMUX HDMI 4K VIDEO MATRIX SWITCH Video Input Names From the Administration menu, the Video Input Names page can be displayed. This page enables the administrative user to change the name of the input ports displayed on the Video Switch page. -
Page 34: Video Output Names
NTI VEEMUX HDMI 4K VIDEO MATRIX SWITCH Video Output Names From the Administration menu, the Output Names page can be displayed. This page enables the Administrator to change the names of the output ports displayed on the Switch page. Figure 14- Video Output Names page To change an Output Name, enter the name of the port for the desired output port number, and press "Save". -
Page 35: Scanning Sequences
NTI VEEMUX HDMI 4K VIDEO MATRIX SWITCH Scanning Sequences From the Administration menu, the Scanning Sequence page can be displayed. The Scanning Sequence page displays the configuration of an automatic switching sequence from input (video source) to input for each output (monitor). - Page 36 NTI VEEMUX HDMI 4K VIDEO MATRIX SWITCH If you make changes and change your mind and want to return the values back to what they were before changing them, press “Reset”. This must be done before pressing the “Save” button, or changes will not be able to be reversed.
-
Page 37: User Config
NTI VEEMUX HDMI 4K VIDEO MATRIX SWITCH User Config From the Administration menu, select the User Config to display a list of the users that have been configured on the VEEMUX. To add a user, select “Add New User”. To change the configuration of a user, select the Username, or “Edit”. -
Page 38: Ddc Options
NTI VEEMUX HDMI 4K VIDEO MATRIX SWITCH DDC Options From the Administration menu, the DDC Options page can be displayed. DDC enables the video source to get EDID information from the display device. This enables the video source to automatically select the optimal resolution for the display by receiving, at power up, information from the display device concerning its resolution specifications. - Page 39 NTI VEEMUX HDMI 4K VIDEO MATRIX SWITCH Disable HDCP 2.2 Place a checkmark in the Disable HDCP 2.2 box if you wish to disable the port's compatibility with HDCPv2.2. Normally, if a video source senses that the VEEMUX is compliant, it will provide HDCP 2.2 compliant video. Then, provided the connected monitor is also HDCP 2.2 compliant, a picture will be displayed.
-
Page 40: Ddc Mix
NTI VEEMUX HDMI 4K VIDEO MATRIX SWITCH DDC Mix From the Administration menu, the DDC Mix page can be displayed. DDC Mix provides a means to decide which outputs (displays) will be used to provide EDID information to the selected input. The VEEMUX will compare EDID information from all selected outputs and provide EDID information that is common to those displays to the video source. -
Page 41: Update Firmware
(https) website, you will be automatically redirected to the non-secure site. To update the firmware: 1. Contact NTI for the latest firmware file name veemux-hd4k-vx-x.bin (where x.x is the version number) and copy it to your computer. 2. On the Update Firmware page, in the “Update File” block, browse to the firmware file. -
Page 42: Standby Mode
NTI VEEMUX HDMI 4K VIDEO MATRIX SWITCH Standby Mode From the menu, the user can quickly place the VEEMUX in Standby Mode. When in Standby, the VEEMUX will still be powered- ON but all functions will stop. The VEEMUX will be in a power-saving ready-to-use state. -
Page 43: Support
SM-16X16-HD4K Video Matrix Switch at NTI. From there you can see what versions of firmware are available and determine if the version in your VEEMUX is current or in need of an upgrade (page 37). -
Page 44: Device Discovery Tool
NTI VEEMUX HDMI 4K VIDEO MATRIX SWITCH DEVICE DISCOVERY TOOL In order to easily locate the VEEMUX on a network, or to change network settings, the NTI Device Discovery Tool may be used. http://www.networktechinc.com/download/d-4k-hdmi-matrix-switch.html The Discovery Tool can be found at Unzip and save to a location on your PC. -
Page 45: Infrared Remote Control
INFRARED REMOTE CONTROL The IRT-UNV Infrared Remote Control (optional- sold separately) allows the user to remotely and intuitively control up to 15 NTI SM-16X16-HD4K video matrix switches, providing the ability to route connections, save and recall switch configurations, and put the switch into Standby. -
Page 46: Buttons
Pressed to recall a switch configuration (port connections and volume settings) Up to 10 configuration can be recalled (0-9) Pressed to select the desired NTI system to be controlled Only used when controlling multiple systems Must be followed by a system number: 1-15 ... -
Page 47: Operation
Operation of the IRT-UNV is intuitive. The number of button presses required to complete any operation is kept to a minimum. This is accomplished using intelligent software within the NTI Matrix Switch. Additionally, the Matrix Switch allows for multiple ways for the user to complete the same operation – ensuring that the Remote will work as expected, regardless of who uses it. -
Page 48: Jump To Input
NTI VEEMUX HDMI 4K VIDEO MATRIX SWITCH Jump To Input With the output port selected, a user knowing the desired input port number can enter it using the Numeric keys (0-9). Just as with using the “OUT” button, pressing the “IN” button after the number will force the command immediately. If the “IN”... -
Page 49: Save And Recall
Multiple Switch Control All compatible NTI matrix switches will work with the same IRT-UNV IR Remote control. As a result, a user with multiple NTI matrix switches may find that, if the switches are installed too close together, both switches may respond to an IR command intended only for one switch. -
Page 50: Technical Specifications For Irt-Unv
NTI VEEMUX HDMI 4K VIDEO MATRIX SWITCH Technical Specifications For IRT-UNV Number of Controllable Systems Max: 15 Pushbutton Control 29 keys Power supply 2x AAA Battery Chassis material Plastic Approvals RoHS Troubleshooting the IRT-UNV PROBLEM SOLUTION IRT-UNV is not selecting... -
Page 51: Creation Of Custom X509 Certificates
Note: Do not disable access to the VEEMUX web interface using http before you verify that the https client authentication works properly (see last page). Using Self-Signed Certificates for VEEMUX Series Products We can use self-signed certificates to access VEEMUX products with HTTPS with a self-signed root certificate authority. - Page 52 Data: Version: 1 (0x0) Serial Number: b2:ce:14:9d:bf:52:f5:1f Signature Algorithm: sha512WithRSAEncryption Issuer: C = US, ST = OH, O = NTI, CN = NTI CA, emailAddress = sales@ntigo.com Validity Not Before: Dec 4 20:00:24 2018 GMT Not After : Dec 1 20:00:24 2028 GMT Subject: C = US, ST = OH, O = NTI, CN = NTI CA, emailAddress = sales@ntigo.com...
- Page 53 NTI VEEMUX HDMI 4K VIDEO MATRIX SWITCH 00:b0:43:2b:de:93:7b:ac:1f:24:96:9d:e9:98:26: 44:bc:cb:7e:04:ec:c2:64:da:60:59:a1:c8:b7:42: 52:04:b7:b2:91:b1:10:db:ea:04:25:52:14:8b:52: a4:7f:5a:fc:08:65:c6:77:44:8b:48:27:71:68:00: c2:09:a2:b4:4a:3d:f9:3c:f8:d0:69:24:e8:44:b8: 07:57:e1:57:2d:0e:9b:2f:3e:df:4c:71:00:45:bb: ff:2d:a6:7f:11:2d:34:ca:f2:07:f5:79:f0:4f:9b: d8:d3:ad:04:3b:3c:56:07:25:c1:be:fe:09:03:8a: 6e:4d:72:82:ad:67:22:2c:54:1b:d5:69:5b:2b:67: 1f:12:f5:98:ef:a4:10:1d:56:83:13:ca:8d:d7:2f: c5:0a:da:d5:3b:30:25:9a:2c:6f:8c:94:c1:69:35: e2:38:9b:1b:37:53:ff:d6:2d:3e:d9:1c:7a:03:b3: 71:a6:76:16:f4:eb:35:2a:f2:86:6f:40:d9:cc:6e: 59:31:ef:94:11:cf:cc:52:9d:eb:8e:06:69:67:ee: 86:98:b0:54:11:61:71:aa:ae:19:2a:f3:77:ce:95: 2c:a5:87:0d:10:16:b9:5e:88:c8:03:da:d9:6d:90: 3b:ca:4c:32:15:0c:ba:05:64:79:c7:4b:b0:7a:f5: 26:5d Exponent: 65537 (0x10001) Signature Algorithm: sha512WithRSAEncryption 9f:d2:50:61:36:f3:d9:b9:cb:39:5e:31:d6:2a:a8:e4:03:f0: e0:65:4d:37:e0:60:cd:71:f5:5a:6d:7d:87:53:6e:2e:8b:3a: f2:fb:73:fc:21:51:63:79:8a:2d:5d:a9:c2:a9:47:a1:b3:17: 9a:2e:5b:8a:7f:29:ab:08:cb:2f:52:70:26:2c:76:2d:2d:07: 81:cc:84:6f:59:db:f3:be:fe:77:dc:67:6b:5d:ff:b3:17:24: bd:f3:c0:cc:83:10:d0:17:67:2d:e5:5b:4b:59:aa:80:fb:ec: 53:ed:e4:c5:0d:a1:0d:13:b3:0b:ee:a4:c2:f0:d2:a0:29:ef: 11:f5:6a:29:8b:46:ed:1a:64:2b:93:02:af:0d:7f:83:28:2c: a2:11:2e:e6:fc:af:61:d2:df:eb:e2:c0:e2:46:6e:ef:51:6e:...
- Page 54 CA/ntiCA.crt -CAkey CA/ntiCA.key –CAcreateserial -out your_device_fqdn_or_ipaddress.pem - days 1024 -extfile extensions.ext Signature ok subject=C = US, ST = OH, L = Aurora, O = NTI, CN = 192.168.3.144, emailAddress = sales@ntigo.com Getting CA Private Key To verify the web server certificate contents, use the following command: # openssl x509 -in your_device_fqdn_or_ipaddress.pem -text...
- Page 55 4. Uploading Server Certificate to a VEEMUX Device The NTI VEEMUX web server expects the certificate and key as a single file in "PEM" format. Use the following command to combine certificate and key file to a single file with extension “pem”.
- Page 56 NTI VEEMUX HDMI 4K VIDEO MATRIX SWITCH 2. There will be a wizard to guide you through the next steps. Click "Next". 3. Click "Browse" and then..
- Page 57 NTI VEEMUX HDMI 4K VIDEO MATRIX SWITCH ..select "Trusted Root Certification Authorities" 4. Click "Finish" to complete.
- Page 58 NTI VEEMUX HDMI 4K VIDEO MATRIX SWITCH 5. You are done! Restart the preferred browser. How to add a Self-Signed Certificate Authority as a Trusted Root Certification Authority on Mozilla Firefox Mozilla Firefox does not use Window’s Certificate Authorities. For the Firefox browser to recognize your CA, do the following: 1.
- Page 59 2. Uploading Server Certificate to a VEEMUX Device The NTI VEEMUX device expects the certificate and key as a single file in "PEM" format. The server certificate file with extension “pem” should be received by your external CA after submitting a certificate request.
- Page 60 NTI VEEMUX HDMI 4K VIDEO MATRIX SWITCH On the VEEMUX Web Interface menu Under “Administration” select “Network”. In X509 certificates, select “Choose File”, select the combined server certificate /key file, click "Upload Server certificate and key". 3. Uploading External CA Certificate to VEEMUX Device: Get the certificate of your CA in a *.cer or *.pem format which should be as shown above.
-
Page 61: General Technical Specifications
NTI VEEMUX HDMI 4K VIDEO MATRIX SWITCH GENERAL TECHNICAL SPECIFICATIONS Video Video Bandwidth 18 GB/s Max. Resolution supported 3840x2160 (UHD), and 4096x2160 (4K) @ 60Hz / RGB/YCBCR 4:4:4. HDMI Compatibility HDMI 1.4 and 2.0 HDCP Support v1.4 and v2.2 Color Depth... -
Page 62: Index
NTI VEEMUX HDMI 4K VIDEO MATRIX SWITCH INDEX reboot................. 39 Backup................25 baud rate................11 Restore ................25 control options ..............8 RS232 pinout ..............11 DDC ............... 10, 34, 36 Scanning Sequences ............31 Device Discovery Tool ............41 SerTest ................
Need help?
Do you have a question about the VEEMUX Series and is the answer not in the manual?
Questions and answers