Table of Contents
Advertisement
Advertisement
Table of Contents

Related Manuals for Xiaomi Truclean W10 Pro B302GL


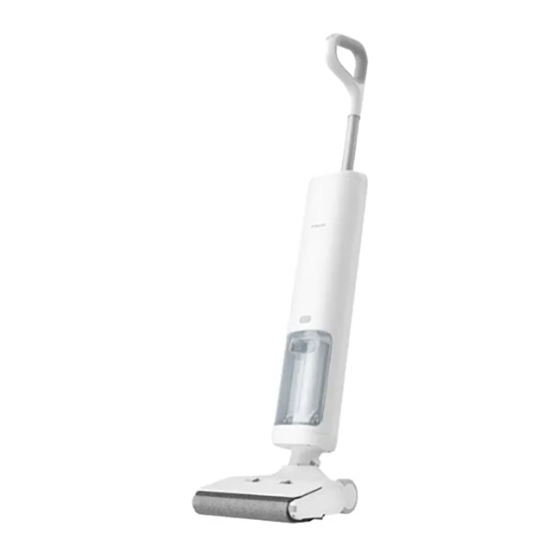
Summary of Contents for Xiaomi Truclean W10 Pro B302GL
- Page 1 Truclean W10 Pro Wet Dry Vacuum User Manual...
-
Page 2: Safety Instructions
Do not charge or store the vacuum near heat sources or in humid areas, such as by a radiator or in a kitchen or bathroom. Only use replacement parts that are approved by Xiaomi. Do not repair the vacuum on your own when it breaks down or has problems like electric leakage, overheating motor, making unusual sounds, overheating main body, giving off odors, or weak suction. -
Page 3: Accessory List
Accessory List Accessories for installing on the Vacuum Handle Roller Brushbar Cover Filter (Pre-installed) (Pre-installed) Vacuum Clean Water Tank Dirty Water Tank Roller Brushbar Holder Roller Brushbar (Pre-installed) (Pre-installed) Mop Pad Accessories for Installing on the Self-cleaning Charging Dock Other Accessories Self-cleaning Charging Dock Power Supply... -
Page 4: Product Overview
Product Overview Vacuum Display Battery Level Dirtiness/Error Indicator Indicator Self-cleaning Button: Mode Button: When the vacuum is Press to switch mode during Insufficient Common charging and its battery cleaning. level is equal to or over 10 %, Water in the Error press to enable or disable Clean Water... -
Page 5: Clean Water Tank
Self-cleaning Charging Dock Clean Water Tank Place Cleaning Brush Here Water Inlet Place Roller Brushbar Here Water Tank Plug Place Filter Here Charging Contacts Dirty Water Tank Dust Compartment Release Button Dust Compartment Power port Water Level Sensor Mounting Clip Installation Slot Dirty Water Tank... -
Page 6: How To Install
How to Install Installing the Roller Brushbar 3. Hold the roller brushbar holder by its upper part, put into the roller brushbar mop pad, and Warning: Turn on the vacuum after installing the roller brushbar onto the floor brush and press them into place. -
Page 7: Installing The Handle
Installing the Handle Installing the Self-cleaning Charging Dock Insert the handle into the vacuum. The handle is installed when you hear a click. 1. Installing the Power Cord 2. Installing the Mounting Clip Caution: Make sure that the handle is secured in place after installation. Plug the power cord into the power port at Install the mounting clip onto the the bottom of the self-cleaning charging... - Page 8 5. Connecting to an Electrical Outlet 6. Charging on the Self-cleaning Charging Dock Place the self-cleaning charging dock on a flat surface and connect it to After the self-cleaning charging dock is plugged in, align the charging contacts at the power via the power supply.
-
Page 9: How To Use
How to use Water Adding Turning on 1. Press the clean water tank release button, and simultaneously pull the tank out. Remove the vacuum from the self-cleaning charging dock, step on the floor brush with one foot and pull back the handle to tilt the vacuum. Press the button to turn on the vacuum. -
Page 10: Switching Modes
Switching Modes Pausing/Turning off Hold the vacuum in the Notes: Press the button to cycle through the modes of auto, water absorbing, and turbo. When the vacuum is upright position to puse paused in the upright Put the vacuum back Auto Mode Water Asorbing Mode Turbo Mode... - Page 11 Using Scenarios The vacuum can be used to clean different types of hard-surface flooring Cautions: Do not use the vacuum on fabric surfaces, such as carpets and blanets. such as wood, tile, and marble. The vacuum can be placed flat at 180° for cleaning the floor underneath the furniture. Do not tilt the vacuum forward or shake it violently while cleaning to avoid dirty water flowing into the vacuum and thus damaging it.
-
Page 12: Self-Cleaning
Care & Maintenance Self-cleaning When the vacuum is charging and its battery level is equal to or more than 10%, press Clean and maintain the relevant components when the vacuum is paused in the upright start self-cleaning. position or turned off. Press the button or the button to stop self-cleaning. -
Page 13: Cleaning The Dirty Water Tank
Cleaning the Dirty Water Tank 1. Press the dirty water tank release button, and simultaneously pull the tank out. 3. Rinse the dirty water tank, the dust compartment, and the water level sensor until they are clean. Notes: The cleaning brush can be used to assist in cleaning. The water level sensor should be cleaned frequently to avoid the detection accuracy being affected by the stains adhered to the sensor. - Page 14 Cleaning the Floor Brush 1. Pinch both roller brushbar cover release buttons to remove the roller brushbar cover. 3. Rotate the handle of the cleaning brush to remove the blade. Use the blade to cut the hair Note: tangled on the roller brushbar and the floor brush. Do not remove the roller brushbar while the vacuum is on the self-cleaning charging dock.
- Page 15 4. Use tap water to rinse the roller brushbar and its cover until they are clean, and then put 6. Reinstall the roller brushbar and its cover in order. When reinstalling the roller brushbar cover, them in the accessory container for drying to prevent odors. align it with the mounting position, and it is secured in place when you hear a click.
-
Page 16: Cleaning The Filter
Cleaning the Water & Air Separator Cleaning the Dirt Detection Sensor It is normal to find a small amount of dirty water around the water & air separator after removing Take out the dirty water tank, and use the cleaning brush to clean the dirt detection sensor and the dirty water tank. - Page 17 Cleaning the Self-cleaning Charging Dock Cleaning the Vacuum Disconnect the self-cleaning charging dock from the power supply before cleaning the dock. Stand the vacuum upright, and use a dry cloth or paper towel to clean the dust from the vacuum. Use a dry cloth or paper towel to clean the dust from the self-cleaning charging dock.
-
Page 18: Troubleshooting
Troubleshooting Please refer to the table below to find the troubleshooting for common issues. Common Issue Possible Cause Solution The display will show an error message or a voice notification will be played when the vacuum is not working normally, please refer to the table to find the solution. If the error cannot be solved Fully charge the vacuum before The battery is depleted. -
Page 19: Specifications
Environmental Notice The lithium-ion battery pack contains substances that are hazardous to the environment. Xiaomi Truclean W10 Pro Wet Dry Vacuum Before disposing of the vacuum, please first remove the battery pack, then discard, or recycle it in accordance with local laws and regulations of the country or region it is used in. -
Page 20: Warranty Notice
2. REMEDIES If a hardware defect is found and valid claim is recieved by Xiaomi within the Warranty Period, Xiaomi will either (1) repair the product at no charge, (2) replace the product, or (3) refund the Product, excluding potential shipping costs. - Page 21 Manufactured for: Xiaomi communications Co., Ltd. Manufactured by: Beijing Shunzao Technology Co., Ltd. (a Mi Ecosystem company) Address: 101, 1st floor, Building 1, No.16, Anningzhuang East Road, Haidian District, 100089 Beijing, PEOPLE‘s REPUBLIC OF CHINA For futher information, please go to www.mi.com User Manual Version: V1.0...
Need help?
Do you have a question about the Truclean W10 Pro B302GL and is the answer not in the manual?
Questions and answers