Table of Contents
Advertisement
Quick Links
INSTALLATION &
MAINTENANCE
GUIDE
(Part # LIT-29133-1A)
Contractor: Please read these instructions before starting installation. After installation,
please forward this guide to the user for operation and maintenance instruction.
© Copyright March 2002 Leviton Manufacturing Co., Inc.
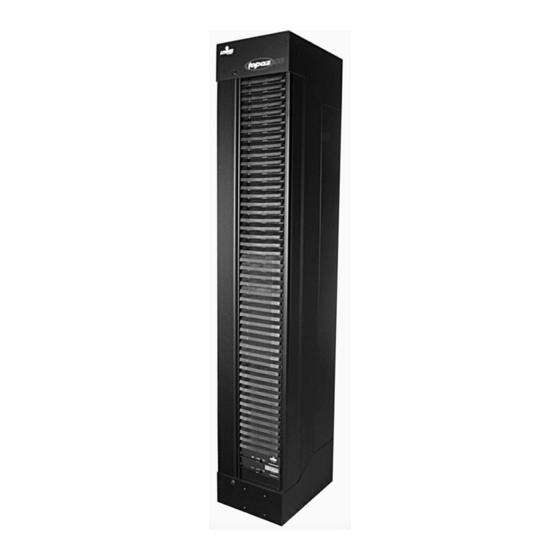
TOPAZ 96™
DIMMER RACK
Advertisement
Table of Contents

Related Manuals for Leviton Topaz 96


Summary of Contents for Leviton Topaz 96
-
Page 1: Dimmer Rack
DIMMER RACK INSTALLATION & MAINTENANCE GUIDE (Part # LIT-29133-1A) Contractor: Please read these instructions before starting installation. After installation, please forward this guide to the user for operation and maintenance instruction. © Copyright March 2002 Leviton Manufacturing Co., Inc. TOPAZ 96™... -
Page 2: Table Of Contents
Table of Contents Unpack Rack(s)…………………………………….………….…… 1 Assemble Racks………………………………….………..….…… 1 Set Rack(s).…………………………………………………………. 1 Terminate Conduits………………………………………………… 3 Pull Power, Load and Control Conductors to the Racks………. 3 Connect Power Feeders ………………………………..……...… 4 Label Circuits.………………………………………………………. 5 Connect Load Conductors……………………………………..…. 5 Low-Voltage Application Notes….………………………..………. 5 Connect Control Conductors………………………………………... -
Page 3: Unpack Rack(S)
The TOPAZ 96 dimmer racks are easy-to-install front-wired electrical distribution racks and are connected similarly to a circuit breaker panel. These instructions will tell you how to set, wire, assemble, test and maintain TOPAZ 96 racks. The instructions in this manual are provided in the order of installation. - Page 4 A. Nut B. Bellville Spring Washer C. Glastic Stand-Off D. Bus Spacer E. Lateral Bus Bar F. Phase Bus Back-up Plate Figure 1 - Typical lateral bus assembly Flat Washer Bolt Phase Bus Plate Support Channel Lock Washer Page 2...
-
Page 5: Terminate Conduits
Step 4 - Terminate conduits Terminate the feeder conduit at the top or bottom conduit entry panel of the rack(s) containing the feeder lugs. • Terminate load conduits at top and/or bottom conduit entry panels of the rack to which the loads will be connected. •... -
Page 6: Connect Power Feeders
PHASE LUGS (TYP.) GROUND LUG (BOTTOM, REAR) Step 6 - Connect power feeders • Connect the feeders at the phase, neutral and ground lugs and tighten according to Table I. Refer to Figure 3 for typical single rack lug location. (If rack has been converted to single-phase, only lugs at A and C will be terminated.) Table 1 –... -
Page 7: Label Circuits
Step 7 - Label Circuits A sheet of labels, with vertical sequentially numbered circuit numbers, P/N 29260, has been supplied to number the • circuits in the circuit directory on the door of the rack if the part number 166-390 or 166-391 sequential control module is used. -
Page 8: Connect Control Conductors
Caution: Operation of a dimmed transformer-loaded circuit with all lamps inoperative or removed may result in current flow or voltage in excess of normal levels. To avoid possible transformer overheating and possible premature transformer failure, Colortran strongly recommends the following: Do not operate dimmed transformer-loaded circuits without operative lamps in place;... -
Page 9: Seal Unused Openings
Two TOPAZ "Rack" control modules are provided for each rack connected to a common set of terminals. These control modules are located in the two slots directly under the last dimmer module slot. Connect the control wires to the 20-pin terminal block (TB4) in each rack. Refer to Figure 6. •... -
Page 10: Set Non-Dim Switches
Step 12. • On an TOPAZ 96 control module locate the 48 non-dim switches on the top printed circuit board. Note that they are numbered 1 thru 48 and 49 thru 96. If this module were to be placed in the upper control module slot of the Rack it would control dimmer locations 1 thru 48. -
Page 11: Set Thumbwheel Switch(Es)
Step 13 - Set thumbwheel switches • Set the thumbwheel switches on all TOPAZ 96 control modules according to Table III. See Figure 8. (Rack 1 is usually the left most rack.) Note: Both control modules in the same rack must have the same switch setting. -
Page 12: Set Panic Switches
Step 14 - Set panic switches Note: If system does not contain a Panic station, skip to the next step (Step 15) Caution: Do not operate these switches while rack is energized. • Switch PANIC switches to select which dimmers will go on when the rack is put into Panic mode. The Panic switches are located on the printed circuit boards along the left side of the rack. -
Page 13: Install Dimmers
Step 16 - Install dimmers • Unpack all dimmers. • Slide a dimmer module into each dimmer slot in the rack beginning with the bottom dimmer slot first and building upward. Push the dimmers in until they are seated firmly. Step 17 - Install filler modules •... -
Page 14: Close Door
Step 19 - Close door • If desired, label circuits for easy identification later. • Close the front access door. This will restrict access to the dimmer circuit breakers and prevent removal of modules. See Figure 11. Access door lock (2) Access door Dimmer &... -
Page 15: Maintenance
Rack Enclosure: For further information on the operation of the TOPAZ 96 Rack refer to the User Guides and Operation Manuals of the control console or architectural control stations that will be used in conjunction with this product. For additional assistance please contact the NSI Technical Support line, Monday thru Friday, 8 AM to 5 PM PST. -
Page 16: Warranty
Leviton-NSI is not liable for any incidental or consequential damages resulting from defect or failure other than repairs of the Leviton-NSI product subject to the terms of this warranty. This warranty gives you specific legal rights, and you may have other rights which vary from state to state. This warranty is expressly in lieu of all other agreements and warranties expressed or implied except as may be otherwise required by law.
Need help?
Do you have a question about the Topaz 96 and is the answer not in the manual?
Questions and answers