
Subscribe to Our Youtube Channel
Related Manuals for BRUEL & KJAER Mediator 2238


Summary of Contents for BRUEL & KJAER Mediator 2238
- Page 1 Technical Documentation 2238 Mediator Integrating Sound Level Meter Service Manual BI 5043 –13...
- Page 3 2238 Mediator Integrating Sound Level Meter Service Manual February, 2002 Brüel & Kjær 2238 Mediator Integrating Sound Level Meter BI 5043 –13 Service Manual...
- Page 4 Safety Considerations This apparatus has been designed and tested in accordance with IEC Publication 61010 - 1, Safety Requirements for Electrical Equipment for Measurement, Control and Laboratory Use, and has been supplied in safe condition. This Service Manual contains information and warnings which must be followed by the user to ensure safe operation and to retain the apparatus in safe condition.
-
Page 5: Table Of Contents
Contents 1. Introduction ........................... 1 About 2238 Mediator ™....................2 Standards .......................... 2 Basic Configuration ......................2 How Mediator Works ....................... 2 Detectors ........................... 3 Application Programs....................... 3 Changing Application ...................... 4 Installing, Upgrading, or Removing Applications ............4 Specifications ........................ - Page 6 Contents Octave Filter Upgrade ....................19 Initial Calibration....................... 20 3. Mechanical Parts ......................21 Dismantling Kit WZ 0065....................23 Dismantling........................23 How to Open and Lock the SMD Connectors for Ribbon Cables ......24 Filter Set Upgrade ......................24 Reassembly........................24 Service Parts List ......................
-
Page 7: Introduction
Chapter 1 Introduction BI 5043 –13 2238 Mediator Integrating Sound Level Meter Service Manual... -
Page 8: About 2238 Mediator
Chapter 1 — Introduction About 2238 Mediator ™ About 2238 Mediator ™ Standards 2238 Mediator Integrating Sound Level Meter complies with the draft of the IEC61672 Class 1 standard. This standard will supersede the IEC 651 and IEC 804 Type 1 stand- ards. -
Page 9: Detectors
Chapter 1 — Introduction Detectors Fig.1.1 Simplified block diagram for 2238 Mediator External power supply Microphone Power supply Batteries 6V Preamplifier Display (4 x AA size) Amplifier Keys 10 dB/step (Cal. adjustment) Digital control and processing Serial Correction filter interface (Sound Incidence, Windscreen) Time weighting... -
Page 10: Changing Application
Chapter 1 — Introduction Changing Application The following software modules are available for upgrading the Mediator: Frequency Analysis Software BZ 7123 – general purpose module for scanning 1/1- and 1/3-octave bands. BZ 7123 requires the 1/1-octave and 1/3-octave filter set (2238 MUF). -
Page 11: Upgrading Filter Set
Chapter 1 — Introduction Service 1.10.1 Upgrading Filter Set The upgrading of Type 2238 with the 1/1-octave and 1/3-octave filter set is a simple operation. This procedure is covered in section 3.3 Filter Set Upgrade. 1.11 Service 1.11.1 Service Notes Service Notes and Service Information are available on the ODIN Website at: http://odin.bk.dk. -
Page 12: Mechanical Spare Parts
Chapter 1 — Introduction Mechanical Spare Parts 1.12 Mechanical Spare Parts Mechanical spare parts can be ordered from Brüel & Kjær. See section 3.5 for availa- ble parts and part numbers. 1.13 Repair 1.13.1 Types of Repair Repair of cold joints Replacement/Resoldering of wires to/from connectors Replacement of flexible cables (spare part) Replacement of spare parts... -
Page 13: About Calibration
Chapter 1 — Introduction About Calibration ² Microphone Adaptor (with 4.7 nF capacitor) to B & K coaxial JJ 2614 plug JP 0144 Adaptor, B & K coaxial plug to BNC JP 0169 Short circuit for WA 0302 WA 0302 Microphone Simulator with 13 pF capacitor WZ 0065 Set of 3 special tools for complete dismantling... - Page 14 2238 Mediator Integrating Sound Level Meter Brüel & Kjær Service Manual...
-
Page 15: Checking Procedure
Chapter 2 Checking Procedure BI 5043 –13 2238 Mediator Integrating Sound Level Meter Service Manual... -
Page 16: Pushkey Definitions
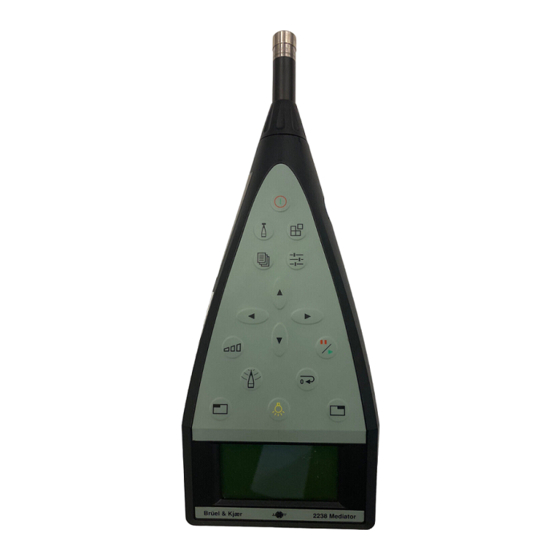
Chapter 2 — Checking Procedure Pushkey Definitions Pushkey Definitions Each pushkey on the sound level meter’s front panel is marked with a pictogram. This section gives a brief explanation of the buttons. Power Switches the instrument on or off. The instrument will be in pause mode when started up. -
Page 17: Introduction
Chapter 2 — Checking Procedure Introduction Introduction This procedure for 2238 Mediator can be photocopied and used as either a hardtop record for the service department, or as documentation to be included with an in- strument when returned to a customer. A 9600 system can also be used for these tests, saving time and providing automatic report generation. -
Page 18: Visual Inspection Of The Microphone
Chapter 2 — Checking Procedure Checking Procedure 2.3.1 Visual Inspection of the Microphone Action: Remove the protection grid from the microphone, inspect and remount Results: No holes, corrosion, scratches or other visual damage to the diaphragm Fig.2.1 Typical setup for Checking Procedures Sine/Noise Generator 1049 Multimeter... -
Page 19: Frequency Weighting
Chapter 2 — Checking Procedure Checking Procedure Table 2.1 The relation between the Display reading and the DC and AC Output SPL Reading Input DC Output Actual AC Output Actual dBµVRMS Reading Reading Display approx. 126 REF. 130.0 4000 ± 50 1000 ±... -
Page 20: Overload
Chapter 2 — Checking Procedure Checking Procedure Table 2.4 C-Weighted (LCFP) Generator Freq. dB SPL value Actual on the Display Reading Ref 1000 128.0 128.0 113.7 + 1.0/ – 3.0 ± 31.6 125.0 ± 3981 127.2 19950 116.8 + 1.0/ – 3.0 2.3.4 Overload Testing is done in the Basic SLM mode, as the overload feature uses the same elec-... -
Page 21: Detectors - Amplitude Linearity Of Rms And Peak Detectors
Chapter 2 — Checking Procedure Checking Procedure play of Type 2238 reads 124.0 dB. Repeat procedure to reset range for each of the five remaining ranges. Change the generator output in steps of 10 dB (use the 115011 Decade Attenuator, if necessary) according to Table 2.5 below. -
Page 22: Noise
Chapter 2 — Checking Procedure Checking Procedure Table 2.6 RMS and Peak Detector Amplitude Linearity Input Display Actual Display Actual (gen. dB SPL Reading dB Peak Reading output) 130.0 ± 0.5 133.0 ± 0.5 Ref. +36 dB 120.0 ± 0.5 123.0 ±... -
Page 23: External Power Supply
Chapter 2 — Checking Procedure Checking Procedure Table 2.7 Noise levels for different weightings Frequency Value on Actual Weighting Display Reading £ 26.0dB Linear (LLSP) £19 dB A-Weighting (LASP) £ 20 dB C-Weighting (LCSP) 2.3.8 External Power Supply Action: Remove the four batteries. Connect an external power supply to 7 –15 V and set the output voltage to 6 V DC. -
Page 24: Crest Factor Test (Crest Factor = 3)
Chapter 2 — Checking Procedure Checking Procedure 2.3.9 Crest Factor Test (Crest Factor = 3) The 2238 must be in LCFP mode for this test. The signal is: Burst Duration: 5.5 milliseconds, Repetition Rate: 40 Hz, Sine Wave Frequency: 2 kHz. Press and use to set the range to 30 –... -
Page 25: 2238 Mediator Integrating Sound Level Meter
Chapter 2 — Checking Procedure Checking Procedure Table 2.9 Tone Burst Test Tone Burst Acceptance Criteria Actual 2000 Hz in dB re 1 µVRMS Reading Reference 96.0 dB 96.0 dB Fast (LCFP) – 200 ms 95.0 ± 1.0 Slow (LCSP) – 500 ms 91.9 ±... -
Page 26: Initial Calibration
Chapter 2 — Checking Procedure Checking Procedure frequency. For the frequencies over 50 Hz, set the weighting to 1/3-octave/F so the readings are available faster. Table 2.10 Center Frequencies in Hz Input Input Input Input Input Actual Actual Actual Actual Actual Freq. -
Page 27: Mechanical Parts
Chapter 3 Mechanical Parts BI 5043 –13 2238 Mediator Integrating Sound Level Meter Service Manual... - Page 28 Chapter 3 — Mechanical Parts Fig.3.1 Exploded view of Type 2238 980498e 2238 Mediator Integrating Sound Level Meter Brüel & Kjær Service Manual...
-
Page 29: Dismantling Kit Wz 0065
Chapter 3 — Mechanical Parts Dismantling Kit WZ 0065 Dismantling Kit WZ 0065 Fig.3.2 The set of 3 special tools (WZ 0065), two of which are needed for complete dismantling of Type 2238 970030e To dismantle Type 2238 completely, you will need Dismantling Kit WZ 0065. This kit contains three “keys”. -
Page 30: How To Open And Lock The Smd Connectors For Ribbon Cables
Chapter 3 — Mechanical Parts Filter Set Upgrade Carefully open Type 2238, noting carefully the routing of the cables. 3.2.1 How to Open and Lock the SMD Connectors for Ribbon Cables 970027e To remove a ribbon cable, use your fingernails to move the ends of the support bar approx. -
Page 31: Service Parts List
Chapter 3 — Mechanical Parts Service Parts List Note: The chassis of the connectors need to have good electrical connection to the metallic coating on the inner surface of the PC/ABS shell. That is, the special nut for the input connector must be firmly tightened to ensure a good EMC seal. Service Parts List Spare parts are ordered individually. -
Page 32: Field Replaceable Parts
Chapter 3 — Mechanical Parts Service Parts List XF 0082 Ribbon Cable (flexible PCB), connector on ZZ 0237 to connector on ZD 0820 XF 0083 Shielding (from 5 - pin socket) DM 0302 Chassis Clip for EMC grounding CK 3682 Ceramic Capacitor, 6.8 nF (4 pcs.) UA 1236 Dust Cover, Foam Rubber, for microphone... -
Page 33: Index
Index Analog Output How Mediator Works Application Programs Description Upgrading Initial Calibration Attenuator Accuracy Installing, Upgrading, or Removing Measuring Range Applications Attenuator Linearity A-Weighted (LAFP) Keypad Symbols Basic Configuration Linear (LLFP) Calibration Center Frequencies Measuring Range Changing Application Attenuator Accuracy Checking Procedure Microphone Typical Setup for Checking Procedures... - Page 34 Index Standards Upgrades Application Programs Octave Filter Tests Crest Factor Overload RMS and Peak Amplitude Linearity Weightings Tone Burst A-Weighted (LAFP) Undervoltage C-Weighted (LCFP) Tools and Equipment Linear (LLFP) Types of Repair 2238 Mediator Integrating Sound Level Meter Brüel & Kjær Service Manual...
Need help?
Do you have a question about the Mediator 2238 and is the answer not in the manual?
Questions and answers