
Subscribe to Our Youtube Channel
Related Manuals for BRUEL & KJAER 2236 A-008


Summary of Contents for BRUEL & KJAER 2236 A-008
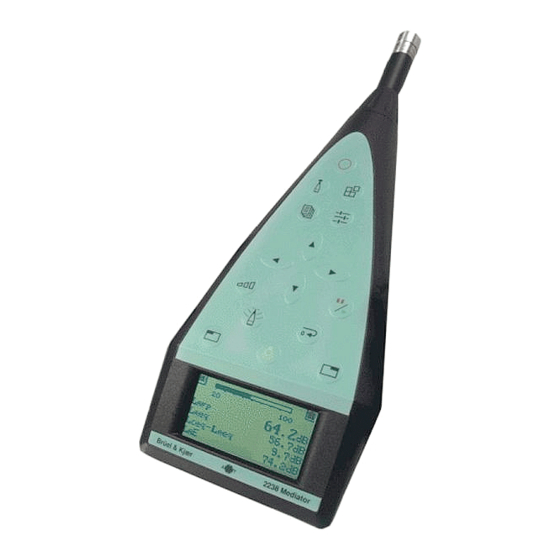
- Page 1 Precision Integrating Sound Level Meter Type 2236 A–008 Type 2236 B–008 Type 2236 C–008 Type 2236 D–008 With software version 2.1 or higher October 1996 Brüel & Kjær BB 0908–13...
- Page 2 Trademarks IBM is a registered trademark of International Business Machines Inc., USA Copyright © 1993, 1996, Brüel&Kjær Sound & Vibration Measurement A/S All rights reserved. No part of this publication may be reproduced or distributed in any form, or by any means, without prior consent in writing from Brüel &...
- Page 3 Contents Useful Information Describes the sound level meter and its general operating principles. An Example Measurement A familiarization guide which explains, step by step, a typical measurement. Setting Up the SLM for Measurement How to prepare the sound level meter for measuring. Measuring How to calibrate and measure with the sound level meter.
- Page 4 Index Controls, Display and Sockets Fold An overview of the sound level meter’s pushkeys, controls and main display. 0 – 6 Precision Integrating Sound Level Meter Type 2236 Brüel & Kjær User Manual...
-
Page 5: Table Of Contents
Chapter 1 Useful Information About this Manual .............. 1 – 2 About the Type 2236 Sound Level Meter ....1 – 2 Parameters................. 1 – 2 Settings ................1 – 3 Data Operations ..............1 – 6 Memory ................1 – 8 Practical Hints .............. -
Page 6: About This Manual
Chapter 1 – Useful Information About this Manual About this Manual Figures are used to guide you through using the pushkeys. Please note the following when using the figures: n× Press this pushkey n times OK Press this to save any changes made in connection with the Settings or 〈Data〉... -
Page 7: Settings
Chapter 1 – Useful Information About the Type 2236 Sound Level Meter In addition, Precision Integrating Sound Level Meter Types 2236 C–008 and 2236 D–008 contain -octave filter sets between 31.5Hz and 8kHz which comply with BS 2475 (1964). They can measure all the above-mentioned parameters in each of the filter bands. - Page 8 Chapter 1 – Useful Information About the Type 2236 Sound Level Meter If there are other set-up lines on the screen, you can move the cursor to them using Level 〈 〉 and 〈 〉. When the cursor is on the set-up line of the Setting you want to change, press Parameter 〈...
- Page 9 Chapter 1 – Useful Information About the Type 2236 Sound Level Meter Fig. 1.2 shows an overview of the available Settings..110 PAUSE 00:00:00 F SPL 58.6 dBA Show Show AUTO LOGGING OUTPUT FORMATS Show Show CALIBRATION INTERFACE Show Show EXPOSURE TIME PEAK WEIGHTING...
-
Page 10: Data Operations
Chapter 1 – Useful Information About the Type 2236 Sound Level Meter Fast Edit In addition to the normal way of changing the set-up of a Setting (that is, pressing 〈Show〉, stepping through to the desired Setting and pressing 〈Edit〉), you can also use two pushkeys together to “fast edit”... - Page 11 Chapter 1 – Useful Information About the Type 2236 Sound Level Meter selected operation. There are four data operations, each with its own screen: Print Store Recall Erase Fig. 1.3 shows an overview of the data operations..110 PAUSE 00:00:00 F SPL 58.6 dBA...
-
Page 12: Memory
Chapter 1 – Useful Information About the Type 2236 Sound Level Meter 1.2.4 Memory The sound level meter has three types of memory: Buffer Memory Buffer Contains the set-up and all results for the current measure- ment (i.e. since the last reset) – see section 1.2.1. From these, the Overall Results are calculated. -
Page 13: Practical Hints
Chapter 1 – Useful Information Practical Hints Overall Results consist of: MaxL Frequency weighting of RMS signal MinL Frequency weighting of Peak MaxP signal Time weighting Measurement range EP,d Elapsed measurement time Exposure Time Start date and time of meas- urement Number pauses... - Page 14 Chapter 1 – Useful Information Practical Hints microphone can influence the result just as much as your physical presence. Fortunately, the combination of free sound field and pure tones is very rare. With sound coming from several directions and as you are measuring over a broad frequency band, the influence of the sound level meter’s housing, tripod and user becomes insignificant, and the above precautions need not be taken.
- Page 15 Chapter 2 An Example Measurement Introduction ................2 – 2 Making a Measurement ........... 2 – 2 2 – 1 BB 0908–13 Precision Integrating Sound Level Meter Type 2236 User Manual...
- Page 16 Chapter 2 – An Example Measurement Introduction Introduction This chapter guides you through the basic functions of the sound level meter by instructing you on how to make a noise measurement in a free sound field. You can find further in- formation on the various steps in the relevant sections of the User Manual.
- Page 17 Chapter 2 – An Example Measurement Making a Measurement Calibrating the Sound Level Meter Press 〈Show〉. The screen shows the default Auto Logging screen. Press Parameter 〈 〉. The screen changes to the Calibration screen. The current calibration factor is shown. Press 〈Edit〉.
- Page 18 Chapter 2 – An Example Measurement Making a Measurement The sound level meter checks the calibration signal against the calibration level you set in step 5. It then asks if you want to calibrate according to the expected level. Press 〈OK〉. The sound level meter calibrates itself according to the calibration level you set in step 5 and returns to the Calibration screen.
- Page 19 Chapter 2 – An Example Measurement Making a Measurement Setting up the Sound Level Meter to Log 14. Press 〈Show〉. The screen shows the default Auto Logging screen (see Fig. 2.2). You can see that the sound level meter is set up so that it doesn’t store Logged Results in its log.
- Page 20 Chapter 2 – An Example Measurement Making a Measurement 17. Press 〈OK〉 twice. The sound level meter returns to the main screen. You are now ready to start an A-weighted measurement of noise with a FAST time weighting. L , MaxL and MaxP will be automatically logged into the sound level meter’s log.
- Page 21 Chapter 2 – An Example Measurement Making a Measurement 22. After a few minutes, press The sound level meter stops measuring and logging. The timer shows the total measurement time. Checking the Sound Level Meter’s Calibration 23. Press 〈Show〉. The screen shows the default Auto Logging screen. 24.
- Page 22 Chapter 2 – An Example Measurement Making a Measurement 31. Press Parameter 〈 〉. The Store Set-up screen (see Fig. 2.4) appears. STORE Overall Results -as Rec. No. 1 930996/1e Fig.2.4 The Store Set-up screen 32. Press 〈OK〉. The Overall Results of the measurement you have just made are stored as Record No.
- Page 23 Chapter 2 – An Example Measurement Making a Measurement The sound level meter is set, by default, to output the overall results with a short heading at a baud rate of 9600. To get a print-out, the printer and the sound level meter must have the same baud rate.
- Page 24 Chapter 2 – An Example Measurement Making a Measurement 2 – 10 Precision Integrating Sound Level Meter Type 2236 Brüel & Kjær User Manual...
- Page 25 Chapter 3 Setting Up the SLM for Measurement Mounting the Microphone ..........3 – 3 Fitting Batteries ..............3 – 4 Replacing Batteries ............3 – 5 Using an External Power Supply ........3 – 6 The Back-up Battery ............3 – 6 Switching the SLM On and Off ........
- Page 26 Chapter 3 – Setting Up the SLM for Measurement Setting the Exposure Time ........... 3 – 15 Setting the Date and Time ..........3 – 16 Setting the SLM to Change Range without Resetting .............. 3 – 18 3.10 Setting up Auto Logging ..........
-
Page 27: Mounting The Microphone
Chapter 3 – Setting Up the SLM for Measurement Mounting the Microphone Mounting the Microphone Before mounting the microphone, note the following precau- tions: When screwing in the microphone, input stage, protection grid and extension cables, do it gently to avoid damag- ing the threads Do not touch the diaphragm with any object —... -
Page 28: Fitting Batteries
Chapter 3 – Setting Up the SLM for Measurement Fitting Batteries Fig.3.1 Mounting the input stage and microphone onto the sound level meter Fitting Batteries Important: Before removing batteries or disconnecting a power supply from the sound level meter, make sure the instrument is switched off from the front panel by pressing . -
Page 29: Replacing Batteries
Chapter 3 – Setting Up the SLM for Measurement Fitting Batteries Fig.3.2 Connecting a microphone extension cable to the sound level meter 3.2.1 Replacing Batteries Make sure the sound level meter is switched off by press- Press the two tabs on the upper edge of the battery compartment and remove the lid. -
Page 30: Using An External Power Supply
Chapter 3 – Setting Up the SLM for Measurement Fitting Batteries the batteries are wrongly inserted in the battery compart- ment. Warnings! It is possible for batteries to explode or leak if they are handled incorrectly, so: For long-term storage, remove the batteries and keep the sound level meter in a dry place. - Page 31 Chapter 3 – Setting Up the SLM for Measurement Fitting Batteries after about 10hours. Fully charged, the back-up battery runs the clock and retains the results for about 6months. These charge times are typical for a sound level meter at room temperature.
-
Page 32: Switching The Slm On And Off
Chapter 3 – Setting Up the SLM for Measurement Switching the SLM On and Off Switching the SLM On and Off Switching the Sound Level Meter On Press The sound level meter tests its memory and then returns to Pause mode with the set-up it had when it was last switched off. -
Page 33: Setting The Measurement Range
Chapter 3 – Setting Up the SLM for Measurement Setting the Measurement Range Switching the Sound Level Meter Off Press The sound level meter goes into Pause mode and switches off. No measurement data from the buffer, log and memory are lost. - Page 34 Chapter 3 – Setting Up the SLM for Measurement Setting the Measurement Range To move the measurement range by 10dB, press Level 〈 〉 or 〈 〉, respectively.* Edit Settings Show Level Frequency Wt. Parameter • Data • ..110 00:00:01 F SPL 58.6 dBA...
-
Page 35: Setting The Time Weighting
Chapter 3 – Setting Up the SLM for Measurement Setting the Time Weighting Setting the Time Weighting The time weightings available are shown below: for normal measurements for checking average levels of fluctuating noise ..110 ..110 Edit PAUSE 00:00:00 F SPL 58.6 dBA... -
Page 36: Setting The Frequency Weighting
Chapter 3 – Setting Up the SLM for Measurement Setting the Frequency Weighting Setting the Frequency Weighting 3.6.1 Introduction If the selected parameter is Peak or MaxP, then the frequency weighting of the Peak signal is shown. Otherwise, the fre- quency weighting of the RMS signal is shown. - Page 37 Chapter 3 – Setting Up the SLM for Measurement Setting the Frequency Weighting ..110 ..110 PAUSE 00:00:00 F SPL 58.6 dBL * † Frequency Wt ..110 PAUSE 00:00:00 F SPL 58.6 dBC * † Frequency Wt Without filter set ..
-
Page 38: Setting The Peak Frequency Weighting
Chapter 3 – Setting Up the SLM for Measurement Setting the Frequency Weighting 3.6.3 Setting the Peak Frequency Weighting The available frequency weightings of the Peak signal are shown below: for measuring the damaging effects of noise (in accordance with the EU directive on exposure to noise at work) for special applications .. -
Page 39: Setting The Exposure Time
Chapter 3 – Setting Up the SLM for Measurement Setting the Exposure Time Setting the Exposure Time Exposure Time is used in the calculation of L (see section EP,d 8.2). It can have values of between 1min and 24hours..110 00:00:01 F LEPd 46.5 dBA... -
Page 40: Setting The Date And Time
Chapter 3 – Setting Up the SLM for Measurement Setting the Date and Time Setting the Date and Time The sound level meter’s clock operates, even when the sound level meter is switched off, if the internal back-up battery is charged up (see section 3.2.3). - Page 41 Chapter 3 – Setting Up the SLM for Measurement Setting the Date and Time See previous page Level 2050 DATE/TIME Param. 31 MAR 1993 1994 09:30:00 1993 Level DATE/TIME Param. 31 MAR 1993 09:30:00 Level DATE/TIME Param. 31 MAR 1993 09 30:00 Level DATE/TIME...
-
Page 42: Setting The Slm To Change Range
Chapter 3 – Setting Up the SLM for Measurement Setting the SLM to Change Range without Resetting Setting the SLM to Change Range without Resetting The sound level meter always resets when changing the fre- quency or time weighting. The sound level meter also nor- mally resets when changing the measurement range. -
Page 43: 3.10 Setting Up Auto Logging
Chapter 3 – Setting Up the SLM for Measurement Setting up Auto Logging at which measurement range the overloads took place. You can, however, see when they took place in the Logged Results (see sections 5.6 and 5.7 for how to view them). The sound level meter takes 6 ms to change measurement range. - Page 44 Chapter 3 – Setting Up the SLM for Measurement Setting up Auto Logging ..110 PAUSE 00:00:00 F SPL 58.6 dBA Show AUTO LOGGING Edit Edit to interface AUTO LOGGING Settings Show to log Param. Level Level* Frequency Wt. Parameter •...
-
Page 45: 3.11 Setting The Viewing Conditions
Chapter 3 – Setting Up the SLM for Measurement Setting the Viewing Conditions Results are not logged while the sound level meter is in Pause mode. For more information about how a pause will affect your log, see section 5.8. Pressing does not erase the log. - Page 46 Chapter 3 – Setting Up the SLM for Measurement Setting the Viewing Conditions ..110 00:00:01 Edit F SPL 58.6 dBA Settings Show Show Level CONTRAST TestTestTestTes tTestTestTestTe Frequency Wt. Parameter • Data • Edit CONTRAST CONTRAST TestTestTestTes TestTestTestTes tTestTestTestTe Param.
- Page 47 Chapter 4 Measuring Calibrating ................4 – 2 Introduction ............... 4 – 2 Calibrating the Sound Level Meter........4 – 3 Checking the Sound Level Meter’s Calibration ....4 – 5 Checking the Sound Level Meter ......... 4 – 7 Starting a New Measurement ........
-
Page 48: Calibrating
Chapter 4 – Measuring Calibrating Calibrating 4.1.1 Introduction When to Calibrate The standards recommend that you calibrate your sound level meter before each set of measurements (see section 4.1.2) and check the calibration after each set (see section 4.1.3). Connecting a recommended microphone extension cable has no effect on the sound level meter’s calibration. -
Page 49: Calibrating The Sound Level Meter
Chapter 4 – Measuring Calibrating Always remove the Random Incidence Corrector DZ9566 (if fitted) from the microphone when calibrating or checking the calibration. Which Calibrators Can I Use? The sound level meter can be calibrated with Sound Level Calibrator Type 4231, Multifunction Acoustic Calibrator Type 4226 or a similar calibrator. - Page 50 Chapter 4 – Measuring Calibrating Fig.4.1 Fitting Sound Level Calibrator Type 4231 onto the sound level meter. Multifunction Acoustic Calibrator Type 4226 is fitted in a similar way (see its manual) 4 – 4 Precision Integrating Sound Level Meter Type 2236 Brüel &...
-
Page 51: Checking The Sound Level Meter's Calibration
Chapter 4 – Measuring Calibrating To calibrate: Fit the calibrator carefully onto the sound level meter and rest the sound level meter on a table or other flat surface. Ensure that the calibrator fits snugly on the microphone (see Fig. 4.1). For the multifunction acoustic calibrator, set it up to calibrate at 94dB and 1kHz (see the calibrator’s instruc- tion manual). - Page 52 Chapter 4 – Measuring Calibrating ..110 00:00:01 F SPL 58.6 dBA Show CALIBRATION Factor: X.X dB To calibrate press Edit Edit Edit Settings 124.5 Show 123.5 CALIBRATION 114.5 Calibr. level: Param. 94.0 dB 113.5 94.5 Level 93.6 93.5 Frequency Wt. Parameter check cal.
-
Page 53: Checking The Sound Level Meter
Chapter 4 – Measuring Checking the Sound Level Meter Checking the Sound Level Meter Before you start a longer series of measurements, it is good practice to check the status of the sound level meter’s battery, log and memory. To do this, press 〈Edit〉 and 〈OK〉. The sound level meter shows the status screen. -
Page 54: Starting A New Measurement
Chapter 4 – Measuring Starting a New Measurement Free log: The hours and minutes left in the log at the current rate of logging are shown Free Records: The number of empty Records left in the memory is also shown. †... - Page 55 Chapter 4 – Measuring Starting a New Measurement that resetting will erase all previous measurement re- sults from the buffer. If this occurs, press 〈OK〉 to confirm that you want to reset the sound level meter. The results in the sound level meter’s display buffer are erased and the elapsed time is set to zero.
-
Page 56: Pausing A Measurement
Chapter 4 – Measuring Pausing a Measurement Pausing a Measurement The Pause mode of the sound lev- el meter allows you to store re- sults in its memory or transfer results across the interface to a Edit printer or computer. Settings Show Press... -
Page 57: Continuing A Measurement
Chapter 4 – Measuring Continuing a Measurement Continuing a Measurement Press “PAUSE” disappears from the Edit display. clock continues Settings counting the measurement time Show from the point at which it stopped. Results are added to the buffer and, if selected, the log. Level Frequency Wt. -
Page 58: Starting A Frequency Analysis
Chapter 4 – Measuring Starting a Frequency Analysis Starting a Frequency Analysis A frequency analysis is a series of measurements in various frequency bands. Each measurement is made as for a normal broad-band measurement (see section 4.3). Using Frequency Wt. 〈 〉... -
Page 59: Setting The Slm To Start Automatically
Chapter 4 – Measuring Setting the SLM to Start Automatically Setting the SLM to Start Automatically The sound level meter can be set to automatically start at any time and date within the next month (e.g. from 19th May to 18th June).. - Page 60 Chapter 4 – Measuring Setting the SLM to Start Automatically See previous page Level* AUTO START Param. –day 19 May –time 12:00:00 Level AUTO START Param. –day 19 May –time 12:00:00 Level AUTO START Param. –day 19 May –time 12 00:00 * only available if "On"...
-
Page 61: Changing The Displayed Parameter
Chapter 4 – Measuring Changing the Displayed Parameter Auto Start only works if the sound level meter is switched off at the set time. Then, at this time, the sound level meter will switch on, reset and, after a pause of 5 seconds, start measuring with the set-up it had when it was switched off. - Page 62 Chapter 4 – Measuring Changing the Displayed Parameter A DC level corresponding to the instantaneous RMS level is emitted from the DC Output socket at the base of the sound level meter for recording on a plotter. The signal emitted from the AC Output socket is unaffected by which parameter or frequency weighting is selected.
- Page 63 Chapter 5 Storing and Transferring Results Storing Results in a Record ..........5 – 2 Recalling Results from a Record ........5 – 3 Erasing Results ..............5 – 4 Setting the Interface ............5 – 5 Setting up the Output Formats ........
-
Page 64: Storing And Transferring Results
Chapter 5 – Storing and Transferring Results Storing Results in a Record Storing Results in a Record Results in the buffer can be stored as one of 40 records in the sound level meter’s memory. The results are stored in the first available record (that is, the first set of results in record 1, the next set in record 2, etc.). -
Page 65: Recalling Results From A Record
Chapter 5 – Storing and Transferring Results Recalling Results from a Record Recalling Results from a Record Results in a record in the memory can be recalled to the sound level meter’s buffer. You can then look at that record’s Overall Results. -
Page 66: Erasing Results
Chapter 5 – Storing and Transferring Results Erasing Results Erasing Results You can erase results from a single record, all records (that is. the entire memory) or the log..110 PAUSE 00:00:00 F SPL 58.6 dBA NO 4 x Data ERASE Record... -
Page 67: Setting The Interface
Chapter 5 – Storing and Transferring Results Setting the Interface Setting the Interface The interfaces of the sound level meter and the instrument (for example, printer or computer) it is connected to via the Serial Interface socket must have the same set-up to enable them to communicate without losing or corrupting data. - Page 68 Chapter 5 – Storing and Transferring Results Setting the Interface ..110 00:00:01 F SPL 58.6 dBA Show INTERFACE – 9600 Baud – XON/XOFF Edit Edit Settings 19200 INTERFACE Show – 9600 Baud Param. – XON/XOFF 2400 1200 Level Level Frequency Wt.
-
Page 69: Setting Up The Output Formats
Chapter 5 – Storing and Transferring Results Setting up the Output Formats Setting up the Output Formats 5.5.1 Introduction The output formats determine how the results are transferred to a printer or computer. Each type of result has its own independent output format. -
Page 70: Output Formats
Chapter 5 – Storing and Transferring Results Setting up the Output Formats Long Heading A heading with space for remarks about the measurement together with the set-up of the sound level meter in a long format and the date and time of the start of the measurement (Overall Results) or of the first logging (Logged Re- sults). - Page 71 Chapter 5 – Storing and Transferring Results Setting up the Output Formats Printer ® For use with an IBM Proprinter or compatible serial printer (for example, Serial Printer WQ 1138). The format is shown in Fig. 5.2. Fig.5.2 Printer output format with short heading (re- sults logged every 1s)
- Page 72 Chapter 5 – Storing and Transferring Results Setting up the Output Formats Printer (24 character/line) You must use this format when you use Graphics Printer Type 2318. It uses a special character set (also for overall results). Do not use this format with any other type of printer. Fig.5.3 24 character/line print “P”...
- Page 73 Chapter 5 – Storing and Transferring Results Setting up the Output Formats “O” indicates that there has been an overload (OVL) during the logging interval. “&” indicates that there has been both a pause and an over- load (OVL) during the logging interval. Spreadsheet A comma-delimited format (that is, all text is in inverted commas (”) and data are separated by commas) for use with...
-
Page 74: Checking And Changing The Output Formats
Chapter 5 – Storing and Transferring Results Setting up the Output Formats 5.5.3 Checking and Changing the Output Formats ..110 00:00:01 F SPL 58.6 dBA Show OUTPUT FORMATS Logged Results –short heading –printer Edit OUTPUT FORMATS Logged Res. Logged Results Param. -
Page 75: Printing
Chapter 5 – Storing and Transferring Results Printing Printing You can print results directly from the sound level meter by using any of the following printers: Portable Printer Type 2322 ® An IBM Proprinter compatible serial printer Graphics Printer Type 2318. The baud rates (see section 5.4) of the sound level meter and the printer must be the same to enable them to communicate without losing or corrupting data. - Page 76 Chapter 5 – Storing and Transferring Results Printing If you are using Portable Printer Type 2322, then set the 2236 to 9600 baud and XON/XOFF handshake (see sec- tion 5.4 for instructions). If you are using another printer, please refer to your printer manual for settings. Set up the Output Format of the results you want to print (see section 5.5).
- Page 77 Chapter 5 – Storing and Transferring Results Printing ..110 PAUSE 00:20:00 F SPL 58.6 dBA Data PRINT Overall results Edit Edit All Records Settings PRINT Record Overall results Show Param. Logged Res. Overall Res. Level Level* Frequency Wt. Parameter •...
-
Page 78: Transferring Results To A Computer
Chapter 5 – Storing and Transferring Results Transferring Results to a Computer Errors If the printer does not print out, check: The baud rates and handshakes of the sound level meter and printer. If they are not the same, switch the printer off, correct the sound level meter’s baud rate and hand- shake (see section 5.4) so that they are the same as the printer’s and switch the printer on again (some printers... - Page 79 Chapter 5 – Storing and Transferring Results Transferring Results to a Computer Configure the computer as follows: 9600 Baud 8 data bits 1 stop bit Parity: none Handshake: XON/XOFF On the computer, enter the name of the file to which you want the results to be transferred (see the instruction manual for the communications program).
- Page 80 Chapter 5 – Storing and Transferring Results Transferring Results to a Computer ..110 PAUSE 00:20:00 F SPL 58.6 dBA Data PRINT Overall results Edit Edit Settings All Records PRINT Record Show Overall results Param. Logged Res. Overall Res. Level Level* Frequency Wt.
-
Page 81: Interpreting The Log Times
Chapter 5 – Storing and Transferring Results Interpreting the Log Times The results are transferred to the computer under the name you have chosen from the computer program. If you have used a standard communications program to save the data as a spreadsheet file, then you can import the results into a spreadsheet program (e.g. -
Page 82: Recording On A Dat-Recorder
Chapter 5 – Storing and Transferring Results Recording on a DAT-recorder When a pause is activated (for example, 3 seconds after a measurement interval has started) the measurement will immediately stop. When pause is deactivated, the measurement will continue and ends when a total of 10 seconds has expired (7 seconds later). -
Page 83: Bb 0908-13 Precision Integrating Sound Level Meter Type 2236
Chapter 5 – Storing and Transferring Results Recording on a DAT-recorder Set the sound level meter to a suitable range (one that covers the sound levels but does not cause overload). It is important to do this to ensure that you know what range the recorded signal represents. - Page 84 Chapter 5 – Storing and Transferring Results Recording on a DAT-recorder 5 – 22 Precision Integrating Sound Level Meter Type 2236 Brüel & Kjær User Manual...
- Page 85 Chapter 6 Specifications Specifications ................. 6 – 2 Ordering Information ............6 – 10 6 – 1 BB 0908–13 Precision Integrating Sound Level Meter Type 2236 User Manual...
- Page 86 Chapter 6 – Specifications Specifications 6.1 Specifications Noise Floor: Under reference conditions: Standards: Frequency Weighting Conforms with IEC 651 (1979) and IEC 804 (1985) Type 1, and IEC 1672 (Draft, June 1996) Class 1. Conforms with ANSI S1.4 – 1983 and Draft Typical Noise Floor S1.43, 6th September, 1992 Type 1I.
- Page 87 Chapter 6 – Specifications Specifications Relative response (dB) – 10 – 20 – 30 – 40 – 50 – 60 – 70 – 80 0.05 0.125 0.25 f/fm 932122/1e Fig.6.2 -octave filter characteristics as a function of frequency, f, against centre fre- quency, f .
- Page 88 Chapter 6 – Specifications Specifications Frequency Weighting: Battery low, pause and overload with hold in- dicators Selected independently for RMS and Peak Time weighting and elapsed measurement time RMS: Frequency weighting (Peak or RMS) or filter A, C according to BS5969 Type 1 †...
- Page 89 Chapter 6 – Specifications Specifications Effect of Magnetic Field Memory Capacity: 128KBytes (Types 2236 A–008 and 2236 C–008). Equivalent to 21600 80A/m (1Ørsted) at 50Hz gives <34dB(L) sets of results (for example, 6h of 1s logging). 512KBytes (Types 2236 B–008 and 2236 D–008). Calibration Conditions: Equivalent to 86400 sets of results (for example, Reference Frequency: 1000Hz...
- Page 90 Chapter 6 – Specifications Specifications CE-mark indicates compliance with EMC Directive Safety EN 61010–1 (1993) and IEC 1010-1 (1990): Safety requirements for electrical equipment for measurement, control and laboratory use EMC Emission EN 50081–1 (1992): Generic emission standard. Part 1: Residential, commercial and light industry EN 50081–2 (1993): Generic emission standard.
- Page 91 Chapter 6 – Specifications Specifications Frequency Response Relative response (dB) Tol. Tol. Tol. Tol. Frequency response satisfies IEC 651 Type 1 Frequency (Hz) 931262/1e Fig.6.5 Typical free-field response of Microphone Type 4188 for 0 ° incidence without random incidence corrector Relative response (dB) Frequency response satisfies ANSI S 1.4–1984 Type 1 Frequency (Hz)
- Page 92 Chapter 6 – Specifications Specifications Directional Characteristics: 1 kHz 8 kHz 270° 270° 12.5 2 kHz 270° 270° 4 kHz 270° · æ & ü 931238/1e Fig.6.7 Directional characteristics of the complete instrument at 1, 2, 4, 8, 12.5kHz 6 – 8 Precision Integrating Sound Level Meter Type 2236 Brüel &...
- Page 93 Chapter 6 – Specifications Specifications Effect of Accessories Relative Response (dB) – 1 Frequency (Hz) 931236/1e Relative Response (dB) – 1 Frequency (Hz) 931235/1e Fig.6.8 (a) Effect of the sound level meter’s casing on its frequency response (for refer- ence) compared to (b) the effect of Tripod UA0801 on the sound level meter’s frequency response Relative Response...
- Page 94 Chapter 6 – Specifications Ordering Information 6.2 Ordering Information Carrying Cases: KE0325: Carrying Case with insert for Type 2236 A Precision Integrating Sound sound level meter, Sound Level Level Meter Calibrator Type 4231 and Tripod Type 2236 B Precision Integrating Sound UA 1251 Level Meter (extended memory)
- Page 95 Chapter 7 Service and Repair 7 – 1 BB 0908–13 Precision Integrating Sound Level Meter Type 2236 User Manual...
- Page 96 Chapter 7 – Service and Repair Precision Integrating Sound Level Meter Type 2236 is de- signed and constructed to provide many years of reliable operation. However, if a fault occurs which impairs the sound level meter’s correct function, then remove its main batteries and disconnect any external power supply to prevent risk of further damage.
- Page 97 Chapter 8 Appendices ..................... 8 – 2 ..................8 – 3 EP,d Controlling the Sound Level Meter from a Computer ................. 8 – 4 Introduction ............... 8 – 4 Commands ................. 8 – 6 8 – 1 BB 0908–13 Precision Integrating Sound Level Meter Type 2236 User Manual...
-
Page 98: Sel
Chapter 8 – Appendices SEL (the Sound Exposure Level) is the constant sound level which, if maintained over 1s, would have the same energy as the measured L over the measurement time, T (see Fig. 8.1). Sound Pressure Level (dB) Time-varying RMS Time (s) Measurement duration... -
Page 99: Lep,D
Chapter 8 – Appendices LEP,d EP,d (the Daily Personal Noise Exposure Level) is the con- EP,d stant sound level which, if maintained over 8hours, would have the same energy as the measured A-weighted L tended over the Exposure Time, T (see Fig. -
Page 100: Controlling The Sound Level Meter From A Computer
Chapter 8 – Appendices Controlling the Sound Level Meter from a Computer Controlling the Sound Level Meter from a Computer 8.3.1 Introduction Messages From the Sound Level Meter This chapter describes the operation of the sound level meter via its serial interface. It assumes that you are familiar with manual operation of the sound level meter and have some experience of interface programming. - Page 101 Chapter 8 – Appendices Controlling the Sound Level Meter from a Computer meter are switched off. Otherwise the instruments could be damaged. Connect the computer to the sound level meter via the Serial Interface socket on the base of the sound level meter using 9-pole Cable with 25-pole Adaptor AO1386.
-
Page 102: Commands
Chapter 8 – Appendices Controlling the Sound Level Meter from a Computer 8.3.2 Commands There are two types of commands: Commands: Change the set-up of the sound level meter or order it to do something. Queries: Cause the sound level meter to display infor- mation about its setup The command and query messages available are listed in Table 8.1. - Page 103 Chapter 8 – Appendices Controlling the Sound Level Meter from a Computer AUTOLog The AUTOLog command message sets the destination of the data and rate of logging. The query message shows the cur- rent status. When logging data over the interface, the sound level meter cannot be controlled from the computer except to change the status of the auto logging.
- Page 104 Chapter 8 – Appendices Controlling the Sound Level Meter from a Computer Field Name Field Setting Comments Status (command) To interface To internal log Rate 1minute 1hour Status (response) INTERFACE Table 8.2 AUTOLog data fields and codes 8 – 8 Precision Integrating Sound Level Meter Type 2236 Brüel &...
- Page 105 Chapter 8 – Appendices Controlling the Sound Level Meter from a Computer AUTOStart The AUTOStart command message sets the auto start time, day of the month and status. The query message shows the current auto start status. The data fields and their settings are listed in Table 8.3.
- Page 106 Chapter 8 – Appendices Controlling the Sound Level Meter from a Computer BATt The BATt query message shows the current voltage level and status of the battery. Together with the FREE command, it is equivalent to the Status Fast Edit function available from the front plate of the sound level meter.
- Page 107 Chapter 8 – Appendices Controlling the Sound Level Meter from a Computer To Sound Level Meter Rate BAUD — From Sound Level Meter Rate SETTING BAUD RATE TO: 930667e Fig.8.8 Syntax for the BAUd command To Sound Level Meter BAUD From Sound Level Meter Rate BAUD RATE:...
- Page 108 Chapter 8 – Appendices Controlling the Sound Level Meter from a Computer CLock The CLock command message sets the date and time on the sound level meter’s calendar and clock. The query message shows the date and time on the sound level meter’s calendar and clock.
- Page 109 Chapter 8 – Appendices Controlling the Sound Level Meter from a Computer CONtinue The CONtinue command message starts a measurement without resetting the sound level meter. To Sound Level Meter CONTINUE From Sound Level Meter MEASUREMENTS CONTINUED 930671e Fig.8.12 Syntax for the CONtinue command DEFault The DEFault command message sets the sound level meter to its default set-up.
- Page 110 Chapter 8 – Appendices Controlling the Sound Level Meter from a Computer DISp The DISp command message sets the parameter to be shown on the sound level meter’s screen. The query message shows the current displayed parameter, its current level and if the sound level meter is or has been overloaded since the last reset.
- Page 111 Chapter 8 – Appendices Controlling the Sound Level Meter from a Computer Field Name Field Setting Comments Parameter (command) MAXP PEAK MAXL MINL Set to L LEPd EP,d Parameter (query MAXP response) PEAK MAXL MINL LEPd EP,d Level XXX.X dB or % Table 8.7 DISp data fields and codes BB 0908–13 Precision Integrating Sound Level Meter Type 2236...
- Page 112 Chapter 8 – Appendices Controlling the Sound Level Meter from a Computer ELapsed The ELapsed query message shows the current elapsed meas- urement time. The data fields and their settings are listed in Table 8.8. To Sound Level Meter ELAPSED From Sound Level Meter Time ELAPSED TIME (HHHH:MM:SS):...
- Page 113 Chapter 8 – Appendices Controlling the Sound Level Meter from a Computer ERASE The ERASE command message erases the selected results. The data field settings are listed in Table 8.15. To Sound Level Meter Result ERASE ERASE — 960399e Fig.8.17 Syntax for the ERASE command Field Name Field Setting Comments...
- Page 114 Chapter 8 – Appendices Controlling the Sound Level Meter from a Computer EXPosure The EXPosure command message sets the Exposure Time. The query message shows the current Exposure Time. The data fields and their settings are listed in Table 8.10. To Sound Level Meter Time EXPOSURE...
- Page 115 Chapter 8 – Appendices Controlling the Sound Level Meter from a Computer FOrmat The FOrmat command message sets the selected Output For- mat. The query message shows the current Output Format for the selected results. The data fields and their settings are listed in Table 8.11.
- Page 116 Chapter 8 – Appendices Controlling the Sound Level Meter from a Computer Field Name Field Setting Comments Type (command, query) Overall Results Logged Results Format (command)* PR24 Printer (24 char.) Printer Spreadsheet Heading (command) Short Long Type (query response) OVERALL RESULTS Overall Results LOGGED RESULTS Logged Results...
- Page 117 Chapter 8 – Appendices Controlling the Sound Level Meter from a Computer FREE The FREE query message shows how much time is left in the sound level meter’s log at the current logging rate, and how many records are left in the sound level meter’s memory. Together with the BATt command, it is equivalent to the Status Fast Edit function available from the front plate of the sound level meter.
- Page 118 Chapter 8 – Appendices Controlling the Sound Level Meter from a Computer The FW command message sets the frequency weighting of the RMS signal. The query message shows the current fre- quency weighting of the RMS signal. The data fields and their settings are listed in Table 8.12.
- Page 119 Chapter 8 – Appendices Controlling the Sound Level Meter from a Computer Field Name Field Setting Comments Status (command) 31.5Hz 63Hz 125Hz 250Hz 500Hz 1kHz 2kHz 4kHz 8kHz Status (response) 31.5 HZ* 63 HZ* 125 HZ* 250 HZ* 500 HZ* 1 KHZ* 2 KHZ* 4 KHZ*...
- Page 120 Chapter 8 – Appendices Controlling the Sound Level Meter from a Computer HAndshake The HAndshake command message sets the form of data exchange over the interface. The query message shows the current status. The data fields and their settings are listed in Table 8.14.
- Page 121 Chapter 8 – Appendices Controlling the Sound Level Meter from a Computer The OFf command message switches the sound level meter off. To switch the sound level meter on, send any character to the sound level meter (e.g. 〈Break〉). To Sound Level Meter From Sound Level Meter MEASUREMENTS PAUSED SLM OFF...
- Page 122 Chapter 8 – Appendices Controlling the Sound Level Meter from a Computer PRint The PRint command message prints the selected results in the current output format to a connected printer or computer. If no results are selected, the sound level meter prints the last selected results.
- Page 123 Chapter 8 – Appendices Controlling the Sound Level Meter from a Computer To Sound Level Meter Status — From Sound Level Meter MEASUREMENT RESET 930686/1e Fig.8.30 Syntax for the PW command To Sound Level Meter From Sound Level Meter Status PEAK WEIGHTING: —...
- Page 124 Chapter 8 – Appendices Controlling the Sound Level Meter from a Computer To Sound Level Meter Status RANGE — 930690e Fig.8.32 Syntax for the RANge command To Sound Level Meter RANGE From Sound Level Meter Status RANGE: — 930691e Fig.8.33 Syntax for the RANge query message and sound level meter response Field Name Field Setting...
- Page 125 Chapter 8 – Appendices Controlling the Sound Level Meter from a Computer RESet The RESet command message resets the sound level meter. Note: There is no reset warning. The handshake and baud rate setting are not reset. To Sound Level Meter RESET From Sound Level Meter MEASUREMENT RESET...
- Page 126 Chapter 8 – Appendices Controlling the Sound Level Meter from a Computer Field Name Field Setting Comments Parameter FREQUENCY WEIGHTING Frequency weighting (RMS) PEAK WEIGHTING Frequency weighting (Peak) TIME WEIGHTING DISPLAYED PARAMETER RANGE CHANGE RANGE AUTO LOGGING AUTO LOGGING RATE EXPOSURE TIME AUTO START Status...
- Page 127 Chapter 8 – Appendices Controlling the Sound Level Meter from a Computer The TW command message sets the time weighting. The query message shows the current time weighting. The data fields and their settings are listed in Table 8.19. To Sound Level Meter Status —...
- Page 128 Chapter 8 – Appendices Controlling the Sound Level Meter from a Computer VErsion The VErsion query message shows the version no. and log capacity, in bytes, of the sound level meter. The data fields and their settings are listed in Table 8.20. To Sound Level Meter VERSION From Sound Level Meter...
- Page 129 Index Numerics BS 6698 ..........1–2 6–2 Buffer ............. 1–8 1/1-octave filter ........ 3–12 8–22 4226, calibration with ........4–3 4231, calibration with ........4–3 C, frequency weighting 3–12 3–14 6–4 8–23 8–27 Calendar ........... 3–16 8–12 A, frequency weighting ... 3–12 6–4 8–23 wrong date or time ........
- Page 130 Index Computer Frequency weighting ........6–4 control from ..........8–4 default (Peak) ...........3–8 set-up ............8–4 default (RMS) ...........3–8 transferring results to ......5–16 Peak ..........3–14 8–26 Computer control reset due to changing ....3–12 3–14 switching on the SLM ......8–25 RMS ..........3–12 8–22 syntax ............8–4 shown on display ......3–12 4–16 CONtinue .............8–13...
- Page 131 Index RANge ............8–27 Range N.A............... 3–11 default ............3–8 Nominal calibration level ......4–3 measurement ........ 3–9 8–27 None (handshake) ......... 5–5 reset due to change ....... 3–18 Recall ............. 5–3 Recording ............. 5–20 Octave filter ........3–12 8–22 Records OFf ...............
- Page 132 Index Spreadsheet output format ....5–11 5–17 Start measurement automatically ..4–13 8–9 Status ............1–6 4–7 battery ............8–10 STOre ............8–30 Store ...............5–2 Storing Overall Results ......2–7 8–30 Switching off ..............3–9 on .............2–2 3–8 Syntax computer control ........8–4 Time ..........3–16 8–12 wrong date or time ........3–7 Time weighting .........3–11 8–31 default ............3–8...
Need help?
Do you have a question about the 2236 A-008 and is the answer not in the manual?
Questions and answers