Table of Contents
Advertisement
Advertisement
Table of Contents

Subscribe to Our Youtube Channel
Related Manuals for BRUEL & KJAER 2245


Summary of Contents for BRUEL & KJAER 2245
- Page 1 Noise Partner with B&K 2245 User Guide for Version 1.0 BN 2376–11...
-
Page 3: Table Of Contents
TABLE OF CONTENTS TABLE OF CONTENTS INTRODUCTION Overview Licences About About the Instrument About the Mobile App About the PC App System Requirements Data Storage Service and Support Contact Information Additional Documentation GET STARTED Hardware Interface Instrument GUI How to Display the GUI in a Web Browser Install the Apps Download the Mobile App Download the PC App... - Page 4 Table of Contents: Status Power Consumption SET UP THE INSTRUMENT Regional Settings How to Change Regional Settings About the Settings Input Settings How to Set up the Input About the Microphone About Sound Fields Measurement Control How to Set up Measurement Controls About Measurement Time About Back-erase Mode Measurement Parameters...
- Page 5 Table of Contents: Make a Measurement Data explorer Data Management Use the App to Make a Measurement ANNOTATIONS How to Make Annotations How to Attach Unattached Annotations Using the Mobile App TRANSFER DATA How to Import Data to the PC App How to Add an Instrument using Its IP Address How to Store a Backup Network Storage...
-
Page 6: Introduction
Introduction: Overview INTRODUCTION Overview Your instrument works with applications: Noise Partner is the default, general-purpose application for measuring sound levels Enviro Noise Partner is for measuring and analysing sound levels in the world around us Work Noise Partner is for determining sound exposure levels in the workplace There is a mobile version and a PC version of each app. -
Page 7: Licences
Introduction: Licences Licences B&K 2245 is a type-approved sound level meter (SLM). However, this basic functionality can be extended with optional licences; it can perform frequency analysis, log broadband and spectral data, perform statistical analysis and make audio recordings. Licences for the instrument control the functionality of the instrument and to which applications it can connect. -
Page 8: About The Mobile App
Introduction: About weighting (A) and time weightings (F, S or I). The instrument takes single measurements. In other words, the instrument calculates a single value for each measured parameter for the total measurement time. Standards Go to: Menu > About > Standards Here you will see the complete list of standards to which the instrument conforms. -
Page 9: System Requirements
Introduction: System Requirements System Requirements The Mobile App iPhone® See supported iOS versions for current app version in the App Store®, under Noise Partner > Information > Compatibility. The PC App System Requirements: Windows® 7, 8.1 or 10 (64-bit) operating system Microsoft®... -
Page 10: Service And Support
Introduction: Service and Support Mobile App Neither measurement data nor annotations are stored on your mobile device, everything is uploaded to and stored on the instrument. Service and Support The instrument comes with the standard product warranty for Brüel & Kjær products. Visit www.bksv.com/Service to request a quote for or find information about services. -
Page 11: Additional Documentation
Introduction: Additional Documentation Additional Documentation Product Data B&K 2245 with Noise Partner: BP 0029 B&K 2245 with Enviro Noise Partner: BP 0030 B&K 2245 with Work Noise Partner: BP 0031 B&K 2245 with Exhaust Noise Partner: BP 0032 Microphone Type 4966:... -
Page 12: Get Started
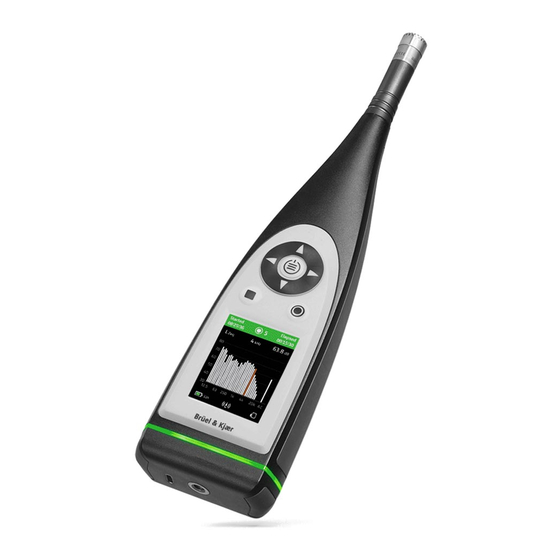
Started: Hardware Interface GET STARTED Hardware Interface The microphone is at the top of the instrument. is the power/menu/reset button. Press and hold the button to power the instrument on or off. When the instrument is on, press the but- ton briefly to open the menu. - Page 13 Started: Hardware Interface is the stop/reset button. Press the button once to stop a measurement. At this point, averaged measurement parameters will stop updating and you can review the results. Press the button again to clear the results and reset the instrument for the next measurement.
-
Page 14: Instrument Gui
Started: Instrument GUI The light ring is colour-coded to reflect the status of the instrument. The light ring is solid green while measuring. The light ring flashes yellow slowly while idle or quickly while paused (measuring). The light ring flashes red quickly for intermittent overloads. The light ring is solid purple for latched overloads. - Page 15 Started: Instrument GUI The top region shows measurement information and instrument status. When idle, the instrument displays the current time (to the left) and input settings (to the right). : Indicates that Sound field is set to Free-field and there is no windscreen : Indicates that Sound field is set to Free-field and there is a windscreen : Indicates that Sound field is set to Diffuse-field and there is no windscreen : Indicates that Sound field is set to Diffuse-field and there is no windscreen...
- Page 16 Started: Instrument GUI The number in the centre is the measurement number. The first measurement of every day is number 1. The number increments with each new measurement. The background colour of the top region and the centre symbol change to indicate the state of the instrument.
- Page 17 Started: Instrument GUI The bar graph shows the instantaneous sound level (L) with frequency and time weightings. This display is sometimes called the fast bar or fast display. : Indicates the maximum instantaneous sound level during a measurement. ✐ Note: The bar graphs in SLM view and List view are unique, that is they can each be set to show a different para- meter.
-
Page 18: How To Display The Gui In A Web Browser
Started: Instrument GUI The Menu Use the buttons on the instrument to interact with the menu. : open / close the menu; open a response dialog; confirm a setting in a response dialog; enable/disable parameter selection boxes : navigate up a list; increment a value in a response dialog : navigate down a list;... -
Page 19: Install The Apps
Started: Install the Apps instrument is 10.42.0.1, so you will type <10.42.0.1/display>. ✐ Note: You can find the instrument's IP address here: System settings > Network settings. Look under Wi-Fi settings or Ethernet settings depending on your connection. Install the Apps Download the Mobile App You will need: iPhone®... -
Page 20: Local Connections
Local Connections Procedure: 1. Go to: https://www.bksv.com/en/Service/downloads. 2. From the list of available downloads, expand B&K 2245 Downloads. 3. Click B&K 2245 Software downloads. 4. Click the link to install the Noise Partner desktop app on your PC. 5. Once the download is complete, double-click Setup.exe to start installation. -
Page 21: Use The Instrument As A Hotspot
Started: Remote Connections d. Go to: Wi-Fi name. e. Select the network you wish to join. f. Enter the password at the prompt. to scroll through the character menu. to move left or right. Press to advance to the options: OK or Cancel. Use the Instrument as a Hotspot Connect your mobile device and / or PC to the instrument's hotspot so that the devices can communicate. -
Page 22: How To Connect Remotely Via An Ipv4 Address
Started: Remote Connections ✐ Note: Remote connection is optional. In other words, you do not need to be able to connect to your instrument remotely in order to use it with the mobile and PC apps. Please refer to the manufacturer of your router or to your Internet service provider (ISP) for information spe- cific to your network. -
Page 23: How To Connect Remotely Via An Ipv6 Address
Started: Remote Connections a. You can find the IPv4 address of the instrument on the instrument or on the router. On the instrument, go to: Menu > Network settings > Wi-Fi settings or Ethernet settings > IP address On the router, there should be a list of the connected devices b. -
Page 24: Connect The Mobile App To The Instrument
Started: Connect the Mobile App to the Instrument 3. Enter the IPv6 address of your instrument. To find the IPv6 address, go to: Menu > Network settings > Wi-Fi settings or Ethernet settings > IPv6 address ✐ Note: Enter the address in brackets, for example: [2701:db8:424d:d15::1a2f::]. 4. -
Page 25: How To Add The Instrument Manually
Started: Connect the Mobile App to the Instrument That's it! The instrument shows when it is connected to the mobile app. Once the mobile app has connected to an instrument, the app will remember the instrument and re-establish a con- nection automatically after separation. -
Page 26: Troubleshooting Connection Problems
Started: Mobile App GUI Troubleshooting Connection Problems Check that the instrument is set to act as a hotspot (System settings > Network settings > Wi-Fi settings > Wi-Fi mode) Check that the instrument is generating a hotspot, it will show Check that Wi-Fi is enabled on the mobile device Make sure that the two devices are within range Try turning Wi-Fi off and on again on the mobile device... - Page 27 Started: Mobile App GUI The mobile app displays the same colour, status icon and measurement number as the instrument. Tap to access the instrument menu. The icon also indicates status. means there is no connection between the instru- ment and the mobile app. means that the wireless signal is weak.
- Page 28 Started: Mobile App GUI to access information about the mobile app and help. Use the navigation bar to change between Total (left) and Annota- tions (right). Total displays instantaneous parameters and parameters that are cal- culated for the total measurement time. It is the main display for single measurements.
- Page 29 Started: Mobile App GUI Annotations is the list of annotations. Tap an annotation to review it. Swipe left on an annotation to delete it. While meas- uring or reviewing a measurement, tap Attach to add an unattached annotation to the measurement. During a measurement, the mobile app shows the measurement start time ( and the measurement duration time (...
-
Page 30: Charge The Battery
Started: Charge the Battery to reset the instrument for the next measurement. to open the annotation menu. to start a measurement. During a measurement, slide to the right to stop or slide to the left to pause. Charge the Battery The instrument has an internal Lithium-ion rechargeable battery. -
Page 31: Status
Started: Charge the Battery Status Go to Menu > Status to see the status of the battery. Status: Either Full, Charging, or Discharging Time remaining: The approximate time left on the charge Charged: The percentage to which the battery is currently charged Max capacity: The percentage of the total amount of energy of the battery when it is of the fully charged Power Consumption Settings for the screen and wireless configuration can have a noticeable effect on the instrument's power consumption. -
Page 32: Set Up The Instrument
Set up the Instrument: Regional Settings SET UP THE INSTRUMENT Regional Settings Regional settings allow you to choose the language, date and time settings of the instrument. How to Change Regional Settings 1. Open the menu. From the instrument: Press briefly to open the menu. -
Page 33: Input Settings
Set up the Instrument: Input Settings Input Settings Input settings ensure that you are collecting accurate data. The instrument optimizes the frequency response based on the selected microphone and makes corrections based on the selected sound field and windscreen. How to Set up the Input 1. -
Page 34: About Sound Fields
Set up the Instrument: Measurement Control About Sound Fields It is important that the instrument knows the type of sound field in which you are measuring so it can apply the appro- priate correction to your measurements. Theses corrections will enhance the overall frequency response of the system regardless of whether or not the microphone you are using is designed for the sound field in which you are measuring. -
Page 35: About Measurement Time
Set up the Instrument: Measurement Control About Measurement Time Preset measurement time means that the instrument will measure for the specified Preset time, then stop and save automatically Free measurement time means that you control the measurement manually... -
Page 36: About Back-Erase Mode
Set up the Instrument: Measurement Parameters About Back-erase Mode This setting determines what happens when you resume a paused measurement. Hint: You can change these settings while a measurement is paused. Enable: Overwrite measurement data for the Back-erase time Disable: Resume the measurement without overwriting earlier data Measurement Parameters How to Set up Broadband Parameters The instrument measures basic broadband sound level parameters with frequency weightings that mimic how humans... - Page 37 Set up the Instrument: Measurement Parameters weighting (A) and time weightings (F, S or I). You can make measurements with up to two frequency weightings simultaneously. Use the Instrument 1. Press briefly to open the menu. 2. Go to: Measurement settings > Broadband parameters. 3.
- Page 38 Set up the Instrument: Measurement Parameters a. Press to navigate to a parameter. b. Press to enable / disable parameters. 5. Navigate to 6. Press to close the parameter selection menu. Use the Mobile App 1. Tap to open the instrument menu. 2.
- Page 39 Set up the Instrument: Measurement Parameters a. Tap one of the weightings on the bottom toolbar. b. Tap the weighting line. c. Tap On. ✐ Note: To enable a different frequency weighting, disable the unwanted frequency weighting first. 4. Enable or disable broadband parameters using the same process. a.
- Page 40 Set up the Instrument: Measurement Parameters This parameter shows the instantaneous time-weighted sound level as measured by the instrument. L(SPL) = sound pressure level This parameter calculates the maximum time-weighted sound level during the latest second. ✐ Note: L and L(SPL) are instantaneous values for display only and are not saved with the measurement. About Time Weightings The instrument uses three standard-defined time weightings: F, S and I.
- Page 41 Set up the Instrument: Measurement Parameters A-weighting Represents the human ear’s response at low to medium sound levels Corresponding equal loudness curve: 40 dB The most commonly applied frequency weighting Can be used for all sound levels B-weighting Represents the human ear’s response at medium sound levels Corresponding equal loudness curve: 70 dB C-weighting Represents the human ear’s response at fairly high sound levels...
-
Page 42: Audio Recording
Set up the Instrument: Audio Recording LImax LAImax LF(SPL) LAF(SPL) LCF(SPL) LZF(SPL) LBF(SPL) LS(SPL) LAS(SPL) LCS(SPL) LZS(SPL) LBS(SPL) Audio Recording Audio signal can be recorded and stored as listen-quality MP3 files (compressed to 3 % of original signal). When enabled, the audio will record for the duration of the measurement time. How To Record Audio 1. -
Page 43: About Screen Settings
Set up the Instrument: Display Settings 3. Adjust the screen settings: brightness and colour scheme. 4. Select the brightness of the light ring. 5. Set up the displays for your measurements. Go to SLM view to set up the instantaneous display (bar graph) and the readout for one broadband para- meter Go to List view to set up the instantaneous display (bar graph) and readouts for multiple broadband para- meters (three on the instrument, five on the mobile app) -
Page 44: About Data View
Set up the Instrument: Voltage Output About Data View About data view displays information about the instrument with which you are measuring. It can also include the loc- ation of the instrument (latitude and longitude) using GPS (global positioning system). To enable latitude and longitude coordinates in the About data view: 1. -
Page 45: Lock The Settings
Set up the Instrument: Lock the Settings Lock the Settings After you have finished setting up the instrument, you can lock the measurement, display and system settings to pre- vent changes. 1. Go to: Menu > System settings > Advanced settings > Service mode. 2. -
Page 46: Check The Calibration
Check the Calibration: How to Perform a Calibration Check CHECK THE CALIBRATION It is a best practice to check the accuracy of your instrument before and after measuring by performing a calibration check. A calibration check is not a calibration. Calibration includes an adjustment of the instrument's sensitivity. A cal- ibration check compares the current sensitivity of the instrument with the sensitivity from its initial calibration, checking that it has not changed too much. - Page 47 Check the Calibration: How to Perform a Calibration Check 3. Turn on the sound calibrator. 4. After a short period the instrument will initiate a calibration check, choose Yes. 5. The calibration check will have one of two results: Pass – the measured sound level is within tolerance. The instrument is ready for use Fail –...
-
Page 48: Calibration History
Check the Calibration: Calibration History Calibration History Go to: Menu > Calibration history Here you can view an instrument's history of calibrations and calibration checks. Calibration Settings Go to Menu > System settings > Advanced settings > Calibration for calibration settings. Automatic Calibration Check The instrument is set to perform a calibration check automatically by default. -
Page 49: Measurements
Measurements: Make a Measurement MEASUREMENTS Make a Measurement The exact steps of a measurement will vary depending on the settings you use in Measurement control. A basic overview is as follows: 1. Press to start a measurement. 2. If necessary, press to pause. -
Page 50: Data Explorer
Measurements: Make a Measurement ✐ Note: You will not need to stop the measurement if it has a preset time. See: Menu > Measurement settings > Meas- urement control Data is stored automatically upon stopping If you are using the instrument with the mobile app, annotations will be synced with the measurement and saved on the instrument Data explorer Go to: Menu >Data explorer... -
Page 51: Use The App To Make A Measurement
Measurements: Use the App to Make a Measurement Use the App to Make a Measurement The exact steps of a measurement will vary depending on the settings you use in Measurement control. A basic overview is as follows: 1. Tap to start a measurement. -
Page 52: Annotations
Annotations How to Make Annotations ANNOTATIONS Use the mobile app to add notes to your measurement. How to Make Annotations 1. From the measurement screen, tap 2. Choose the kind of annotation you want to add: : Photos : Videos : Notes : Commentaries 3. -
Page 53: How To Attach Unattached Annotations Using The Mobile App
Annotations How to Attach Unattached Annotations Using the Mobile App How to Attach Unattached Annotations Using the Mobile App To attach an annotation to a measurement, a measurement must be open or in progress. 1. Navigate to Annotations. 2. Tap Attach at the desired annotations (or tap if you want to create more annotations.) -
Page 54: Transfer Data
Transfer Data How to Import Data to the PC App TRANSFER DATA You will need to move your data from the instrument in order to process it. You can transfer data using one of the fol- lowing methods: Import data from the instrument to the PC app then save it as a project to a local or shared location Store a backup of your data on a USB stick or network then access it from the PC app How to Import Data to the PC App You will need:... - Page 55 Transfer Data How to Import Data to the PC App ✐ Note: To import from a backup, click on the storage location. 4. Select the data you want to transfer. Hint: Use <Ctrl> or <Shift> to select multiple measurements or annotations. 5.
-
Page 56: How To Add An Instrument Using Its Ip Address
Transfer Data How to Add an Instrument using Its IP Address How to Add an Instrument using Its IP Address If you want to find an instrument that is not showing up in the list of discovered instruments, such as an instrument on another network, you can manually add the instrument to the list using its IP address. -
Page 57: Usb Stick
Transfer Data How to Store a Backup USB Stick You will need: A USB-C (or USB-A with an adaptor) memory stick with at least 16 GByte formatted as FAT32 or exFAT Your instrument Procedure: 1. Go to: Menu > System settings > Data management > Backup settings > Backup. 2. -
Page 58: Use The Pc App
Use the PC App: PC App GUI USE THE PC APP PC App GUI The application tab opens / closes the system menu where you will find information about the application and its options. Options: Change the language of the GUI About: Information about the application Exit: Close the application... - Page 59 Use the PC App: PC App GUI These are the tools that control the operation of the application. : Create a new project : Open an existing project : Save the current project : Save the current project under a new name or in another location : Import data from the instrument or network storage : Export project contents into another format : Open the help...
- Page 60 Use the PC App: PC App GUI When you open a project or import data, you will see the individual measurements in the project browser window. Select measurements to view them. Project Name: Unnamed projects appear as Untitled in the toolbar : Select all measurements in the project browser...
- Page 61 Use the PC App: PC App GUI Unattached Annotations displays annotations that are not linked to a measurement. Unattached annotations are organized by type: Gallery (photos and videos), Commentaries and Notes. Tasks, such as importing data or exporting a project, are displayed in this window.
- Page 62 Use the PC App: PC App GUI These tabs are for switching between the Measurement and Gallery windows. Within the Measurement window, there are two areas. The upper section is an overview of the selected meas- urements in a project. It will help keep you oriented while you investigate the graph and table views in the section below.
-
Page 63: Create A Project
Use the PC App: Create a Project In this panel, you will find collapsible windows for viewing annotations. Gallery: View photos and videos attached to the measurement Commentaries: Listen to voice memos attached to the measurement Notes: Read the notes attached to the measurement Create a Project A project is a collection of one or more measurements plus any associated annotation files. -
Page 64: Import Measurements
Use the PC App: Import Measurements You are now ready to add measurements to your project. Import Measurements Import measurements to add them to a project. You can add measurements to empty projects or to projects that already contain measurements. You will need: A project open in the PC app One or more measurements... - Page 65 Use the PC App: Import Measurements ✐ Note: To import from a backup, click on the storage location. 4. Select the data you want to transfer. Hint: Use <Ctrl> or <Shift> to select multiple measurements or annotations. 5. Click Import.
-
Page 66: Import From A Backup
Use the PC App: Examine the Project Import from a Backup The first time you import from a backup, you will need to tell the PC app where the backup is stored. You will need: An instrument that is set up to store a backup of its data, see Transfer Data Data in the backup Procedure:... - Page 67 Use the PC App: Examine the Project Switch Views Once you select measurements in the project, you can view the measurement data as graphs or in a table. Click to switch between the graph and table views. The Graph View For single measurements, each parameter is a single, calculated dB level for the total measurement time.
-
Page 68: Review Annotations
Use the PC App: Examine the Project Zoom There are many ways to get a closer look at your data: In the large graph, click on a measurement number to zoom in on the measurement Select a range, then right-click and select Zoom. Select Unzoom to zoom out Double-click the y-axis to scale the graph to the shown levels Hint: When you zoom in, you can use the overview to stay oriented within the project. -
Page 69: Export A Project
Use the PC App: Export a Project Read Notes You will find any notes that have been attached to the measurements in the project in the Notes window. Each note is stamped with the date and time. 1. Select measurements in the project browser. 2. -
Page 70: How To Export A Project
Use the PC App: Export a Project How to Export a Project 1. In the project browser, highlight the measurements you want to export. 2. Click 3. Specify the name and location of the export file in the Destination file field. 4. - Page 71 Use the PC App: Export a Project ReportExample ReportExample is an example of a master file that defines the measurement parameters to export and generates cal- culations and graphics based on the exported data. How to Create Master Files You can create your own (custom) Microsoft Excel files that define the data you wish to export. This can be used to filter your measurement data in the exported file.
-
Page 72: Terminology
Terminology: Export a Project TERMINOLOGY Frequency weighting corresponding approximately to the 40 dB equal loudness curve, that is to say, A-weighting the human ear’s response at low to medium sound levels. It is by far the most commonly applied fre- filter quency weighting and is used for all levels of sound. - Page 73 Terminology: Export a Project hearing for a healthy young person ranges from approximately 20 Hz to 20000 Hz (20 kHz). Our hearing is less sensitive at very low and very high frequencies. In order to account for this, Frequency weighting filters can be applied when measuring sound. The most commonly used weighting is the weighting 'A-weighting', which approximates the human ear’s response to low - medium noise levels.
- Page 74 Terminology: Export a Project Loudness is the subjective judgement of intensity of a sound by humans. Loudness depends upon the sound pressure and frequency of the stimulus and whether the sound field is diffuse- or free- Loudness field. The unit is the Sone. The Zwicker method of calculation of stationary loudness based on 1/3- octave measurements is described in ISO 532 - 1975, Method B.
Need help?
Do you have a question about the 2245 and is the answer not in the manual?
Questions and answers