Table of Contents
Advertisement
Available languages
Available languages
Built-In Electric Single and Double Oven Control Guide
WARNING: To reduce the risk of fire, electric shock, or injury to persons, read the IMPORTANT SAFETY INSTRUCTIONS, located in
your appliance's Owner's Manual, before operating this appliance.
This manual covers different models. The oven you have purchased may have some or all of the items listed. The locations and
appearances of the features shown here may not match those of your model.
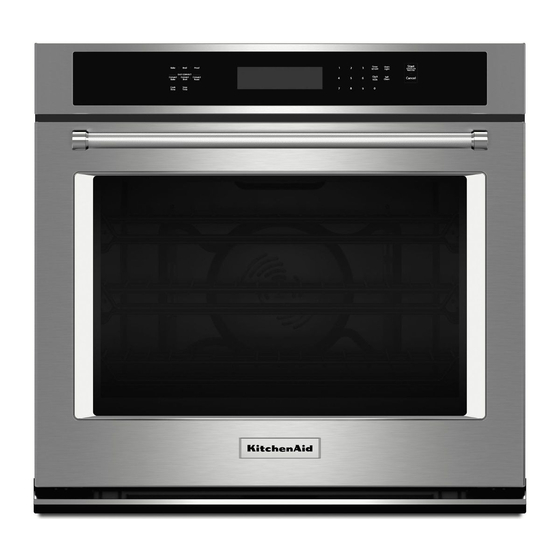
A. Electronic oven control
B. Automatic oven light switch
C. Oven door lock latch
D. Model and serial number plate (on bottom edge of control panel, right
hand side)
E. Oven lights
F.
Temperature probe jack (oven with convection element and fan only)
G. Oven racks (roll-out racks available on select models only)
PARTS AND FEATURES
H. Gasket
I.
Lower oven (on double oven models)
J.
CleanBake™ bake element (hidden beneath floor panel)
K. Convection element and fan (in back panel)
L.
Broil elements (not shown)
M. Oven vent
Parts and Features not shown
Temperature probe
1
Advertisement
Table of Contents

Related Manuals for KitchenAid KOSE500ESS


Summary of Contents for KitchenAid KOSE500ESS
- Page 1 Built-In Electric Single and Double Oven Control Guide PARTS AND FEATURES WARNING: To reduce the risk of fire, electric shock, or injury to persons, read the IMPORTANT SAFETY INSTRUCTIONS, located in your appliance's Owner's Manual, before operating this appliance. This manual covers different models. The oven you have purchased may have some or all of the items listed. The locations and appearances of the features shown here may not match those of your model.
- Page 2 This manual covers several models. Your model may have some or all of the items listed. Refer to this manual or the Frequently Asked Questions (FAQs) section of our website at www.kitchenaid.com for more detailed instructions. In Canada, refer to the Service and Support section at www.kitchenaid.ca.
- Page 3 KEYPAD FEATURE INSTRUCTIONS TIMER Oven timer The Timer can be set in hours or minutes up to 23 hours and 59 minutes. (SET/OFF) 1. Touch TIMER SET/OFF. Touch TIMER SET/OFF again to switch between MIN/SEC, HR/MIN, and OFF. If no action is taken, the control will continue to wait for a length of time to be entered.
-
Page 4: Electronic Oven Controls
KEYPAD FEATURE INSTRUCTIONS EASY CONVECT Convect roast 1. Touch Upper or Lower CONVECT ROAST. ROAST 2. Touch the number keys to choose whether or not to convert the recipe. 3. If “1: Yes” has been selected, you will see a screen with “easy convect roast.” Touch the number keys to enter a temperature. - Page 5 Display Tools When power is first supplied to the oven, the timer display will The Tools selection key allows you access to 9 hidden functions flash “12:00”, and “Clock-Enter Time” will appear on the display. within the Electronic Oven Control. These hidden functions allow Enter the time by touching the number keys.
- Page 6 On double ovens, the upper oven and the lower oven can each be To Regularly Set, Untimed to Activate: calibrated independently. Sabbath Mode must be enabled before starting the Bake cycle. A minus sign means the oven will be cooler by the displayed See the “To Enable”...
-
Page 7: Rack And Bakeware Positions
OVEN USE Bakeware To cook food evenly, hot air must be able to circulate. For best Odors and smoke are normal when the oven is used the first few results, allow 2" (5 cm) of space around bakeware and oven walls. times, or when it is heavily soiled. -
Page 8: Meat Thermometer
Preheating and Oven Temperature To Replace SatinGlide Roll-Out Extension Rack: ™ 1. Using 2 hands, grasp the front of the closed rack and the Preheating sliding shelf. Place the closed rack and the sliding shelf on the When beginning a Bake or Convect Bake cycle or Convect Roast rack guide. -
Page 9: Convection Bake (On Some Models)
Convection Roast (on some models) � Pull out oven rack to stop position before turning or removing food. Use tongs to turn food to avoid the loss of juices. Very Convection roasting can be used for roasting meats and poultry. thin cuts of fish, poultry or meat may not need to be turned. -
Page 10: Temperature Probe (Single, Upper, And On Some Models, Lower Oven)
Temperature Probe (single, upper, 4. Touch START. and on some models, lower oven) The minute time countdown will appear on the oven display. The start time and stop time are not displayed until the oven is The temperature probe accurately measures the internal finished preheating. - Page 11 Guide des commandes du fours électriques simples et doubles encastré PIÈCES ET CARACTÉRISTIQUES AVERTISSEMENT : Pour réduire le risque d’incendie, de décharge électrique ou de blessures, lire les INSTRUCTIONS IMPORTANTES DE SÉCURITÉ du guide d’utilisation de votre appareil avant de faire fonctionner cet appareil. Ce manuel couvre différents modèles.
- Page 12 Ce manuel concerne plusieurs modèles. Le modèle que vous avez peut comporter toutes les caractéristiques énumérées ou seulement certaines d’entre elles. Se reporter à ce manuel ou à la section Foire Aux Questions (FAQ) de notre site Web sur www.kitchenaid.com pour des instructions plus détaillées.
- Page 13 TOUCHE FONCTION INSTRUCTIONS TIMER Minuterie du La minuterie peut être réglée en heures ou en minutes jusqu’à concurrence de 23 heures (SET/OFF) four et 59 minutes. (réglage/arrêt de la 1. Appuyer sur TIMER SET/OFF (réglage/arrêt de la minuterie). Appuyer de nouveau minuterie) sur TIMER SET/OFF (réglage/arrêt de la minuterie) pour passer des MIN/SEC aux HR/MIN et sur OFF (arrêt).
- Page 14 TOUCHE FONCTION INSTRUCTIONS EASY CONVECT BAKE Cuisson au Avant la cuisson au four par convection, placer les grilles tel qu’indiqué à la section (cuisson au four par four par “Positionnement des grilles et des ustensiles de cuisson”. convection facile) convection 1.
-
Page 15: Commandes Électroniques Du Four
TOUCHE FONCTION INSTRUCTIONS STOP TIME Mise en La touche Stop Time (heure d'arrêt) sert à entrer l’heure de mise en marche pour un four marche (heure d’arrêt) équipé de mise en marche différée. La touche Stop Time (heure d'arrêt) ne doit pas être différée utilisée pour les aliments tels que pains et gâteaux, car ils risquent de ne pas bien cuire. - Page 16 Fahrenheit et Celsius Verrouillage des commandes La température est préréglée en Fahrenheit, mais elle peut être Le verrouillage des commandes désactive les touches du tableau modifiée et affichée en Celsius. de commande pour éviter l’utilisation involontaire du ou des fours. Si le verrouillage des commandes a été...
-
Page 17: Utilisation Du Four
Mode Sabbat 6. Lorsque l’heure d’arrêt est atteinte, le four s’ éteint automatiquement. Le module de commande du four reste e n Le mode Sabbat maintient le réglage de cuisson au four tant que mode Sabbat jusqu’à ce qu’on appuie sur le bouton Ca ncel le four n’est pas éteint. -
Page 18: Grille Déployante Satinglide
Positionnement des grilles et des Number of Pan(s) POSITION SUR LA GRILLE ustensiles de cuisson au four Centre de la grille. Se servir de l’illustration et du tableau suivants comme guide. Positions de grille – Four supérieur et inférieur Côte à côte ou légèrement décalés. 3 ou 4 Voir les illustrations de position de grille dans cette section pour connaître le... -
Page 19: Ustensiles De Cuisson
Thermomètre à viande Réinstallation de la grille déployante SatinGlide ™ 1. À 2 mains, saisir l’avant de la grille rétractée et du support Tous les modèles ne sont pas équipés d'une sonde coulissant. Placer la grille rétractée et le support coulissant thermométrique. -
Page 20: Cuisson Au Gril
Cuisson au gril Cuisson au four par convection (sur certains modèles) La cuisson au gril utilise la chaleur radiante directe pour cuire les aliments. L’élément de convection est dissimulé dans le panneau arrière de L'élément s'allume et s'éteint par intermittence pour maintenir la la cavité... -
Page 21: Levée Du Pain
Cuisson au gril par convection (sur Sonde thermométrique (four simple certains modèles) et supérieur, sur certains modèles, four inférieur) Durant la cuisson au gril par convection, l'élément de cuisson au gril s’allume et s’éteint par intermittence pour maintenir le four à La sonde thermométrique mesure précisément la température température constante tandis que le ventilateur fait circuler l’air interne de la viande, de la volaille et des mets en sauce liquides et... -
Page 22: Cuisson Minutée
7. Appuyer sur la touche CANCEL (annulation) du four sélectionné ou ouvrir la porte et refermer pour effacer l’affichage et/ou arrêter les signaux sonores de rappel. ® ©2020 KitchenAid. All rights reserved. Used under license in Canada. ™ W11417277A Tous droits réservés. Utilisé sous licence au Canada.
Need help?
Do you have a question about the KOSE500ESS and is the answer not in the manual?
Questions and answers
How do I get rid of Demo Mode? I can't heat my oven?
How do I reset my KOCE500e back to english? I somehow have it set on French and cannot figure how to change it back.