Table of Contents
Advertisement
Available languages
Available languages
Advertisement
Chapters
Table of Contents

Subscribe to Our Youtube Channel
Related Manuals for Levolor Cellular Shades


Summary of Contents for Levolor Cellular Shades
- Page 1 Cellular Shades Persianas celulares Toiles alvéolées INSTALLATION • OPERATION • CARE INSTALACIÓN • FUNCIONAMIENTO • CUIDADO INSTALLATION • FONCTIONNEMENT • ENTRETIEN Motorized Control Lift Elevación con control motorizado Commande de levage motorisée...
-
Page 2: Table Of Contents
Please reference all warning tags and labels in the instructions and on the shade. Cellular Shades Motorized Control Lift © 2022 LEVOLOR ®... -
Page 3: Window And Shade Terminology
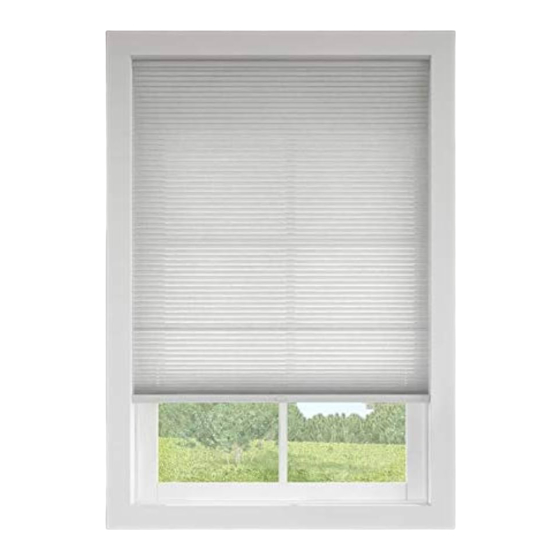
WINDOW AND SHADE TERMINOLOGY Thank you for purchasing LEVOLOR Cellular Shades. With proper installation, operation, ® and care, your new cellular shade will provide years of beauty and performance. Please thoroughly review this instruction booklet before beginning installation. MOUNTING TYPES AND WINDOW TERMINOLOGY... - Page 4 WINDOW AND SHADE TERMINOLOGY LIFT STYLES Bottom-Up Shade Headrail Fabric Panel Bottom Rail Top-Down/Bottom-Up Shade Headrail Middle Rail Fabric Panel Bottom Rail Day/Night Shade Headrail Fabric Panel A Middle Rail Fabric Panel B Bottom Rail Cellular Shades Motorized Control Lift...
-
Page 5: Product View
Shade Bottom Rail Not Shown: Top-Down/Bottom-Up and Day/Night Shades Micro-USB Power Adapter Magnetic Charging Cable Charging Adapter Standard Top-Down/Bottom-Up, AAA Battery Remote Control Remote Control Day/Night Remote Control (2-Pack) Holder (optional) Remote Control Kit (optional) Cellular Shades Motorized Control Lift... -
Page 6: Components Included
(2-Pack) Holder (optional) Remote Control Kit (optional) • Shade • Mounting Brackets • Installation Hardware • Remote Control Kit • Other accessories (optional) Optional items will be included, if selected at time of shade order. Cellular Shades Motorized Control Lift... -
Page 7: Tools And Fasteners You May Need
Note: Longer screws may be needed with extension brackets and spacers, not shown. CAUTION: Use drywall anchors (not provided) when mounting into drywall. Failure to properly anchor shade could cause shade to fall, possibly resulting in injury. Cellular Shades Motorized Control Lift... -
Page 8: Installation Installation Overview
In the next 10 seconds, press and hold the on the remote until the shade jogs twice. Programming Button USING THE INMOTION APP Micro-USB • If you purchased a hub, download the LEVOLOR Charging Port InMotion app to get started. ™ Indicator •... - Page 9 — The minimum depth for a fully recessed mount is 21/4". — Use the center screw hole when depth permits. — Use both winged screw holes with shallow mounting depths. IMPORTANT: Brackets must be level and aligned to each other. Cellular Shades Motorized Control Lift...
- Page 10 — Check that the front lip of each bracket is in the front channel of the headrail. Snap in — If any brackets are not installed correctly, release the Place shade and reinstall. See “Removing the Shade (If Necessary)” on page 17. Good Cellular Shades Motorized Control Lift...
-
Page 11: Outside Mount
In the next 10 seconds, press and hold the on the remote until the shade jogs twice. Programming Button USING THE INMOTION APP Micro-USB • If you purchased a hub, download the LEVOLOR Charging Port InMotion app to get started. ™ Indicator •... - Page 12 — When using extension brackets, mark two screw holes per bracket. CAUTION: The rear of the brackets must be flush against a flat mounting surface. Do not mount brackets on curved molding. Cellular Shades Motorized Control Lift...
- Page 13 — The top of the spacer blocks should be at the desired shade height. — If using extension brackets, attach an installation bracket to the underside of each extension bracket using the provided screws and speed nuts. Cellular Shades Motorized Control Lift...
- Page 14 — Check that the front lip of each bracket is in the front channel of the headrail. — If any brackets are not installed correctly, release the shade and reinstall. See “Removing the Shade (If Necessary)” on page 17. Snap in Place Good Cellular Shades Motorized Control Lift...
-
Page 15: Side Mount
— Check that the front lip of each bracket is in the front channel of the headrail. Snap in — If any brackets are not installed correctly, Place release the shade and reinstall. See “Removing the Shade (If Necessary)” on page 17. Good Cellular Shades Motorized Control Lift... -
Page 16: Operation Remote Operation
• Indicator light battery status: – Low (red flash) Magnetic Charging – Charging (green flash) Insert – Charged (green solid) • It is recommended to fully charge shade prior to first use. Cellular Shades Motorized Control Lift... -
Page 17: Level The Bottom Rail
Shade Remove Headrail installation bracket to release the bottom edge of the headrail. • Bottom After releasing the bottom edge, roll the back of the headrail down and out from the bracket. Cellular Shades Motorized Control Lift... -
Page 18: Additional Information And Support Cleaning Procedures
ADDITIONAL INFORMATION AND SUPPORT CLEANING PROCEDURES All LEVOLOR Cellular Shades are made of 100% polyester and with multiple cleaning options, these easy to care for shades will maintain their beautiful appearance for years to come. NOTICE: Avoid contact with window cleaning products. Improper cleaning may damage the shade and void warranty. -
Page 19: Troubleshooting
1-800-LEVOLOR or 1-800-538-6567. CONTACTING US To contact LEVOLOR Customer Service regarding any questions or concerns you may have about your new shades, you may reach us at 1-800-LEVOLOR (9:00 am – 6:00 pm EST) www.LEVOLOR.com ADDITIONAL PARTS AND SERVICES Additional or replacement parts can be ordered, or shades can be repaired or restrung through our repair center. - Page 21 Persianas celulares INSTALACIÓN • FUNCIONAMIENTO • CUIDADO Elevación con control motorizado...
- Page 22 Consulte todos los rótulos y las etiquetas de advertencia en las instrucciones y en la pantalla. Elevación con control motorizado de persianas celulares © 2022 LEVOLOR ®...
-
Page 23: Terminología De Ventanas Y Cortinas
TERMINOLOGÍA DE VENTANAS Y CORTINAS Gracias por comprar las cortinas celulares LEVOLOR . Con una instalación, operación ® y c uidado adecuados, su nueva cortina celular proporcionará años de belleza y r endimiento. Lea atentamente este folleto de instrucciones antes de comenzar la instalación. - Page 24 TERMINOLOGÍA DE VENTANAS Y CORTINAS ESTILOS DE ELEVACIÓN Cortina ascendente Riel superior Panel de tela Riel inferior Cortina descendente/ascendente Riel superior Riel central Panel de tela Riel inferior Cortina de día y de noche Riel superior Panel de tela A Riel central Panel de tela B...
-
Page 25: Vista Del Producto
INTRODUCCIÓN VISTA DEL PRODUCTO Soportes de instalación Botón de programación Puerto de carga micro USB Riel Cortina superior ascendente estándar Riel inferior No se muestra: persianas ascendentes/descendentes y día/noche Cable de carga Adaptador de Adaptador micro USB alimentación de carga magnética Control remoto Control remoto para Baterías AAA... -
Page 26: Componentes Incluidos
INTRODUCCIÓN COMPONENTES INCLUIDOS Cortina celular Tornillos de Tornillo de cabeza Tuerca de bloqueo cabeza hexagonal plana n.º 6 para usar rápido y tornillo Bloque (2 por soporte) en instalaciones finales (se incluyen dos con cada espaciador (incluidos) soporte de extensión) (opcionales) Soportes de instalación lateral/de extensión Soporte de... -
Page 27: Herramientas Y Sujetadores Que Puede Necesitar
INTRODUCCIÓN HERRAMIENTAS Y SUJETADORES QUE PUEDE NECESITAR (no incluidos) Las herramientas que necesitará para instalar la cortina variarán en función de la superficie y el tipo de soporte de instalación. Entre las herramientas que habitualmente se emplean para la instalación, se incluyen las siguientes: Cinta métrica metálica Destornilladores Llave de tuerca de... -
Page 28: Instalación
USB USO DE LA APLICACIÓN INMOTION indicadora • Si compró un concentrador, descargue la aplicación LEVOLOR InMotion para comenzar. ™ • La persiana puede emparejarse directamente con la aplicación, pero se recomienda emparejar primero con el control remoto. - Page 29 INSTALACIÓN INSTALACIÓN INTERIOR (II) Bracket Soporte PASO 1: MARCAR LA UBICACIÓN DE LOS SOPORTES • Marque entre 1" y 2" en cada jamba para ubicar el soporte. — Si en su compra se incluyen más de dos soportes de instalación, coloque el (los) soporte(s) adicional(es) espaciándolo(s) de manera uniforme entre los dos soportes de los extremos.
- Page 30 INSTALACIÓN INSTALACIÓN INTERIOR (II) PASO 2: INSTALAR LOS SOPORTES • Perfore los orificios de los tornillos con una broca de ⁄ ". • Fije los soportes de instalación con los tornillos suministrados. Se utilizan dos tornillos por soporte. • Asegúrese de que todos los soportes estén alineados entre sí.
-
Page 31: Instalación Exterior
Puerto de carga micro USB USO DE LA APLICACIÓN INMOTION • indicadora Si compró un concentrador, descargue la aplicación LEVOLOR InMotion para comenzar. ™ • La persiana puede emparejarse directamente con la aplicación, pero se recomienda emparejar primero con el control remoto. - Page 32 INSTALACIÓN INSTALACIÓN EXTERIOR (IE) • Marque con un lápiz las ubicaciones de los tornillos del soporte de instalación o extensión a través de los orificios posteriores rectangulares del soporte más grandes. Utilice 2 tornillos por soporte. • Use un nivelador para garantizar que todos los soportes están alineados. •...
- Page 33 INSTALACIÓN INSTALACIÓN EXTERIOR (IE) Taquete para panel Soporte de yeso Tornillo PASO 2: INSTALAR LOS SOPORTES NOTA: use las anclas de expansión para panel de yeso cuando instale en el panel de yeso. • Perfore los orificios para los tornillos con una broca de ⁄...
- Page 34 INSTALACIÓN INSTALACIÓN EXTERIOR (IE) Borde frontal Lengüeta con resorte Riel superior PASO 3: INSTALAR LA CORTINA Y EL RIEL SUPERIOR • Ajuste el canal frontal del riel superior en el borde frontal La parte frontal del de los soportes de instalación. soporte se ajusta a ...
-
Page 35: Instalación Lateral
INSTALACIÓN INSTALACIÓN LATERAL PASO 1: MARCAR LA UBICACIÓN DE LOS SOPORTES Utilice la instalación final del riel superior cuando las técnicas de 1 ⁄ " instalación convencional no funcionen; por ejemplo, en la abertura mínimo de una ventana arqueada. • Coloque los soportes de instalación final de manera tal que la Largo parte superior de los soportes de instalación fijados queden a ... -
Page 36: Funcionamiento Funcionamiento Remoto
FUNCIONAMIENTO FUNCIONAMIENTO REMOTO • Escanee la guía remota. CARGA DE LA BATERÍA • La batería recargable está integrada en el Botón de programación riel superior de la persiana. • Puerto de carga Para la carga estándar, retire el inserto de micro USB carga magnético del riel superior. -
Page 37: Nivelar El Riel Inferior
FUNCIONAMIENTO NIVELAR EL RIEL INFERIOR (SI ES NECESARIO) • Levante el riel inferior para ubicar las cavidades en la parte interior del riel. • Tire suavemente del riel inferior para insertar Cavidad completamente la llave Allen de ⁄ " en la cavidad. La llave se inserta completamente cuando el aro Parte interior del riel inferior de la llave toca la cavidad. -
Page 38: Información Adicional Y Asistencia
INFORMACIÓN ADICIONAL Y ASISTENCIA PROCEDIMIENTOS DE LIMPIEZA Todas las cortinas celulares LEVOLOR están hechas de 100 % poliéster y se pueden limpiar de diversas maneras. Estas cortinas son fáciles de cuidar y conservarán su hermosa apariencia en el futuro. AVISO: Evite el contacto con productos de limpieza de ventanas. La limpieza inadecuada puede dañar la cortina y anular la garantía. -
Page 39: Solución De Problemas
• Consulte los siguientes procedimientos para encontrar una solución específica a los problemas que tenga con la cortina. Si aún tiene inquietudes, comuníquese con el Servicio al Consumidor de LEVOLOR al 1-800-LEVOLOR o al 1-800-538-6567. Problema La cortina no cabe en los soportes de instalación. - Page 41 Toiles alvéolées INSTALLATION • FONCTIONNEMENT • ENTRETIEN Commande de levage motorisée...
- Page 42 Veuillez vous référer à l’ensemble des étiquettes d’avertissement qui se trouvent dans les instructions et sur le store. Commande de levage motorisée pour stores cellulaires © 2022 LEVOLOR ®...
-
Page 43: Terminologie Des Fenêtres Et Des Stores
TERMINOLOGIE DES FENÊTRES ET DES STORES Merci d'avoir acheté les toiles alvéolées LEVOLOR . Avec une installation, une ® utilisation et un entretien appropriés, votre nouvelle toile alvéolée durera des années tout en ayant belle apparence. Veuillez lire attentivement ce livret d'instructions avant de commencer l'installation. - Page 44 TERMINOLOGIE DES FENÊTRES ET DES STORES STYLES DE LEVAGE Store ascendant Rail supérieur Panneau de tissu unique Rail inférieur Store descendant/ascendant Rail supérieur Rail médian Panneau de tissu unique Rail inférieur Store jour/nuit Rail supérieur Panneau de tissu A Rail médian Panneau de tissu B...
-
Page 45: Aperçu Du Produit
POUR COMMENCER APERÇU DU PRODUIT Supports de fixation Bouton de programmation Port de charge micro USB Rail Store supérieur ascendant standard Rail inférieur Non illustré : stores à ouverture du haut vers le bas et du bas vers le haut et avec fonction jour/nuit Câble de chargement Adaptateur Adaptateur... -
Page 46: Composants Inclus
POUR COMMENCER COMPOSANTS INCLUS Toile alvéolée Vis à tête Tournevis à tête plate Écrou de verrouillage et vis hexagonale n° 6 pour utilisation (deux fournis avec chaque Cale (deux par support) avec les installations support d'extension) d’écartement aux extrémités (optionnelle) (fournis) Supports d'extension et pour installation latérale Support de retenue... -
Page 47: Outils Et Attaches Dont Vous Pourriez Avoir Besoin
POUR COMMENCER OUTILS ET ATTACHES DONT VOUS POURRIEZ AVOIR BESOIN (non inclus) Les outils dont vous aurez besoin pour installer votre store varieront en fonction de la surface d'installation et du type de support de montage. Les outils généralement utilisés pour l’installation incluent : Ruban à... -
Page 48: Installation Aperçu De L'installation
UTILISATION DE L’APPLICATION INMOTION Témoin lumineux • Si vous avez acheté un concentrateur, téléchargez l’application LEVOLOR InMotion™ pour commencer. • Le store peut être jumelé directement à l’application, mais il est recommandé de le jumeler d’abord à la télécommande. Commande de levage motorisée pour stores cellulaires... -
Page 49: Installation À L'extérieur Du Châssis
INSTALLATION INSTALLATION À L'INTÉRIEUR DU CHÂSSIS (IIC) Bracket Support ÉTAPE 1 : MARQUAGE DE L’EMPLACEMENT DES SUPPORTS • Faites une marque à 5,1 cm (2 po) de chaque montant pour indiquer l'emplacement du support. — Si votre commande comprend plus de deux s upports de fixation, placez le/les support(s) supplémentaire(s) à ... - Page 50 INSTALLATION INSTALLATION À L’INTÉRIEUR DU CHÂSSIS (IIC) ÉTAPE 2 : INSTALLATION DES SUPPORTS • Percez les trous pour les vis en utilisant une mèche de 0,2 cm ( po). • Fixez les supports de fixation à l'aide des vis fournies. Deux vis par support. • Assurez-vous que tous les supports sont bien alignés.
- Page 51 UTILISATION DE L’APPLICATION INMOTION Témoin lumineux • Si vous avez acheté un concentrateur, téléchargez l’application LEVOLOR InMotion™ pour commencer. • Le store peut être jumelé directement à l’application, mais il est recommandé de le jumeler d’abord à la télécommande. INSTALLATION À L'EXTÉRIEUR DU CHÂSSIS (IEC) ÉTAPE 1 : MARQUAGE DE...
- Page 52 INSTALLATION INSTALLATION À L'EXTÉRIEUR DU CHÂSSIS (IEC) • Tracez une marque à environ 2,5 à 5,1 cm (1 à 2 po) de chaque extrémité du rail supérieur pour indiquer l'emplacement des supports de fixation. — Laissez un espace minimal de 0,6 cm ( po) entre le bas du support de fixation et le haut de la moulure de la fenêtre.
- Page 53 INSTALLATION INSTALLATION À L'EXTÉRIEUR DU CHÂSSIS (IEC) Ancrage de cloison sèche Support ÉTAPE 2 : INSTALLATION DES SUPPORTS REMARQUE : Utilisez des chevilles d’ancrage pour un montage sur une cloison sèche. • Percez les trous pour les vis à l'aide d'une mèche de 0,2 cm ( po).
- Page 54 INSTALLATION INSTALLATION À L'EXTÉRIEUR DU CHÂSSIS (IEC) Rebord avant Languette à ressort Rail supérieur ÉTAPE 3 : INSTALLATION DU STORE – MONTAGE DU RAIL SUPÉRIEUR Le devant du support se • Ajustez la rainure avant sur le dessus du rail supérieur place sous la rainure. sur le rebord avant des supports de fixation.
-
Page 55: Installation Sur Le Côté
INSTALLATION INSTALLATION SUR LE CÔTÉ ÉTAPE 1 : MARQUAGE DE L'EMPLACEMENT DES SUPPORTS Installez le rail supérieur aux extrémités lorsque des techniques de montage conventionnelles ne sont pas possibles – par Minimum de 3,2 c m (1 p o) exemple, dans le cadre d’une fenêtre en arche. •... -
Page 56: Fonctionnement
FONCTIONNEMENT FONCTIONNEMENT DE LA TÉLÉCOMMANDE • Balayez le code pour le guide de la télécommande. BATTERY CHARGING • La pile rechargeable est intégrée au caisson du store. • Bouton de Pour une charge normale, retirez la pièce programmation insérée dans le chargeur magnétique du caisson. -
Page 57: Mettre Le Rail Inférieur À Niveau
FONCTIONNEMENT METTRE LE RAIL INFÉRIEUR À NIVEAU (AU BESOIN) • Soulevez le rail inférieur pour localiser les poches sur la face inférieure du rail. • Tirez doucement sur le rail inférieur pour insérer complètement la clé hexagonale de 0,3 cm ( Poche dans la poche. -
Page 58: Renseignements Supplémentaires Et Assistance
RENSEIGNEMENTS SUPPLÉMENTAIRES ET ASSISTANCE PROCÉDURES DE NETTOYAGE Toutes les toiles alvéolées LEVOLOR sont faites de polyester à 100 % et grâce à de nombreuses options de nettoyage, ces toiles faciles d'entretien conserveront leur belle apparence pour des années à venir. -
Page 59: Dépannage
à la clientèle au 1 800 LEVOLOR ou au 1 800 538-6567. POUR NOUS JOINDRE Pour communiquer avec le service à la clientèle de LEVOLOR ou pour toute question ou préoccupation concernant vos nouveaux stores, vous pouvez nous joindre au 1 800 LEVOLOR (de 9 h 00 à 18 h 00 HNE). - Page 60 ©2022 LEVOLOR , Inc. ® 5775 Glenridge Drive Building A 20-0048-079 Atlanta, GA 30328 1029596...
Need help?
Do you have a question about the Cellular Shades and is the answer not in the manual?
Questions and answers
my cellular bottom up will not go up
Your Levolor cellular bottom-up shades may not go up due to several possible reasons:
1. Uneven or misaligned brackets – Check that the headrail and brackets are level and tightly secured.
2. Obstruction in the shade’s path – Make sure nothing is blocking the shade as it moves.
3. Damaged or misaligned lifting strings – Look for frayed or broken strings; if found, all strings in that operation may need replacing.
4. Worn cord guides or cord lock – Inspect for grooves or sharp edges that may cause the strings to stick or wear out.
Lower the shade completely, then raise it again to see if it self-corrects. If issues persist, inspect and replace any damaged parts.
This answer is automatically generated
Cellular motorized shades repeatedly move an inch up and down fully extended to the window sill.. They do not move up and down completely.
The issue may be due to a problem with the cordless mechanism. If the shades do not fully lift or only move slightly, it can often be fixed by pulling the shade down as far as it will go, pulling out at a 45-degree angle, and gently tugging downward two to three times. Then raise the shade fully. If the issue persists, refer to the guide that came with the control device for further troubleshooting.
This answer is automatically generated