
Subscribe to Our Youtube Channel
Related Manuals for Levolor Roman Shades


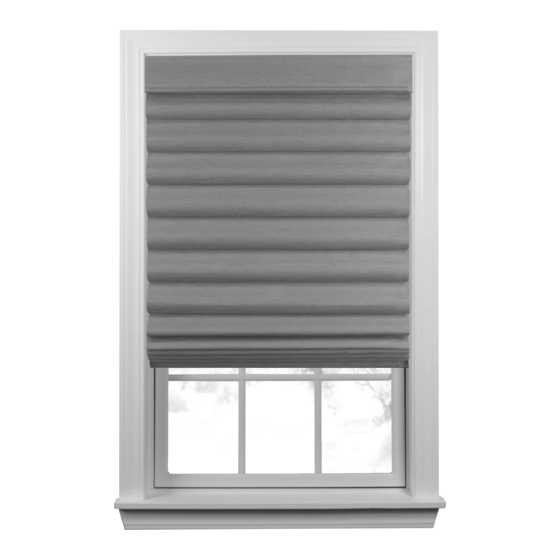
Summary of Contents for Levolor Roman Shades
- Page 1 Roman Shades Persianas romanas INSTALLATION • OPERATION • CARE INSTALACIÓN • FUNCIONAMIENTO • CUIDADO Motorized Control Lift Elevación con control motorizado...
-
Page 2: Table Of Contents
CONTENTS WINDOW AND SHADE TERMINOLOGY Getting Started Thank you for purchasing LEVOLOR Roman Shades. With proper installation, operation, ® and care, your new roman shade will provide years of beauty and performance. Please Window and Shade Terminology ..............3 thoroughly review this instruction booklet before beginning installation. -
Page 3: Getting Started
• Other accessories (optional) Standard AAA Battery Optional items will be included, Remote Control Remote Control (2-Pack) Holder if selected at time of shade order. (optional) Remote Control Kit (optional) Roman Shades Motorized Control Lift Roman Shades Motorized Control Lift... -
Page 4: Tools And Fasteners You May Need
Note: Longer screws may be needed with extension brackets and spacers, not shown. USING THE INMOTION APP Micro-USB • If you purchased a hub, download the LEVOLOR Charging Port CAUTION: Use drywall anchors (not provided) when mounting into InMotion app to get started. -
Page 5: Inside Mount (Im)
— The minimum depth for a fully recessed mount is 21/4". — Use the center screw hole when depth permits. — For shallow mounting depths, use the hole located in the upper rear corner of the bracket. Roman Shades Motorized Control Lift Roman Shades Motorized Control Lift... -
Page 6: Outside Mount (Om)
In the next 10 seconds, press and hold the on the remote until the shade jogs twice. Programming Button USING THE INMOTION APP • Micro-USB If you purchased a hub, download the LEVOLOR Charging Port InMotion app to get started. ™ Indicator •... - Page 7 Do not mount brackets on curved molding. — If using extension brackets, attach an installation bracket to the underside of each extension bracket using the provided screws and speed nuts. Roman Shades Motorized Control Lift Roman Shades Motorized Control Lift...
- Page 8 — If any brackets are not installed correctly, Snap in Place release the shade and reinstall. See “Removing the Shade (If Necessary)” on page 16. Good Roman Shades Motorized Control Lift Roman Shades Motorized Control Lift...
-
Page 9: Operation Remote Operation
First review the guide that came with your control device. • Refer to the following troubleshooting procedures for specific solutions for your shade. If questions remain, please contact LEVOLOR Customer Service at 1-800-LEVOLOR or 1-800-538-6567. Problem The shade will not fit into the installation brackets. -
Page 10: Cleaning Procedures
Improper cleaning may To contact LEVOLOR Customer Service regarding any questions or concerns damage the shade and void warranty. you may have about your new shades, you may reach us at 1-800-LEVOLOR (9:00 am – 6:00 pm EST) DUSTING www.LEVOLOR.com... - Page 11 Persianas natural INSTALACIÓN • FUNCIONAMIENTO • CUIDADO Elevación con control motorizado...
- Page 12 CONTENIDO TERMINOLOGÍA DE VENTANAS Y PERSIANAS Terminología de ventanas y persianas Gracias por comprar las persianas de fibras naturales LEVOLOR . Con una colocación, ® manejo y cuidado adecuados, su nueva persiana de fibras naturales le brindará Terminología de ventanas y persianas ............23 decoración y funcionalidad por muchos años.
-
Page 13: Vista Del Producto
INTRODUCCIÓN INTRODUCCIÓN VISTA DEL PRODUCTO COMPONENTES INCLUIDOS Soportes de colocación Botón de Persiana romana programación Puerto Riel superior de carga micro USB Persiana Tornillos de Tornillo de cabeza Tuerca de bloqueo ascendente cabeza hexagonal plana n.º 6 para usar rápido y tornillo Bloque estándar (2 por soporte) -
Page 14: Instalación
(No suministrados). • Si compró un concentrador, descargue la aplicación Si coloca la cortina de manera incorrecta, podría ocasionar que se indicadora LEVOLOR InMotion para comenzar. ™ caiga y podría provocar una lesión. •... -
Page 15: Montaje Interior (Mi)
INSTALACIÓN INSTALACIÓN MONTAJE INTERIOR (MI) MONTAJE INTERIOR (MI) Para colocaciones de poca profundidad, inserte el tornillo en la esquina superior trasera del soporte. Soporte Soporte Bracket Bracket Soporte Screw Tornillo Screw PASO 1: MARCAR LA UBICACIÓN DE LOS SOPORTES PASO 2: COLOCAR LOS SOPORTES •... -
Page 16: Montaje Exterior (Me)
Puerto de carga micro USB USO DE LA APLICACIÓN INMOTION • indicadora Si compró un concentrador, descargue la aplicación LEVOLOR InMotion ™ para comenzar. • La persiana puede emparejarse directamente con la aplicación, pero se recomienda emparejar primero con el control remoto. - Page 17 INSTALACIÓN INSTALACIÓN MONTAJE EXTERIOR (ME) MONTAJE EXTERIOR (ME) PASO 1: MARCAR LA UBICACIÓN DE LOS SOPORTES • Use un lápiz para marcar ligeramente cada extremo del riel superior. — De manera alternativa, mida el ancho del riel superior y use ese ancho para marcar los puntos finales de este sobre la abertura de la ventana.
- Page 18 CÓMO COLOCAR COMPONENTES ADICIONALES INSTALACIÓN MONTAJE EXTERIOR (ME) COLOQUE LA CENEFA IMPORTANTE: empareje el control remoto antes de instalar la cenefa. • Enganche la parte superior de la cenefa sobre el borde superior del riel superior. Borde frontal • Presione cuidadosamente la cenefa hacia abajo y hacia atrás contra el riel superior hasta que la cenefa se fije en su lugar.
-
Page 19: Información Adicional Y Asistencia
Consulte los siguientes procedimientos para encontrar una solución específica a los problemas que tenga con la persiana. Si aún tiene preguntas, comuníquese con el Servicio de Atención al Cliente de LEVOLOR al 1 -800-LEVOLOR o al 1 -800-538-6567. BATTERY CHARGING Problema La persiana no cabe en los soportes de colocación. -
Page 20: Procedimientos De Limpieza
No se recomienda la limpieza ultrasónica y tampoco está cubierta por la garantía. La limpieza inadecuada puede dañar la persiana y anular la garantía. Para ponerse en contacto con el Servicio de Atención al Cliente de LEVOLOR y plantear alguna duda o problema que pueda tener acerca de su nueva persiana, llámenos al 1-800-LEVOLOR... - Page 21 ©2022 LEVOLOR , Inc. ® 5775 Glenridge Drive Building A 20-0048-083 Atlanta, GA 30328 1029597...
Need help?
Do you have a question about the Roman Shades and is the answer not in the manual?
Questions and answers