
Related Manuals for LEGRAND Raritan Dominion User Station


Summary of Contents for LEGRAND Raritan Dominion User Station
- Page 1 Dominion User Station User Guide Release 4.4.0 Copyright © 2021 Raritan, Inc. KXUST-1K-v4.4.0-E July 2021 255-62-0011-00...
- Page 2 This document contains proprietary information that is protected by copyright. All rights reserved. No part of this document may be photocopied, reproduced, or translated into another language without express prior written consent of Raritan, Inc. © Copyright 2021 Raritan, Inc. All third-party software and hardware mentioned in this document are registered trademarks or trademarks of and are the property of their respective holders.
- Page 3 What's New in the Dominion User Station User Guide for Release 4.4.0 Multiple Video with Three or More Dominion KX IV-101 Devices. Two (dual) • video ports were previously supported: Multi KVM Access with Dominion KX4-101 devices (on page 48) •...
-
Page 4: Table Of Contents
Contents What's New in the Dominion User Station User Guide for Release 4.4.0 Introduction Overview ..............................1 Package Contents ............................2 Product Features ............................2 Product Features ..........................2 Introduction to the User Station ........................3 Front View ............................3 Rear View ............................ - Page 5 Contents Dominion Serial Access Module (DSAM) Ports ................41 Managing Targets and Access Methods Adding Targets and Access Methods ......................43 SSH, VNC, and RDP Access ......................44 WEB Access ............................. 45 ESXi Access ............................46 Multi KVM Access with Dominion KX4-101 devices ................ 48 Editing and Deleting Targets and Access Methods ..................
- Page 6 Contents Peripheral Devices and USB Settings ......................92 Audio Device ........................... 94 Virtual Media........................... 96 SmartCard Reader ......................... 102 Disconnecting a Virtual Device ...................... 106 USB Profiles ........................... 107 Power Control ............................109 External Device Control ..........................110 View Settings ............................111 Fit window to Target ........................
- Page 7 Contents LDAP Login Failure Message ......................158 CommandCenter Secure Gateway Integration ..................159 CC-SG Integration Requirements ....................159 Enabling CC-SG Integration ......................160 Logging in with CC-SG Integration ....................162 Navigator with CC-SG Integration ....................163 ESXi Access Requirements......................166 CC-SG Authentication Fallback ......................
- Page 8 Contents About this Device ............................. 213 System Settings Date/Time..............................214 Time Zone ............................217 Keyboard ..............................218 Keyboard Layouts .......................... 219 Mouse Keys ........................... 220 Monitor ..............................222 Mouse ............................... 223 Network ..............................224 Network Connections - Ethernet....................224 Network Connections - Bond Connections ................... 235 OpenVPN Connections ........................
- Page 9 Contents Session Close / Logout ..........................255 Parameters ............................ 255 Response ............................256 Example ............................256 Access Functionality ..........................256 Get Devices and Targets ........................ 256 Get Devices and Ports ........................257 Get Targets and Access Points ...................... 260 Handling of Access Client Sessions ......................262 Create Access Client Sessions .......................
-
Page 11: Introduction
Introduction This chapter introduces the Dominion User Station (Dominion User Station). In This Chapter Overview ....................... 1 Package Contents ....................2 Product Features ....................2 Introduction to the User Station................3 Introduction to the Software ................5 Overview The Dominion User Station (DKX3-UST, DKX4-UST) is designed to access servers and computer devices connected to Dominion KX III and Dominion KX IV-101 KVM switches from customer LAN/WAN networks. -
Page 12: Package Contents
Appendix A: Introduction A USB Keyboard, USB mouse, and one or two HDMI- or DisplayPort-interfaced monitors Analog or digital audio appliances Optional smart card reader for remote IT device authentication External drives as virtual media, such as CD-ROM USB drives for virtual media or User Station software update Optional integration with CC-SG Package Contents •... -
Page 13: Introduction To The User Station
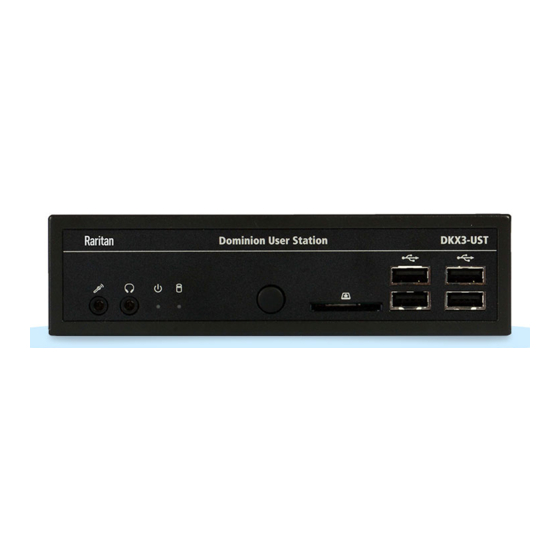
Appendix A: Introduction Introduction to the User Station Front View DKX4-UST: 1. Microphone input 2. Audio output DKX3-UST Version 2: 3. Power LED 4. Hard disk LED 5. Power button 6. SD card reader (not available) 7. USB 2.0 and 3.1* ports ... -
Page 14: Rear View
Appendix A: Introduction Rear View DKX4-UST: 1. RS232/RS422/RS485 2. RS232 3. DC power input DKX3-UST Version 2: 4. Gigabit LAN port 1 5. Gigabit LAN port 2 6-7. USB Ports KX3-UST and KX3-UST Version 2: USB 2.0, 3.0 KX4-UST only: USB 3.1 ... -
Page 15: Introduction To The Software
Appendix A: Introduction Introduction to the Software After powering on the User Station, the Login Screen is shown. After successfully logging in to the User Station, the Main Screen displays. Login Screen... - Page 16 Appendix A: Introduction • System date and time • Keyboard language (default US English) and Restart or Shut Down Login: The login icon indicates the authentication type being used: Local, • LDAP, or CC-SG. • A local authentication checkbox is available whenever the username "admin"...
-
Page 17: Main Menu, Port Navigator, Toolbar
Appendix A: Introduction Main Menu, Port Navigator, Toolbar The screen displayed after login is the Main Screen. When logging in for the first time, a welcome message is displayed. The Main Menu and toolbar is located at the bottom of this screen. This toolbar shows the Main Menu, shortcut icons and lists any open User Station and KVM Client windows. -
Page 18: Online Help
Appendix A: Introduction You can right-click any open window in the Toolbar to minimize, maximize, move, resize and so on. • Shortcut icons for viewing/configuring system settings: Hover your mouse pointer over an icon to view information, or click or right-click it to configure settings. -
Page 19: Help On Hotkeys
Appendix A: Introduction Help on Hotkeys You can also access this list of pre-programmed and user-configurable hot keys for the User Station in the Main Menu. • Choose Main Menu > Help > Help on Hotkeys. Hotkeys in the Dominion User Station Dominion User Station has a number of pre-defined and user configurable hotkeys implemented to open tools, move or resize windows, open target windows or perform some operations. - Page 20 Appendix A: Introduction The next keys are used to move and resize the open windows and switch between windows. They are not configurable individually but can be enabled or disabled globally.NOte that the keypad keys are functional independently of the status of Num Lock. Keypad 4, 6. 8, 2 act as Left, Right, Up and Down respectively.
- Page 21 Appendix A: Introduction Target Hotkeys You can configure target hotkeys for quick access to KVM ports or other targets. For KVM ports, open the Configuration, select a KX device, select a port, and click Edit Preferences. For other targets, select Targets, choose an Access Point to this target, then click Edit Preferences.
-
Page 22: Getting Started
Getting Started This chapter introduces the basic installation and configuration. In This Chapter Installation and Configuration ................12 Basic Network Settings ..................21 Logout or Shutdown ................... 23 VESA Mount (Optional) ..................23 Rackmount Using L-type Brackets (Optional) ............. 25 Installation and Configuration Step 1: Connect the Equipment Only the basic hardware installation is described. - Page 23 Appendix A: Getting Started DKX4-UST: DKX3-UST Version 2: DKX3-UST Version 1: 1. Power ON all devices.
-
Page 24: Step 2: Initial Log In To The Dominion User Station
Appendix A: Getting Started Step 2: Initial Log in to the Dominion User Station Use the factory default user credentials for initial login. User credentials are case sensitive. • Username: admin Password: raritan • Changing the default password is enforced at first login. For details on password changes, see Change Password (on page 135). - Page 25 Appendix A: Getting Started Choose Main Menu > User Station Configuration. For the Main Menu's Main Menu, Port Navigator, Toolbar location, see (on page 7). 2. Click New. 3. Enter the data for the KX Device (a KX III or KX IV-101 KVM switch).
- Page 26 Appendix A: Getting Started Type the KVM switch's IPv4/IPv6 address or hostname in this field. The default Discovery Port and HTPS Port can be customized if needed. Select the authentication method. Normal: You must enter login credentials for the KVM switch.
-
Page 27: Step 4: Access Kvm Switches And Ports (Without Cc-Sg Integration)
Appendix A: Getting Started Step 4: Access KVM Switches and Ports (without CC-SG integration) You access the computer devices connected to a device's ports and your other targets through the Port Navigator window, which contains 3 panels: • Favorite Access shows the access you have configured as favorites. See Configuring KVM Ports (on page 36). -
Page 28: Step 5: Use The Kvm Client
Appendix A: Getting Started Note: To show KVM ports whose status is down, see Using Filters (on page 65). Click the desired KVM port's icon , and select Open in new KVM client or or Open in current KVM client. Or, click the port name: single-click opens it in the current KVM Client window, double-click opens it in a new KVM Client window, right-click shows the KVM Client options. - Page 29 Appendix A: Getting Started The toolbar is split into two groups. The left group comprises the following buttons that you can use to change settings and properties. Button Function Connection Properties: Manages streaming video performance over your connection to the target server. The settings are stored persistently for the accessed port.
- Page 30 Appendix A: Getting Started Button Function View: Shows several display options, such as Scale Video and Full-Screen Mode. The right group comprises the following shortcut buttons for frequently-used functions. These functions are also available in the left group, but the shortcut buttons allow quick access with a click.
-
Page 31: Basic Network Settings
Appendix A: Getting Started Automatic Reconnection If your connection to the client fails, an automatic reconnection will be attempted in most cases. Reconnection is attempted at 30 second intervals until a successful connection is made. A message appears when the connection drops with information about reconnection timing and options to cancel or quit. - Page 32 Appendix A: Getting Started Select the desired one and click Edit. 3. Click the IPv4 Settings tab. 4. In the Method field, select one of the following options: Automatic (DHCP): The DHCP server automatically assigns an IPv4 address. This is the default. Automatic (DHCP) addresses only: The DHCP server automatically ...
-
Page 33: Logout Or Shutdown
Appendix A: Getting Started Ethernet Settings 6. For additional settings, click the Ethernet tab. See page 233). 7. Click OK. The new network settings apply now. Logout or Shutdown Both logout and shutdown commands are available under Leave in the Main Menu. - Page 34 Appendix A: Getting Started 2. Attach the VESA mount securely to the back of your monitor using four appropriate screws. 3. Align two screw holes on each side of the Dominion User Station with those on the VESA mount. 4. Tighten two sides securely using four appropriate screws.
-
Page 35: Rackmount Using L-Type Brackets (Optional)
Appendix A: Getting Started 5. The Dominion User Station is now securely attached to the monitor. Rackmount Using L-type Brackets (Optional) To mount the User Station in a 19-inch data center rack, you must purchase the L-type rackmount kit from Raritan. One rackmount kit contains two L-type brackets, the cable-support bar and a number of screws. - Page 36 Appendix A: Getting Started 2. Secure the cable-support bar to the back end of the L-type brackets, using two of the included screws. Letter Item Cable-support bar Front arms of the L-type brackets 3. Attach the L-type brackets to the rack through the screw holes on the front arms, using your fasteners.
-
Page 37: Managing Kvm Switches And Ports
Managing KVM Switches and Ports KVM switches and their KVM ports are managed in the User Station Configuration window. Note: If you are using CC-SG integration, you do not need to add KVM switches in this way. See CommandCenter Secure Gateway Integration (on page 159). - Page 38 Appendix A: Managing KVM Switches and Ports The User Station Configuration window opens. 1. Configuration tabs: Configuration: Manage KX Devices and Targets. See the other sections in this chapter. Preferences: Set personal preferences, such as audio settings. See Setting User Preferences (on page 117).
-
Page 39: Adding Kvm Switches
Appendix A: Managing KVM Switches and Ports Adding KVM Switches All KX devices added to this User Station can be seen by all users who log in to this User Station although they can only access those switches if they have provided proper user credentials. - Page 40 Appendix A: Managing KVM Switches and Ports 2. The following page opens, and the user must enter the required Step 3: Add KX Devices (without CC-SG integration) information. See page 14). Click Save, and the new KVM switch's content is shown. ...
-
Page 41: Editing Kvm Switches
Appendix A: Managing KVM Switches and Ports user credentials for a KVM switch are saved on a per-user basis. Other users must enter and save their own user credentials for the KVM switches you added. See Editing KVM Switches (on page 31). Editing KVM Switches Added KVM switches are listed in the User Station Configuration window. -
Page 42: Deleting Kvm Switches
Appendix A: Managing KVM Switches and Ports 3. Click Save. Note: If you enter incorrect user credentials for a KVM switch, you may be blocked if User Blocking has been enabled on that KVM switch and too many incorrect attempts are made. When this occurs, contact the KVM switch's system administrator for help. -
Page 43: Importing Kvm Switches
Appendix A: Managing KVM Switches and Ports Importing KVM Switches Bulk Import and Update allows you to add or update multiple KVM switches at once using a CSV file found in the root folder of a connected USB storage device. When you import, Dominion User Station adds devices detected as new by their IP address/hostname. - Page 44 Appendix A: Managing KVM Switches and Ports 2. The Storage list displays all CSV files found in the root folder of connected USB storage devices. 3. Click the file you want to import. The Bulk Import page opens to display the file details: File name and size ...
- Page 45 Appendix A: Managing KVM Switches and Ports Note: If errors are listed, the import button is disabled. Correct the file and try again. 4. Click Start the Import/Update in the details dialog. Import progress shows in the dialog. When complete, a success message appears in the main page.
-
Page 46: Bulk Import Examples
Appendix A: Managing KVM Switches and Ports Bulk Import Examples Import / update listed KX switches: 192.168.2.104,admin,raritan 192.168.2.103,thomas,thomas,5000,443 192.168.3.30,admin,raritan 192.168.5.52,user,password Special characters and escaping Line 1 is an example of using comma in a value. Line 2 is an example for escaping ", the resulting password string is "password" 192.168.2.104,admin,"rar,itan"... - Page 47 Appendix A: Managing KVM Switches and Ports The icon shown in the top-right corner of the Ports section indicates the KVM port information retrieval status. In this example, there is a Port Data Retrieval Status green checkmark. See (on page 39). 2.
-
Page 48: Unavailable Hotkeys For Port Access
Appendix A: Managing KVM Switches and Ports Automatically connect Speaker will automatically be connected to this port Speaker at target launch. Automatically connect Microphone will automatically be connected to this Microphone port at target launch. Include in Port Add the port to the port scanner. See Port Scanner Scanner (on page 68). -
Page 49: Port Data Retrieval Status
Appendix A: Managing KVM Switches and Ports Unavailable hot keys Notes Ctrl + Alt + C Ctrl + Alt + F These hotkeys can be used if you first Ctrl + Alt + L disable them as User Station hotkeys. See Hotkeys for Controlling the User Station. - Page 50 Appendix A: Managing KVM Switches and Ports Click this icon to view additional information. The icon changes depending on the current retrieval status of KVM port information. Icon Port data retrieval state Port information on the selected KVM switch is accessible. Port information on the selected KVM switch is NOT accessible.
-
Page 51: Dominion Serial Access Module (Dsam) Ports
Appendix A: Managing KVM Switches and Ports Dominion Serial Access Module (DSAM) Ports Dominion KX III supports serial targets through Dominion Serial Access Modules (DSAM) connected to the KX III switch. These serial targets are supported in the Dominion User Station. DSAM ports appear on the User Station when the KX device is added, similar to KVM ports. -
Page 52: Managing Targets And Access Methods
Managing Targets and Access Methods Targets and Access methods are managed in the User Station Configuration window. See User Station Configuration (on page 27). The Targets and Access methods feature offers different ways to view, manage, and connect to targets, using KVM port access, as well as RDP, SSH, and VNC. Additionally, you can add access to a Web application or ESXi virtual machine. -
Page 53: Adding Targets And Access Methods
Appendix A: Managing Targets and Access Methods Adding Targets and Access Methods To add targets and access methods: 1. In Main Menu, open the User Station Configuration window, then click Targets. 2. The Targets list appears. Click New. 3. In the Add Access page, you will name the Target, and add the first access method. -
Page 54: Ssh, Vnc, And Rdp Access
Appendix A: Managing Targets and Access Methods SSH VNC RDP WEB ESXi Dual KVM 4. Next steps vary based on Access Type. SSH, VNC, and RDP Access (on page 44) WEB Access (on page 45) ... -
Page 55: Web Access
Appendix A: Managing Targets and Access Methods User Credentials: Enter the username and password as required for the access type. *VNC requires password only. 3. Click Save. SSH/VNC/RDP access is added to the target and a list of all current access methods with options for editing displays. -
Page 56: Esxi Access
Appendix A: Managing Targets and Access Methods For example: https://www.example.com/test 4. Click Save. WEB access is added to the target and a list of all current access methods with options for editing displays. ESXi Access The ESXi access method allows you to access and control VMware ESXi virtual machines from the User Station Navigator using the VMware “ESXi Embedded Host Client.”... - Page 57 Appendix A: Managing Targets and Access Methods 2. Select ESXi as the Access Type. 3. Enter the IP Address or Hostname of the ESXi Server. 4. Enter the Virtual Machine ID. The ID can be found in the address bar of a browser where the URL to the virtual machine is displayed.
-
Page 58: Multi Kvm Access With Dominion Kx4-101 Devices
Appendix A: Managing Targets and Access Methods Multi KVM Access with Dominion KX4-101 devices You can configure two or more KVM ports as a virtual multi-monitor KVM target. These independent ports are treated as a multi-monitor port group. Important: Only Dominion KX4-101 ports connected to the same target PC are supported. - Page 59 Appendix A: Managing Targets and Access Methods Supported Orientations: • Horizontal Dual Vertical Dual • • Horizontal Triple • Vertical Triple Horizontal Quad • • Vertical Quad Quad 2x2 • • Horizontal 5 Ports • Vertical 5 Ports Horizontal 6 Ports •...
-
Page 60: Editing And Deleting Targets And Access Methods
Appendix A: Managing Targets and Access Methods 5. Click Save. The new M-KVM target/access is added to the Targets list. Editing and Deleting Targets and Access Methods Targets and Access methods are listed in the User Station Configuration window. You cannot delete KVM access, but all other access methods can be deleted. A Target must have at least one access method, or the target is deleted. - Page 61 Appendix A: Managing Targets and Access Methods 2. The Targets list appears. Use the Actions icons to edit as needed. Edit settings for a port or access point. Configuring KVM Ports (on page 36) for details on KVM port settings. Configuring Access Settings page 52) for all other types.
-
Page 62: Configuring Access Settings
Appendix A: Managing Targets and Access Methods Configuring Access Settings For each access type, you can configure General and Target Window Settings. Most settings are shared among all types of targets, but there are some unique settings in each category. Unique settings for each access type are outlined in the examples below. - Page 63 Appendix A: Managing Targets and Access Methods VNC Access Settings:...
- Page 64 Appendix A: Managing Targets and Access Methods SSH Access Settings:...
- Page 65 Appendix A: Managing Targets and Access Methods WEB Access Settings:...
-
Page 66: Known Limitations On Targets
Appendix A: Managing Targets and Access Methods ESXi Access Settings: Known Limitations on Targets There are some known limitations on how Target access sessions function compared to typical KVM Client sessions. When opening a session, "Open in new / Open in current" is available for •... - Page 67 Appendix A: Managing Targets and Access Methods If RDP connections to Windows targets fail, check these settings. Open the • Edit Group Policy tool from Control Panel or use the Windows Search dialog (Windows Key + R, then type in gpedit.msc). Browse to: Local Computer Policy>Computer Configuration>Administrative Templates>Windows Components>Remote Desktop Services>Remote Desktop Session Host>Remote Session Environment.
-
Page 68: Navigation And Access
Navigation and Access The Port Navigator contains three panels for accessing your ports and other targets: Favorite Access Devices Targets And two panels for managing client windows: Window Management Window Layouts The Navigator remembers the last-opened panel and returns to it when Navigator is opened again. -
Page 69: Port Navigator
Appendix A: Navigation and Access To use Window Layouts: 1. Open the Window Layouts panel. 2. Click a window layout to open it. You must setup and save layouts before Window Layouts you can select them here. See (on page 130) for more details and configuration. - Page 70 Appendix A: Navigation and Access The Port Navigator window opens. 1. Search, Filters, and Help: Search: Searches for ports, switches, or targets and access points containing the search word(s). See Using Search (on page 65). Additional Filters: Determines which items are displayed in this window based on connectivity and availability.
- Page 71 Appendix A: Navigation and Access Left-click on the Target opens the appropriate client. If there is more than one Access Point defined, the following hierarchy applies for which type of Access to use: KVM RDP VNC ...
- Page 72 Appendix A: Navigation and Access If a secondary monitor is available for KVM or VNC targets, you can choose to open the target in the secondary monitor. Also on the right-click menu, choose Open Port Settings to jump to configuration. The default is to show items whose status is Up.
-
Page 73: Identifying States Of Kvm Switches And Ports
Appendix A: Navigation and Access Identifying States of KVM Switches and Ports In the Port Navigator window, different icons and colors are applied to indicate current states of the added KVM switches and ports. Icon and color information is available by clicking the question mark icon... -
Page 74: Identifying External Media
Appendix A: Navigation and Access Identifying External Media When external media are connected to a port via virtual media, the media icons display after the port name/number. Icon Port state Mass Storage ISO/CD device Microphone Speaker Smart Card Reader Dual Video Port Status The primary port must have Status=Up to make a connection to both ports. -
Page 75: Using Search
Appendix A: Navigation and Access Using Search The search box allows you to search for the KVM ports or switches that match the user's search words. To search for KVM ports or switches: 1. Open the panel where you want to perform the search function. To search for a KVM switch, click the Devices panel. - Page 76 Appendix A: Navigation and Access To change the filter: 1. Click Filters, and the following checkboxes will appear. 2. Select or deselect any checkboxes to determine what is shown. Checkbox KVM switch's state Normal 1. The KVM switch can communicate with the User Station, and the device state is normal.
- Page 77 Appendix A: Navigation and Access 2. For Target Access Type, select the access types you want to include. 3. When completed, click Filters again to hide the options.
-
Page 78: Port Scanner
Port Scanner The Port Scanner displays an assortment of ports that you select, by scanning through each connection for a specified period of time. You can launch a KVM connection to any port shown in the scanner. The Port Scanner can also save target snapshots to an external USB device, when enabled. -
Page 79: Operating The Port Scanner
Appendix A: Port Scanner The scanner allows you to pause and restart the scanning, open KVM • sessions, show and hide thumbnails of each port, and set the scan options. Operating the Port Scanner (on page 69). • Audit log entries are created for each individual scanned port when you scan KX2-101/KX4-101 ports. - Page 80 Appendix A: Port Scanner The thumbnail preview shows all included ports. Choose vertical or horizontal placement in the scanner options.
-
Page 81: Scanner Options
Appendix A: Port Scanner The currently displayed port is highlighted in the thumbnails preview. Click the thumbnail once to view the port in the scanner. Double-click the thumbnail to open a KVM session to the port. Note that the default action Access Client of a double-click can be configured in Launch Settings. -
Page 82: Port Scanner Settings
Appendix A: Port Scanner 5. Click OK. Port Scanner Settings You can configure the scanner intervals, delays, and orientation, and specify storage of snapshots from the scanner. Note that you can also configure Scanner Options intervals and orientation from the Port Scanner window. See (on page 71),. - Page 83 Appendix A: Port Scanner indicates the setting is disabled. 3. Click Edit to make changes. 4. To set Intervals and Delays: Port Display Interval (1..300 sec): Select the number of seconds to display each port before switching to next...
- Page 84 Appendix A: Port Scanner Interval between Ports: Select the number of seconds to pause after Port Display Interval ends. 5. To set Snapshot Recording: Enable Snapshot Recording: Click the checkbox to turn the feature on. Make sure a USB drive is accessible. ...
-
Page 85: Port Scanner Grid View
Appendix A: Port Scanner Select the Pause Scanner when opening KVM Sessions checkbox if the scanning should stop when you open a port into a full KVM session. 7. Click Save. Port Scanner Grid View The User Station port scanner offers a "grid" or "matrix" view option of ports from different Dominion devices. - Page 86 Appendix A: Port Scanner The thumbnails section fills the entire space; if preferred, the live preview section can be hidden.
-
Page 87: Using The Kvm Client
Using the KVM Client A KVM Client window opens after launching a port where a server is physically connected. When dual video ports are configured, connecting to the dual video Dual port group opens two KVM client windows that are bound together. See Video Port Connections (on page 116). -
Page 88: Connection Properties
Appendix A: Using the KVM Client Connection Properties Connection properties manage streaming video performance over connections to target servers. The properties are applied only to your connection, not the connection of other users accessing the same target server. To configure connection properties: 1. - Page 89 Appendix A: Using the KVM Client Setting Description Noise Filter This slider controls the noise filter threshold. Left: higher threshold. Right: lower threshold. Noise Filter (on page 81). Reset to Defaults Reset connection properties to the factory defaults. 3.
-
Page 90: Default Connection Properties
Appendix A: Using the KVM Client Item Description Rendered FPS Number of frames per second that were displayed onscreen. Usually this number is similar to "Decoded FPS", but it may be lower on high graphics demand. Connection Time Duration of the current connection. Connected Users Number of connected users. -
Page 91: Color Accuracy
Appendix A: Using the KVM Client Color Accuracy When Color Accuracy is selected, all video modes are rendered in full 24-bit color with more compression artifacts. This setting applies to viewing video streams such as movies or other broadcast streams. In lower quality video modes, sharpness of fine detail, such as text, is sacrificed. -
Page 92: Keyboard Macros
Appendix A: Using the KVM Client Keyboard Macros Click to select one of the pre-programmed hotkey macros. Note: If you have manually created any hotkey macros and have them enabled, these macros are displayed below "Send LeftAlt+Tab." See Managing Keyboard Macros (on page 123). -
Page 93: Mouse Settings
Appendix A: Using the KVM Client Mouse Settings You can operate in either single mouse mode or dual mouse mode. Single mouse mode displays only one mouse pointer while dual mouse mode displays two. In any mouse mode, when the mouse pointer lies within the KVM Client's target server window, mouse movements and clicks are directly transmitted to the target server. -
Page 94: Synchronize Mouse
Appendix A: Using the KVM Client Synchronize Mouse In the dual mouse mode, the Synchronize Mouse command forces realignment Dual Mouse of the target server's mouse cursor with the User Station's. See Modes (on page 85). To synchronize the mouse cursors: •... -
Page 95: Dual Mouse Modes
Appendix A: Using the KVM Client 2. To return to the single mouse mode, click anywhere on the target server's image in the KVM Client. Dual Mouse Modes In the dual mouse modes, two cursors appear onscreen. They are: The mouse cursor of the User Station. •... - Page 96 Appendix A: Using the KVM Client Automatic Mouse Mode In this mode, the target server's mouse settings are detected and the mouse cursors synchronized accordingly, allowing mouse acceleration on the target server. This mode is the default for non-VM target servers. Note: A non-VM target server is the target server using a CIM that does not support virtual media.
-
Page 97: Mouse Synchronization Tips
Appendix A: Using the KVM Client Note: Automatic mouse synchronization does not work with UNIX target servers. Standard Mouse Mode Standard mouse mode uses a standard mouse synchronization algorithm. The algorithm determines relative mouse positions on the User Station and target server. -
Page 98: Video Settings
Appendix A: Using the KVM Client Video Settings Click to open the Video Settings dialog. Video Sensing settings: Setting Description Auto Sense Video Automatically detects the target server's Settings video settings (resolution, refresh rate) and redraws the video screen. Clicking in the toolbar results in the same video re-sensing function. - Page 99 Appendix A: Using the KVM Client Setting Description Quick Sense Video Uses a quick video Auto Sense to show the Mode target server's video sooner. This option is especially useful for entering a target server's BIOS configuration right after a reboot. Advanced Settings Adjusts the clock, phase, horizontal and vertical offset.
-
Page 100: Advanced Video Settings
Appendix A: Using the KVM Client Advanced Video Settings In the Video Settings dialog, click Advanced Settings in the Video Sensing section to show additional settings. Click , drag sliders, or type a new numeric value in the text box to adjust corresponding settings. -
Page 101: Advanced Color Settings
Appendix A: Using the KVM Client Setting Description Phase Phase values range from 0 to 31 and will wrap around. Stop at the phase value that produces the best video image for the active target server. Horizontal Offset Controls the horizontal positioning of the target server display on your monitor. -
Page 102: Peripheral Devices And Usb Settings
Appendix A: Using the KVM Client Click , drag sliders, or type a new numeric value in the text box to adjust corresponding settings. Setting Description Brightness Red Controls the brightness of the target server's display for the red signal. Brightness Green Controls the brightness of the green signal. - Page 103 Appendix A: Using the KVM Client card reader will be temporarily disconnected while connecting the audio or virtual media device. Section Description • Audio Device ... Connect New Device Click this button to virtually connect an audio device to the target server. Audio Device (on page 94).
-
Page 104: Audio Device
Appendix A: Using the KVM Client Audio Device The User Station supports end-to-end, bidirectional, digital audio connections with a target server for digital audio playback and capture devices. One of the following CIMs must be used: D2CIM-DVUSB • • D2CIM-DVUSB-DVI D2CIM-DVUSB-HDMI •... - Page 105 Appendix A: Using the KVM Client 2. Click the "Audio Device ..." button. The Connect Audio Device dialog appears. Checkbox Description Connect Playback To manually connect an available audio Device (Speaker / playback device to the target server, Headphones) select this checkbox. ...
-
Page 106: Virtual Media
Appendix A: Using the KVM Client Checkbox Description Connect Capture To manually connect an available audio Device recording device to the target server, (Microphone) select this checkbox. Set the recorded audio format in the Audio Format field. Automatically Connect at Startup: The selected microphone will automatically be connected to the current target server whenever that target is... - Page 107 Appendix A: Using the KVM Client Supported For the VM types supported by the Dominion User Station, see Virtual Media Types (on page 97). Prerequisites for Using Virtual Media KVM switch requirements: • If you want to access virtual media, your "KVM switch" permissions must be set to allow access to the relevant KVM ports, as well as virtual media access (VM Access port permission) for those ports.
- Page 108 Appendix A: Using the KVM Client Connecting Local USB Drives and Local Disk Images This option mounts an entire USB drive virtually onto the target server when you select the Local USB Drive option. Use this option for external drives only. It does not include CD-ROM, or DVD-ROM drives.
- Page 109 Appendix A: Using the KVM Client The media will be mounted on the target server virtually. You can access the media just like any other drive. Note: If you are working with files on a Linux target server, use the Linux Sync ®...
- Page 110 Appendix A: Using the KVM Client 2. Click the "CD-ROM Device / ISO File ..." button. The Connect CD-ROM Drive / ISO Image dialog appears. 3. For USB CD-ROM/DVD-ROM drives: Select the Local CD-ROM Drive option. b. Choose the drive from the Local CD-ROM Drive drop-down list, which shows all available CD-ROM/DVD-ROM drive names.
- Page 111 Appendix A: Using the KVM Client 6. Click OK. The media will be mounted on the target server virtually. You can access the media just like any other drive. To disconnect the CD-ROM , DVD-ROM or ISO image from the target server: Disconnecting a Virtual Device (on page 106).
-
Page 112: Smartcard Reader
Appendix A: Using the KVM Client SmartCard Reader If any target server requires a smart card for authentication, then mount a smart card reader onto it. If other virtual devices than the card reader are also required, it is strongly recommended to connect them prior to the card reader. - Page 113 Appendix A: Using the KVM Client If this button is disabled, it may be impacted by the KX III KVM switch's settings. See Card Reader Restriction Caused by KX III KVM Switch Settings. 4. Select the desired card reader from the list shown in the dialog. To automatically connect the selected card reader to the current target ...
- Page 114 Appendix A: Using the KVM Client 6. When the card reader is listed as a virtual device in the "Audio, Mass Storage and SmartCard Devices" dialog, you can insert the card. To disconnect the card reader from the target server: Click the Unmount button in the "Audio, Mass Storage and SmartCard •...
- Page 115 Appendix A: Using the KVM Client Emulating the Card Reinsertion If the authentication on the target server fails while the card is being properly inserted into the card reader, you can attempt to solve the issue by removing and reinserting the card. The User Station is able to emulate the card reinsertion without physically removing and reinserting the card.
-
Page 116: Disconnecting A Virtual Device
Appendix A: Using the KVM Client The card is not detected. You can emulate the card reinsertion to re-detect Emulating the Card Reinsertion it. See (on page 105). Disconnecting a Virtual Device When the KVM Client is closed, the virtual media connection to the target server is closed. -
Page 117: Usb Profiles
Appendix A: Using the KVM Client 3. Click the Disconnect button for the device you want to disconnect. Click the Unmount button if you are disconnecting the smart card reader. 4. Click Yes on the confirmation message. USB Profiles Usually the "Generic"... - Page 118 Appendix A: Using the KVM Client If intended, click the Help button to view information similar to Profile Overview (on page 108). For detailed information of each USB profile, see the section titled "Available USB Profiles" in the KX III KVM switch's user documentation, which is accessible from the KVM switch application or the Raritan website's Support page...
-
Page 119: Power Control
Appendix A: Using the KVM Client Power Control You can power on, power off, and power cycle a target server through the outlet(s) it is connected to. This power control button is enabled only when the power control requirements are met. Power control requirements: •... -
Page 120: External Device Control
Appendix A: Using the KVM Client External Device Control KX4-101 targets may have connected external devices that can be controlled. 1. Click the External Device icon in the toolbar to open the settings: 2. The device state is listed. 3. Enabled devices can be controlled using the Actions options. Turn External Device On/Off: Click On or Off to control terminal output ... -
Page 121: View Settings
Appendix A: Using the KVM Client View Settings Click to show available view options. Fit window to Target The "Fit window to Target" command enlarges or shrinks the size of the KVM Client window to the target server's video resolution. The KVM Client's scroll bars may or may not appear, depending on whether the target server's resolution is small enough for the KVM Client window to show the target server's entire desktop video. -
Page 122: Show Window Decorations
Appendix A: Using the KVM Client Show Window Decorations You can use the KVM Client with or without the window decorations, including the window title and scroll bars. Tip: You can have this display option automatically enabled or disabled by setting your preferences on the KVM Client Settings page. -
Page 123: Window Management
Appendix A: Using the KVM Client Crosshair Transparent Window Management Window Management helps you organize open sessions. All client types are included. Other User Station windows, such as Port Navigator and the Port Scanner, are not included in window management. If two monitors are connected to the User Station, the feature works separately on each monitor. - Page 124 Appendix A: Using the KVM Client To use Window Management: 1. Choose Main Menu > Window Management, then select an option. 2. Open the Port Navigator, then open the Window Management panel to select an option.
- Page 125 Appendix A: Using the KVM Client Tile Client Windows: arranges all client windows in a tiled layout on • desktop. Minimized windows will be unminimized. Revert Tiling: Undo last tiling operation and restore previous window sizes. • Previously minimized windows will be minimized again. •...
-
Page 126: Dual Video Port Connections
Appendix A: Using the KVM Client Dual Video Port Connections When connecting to a Dual Video port, two KVM client windows are opened. The two client windows are bound to each other. Window title: [<group_name>] port_name. When one window is closed, the other one is closed automatically Switching to and from Dual Video ports is not possible. -
Page 127: Setting User Preferences
Setting User Preferences In the User Station Configuration window, click Preferences to customize the following user settings. In This Chapter Access Client Settings ..................118 Managing Keyboard Macros ................123 Audio Settings ....................126 Hotkeys and Gestures ..................127 Window Layouts ....................130 Port Scanner Settings.................. -
Page 128: Access Client Settings
Appendix A: Setting User Preferences Access Client Settings You can configure settings for all access types, as well as general launch and connection settings. Users with the System Admin privilege can configure the default Access Client Settings for all new users. Video Target Window Settings •... - Page 129 Appendix A: Setting User Preferences Positioning Determines where the Access Client shows up on the screen: Automatic: The positioning of the Client is not restricted. For example, the first Client that appears may align with the top-left corner of the screen, but the second Client may align with the bottom-right corner of the screen.
- Page 130 Appendix A: Setting User Preferences Resizing Behavior Select resize preference for RDP sessions: Fixed size, Dynamic Resolution Change, Scale Transmission Select preferred transmission quality for RDP Quality sessions: Best Quality (Slowest), Medium, Fastest (Lowest Quality) Preferred Select preferred resolution for RDP sessions. Resolution Display as Select multi-monitor preferences for RDP...
- Page 131 Appendix A: Setting User Preferences Console Size Select the preferred console size. Serial Client size may not be accurate. Web Target Window Settings: Window Show or hide the window decorations. Decorations For details on window decorations, see Show Window Decorations (on page 112).
-
Page 132: Single Mouse Mode For Dual Monitor Targets
Appendix A: Setting User Preferences Open a new Always launches a new Access Client. Access Client Open a new Always launches a new Access Client on the Access Client on secondary monitor, if available. secondary monitor Launches multiple KVM sessions to one new Multiple Sessions KVM target if: (1) Open a New Access Client to One Target:... -
Page 133: Managing Keyboard Macros
Appendix A: Setting User Preferences Managing Keyboard Macros Keyboard macros can be created to use instead of physical keystroke combinations, so that the actions intended for the target server are sent to and interpreted only by the target server. Otherwise, they might be interpreted by the User Station itself. -
Page 134: Executing Macros
Appendix A: Setting User Preferences Field/option Description Key Sets Select the key set containing the desired keys. See Available Key Sets. All keys that the selected key set contains are listed in the Keys box. Keys Select each desired key from the list and click to add it to the right box. -
Page 135: Editing Or Deleting Macros
Appendix A: Setting User Preferences Editing or Deleting Macros To view all manually-created keyboard macros in the User Station Configuration window, click Preferences > Keyboard Macros. • Click the Name column header to sort the list. • An enabled macro shows in the Enabled column. -
Page 136: Audio Settings
Appendix A: Setting User Preferences Audio Settings The default audio playback/capture devices used by the User Station are the front-panel analog speakers and microphone. You can change this by setting other audio devices you prefer as the audio playback and/or capture devices. Note that the audio configuration changes made by any user apply on a User Station basis so the changes impact all users of this User Station. -
Page 137: Hotkeys And Gestures
Appendix A: Setting User Preferences Hotkeys and Gestures You can enable, disable and customize hotkeys and gestures to control the User Station, manage windows, or control KVM Client functions. These hotkeys and gestures are executed on the User Station rather than being transmitted to any target servers you are operating. - Page 138 Appendix A: Setting User Preferences 2. Click Preferences > Hotkeys and Gestures. The Hotkeys and Gestures page opens, showing the current settings for all categories. 3. Scroll down and click Edit to make changes: To enable, select a key combination for the function from its ...
-
Page 139: Move Keys
Appendix A: Setting User Preferences Move Keys Move Keys are key combinations that move the foreground window around on the desktop. You can enable or disable these hotkeys using the "Move Keys" setting. See Hotkeys and Gestures (on page 127). Hotkey Function Ctrl + Alt + Shift +... -
Page 140: Switch Keys
Appendix A: Setting User Preferences Hotkey Function Alt + Windows + Shrink the window in the specified direction until its border touches the nearest edge, which is one of the following: Alt + Windows + Borders of another window ... - Page 141 Appendix A: Setting User Preferences 2. In Main Menu: Click Window Layouts > Save Layout. If previously saved layouts exist, the menu also includes an option to save as new, or overwrite a named layouts, such as Save Layout (current layout name). New layouts are automatically assigned names.
-
Page 142: Port Scanner Settings
Appendix A: Setting User Preferences Click Edit to change the name or hotkey. Names must be 4-32 characters. Hotkeys will be verified for availability. Click Delete on a layout, or select multiple layouts and click Delete Selected to remove layouts. Click to confirm deletion. Port Scanner Settings You can configure the scanner intervals, delays, and orientation, and specify storage of snapshots from the scanner. - Page 143 Appendix A: Setting User Preferences indicates the setting is disabled. 3. Click Edit to make changes. 4. To set Intervals and Delays: Port Display Interval (1..300 sec): Select the number of seconds to display each port before switching to next...
- Page 144 Appendix A: Setting User Preferences Interval between Ports: Select the number of seconds to pause after Port Display Interval ends. 5. To set Snapshot Recording: Enable Snapshot Recording: Click the checkbox to turn the feature on. Make sure a USB drive is accessible. ...
-
Page 145: Change Password
Appendix A: Setting User Preferences Select the Pause Scanner when opening KVM Sessions checkbox if the scanning should stop when you open a port into a full KVM session. 7. Click Save. Change Password You can change your own password. To change your password: 1. -
Page 146: Administration Features
Administration Features In the User Station Configuration window, click Administration to perform the following User Station administration tasks. In This Chapter Users ......................... 137 User Groups ...................... 140 Autologin ......................144 LDAP........................145 CommandCenter Secure Gateway Integration ..........159 Trusted Certificates ..................166 Server Certificate .................... -
Page 147: Users
Appendix A: Administration Features Users The Dominion User Station provides a built-in administrator account, which is ideal for initial login and system administration. You can add user profiles with configurable privileges for other users to operate and administer the User Station. Note that the Dominion User Station's user profiles determine the permissions users are granted to have on the User Station instead of the KVM switches. - Page 148 Appendix A: Administration Features 2. In the User Station Configuration menu, click Administration > Users > New User. The New User page opens. 3. Enter information for the new user. The fields marked with * are mandatory. Field Description Login User name for logging in to the User Station.
-
Page 149: Editing Or Deleting Users
Appendix A: Administration Features Field Description Password, Password for logging in to the User Station. Password A minimum of five characters are required. confirmation Selected User Assigning user groups determines the Groups permissions granted to this user. See User Groups (on page 140). -
Page 150: User Groups
Appendix A: Administration Features Click each user's login name to view details. Note that you cannot delete the built-in admin user, but you can modify its data other than the privileges (user groups). To modify a user profile: 1. Click the desired user's button. -
Page 151: Privileges
Appendix A: Administration Features 2. Click Administration > User Groups > New User Group. The New User Group page opens. 3. Enter information for the new user group. Field Description Name Type a name for the new user group. Privileges Assign one or multiple privileges to the new user group. - Page 152 Appendix A: Administration Features Privilege Operations permitted Open VNC, RDP, and SSH sessions. VNC Access This permission alone does not grant RDP Access login privileges. User must also be a SSH Access member of a group with System Administration, Device Administration or Device Access privileges.
-
Page 153: Editing Or Deleting User Groups
Appendix A: Administration Features Editing or Deleting User Groups To view all user groups in the User Station Configuration window, click Administration > User Groups. The Users column lists the names of all users who belong to this user group. If the real name is not available in the user profile, the user's login name is shown. -
Page 154: Autologin
Appendix A: Administration Features If any user will not be able to log in after losing this user group, the confirmation message shows a warning similar to the following diagram. This is because the selected user group is the only user group that one or some of the group members have. -
Page 155: Ldap
Appendix A: Administration Features LDAP The external LDAP authentication has the following two modes: Authentication and authorization via LDAP • • Only authentication via LDAP LDAP cannot be used when CC-SG Integration is enabled. Note: For single sign-on capability in Dominion User Station, your KX devices, the Dominion User Station and your users must exist in the same LDAP environment, and the value of "login name attribute"... -
Page 156: Adding Ldap Servers
Appendix A: Administration Features LDAP alias works fine in the LDAP authentication only mode. User Station configuration required for either LDAP authentication mode: • Add the LDAP server(s). See Adding LDAP Servers (on page 146). Enabling or Disabling the LDAP •... - Page 157 Appendix A: Administration Features Setting Description The type of the new LDAP server: Type Active Directory Server: Microsoft Active Directory LDAP server: OpenLDAP The order of this LDAP server, which Order determines the authentication priority when there are multiple LDAP servers. If adding more than one LDAP server, you can change the priority by selecting the sequential number of any existing LDAP server.
- Page 158 Appendix A: Administration Features Setting Description Configurable when "Type" is set to "Active Domain Directory Server." The Active Directory server's domain name. Usually the User Station can determine the Active Directory server's host name via its domain name and DNS. If you select the following Use Host checkbox, this behavior is replaced.
- Page 159 Appendix A: Administration Features 5. Enter the bind credentials in the Bind section.
- Page 160 Appendix A: Administration Features Setting Description Distinguished Name (DN) of the search base, Base DN which is the starting point of the LDAP search. Example: ou=dev,dc=example,dc=com The attribute of the LDAP user class which Login Name denotes the login name. Attribute Note that only relative distinguished names (RDNs) can be specified in this field.
- Page 161 Appendix A: Administration Features Setting Description Configurable when "Search Credentials" is NOT Bind After Search set to "no search." Select this checkbox if the LDAP bind operation shall be performed with a DN derived from a search operation for the user who's trying to log Usually this checkbox is: ...
- Page 162 Appendix A: Administration Features Setting Description Select this checkbox if authorization via Use Groups For LDAP is intended. See LDAP (on page 145). Authorization When disabled, authorization is managed by the User Station, and this LDAP server only manages authentication. Select this checkbox when intending to Use Group Search search a dedicated base DN instead of the...
- Page 163 Appendix A: Administration Features 8. Click Save. 9. Repeat the same steps to add more LDAP servers as needed. Editing or Deleting LDAP Servers To show a list of existing LDAP servers, click Administration > LDAP. In the Active column: •...
-
Page 164: Enabling Or Disabling The Ldap Authentication
Appendix A: Administration Features Enabling or Disabling the LDAP Authentication Click Administration > LDAP to open the LDAP Servers page. The right-most button indicates the current LDAP authentication setting. When that page shows , the LDAP authentication is currently disabled, which is the default. While disabled, all users are authenticated via the local database of the User Station so their user credentials must be available on the User Station. -
Page 165: Searching For Ldap Users And Groups
Appendix A: Administration Features Searching for LDAP Users and Groups When the LDAP authentication is being enabled, you can manually search for LDAP users or user groups as needed. To search for LDAP user or group objects: 1. Click Administration > LDAP > . - Page 166 Appendix A: Administration Features 3. The following settings on this page are pre-populated with the values of the selected LDAP server, but you can adjust them to match your search needs. If you are not familiar with the LDAP settings, consult your LDAP administrator for help.
-
Page 167: Configuring The Maximum Search Results And Local Authentication Settings
Appendix A: Administration Features This button is displayed for those groups that are not available on the User Station yet. Click this button to add the LDAP group as a user group with the "Device Access" privilege assigned. To modify the Editing or Deleting User Groups privileges, see (on page 143). -
Page 168: Logging In With Ldap
Appendix A: Administration Features 5. Select "Allow access for local users" to enable the login screen checkbox for local authentication. 6. Click Save. Logging in with LDAP When LDAP is enabled, Dominion User Station presents a different login page. The login icon indicates the authentication type being used: Local, LDAP, or CC-SG. -
Page 169: Commandcenter Secure Gateway Integration
Appendix A: Administration Features CommandCenter Secure Gateway Integration Raritan’s CommandCenter® Secure Gateway (CC-SG) is an easy to deploy, plug-and-play appliance that provides IT administrators and lab managers with a secure, single point of remote access and control. Raritan’s CC-SG consolidates multiple remote access technologies, including Dominion® KVM-over-IP switches and serial console servers, Raritan PX PDUs, service processors, and in-band methods such as RDP, SSH and VNC. -
Page 170: Enabling Cc-Sg Integration
Appendix A: Administration Features Enabling CC-SG Integration Enable CC-SG integration in the Administration settings. When the feature is enabled or disabled, you must logout of Dominion User Station, and then log back in so that the authentication can take effect. If you have local users and CC-SG users, make sure "Allow access for local users"... - Page 171 Appendix A: Administration Features 4. For the setting to take effect, you must log out of Dominion User Station, Logging in with CC-SG then login again with your CC-SG credentials. See Integration (on page 162).
-
Page 172: Logging In With Cc-Sg Integration
Appendix A: Administration Features Logging in with CC-SG Integration When CC-SG integration is enabled, the login page includes a CC-SG icon. Login with your CC-SG username and password to access the targets you have permissions for on CC-SG. Depending on your setting, you may see an extra checkbox for local users. Authenticate locally checkbox: This checkbox appears when the username •... -
Page 173: Navigator With Cc-Sg Integration
Appendix A: Administration Features Navigator with CC-SG Integration When CC-SG integration is enabled, the Navigator is optimized to show your Favorite Access items, and CC-SG Targets. The CC-SG Targets section includes nodes that the user is authorized to view, including KVM, SSH, VNC, RDP, and ESXi interfaces. - Page 174 Appendix A: Administration Features The Port Navigator window is displayed by default. To launch Port Navigator: • Press Ctrl+Alt+N. OR choose Main Menu > Port Navigator. • The Port Navigator window opens. 1. Search, Filters, and Help: Search: Searches for ports, switches, or interfaces containing the search word(s). Using Search (on page 65).
- Page 175 Appendix A: Administration Features Favorite Access panel: Shows a list of the favorite access you have configured. See Configuring KVM Ports (on page 36). CC-SG Targets panel: Shows a list of all CC-SG Targets. Targets with KVM access also show ...
-
Page 176: Esxi Access Requirements
Appendix A: Administration Features ESXi Access Requirements You can access your VMW Viewer interfaces in the Navigator using the VMware “ESXi Embedded Host Client.” The ESXi server must support the ESXi Embedded Host Client and must be version 6.0 or higher. Upon launching, the Remote Console of the virtual machine is shown. -
Page 177: Removing An Installed Certificate
Appendix A: Administration Features 2. Click Administration > Trusted Certificates, then click the Import Certificate button . The Import Trusted Certificate page opens with a list of detected certificates. 3. Click Import to install the desired certificate onto the User Station. Certificate files must be one of the following types: PEM, DER, TXT, CER, or CRT. -
Page 178: Certificate Failure Messages
Appendix A: Administration Features Certificate Failure Messages In the FIPS mode and when Check KX Device Certificates is enabled, if the KVM connection failure is resulted from the absence of a valid KVM switch certificate on the User Station, an error message similar to the following appears. -
Page 179: Server Certificate
Appendix A: Administration Features Server Certificate Services that occur over network, such as remote control, are secured with TLS. This requires the installation of a TLS certificate on the Dominion User Station. By default, the Dominion User Station has a demo certificate. You must have System Administrator privileges to view, download or change the certificate. -
Page 180: Import Private Key And Certificate
Appendix A: Administration Features Import Private Key and Certificate If you would like to use your own private key and certificate, you can import it from an attached USB drive. Passphrase protected keys are not supported. The private key and certificate must be combined in one file. -
Page 181: Create Self Signed
Appendix A: Administration Features Create Self Signed If you would like to use a self signed certificate, you can create the Private Key and the Certificate using Dominion User Station. After creating the certificate, you will install it. To create a self signed certificate: 1. - Page 182 Appendix A: Administration Features 4. Click Create. 5. The certificate and key details display. If you approve, click Install to use this certificate. Installing the certificate requires a reboot.
-
Page 183: Security Settings
Appendix A: Administration Features Security Settings Enable/Disable FIPS Mode and Certificate Settings The User Station optionally uses a FIPS 140-2 encryption module that supports the Security Requirements for Cryptographic Modules of the Federal Information Processing Standards (FIPS), which is defined in the FIPS PUB 140-2 (http://www.nist.gov/cmvp/), Annex A: Approved Security Functions. - Page 184 Appendix A: Administration Features indicates the setting is disabled. Note: These options require certificates to be installed. Click Manage Certificates to check certificates or install more. See Trusted Certificates (on page 166). 2. Click Edit, and then select or deselect the checkboxes for FIPS or Certificate Settings.
-
Page 185: Strong Password Settings
Appendix A: Administration Features Strong Password Settings Password aging and strong passwords can be enabled to offer additional security. Password Aging forces users to change passwords regularly. Strong Passwords can be enabled to specify length and characters required, and limit reuse of old passwords. - Page 186 Appendix A: Administration Features Password Aging Interval: All users are required to change their password at the selected interval. 4. Strong Passwords: Select the Strong Passwords checkbox to enable the feature. This requires users to create passwords that meet the additional criteria specified.
-
Page 187: User Blocking
Appendix A: Administration Features User Blocking The User Blocking options specify the criteria by which users are blocked from accessing the system after the specified number of unsuccessful login attempts. The admin user is excluded from User Blocking. If a blocked user tries to log in, "Authentication Failed" is displayed at the login screen. -
Page 188: Restricted Service Agreement
Appendix A: Administration Features 5. Count of Failed Logins: The maximum number of failed logins before blocking a user. 6. Scroll down to click Save. Restricted Service Agreement After the Restricted Service Agreement feature is enabled, the agreement's content is displayed on the login screen. Users must select a checkbox to agree to the statement to login. -
Page 189: Display Settings
Appendix A: Administration Features indicates the setting is disabled. 2. Click Edit then scroll down to the Restricted Service Agreement options. 3. To enable the feature, select the Enforce Restricted Service Agreement checkbox. 4. A default agreement is provided. You can edit or replace the default text as needed. - Page 190 Appendix A: Administration Features 2. Click Edit. 3. To turn off the monitor after an idle timeout period, select the time period: Select Never to keep monitor on. Select 1, 2, 3, 5, 10, 15, 30 or 60 Minutes to enable the monitor turn ...
-
Page 191: Customization
Appendix A: Administration Features Customization To customize your Dominion User Station GUI appearance, you can replace the default Raritan desktop background, application logo, and login screen with your own images and messaging. System Administration privilege is required. Customizations are applied for all users. Changes are logged to the event log with image name and user who performed the change. - Page 192 Appendix A: Administration Features Login screen: logo image, plus Header and Message text options 3. If an custom image is currently in use, the file name is listed, while non-customized sections will show "Default". Image files found on the USB device are listed as options.
- Page 193 Appendix A: Administration Features Once the image is set, click Back to return to the options. In this example, the current desktop background is the default Raritan branding, and there are 2 image files found on the connected USB device.
-
Page 194: Customization Examples
Appendix A: Administration Features Customization Examples Customized "ABC" logo on User Station Configuration: In this example, the customized "application logo" was just saved. Customized login screen: In this example, a customized login screen was configured. The login screen contains the customized "sunshine" logo image, and the customized message "Welcome to the Dominion User Station!". -
Page 195: Remote Control
Appendix A: Administration Features Remote Control One common use case for remote control is to connect the controlled user station to a wall monitor and remotely control the display of various target servers on monitor via web browser. Using a web browser, connect to the Remote Control interface of the Dominion User Station using the IP address or hostname as the URL. - Page 196 Appendix A: Administration Features 5. Unrestricted Navigator: Enable Unrestricted Navigator to allow additional features: The Unrestricted Navigator can launch sessions in non-full-screen mode, and show multiple sessions at the same time. Windows Layout and Window Management functions can be used ...
-
Page 197: Remote Control Via Api
Appendix A: Administration Features Remote Control via API The Dominion User Station supports a remote RESTful API via HTTPS, allowing programmed remote control to: • Launch Access Client sessions or Windows Layouts. Perform certain administrative tasks. • • (on page 254) for API documentation. API Overview The API can be enabled independently from the regular remote control •... - Page 198 Appendix A: Administration Features 5. Click Save. Using the API 1. Create a login session to authenticate on further calls. There are API calls to create the login session. 2. The remote API session is bound to a local user session. If an API user logs in, the following will happen: If the API user is already logged in on the local console, the API will ...
-
Page 199: Keyboard/Mouse Sharing
Appendix A: Administration Features 4. When finished, the API user can log off the session. Logging off also terminates the session on the local console. (on page 254) for details. Keyboard/Mouse Sharing Keyboard and Mouse Sharing allows you to control several Dominion User Stations by one keyboard and mouse that is connected to one of the Dominion User Stations. - Page 200 Appendix A: Administration Features KX3 User Station 4 Monitor Vertical Configuration Example:...
-
Page 201: Keyboard/Mouse Sharing In Single Cursor Mode
Appendix A: Administration Features To configure, designate the Dominion User Station with the keyboard and mouse connected as "Controller". The Dominion User Stations you intend to share the keyboard and mouse with are designated as "client". For the initial configuration, connect a keyboard and mouse to each client Dominion User Station--You can remove these when the configuration is complete. -
Page 202: Configuring Keyboard/Mouse Sharing
Appendix A: Administration Features 2. Press the Scroll Lock key to lock the mouse pointer to this Dominion User Station. 3. Single Mouse Cursor Mode will now work in the KVM client. 4. After leaving Single Mouse Cursor Mode in the KVM client, press the Scroll Lock key again to unlock the mouse pointer. - Page 203 Appendix A: Administration Features 8. Enter the IP address/Hostname of the ControllerDominion User Station, which is where the keyboard and mouse are connected. 9. Click Save. Repeat this task for all client screens. To configure the Controller: 1. Login to the Controller Dominion User Station. 2.
- Page 204 Appendix A: Administration Features 9. Click Save.
-
Page 205: Language Settings
Appendix A: Administration Features Language Settings The Language Settings feature allows you to change the Dominion User Station GUI and system language. English • • French: Francais German: Deutsch • • Chinese (Simplified): 中文(简体) Japanese: 日本語 • After setting a new language, you must reboot to fully update the language in every area. - Page 206 Appendix A: Administration Features 3. Click Save. You will see an immediate change in the GUI, but you must reboot the Dominion User Station to ensure a full language update.
-
Page 207: Maintenance Features
Maintenance Features In the User Station Configuration window, click Maintenance to perform the following User Station maintenance tasks. In This Chapter Event Log ......................198 Backup and Restore ..................204 Factory Reset ....................208 Software Update ....................209 Support ......................210 About this Device .................... -
Page 208: Event Log
Appendix A: Maintenance Features Event Log The Event Log is an application level log of activity taking place in the User Station. It records who did a certain task and when it was done. For example, login and logout, open connection to a KVM-port, updating the software and so on. -
Page 209: Event Type And Description
Appendix A: Maintenance Features Event Type and Description The Event Log includes the following events types. • Authentication Events: Description includes user name and local, CC-SG, or LDAP category • LDAP Events: Errors and information for LDAP authentication and authorization CC-SG Events: Access of CC-SG, connections failures. - Page 210 Appendix A: Maintenance Features Create an Archive 1. If not displayed, launch the User Station Configuration window. See User Station Configuration (on page 27). 2. Click Maintenance> Event Log. The Event Log page opens. 3. Click Archives. The Event Log Archives page opens. 4.
- Page 211 Appendix A: Maintenance Features 6. Click OK in the confirmation dialog.
- Page 212 Appendix A: Maintenance Features Automatic Archives Dominion User Station will automatically create archives in cases where the database has become full of too many records. Automatic archives are implemented with two thresholds, Warning and Critical. The thresholds are checked once per day. If thresholds are met, an error message appears in the event log.
- Page 213 Appendix A: Maintenance Features Deleting Archive Files You can delete an archive file. If you want to save the file off the Dominion User Station before deleting it, see Exporting Archive Files (on page 202). 1. If not displayed, launch the User Station Configuration window. See User Station Configuration (on page 27).
-
Page 214: Backup And Restore
Appendix A: Maintenance Features Archive File Storage The amount of storage to keep Event Log archives inside Dominion User Station is limited. If no more storage is available, you will see an error message upon attempting to create a new archive. The error message prompts you to delete old archive files. - Page 215 Appendix A: Maintenance Features 2. Click Maintenance > Backup & Restore. The Backup & Restore page opens. 3. Click Create Backup. 4. Once completed, the Backup Archives page lists the backup file, with the filename, software version and file size shown on the screen. To restore to the previous settings and data: 1.
-
Page 216: Exporting And Importing Backup Files
Appendix A: Maintenance Features 3. Click OK on the confirmation message. 4. A text screen appears to show restore progress. When restore is completed, Dominion User Station restarts and opens the login page. Exporting and Importing Backup Files To export or import a backup file, you must connect a USB flash drive to the User Station first. -
Page 217: Deleting Backup Files
Appendix A: Maintenance Features Deleting Backup Files To check the creation date of a backup file before removing it: The creation date and time stamp is included as the last set of numbers in the filename, after software version and sometimes serial number. The date is expressed in 8 digits. -
Page 218: Factory Reset
Appendix A: Maintenance Features Factory Reset The factory reset feature resets all of your User Station's settings to the factory defaults except for Network Settings and Date/Time Settings. All other customized data is removed simultaneously, including: All KVM switches added to the User Station •... -
Page 219: Software Update
Appendix A: Maintenance Features 3. Click Perform Factory Reset. A confirmation message appears. 4. Click OK to confirm the operation or Cancel to abort it. Software Update The software update feature only permits software UPGRADE, not downgrade. Note: To perform software downgrade, contact Raritan Technical Support for help. -
Page 220: Support
Appendix A: Maintenance Features 6. Click Maintenance > Software Update. The Software Updates page opens, with a list of software files found in the root directory of the USB flash drive or CD/DVD disc. 7. Click the desired file, and it will be analyzed. Verify the minimum required version and validity check results. -
Page 221: Support Login
Appendix A: Maintenance Features Support Login The Support Login feature allows remote access from Raritan Technical Support. By default, this feature is disabled for security. You MUST NOT enable this feature unless you are instructed by Raritan Technical Support to do so. To permit remote access from Raritan Technical Support: 1. -
Page 222: Diagnostic Log File
Appendix A: Maintenance Features Note: Selecting Debug may affect system performance. 5. Click Save. Click OK in the confirmation message to set the level and restart the Dominion User Station. Diagnostic Log File When the User Station does not work properly, you can export the User Station's diagnostic log file to a connected USB flash drive, and send the file to the Raritan Technical Support for troubleshooting. -
Page 223: About This Device
Appendix A: Maintenance Features 4. Wait until the User Station finishes the export, displaying the "Successfully finished" message as well as the filename of the diagnostic log. 5. Send the file to Raritan Technical Support. About this Device The "About this Device" page shows the firmware version information and the product serial number. -
Page 224: System Settings
System Settings System Settings are found in the Main Menu. In This Chapter Date/Time ......................214 Keyboard ......................218 Monitor ......................222 Mouse ....................... 223 Network ......................224 Default Shortcut Icons in the Main Toolbar ............. 241 Date/Time 1. Choose Main Menu > System Settings > Date/Time. The date/time dialog appears. - Page 225 Appendix A: System Settings Time Zone 2. See (on page 217) for details on how time zone is used by manual and NTP date/time configurations.
- Page 226 Appendix A: System Settings To manually set date and time: Click Edit and set the correct Time Zone if needed, then use the Time and • Date sections to configure the current date and time. Note that the Time section uses a 24-Hour clock. Click Apply or OK when complete. To use NTP: •...
-
Page 227: Time Zone
Appendix A: System Settings Time Zone The time zone setting is important for both manual and NTP-synchronized time. If it is correct, do NOT change it unless required. • For the time synchronized with an NTP server, time zone changes affect the time displayed onscreen, daylight savings time, and internal UTC-based clock of the User Station. -
Page 228: Keyboard
Appendix A: System Settings Keyboard 1. Choose Main Menu > System Settings > Keyboard. The Keyboard Preferences dialog appears. 2. Click any tab to configure different keyboard settings. Configure the keyboard layout in the tab labeled Keyboard Layouts page 219). Mouse Keys To use the keypad to move the mouse pointer, configure ... -
Page 229: Keyboard Layouts
Appendix A: System Settings Keyboard Layouts In the Layouts tab, available keyboard layouts are all shown. The same keyboard layout list is also available when working with the keyboard icon in the Main Toolbar. Any changes made to the dialog's keyboard layout list also change the keyboard layout list available in the Main Toolbar. -
Page 230: Mouse Keys
Appendix A: System Settings To add a layout to the list, click Add. If four layouts are already listed, you must remove one before you can add another. After clicking Add, select a layout by County or Language to preview the keyboard layout. Click Add to add the layout to your list. - Page 231 Appendix A: System Settings Function Move toward the bottom-right corner Move left Click the selected button Move right Move toward the top-left corner Move up Move toward the top-right corner Num Lock The other alternative to activate or deactivate the Mouse Keys function is to press: Left Alt+Left Shift+Num Lock Select primary button...
-
Page 232: Monitor
Appendix A: System Settings Monitor 1. Choose Main Menu > System Settings > Monitor. The Monitor Preferences dialog appears. 2. Perform or configure any of the following function: Setting/button Function On/Off Turn on or off this monitor, if there are two monitors connected to the User Station. -
Page 233: Mouse
Appendix A: System Settings Setting/button Function Detect monitors Click this button if any connected monitor is not detected. Usually it is not necessary to use this function when there is only one monitor connected. Show monitors in Determine whether the monitor shortcut icon is Main Menu, Port panel added to the Main Toolbar. -
Page 234: Network
Appendix A: System Settings Locate Pointer: Select this option to show the position of the pointer when the Control key is pressed. Pointer Speed: Adjust Acceleration and Sensitivity. Drag and Drop: Adjust the threshold for drag and drop operations. ... - Page 235 Appendix A: System Settings Ethernet 1 is for LAN port 1, and Ethernet 2 is for the other. 2. Select the desired connection, and click Edit. A dialog appears. 3. Enter a new name in the Connection name field if desired. 4.
- Page 236 Appendix A: System Settings Setting Description Method Select one of the following as the connection method and configure associated settings: Automatic (DHCP) Automatic (DHCP) addresses only Manual Disabled IPv4 Settings (on page 226). IPv6 Settings: Setting Description Method...
- Page 237 Appendix A: System Settings Automatic (DHCP): The DHCP server in the network automatically assigns an IPv4 address to the User Station as well as DNS server(s) and domain(s). The following settings are configurable for this method. Setting Description Additional DNS servers Optional.
- Page 238 Appendix A: System Settings Setting Description Routes Optional. Configure the IPv4 routing for this User Station. Click Add to add one or multiple routing addresses for the User Station to reach in the network. To remove any existing routes, select it and click Delete.
- Page 239 Appendix A: System Settings Manual: Select this method when intending to manually assign a static IP address to the User Station. In the Addresses section, click Add and then type the User Station's IPv4 address, netmask and gateway in this section. At least one IPv4 address, netmask and gateway must be specified.
- Page 240 Appendix A: System Settings Automatic: IPv6 auto-configuration automatically assigns an IPv6 address to the User Station, and retrieves the information of DNS server(s) and domain(s) from the DHCP server. The following settings are configurable for this method. Setting Description Additional DNS servers Optional.
- Page 241 Appendix A: System Settings Setting Description Routes Optional. Configure the IPv6 routing for this User Station. Click Add to add one or multiple routing addresses for the User Station to reach in the network. To remove any existing routes, select it and click Delete.
- Page 242 Appendix A: System Settings Automatic, DHCP only: The DHCPv6 server in the network automatically assigns an IPv6 address to the User Station, and specify DNS server(s) and domain(s). The following settings are configurable for this method. See the above table for associated information. IPv6 address generation mode ...
- Page 243 Appendix A: System Settings Ethernet Settings MTU: • Select Automatic, or click plus/minus to specify the maximum number of bytes per packet.
- Page 244 Appendix A: System Settings Wake on LAN: Default: Leave as default, or deselect to enable other options. • • • Unicast Multicast • • Ignore Broadcast Arp • • Magic: Requires Wake on LAN password. Link Negotiation: • Ignore Automatic •...
-
Page 245: Network Connections - Bond Connections
Appendix A: System Settings Network Connections - Bond Connections To create NIC redundancy, you can configure network bonding devices to replace the standard Ethernet configuration. This setup doubles the maximum network speed if both ports are used and provides redundancy. The Dominion User Station network will continue to work if either one of the ports fails. - Page 246 Appendix A: System Settings 3. In the Choose a Connection Type dialog, select Bond, then click Create. 4. The Bond Connection dialog opens. 5. In the Bond tab, click Add.
-
Page 247: Openvpn Connections
Appendix A: System Settings 6. Select the connection type you want to use for the bond connection, then click Create to create the first bond link for the first network interface. 7. In the bond link dialog, select the MAC address of the interface in the Device field. - Page 248 Appendix A: System Settings 2. Click the Add Icon (plus sign). • In the Choose a Connection Type dialog, select "Import a saved VPN configuration..." then click Create.
- Page 249 Appendix A: System Settings 1. An upload dialog appears. Select the .ovpn config file, then click Open. 2. The VPN client is added. Select it and click the Edit icon.
- Page 250 Appendix A: System Settings 3. Edit the VPN Connection name and/or enter password. 4. Click OK. When the VPN is connected, status bar will show that it is active. The "Lock" icon displays in the status bar when a user logs in with active VPN.
-
Page 251: Default Shortcut Icons In The Main Toolbar
Appendix A: System Settings Default Shortcut Icons in the Main Toolbar Shortcut icons in the Main Toolbar provides quick access to some system settings. For information on the Main Toolbar, see Main Menu, Port Navigator, Toolbar (on page 7). This section introduces the following factory default icons. Keyboard Layout Icon Clicking the icon: The keyboard layout switches among available languages. - Page 252 Appendix A: System Settings Clicking the icon: A list of available Ethernet networks and connections displays. Only one network connection is shown if only one LAN port is connected to the network. Two network connections are listed if both LAN ports are connected to ...
-
Page 253: Clock Icon
Appendix A: System Settings The default connection has the word "default" shown on its tab. • Edit Connections: This triggers the Network Connections dialog. See Network Connections - Ethernet (on page 224). Clock Icon Clicking the icon: A calendar with Locations section displays. Click Locations to: •... -
Page 254: Location And Clock Time Format
Appendix A: System Settings Location and Clock Time Format After expanding the Locations section, click Edit. The Clock Preferences dialog appears. Click the desired tab or button to configure settings. - Page 255 Appendix A: System Settings Time Settings: Date/Time (on page 214). • Locations: • Click Add to specify your city or country. You can simply type the city or country name in the Location Name field and then select the correct one from the list that appears. If your city's or country's name is not available in the list, you can ...
- Page 256 Appendix A: System Settings The Locations section: When you hover your mouse pointer over the weather icon below the location name, more information is displayed, including the weather, temperature, wind speed and the time for sunrise/sunset. Tip: If the system's time zone setting is different from the selected location's and you have the System Administration privilege, a "Set"...
-
Page 257: Additional Features
Additional Features In This Chapter Screen Unlocking ....................247 Factory Reset at Startup ................... 248 Take a Screenshot ..................... 248 Screen Unlocking When the User Station screen is locked, no data is displayed onscreen. Note: See Desktop Settings for details on screen locking. When you attempt to unlock the screen, a password prompt appears. -
Page 258: Factory Reset At Startup
Appendix A: Additional Features To log out of the User Station: 1. At the password prompt, click Log Out. NO password is needed. 2. The Login Screen displays, and any user can log in. Factory Reset at Startup In addition to the factory reset feature in the User Station Configuration window, you can reset the User Station to factory defaults by performing the factory reset during the device boot. - Page 259 Appendix A: Additional Features 2. Scroll down to "Screenshot of Desktop" and "Screenshot of Active Window". If the functions are enabled, use the hotkey displayed. If the functions are disabled, click Edit, then select a hotkey for the function. Hotkeys and Gestures (on page 127).
-
Page 260: Specification
Appendix A Specification Slim 1.3 litre metal chassis, black Chassis design 190 x 165 x 43 mm Dimension (LxWxH) 0 to 40 degrees Celsius Operating temperature non-condensing: 10~90% Humidity 75 x 75 mm VESA mount 100 x 100 mm ... -
Page 261: Authentication Of User Stations And Kvm Switches
Appendix B Authentication of User Stations and KVM Switches User credentials you use to log in to the Dominion User Station can be different or identical to the user credentials you enter for accessing the port information of any KX III KVM switch. User Station's user credentials: User credentials for logging in to the User Station determine the tasks/permissions you are allowed to perform on the User Station, but not the... - Page 262 Appendix B: Authentication of User Stations and KVM Switches User account for the Tasks you can do on the User User account for the Tasks you can do on a KVM User Station Station KVM switch port/target server admin You can do anything, including: user-A Limited privileges are granted: ...
-
Page 263: Open Ports Recommendations
Appendix C Open Ports Recommendations Listening Ports: By default, the User Station does not have any listening ports opened unless the following settings are enabled: 443 (HTTPS) if Remote Control is enabled • • 22 (SSH) if Support Login is enabled •... -
Page 264: Api
Appendix D In This Chapter Session Management ..................254 Login Progress ....................255 Session Close / Logout ..................255 Access Functionality ..................256 Handling of Access Client Sessions ..............262 Maintenance ..................... 264 Session Management Session Creation and Login In order to use the API, users need to authenticate and create a session. The first step is always a POST to /session/login with the user credentials. -
Page 265: Login Progress
Appendix D: API in_progress: The authentication was successful, but the user is not logged • in immediately. Instead, the login process is started and takes some time. There is another responsevalue "auth_id" which can be used to wait for the login process to finish. Use a POST to the URL /session/progress to query the login process's status. -
Page 266: Response
Appendix D: API Response • result: A boolean value. True is the logout was successful, false otherwise (e.g. the user was already logged out of other reasons). • error: Optional. An error if the result is false. Example • First, start the login process: curl -c cookies.txt -b cookies.txt -H "Content-Type: application/json"... -
Page 267: Get Devices And Ports
Appendix D: API Get Devices and Ports In order to get all access devices with their ports, send a GET request to the /access/items URL. The result is an array of items (access devices) with all ports of the device. Some of the ports may not be accessible (either due to missing permissions, or if a port is unsupported). - Page 268 Appendix D: API {"id":6,"name":"thre-Mac-mini","status":"up","availability":"idle","port_type":" kvm","access_id":5}, {"id":1,"name":"Local Port (DVI)","status":"up","availability":"idle","port_type":"kvm","access_id":2}, {"id":2,"name":"Windows Box (Dual-VM)","status":"up","availability":"idle","port_type":"kvm","access_id":77 {"id":833,"name":"DSAM4 Port 1","status":"down","availability":"idle","port_type":"serial","access_id":1255}, {"id":834,"name":"DSAM4 Port 2","status":"down","availability":"idle","port_type":"serial","access_id":1256}, {"id":8,"name":"thre-KX3UST","status":"up","availability":"idle","port_type":"k vm","access_id":7}, {"id":7,"name":"thre-KX4UST","status":"up","availability":"idle","port_type":"k vm","access_id":6}, {"id":3,"name":"Windows Box Multi-Monitor 1","status":"up","availability":"idle","port_type":"kvm"}, {"id":4,"name":"Windows Box Multi-Monitor 2","status":"up","availability":"idle","port_type":"kvm"}, {"id":5,"name":"Windows Box PS/2","status":"up","availability":"idle","port_type":"kvm","access_id":4} "port_groups": [ {"id":1,"name":"Windows Box Dual","port_ids":[3,4],"access_id":8} "id":594, "name":"DKX4-101", "ports": [ {"id":472,"name":"Dominion_KX4_Port1","status":"up","availability":"idle","po rt_type":"kvm","access_id":770} "port_groups": []...
- Page 269 Appendix D: API...
-
Page 270: Get Targets And Access Points
Appendix D: API Get Targets and Access Points In order to get all targets and their access points, send a GET request to the /access/targets URL. You will retrieve an array of targets. Each target has an ID, a name and an array of Access Points. Each of the Access Points have an access ID (required to launch a target connection to this access point) and a type (KVM, Serial, SSH, VNC, etc.). - Page 271 Appendix D: API {"access_id":23,"access_type":"esxi"}, {"access_id":777,"access_type":"kvm","status":"up","availability":"idle"}, {"access_id":781,"access_type":"virt_multi_kvm","status":"up","availability":"i dle"} {"id":4,"name":"Windows Box PS/2","access":[{"access_id":4,"access_type":"kvm","status":"up","availability": "idle"}]}, {"id":5,"name":"thre-Mac-mini","access":[{"access_id":5,"access_type":"kvm"," status":"up","availability":"idle"}]}, {"id":6,"name":"thre-KX4UST","access":[{"access_id":6,"access_type":"kvm","st atus":"up","availability":"idle"}]}, {"id":7,"name":"thre-KX3UST","access":[{"access_id":7,"access_type":"kvm","st atus":"up","availability":"idle"}]}, {"id":8,"name":"Windows Box Dual","access":[{"access_id":8,"access_type":"multi_kvm","status":"up","availa bility":"idle"}]}, {"id":993,"name":"DSAM4 Port 1","access":[{"access_id":1255,"access_type":"serial","status":"down","availabi lity":"idle"}]}, {"id":994,"name":"DSAM4 Port 2","access":[{"access_id":1256,"access_type":"serial","status":"down","availabi lity":"idle"}]}, {"id":595,"name":"Dominion_KX4_Port1","access":[{"access_id":770,"access_ty pe":"kvm","status":"up","availability":"idle"}]},...
-
Page 272: Handling Of Access Client Sessions
Appendix D: API Handling of Access Client Sessions Create Access Client Sessions Access Clients (KVM, VNC, RDP, SSH, etc.) can be opened and closed via API. To open an Access Client session, POST to the /access/open_client URL. This call has the following parameters: •... -
Page 273: Named Scenes (Aka Window Layouts)
Appendix D: API Named Scenes (aka Window Layouts) Named Scenes (or Window Layouts) are collections of Access Client windows which can saved and restored with all their positions and sizes. With the API, users can currently get a list of available scenes, and they can restore (or open) a scene. -
Page 274: Window Management
Appendix D: API Window Management The User Station API allows some special Window Management functions to arrange or close Access Client windows. To perform such an operation, POST to the /access/window_management URL. This call has one parameter: the operation to perform. This may be one of the following: •... -
Page 275: Firmware Operations
Appendix D: API Firmware Operations Software Versions To retrieve some informations about the firmware versions, send a GET request to the /maintenance/firmware URL. The resulting object contains the versions of the installed firmware, the underlying operating system and the Linux kernel version. -
Page 276: Backup/Restore
Appendix D: API Backup/Restore With the User Station Remote API, you can access system backup files. You can list all backups available in the system, you can download or upload them, you can restore or delete backups. Get all backups in the system In order to get a list of all backup files currently available in the system, use a GET request to the /maintenance/backups URL. - Page 277 Appendix D: API You can use the ID returned by this call for later use of the backup, e.g. you can downlaod it later. Please note that the backup is created in the background and cannot be used immediately. Please request the details of this backup until the state property changes to "complete".
- Page 278 Appendix D: API {"result":true} curl -c cookies.txt -b cookies.txt -H "Content-Type: application/json" https://192.168.3.175:8443/api/v1/maintenance/backups/11/destroy {"result":true} Get the list again, which is now empty. • curl -c cookies.txt -b cookies.txt -H "Content-Type: application/json" https://192.168.3.175:8443/api/v1/maintenance/backups {"backups":[]} Create a new backup • curl -c cookies.txt -b cookies.txt -H "Content-Type: application/json" https://192.168.3.175:8443/api/v1/maintenance/backups/new {"result":true,"backup_id":12} •...
- Page 279 Appendix D: API curl -c cookies.txt -b cookies.txt -H "Content-Type: application/json" https://192.168.3.175:8443/api/v1/maintenance/backups/13 {"backup":{"id":12,"filename":"KXUST_backup_4.4.0.5.85.20210324092030_20 210325104912.dat","status":"complete"}} • Or: Import the backup using an URL. curl -c cookies.txt -b cookies.txt -H "Content-Type: application/json" -d '{ "uri":"http://192.168.2.101/backup.bin" }' https://192.168.3.175:8443/api/v1/maintenance/backups/import {"result":true,"backup_id":13} • Now restore this backup. curl -c cookies.txt -b cookies.txt -H "Content-Type: application/json"...
-
Page 281: Index
Index Configuring Keyboard/Mouse Sharing • 144, 191, Configuring KVM Ports • 17, 31, 36, 51, 60, 68, 165 About this Device • 209, 213 Configuring the Maximum Search Results and Absolute Mouse Mode • 84, 85, 87 Local Authentication Settings • 146, 154, 157, Access Client Settings •... - Page 282 Index Enabling or Disabling the LDAP Authentication • 146, 154, 155 ESXi Access • 44, 46 Keyboard • 218, 241 ESXi Access Requirements • 166 Keyboard Layout Icon • 8, 241 Ethernet Settings • 23, 224, 233 Keyboard Layouts • 218, 219 Event Log •...
- Page 283 Index Navigator with CC-SG Integration • 42, 46, 58, 59, Scenarios When Read/Write is Unavailable • 98, 159, 163 Network • 224 Screen Unlocking • 23, 247 Network Connections - Bond Connections • 224, Searching for LDAP Users and Groups • 145, 155 Security Settings •...
- Page 284 Index USB Profile Overview • 108 USB Profiles • 93, 107 User Blocking • 177 User Groups • 72, 132, 139, 140, 143, 145 User Station Configuration • 27, 29, 33, 42, 72, 118, 123, 126, 132, 135, 137, 140, 144, 146, 160, 198, 200, 203, 204, 208, 209, 211 Users •...
Need help?
Do you have a question about the Raritan Dominion User Station and is the answer not in the manual?
Questions and answers