Table of Contents
Advertisement
Quick Links
Advertisement
Table of Contents

Subscribe to Our Youtube Channel
Related Manuals for Hunt Electronic HLT-S8KDH


Summary of Contents for Hunt Electronic HLT-S8KDH
- Page 1 User Manual IP Speed Dome Camera V1.0_20220921...
- Page 2 WARNING TO REDUCE THE RISK OF FIRE OR ELECTRIC SHOCK, DO NOT EXPOSE THIS PRODUCT TO RAIN OR MOISTURE. DO NOT INSERT ANY METALLIC OBJECT THROUGH VENTILATION GRILLS. CAUTION CAUTION RISK OF ELECTRIC SHOCK DO NOT OPEN CAUTION:TO REDUCE THE RISK OF ELECTRIC SHOCK. DO NOT REMOVE COVER (OR BACK).
-
Page 3: Table Of Contents
Table of Contents PREFACE ................1 Setting Management ............31 Setting Download.............. 31 PRODUCT SPECIFICATIONS ..........1 New Setting File ..............31 PRODUCT INSTALLATION ........... 5 Network ................32 IP Settings ................. 33 Monitor Settings ..............5 IP Assignment ..............33 Hardware Installation ............ - Page 4 Day Profile & Night Profile ..........56 Log..................69 D-WDR & True-WDR ............56 Subject ................. 69 Brightness ................57 Interval ................. 69 Contrast................57 Based on the schedule ............ 69 Sharpness ................58 Record File ................69 Denoise 3D or 2D ............... 58 AVI File (with Record Time Setting) ........
- Page 5 Internet Explorer ..............93 Adobe Reader ..............93 DirectX ................. 93 FFdshow ................93...
-
Page 6: Preface
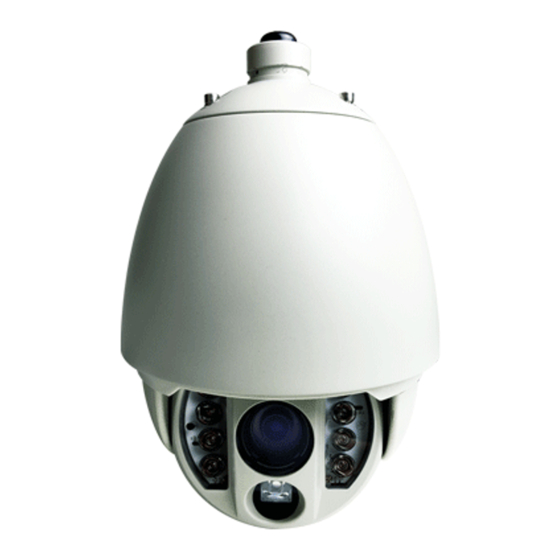
PREFACE This is a 1/2.8” Sony Starvis CMOS Sensor Speed Dome IP camera with a built-in web server. The user can view real-time video via IE browser. It supports H.264+, H.264, and JPEG video compression, providing smooth and high video quality. The video can be stored in Micro SD card and playback remotely. - Page 7 Hardware Multimedia SoC (MIT) 512MB Flash 128MB Image Sensor 1/2.8” Sony Starvis CMOS Sensor Sensitivity Color : 0.003 Lux (AGC ON) , B / W: 0.001 Lux (AGC ON) Lens Type 30x optical zoom Focal Length F=4.7mm (WIDE) to 141 mm (TELE) Maximum Aperture F1.5 ~ F4.0 View Angle...
- Page 8 Off / On Brightness -4 (Low) ~ 4(High) Contrast -4 (Low) ~ 4(High) Saturation -4 (Low) ~ 4(High) Sharpness -4 (Low) ~ 4(High) 4 DI / 1 DO G.711(64K) and G.726(32K,24K) Audio Compression Input : 3.5mm phone jack Audio Output: 3.5mm phone jack Support 2-way audio Power Source AC24V / DC36V / PoE IEEE 802.3 bt...
- Page 9 ROI, Smart Stream, Motion Detection, Anti Fog, DIS, Features Tampering Detection, Push Video , P2P(Optional) Crowd Detection,Queue Detection, Intrusion Detection, AI function (optional) Loitering Detection, Line Crossing Detection, Auto Tracking Quadruple Streaming Image Snapshot Full Screen Monitoring Compression Format H.264+ / H.264 / M-JPEG Video Bitrate Adjust CVBR, VBR Motion Detection...
-
Page 10: Product Installation
PRODUCT INSTALLATION Monitor Settings Caution: This setting only applies to Windows 7 system users. Right-Click on the desktop. Select Properties Change color quality to highest (32bit). -
Page 11: Hardware Installation
Hardware Installation Camera Without Any Mount Bracket Camera With Wall Mount Bracket... -
Page 12: Mounting The Camera (Optional)
Mounting the Camera (Optional) The camera in the package is already assembled. Please be sure its cable connects thoroughly from the camera body through inside the mount, and goes right behind the mounted surface to reach connectors for power supply and internet connection. - Page 13 Wall Mount Installation Steps 1) Ensure the mounted surface is solid enough to support the weight of the whole camera hardware. 2) Drill holes through the mounting surface for allowing cables through. 3) Put screws on to stiff the camera. Corner Mount (Facing Out) Corner Mount (Facing In) Pole Mount...
-
Page 14: Connector Instruction
Connector Instruction The camera connectors are as below. Connect the power and the Ethernet cable with the camera, and set it according to your network environment. PoE Injector Connection Setup Connect the IP camera with the PoE injector for supplying power to the camera. - Page 15 1. Connect the DC 56V with the power adaptor and connect the DATA IN with the RJ45 cable from the network host. 2. Connect the PWR+DATA OUT with the RJ45 cable from the camera. 3. If the power goes through successfully, the green signal lights of both ends should light up and the camera will start up.
-
Page 16: Logging In
Logging In Open the browser is opened, input the default IP address of the camera (192.168.1.200 as an example), and press enter on the keyboard. User will then be directed to live video page. If you are unable to establish connection between the camera and PC, refer to Assignment. - Page 17 iv. IP Scanner will search for all the IP Cameras connected on the LAN. The user can click Search IPCam to search again. v. Click one of the IP Cameras listed on the left side. The network configuration of this IP camera will be shown on the right side once you highlight the device with your mouse.
-
Page 18: Ip Assignment
You can select different network cards that you are currently connected to from the drop-down menu at the top right corner. You can also select the online device from a specific network card in Device lists, or choose Select All to include all network card devices in Device lists. -
Page 19: Install Active Control
Install Active Control When viewing the camera video for the first time via IE, the browser will ask you to install the ActiveX component. For users using IE 6.0 or above When viewing the camera video for the first time via IE, the browser will ask you to install the ActiveX component. - Page 20 v. When popup the following dialogue box, click Yes.
-
Page 21: Another Method
Another Method Go to: IE→Tools → Internet Options… → Security Tab → Trusted sites → Add the IP address and click OK. In the site list you can key in one single IP address or a LAN address. For example, if you add 192.168.21.*, all the IP address under 21.* on the LAN will be regarded as trusted sites. -
Page 22: Live Video
LIVE VIDEO Start an IE browser, input IP address of the IP camera in the address field. A dialogue box will pop up as below. Log in username & password using admin. When IP Camera is successfully connected, the following interface appears. Note: is a sign which flickers on the live view screen as Please change default password... -
Page 23: Submenu
Live Video Panel Click - Get into the administration page. Click - A snapshot preview window will appear. Choose to save the current snapshot or choose to discard it. Show the system time, video resolution, and other information. - Clicking the icon will enter the full screen mode. - Page 24 Snapshot: Save a JPEG picture Record Start: Record the video to the local PC. The video format is AVI and you will be asked to set up the directory for the video file. To stop recording, right-click again. Select “Record Stop”. iii.
-
Page 25: Performing Ptz
Choose to hide to make the frames invisible, or choose show to keep the frames. Performing PTZ PTZ Panel Move the camera view with 8-direction arrows. The bigger value selected in the faster each click with the arrow traveling time will be. If you click on the icon, the camera will go back to its initial position. -
Page 26: Setting A Preset Point
Setting a Preset Point After clicking on “Preset Point”, use the 8-direction arrows, Zoom, and Focus function to shift the camera view. After you adjust the camera view to where you want to set the preset point, select a number from the "Preset Point" drop-down menu, key-in a name in the "Name"... -
Page 27: Setting Auto Pan
If you select "Always" in Run Period, If you select manual focus in Focus the camera will keep patrolling until Mode, remember to focus clearly it is stopped manually. The longest toward the view point when setting up patrolling time lasts for 240 minutes. that preset point. -
Page 28: Auto Recovery
Auto Recovery In case there are no settings for “Pan” and “Patrol”, the settings made here recover the viewing angle of the IP camera automatically. Pending Time: Varies from No Action, 10~50 seconds to 1~10 minutes. Action: Different actions can be executed from other settings. -
Page 29: Advanced Setting
: Click to begin. Press 8-direction arrows to move camera view in a pattern of preset points, bear in mind that every movement made with your camera view will be recorded. : Once you have finished making your preset points in Record Start, click to stop. -
Page 30: Camera Configuration
CAMERA CONFIGURATION System Click to open the administration page as below from Live Video. Click titles under on the left to enter System menu. Click to go back to the Live Video page. -
Page 31: System Information
System Information Server Information Set up the camera name, language, and the camera time. Server Name This is the Camera name. This name will be shown on the IP Scanner. Tick the checkbox of Status Bar to display the Server Name in Live Video. -
Page 32: Text
Click Text Edit to edit the OSD content which is defaulted as OSD_Display. Text Input the arbitrary content of the OSD on Live video screen. Size Adjust the size of the OSD text on Live video screen. Color Adjust the color of the OSD text on Live video screen. -
Page 33: User Management
User Management... -
Page 34: Anonymous User Login
Anonymous User Login Select Yes for allowing access to watch live video of the IP camera without having to enter username and password. Yet when entering the configuration page of the IP camera, the system will do otherwise. Select No for requiring a username and login to access the camera. -
Page 35: Firmware Upgrade
Firmware Upgrade To update the firmware online, click Browse… to select the firmware, and then click Upgrade to proceed. Reboot System Restart the IP camera. Factory Default Delete all the settings of this IP camera. Setting Management The user can download the current settings to PC, or upgrade from previous saved settings. -
Page 36: Network
Network Click to open the administration page as below from Live Video. Click on the title under the Network category to open Advanced, PPPoE & DDNS Server Settings. Click to go back to the Live Video page. -
Page 37: Ip Settings
IP Settings IP Assignment The IP Camera supports DHCP and static IP. DHCP The IP Camera will get all the network parameters automatically. Static IP Type-in the IP address subnet mask, gateway, and DNS. IPv6 Assignment By enabling DHCPv6 you can configure the following IPv6 address settings: Manually setup the IPv6 address Key-in the Address, Gateway, and DNS. -
Page 38: Automatically Generated Ipv6 Address
Automatically generated IPv6 Address Indicates a virtual IPv6 address automatically generated by the IP camera. This virtual IPv6 address cannot be used on WAN. Use IPv6 address to access the IP camera. Open a web browser and input [IPv6 address] in its address bar. The [ ] parentheses mark is necessary. Port Assignment The user might need to assign a different port to avoid conflicts when setting up the IP. -
Page 39: Upnp Port Forwarding
UPnP Port Forwarding accessing the IP Camera from the Internet; this Enable UPnP Port Forwarding for option allows the IP Camera to open ports on the router automatically so that video streams can be sent out from a LAN. There are three external ports for being set: Web Port, Http Port and RTSP port. -
Page 40: Rtsp Setting
iii. Windows might ask your confirmation for enabling the components. Click Yes. Now the IP device is displayed under the LAN. Double-click the icon to access the camera via web browser. To disable the UPnP, click Hide icons for networked UPnP devices in the tasks column. -
Page 41: Rtsp Authentication
RTSP Authentication Choose Digest, Basic or Disable. Disable means everyone who knows your camera IP Address can link to your camera via RTSP. No username and password are required. Under Basic and Digest authentication mode, the camera asks for a username and password before allows access. -
Page 42: Security
Security By selecting Disable, the username and password are not required for accessing the camera via ONVIF. By selecting Enable the username and password are necessary. RTSP Keepalive When the function is enabled, the camera will check once in a while if the camera via ONVIF is still connected. -
Page 43: Lltd
LLTD If your PC supports LLTD, enable LLTD for allowing checking the connection status, properties, and device location (IP address) in the network map. If the computer is running Windows Vista or Windows 7, you can find LLTD through the path: Control Panel → Network and Internet → Network and Sharing Center →... -
Page 44: Https (Hypertext Transfer Protocol Secure)
Https (Hypertext Transfer Protocol Secure) The Https protocol has a verifying mechanism. When the user access a website via Https, the browser will check the certificate of that domain and verify its trustiness and security. Certificate generation process: Connection Types TLS is the abbreviation of Transport Layer Security. -
Page 45: Remove Existing Certificate
HTTPS User can access the camera via HTTPS path but cannot access it via the HTTP path. HTTP & HTTPS Both the Http and Https path can be used to access the camera. When you change the connection type settings, it may cause connection error or disconnection error if you switch the protocol directly. - Page 46 Fill-in the following form and click apply. Country: Country where the company is located State or province: The state or province where the company is located Locality: The name of the city where the company is located Organization: Needs to be consistent with legally registered name Organizational Unit: Company department, you can fill in its common name Common Name: The name of the domain you want to secure After generating a certificate request, if you choose to turn it &...
- Page 47 If you choose to generate a self-signed certificate, fill-in the following forms and set the validity day, click Apply to finish installed it. After finishing the installation, click on Content to call out and check the certificate content. To use Https to access the camera, open your browser, and key-in https:// (IP address)/ in the address bar.
-
Page 48: Snmp
SNMP (Simple Network Management Protocol) The term "Community name" in SNMPv1 and SNMPv2c can be roughly regarded as key. The person who has the community name has the authority to read or edit the information of IP camera via SNMP. SNMPv1 or SNMPv2 Fill in the name of both Write Community and Read Community. - Page 49 name( the same as "community name" in v1&v2c, or sometimes we call it "context name") but the password in order to access the IP camera. Please set security name, authentication type, authentication password, encryption type, encryption password of write and read respectively. The security name can be any English characters and numbers, and must be shorter than 31 bits.
-
Page 50: Snmpv1/V2C Trap
same encryption type with camera setting for privacy protocol (DES), and key in encryption password of write security. Click OK to add the user who has write authority to the camera. Connection succeeds. If you want to add the new user who has read authority, key in correct security user name(public), key in authentication password of read security, and key in encryption password of read security. -
Page 51: Access List
Access List Enable IP address filter to allow/reject some IP address a network access. There are two options: single and range. Check the Enable ip Address filter, enter the IP address you want to deny access. Input the IP address you would like to deny entry, select "deny" and... -
Page 52: Qos/Dscp
click the "Add" icon to add this IP address to the rejection list, the user with that IP address connecting to the camera will be blocked. You can also choose to set a range of IP addresses to deny access, but allow several other IP address in the range to access the camera. -
Page 53: Pppoe & Ddns
Check what version supports the authenticator and authentication server. This camera supports EAP-TLS method. Enter the ID, password issued by the CA, then upload related certificates. PPPoE & DDNS PPPoE Setting... -
Page 54: Send Mail After Pppoe Dialed
Select Enabled to use PPPoE. Key-in the Username and password for ADSL connection. Send mail after PPPoE dialed When connected to the internet, the camera will send a mail to a specific mail account. DDNS Setting camddns as an example: Enable this service→Input username→IP schedule update→Default: 5 minutes→Click Apply Check results from the message presented inside the State field. -
Page 55: Server Settings
(4) Update Failed, the name is already registered: The user name has already been used. Please change it. (5) Update Failed; please check your internet connection: Network connection failed. (6) Update Failed, please check the account information you provided: The server, user name, and password may be wrong. -
Page 56: Mail Setting
Mail Setting To send out the video via mail of FTP, set up the configuration first. Click Apply to confirm settings at the bottom of Server Settings, then click Test icon to test the server connection. FTP Setting To send out the video via mail of FTP, please set up the configuration. Click Apply to confirm settings at the bottom of Server Settings, then click Test icon to test the server connection. - Page 57 Click Apply to confirm settings at the bottom of Server Settings, then click Test icon to test the server connection.
-
Page 58: A/V Settings
A/V Settings Click to open the administration page as below from Live Video. Click the titles under the category on the left to enter the Image Settings menu. Click to go back to the Live Video page. -
Page 59: Image Setting
Image Setting Privacy Mask A defined area on the monitoring screen can be masked as a block of color only in Live Video for security and privacy purposes, but will not be visible in the video recorded. You can create up to 24 privacy masks. Start drawing the masked area on the preview screen with your mouse left button after selecting a number from the Mask Number drop-down list. -
Page 60: Image Setting
You can click Go to start adjusting the size of this masked area which has been assigned with a Mask Number by clicking and dragging its edge with mouse left button. Click Save to finish creating the new mask. Click Clear to erase the current mask. -
Page 61: Brightness
Input Resolution with WDR feature=True WDR Back to Image Setting where you can operate a different set of settings. D-WDR enables the camera to reduce the contrast in the view to avoid dark zones as a result of over & under exposure True-WDR enables the camera to combine the over &... -
Page 62: Sharpness
Sharpness It is used to adjust the contrast of monitoring objects or edges possessed by objects in the screen. Denoise 3D or 2D Filter the noise & blur from the image through 3D or 2D filters. Shutter Time Choose the location of your camera or a fixed shutter time. The shorter the shutter time is the less light the camera receives and the image becomes darker. -
Page 63: Blc
Back light compensation. This function is used to make the dark zone resulting from back light lighter and clearer. It allows the other objects in the view to be free from the effect of strong light. The higher level you select, the darker the blanked zone becomes. - Page 64 Light Sensor Mode Automatically adjust itself depending on the light of the monitoring scene. Night to Day Interval & Day to Night Interval: Set up the duration of how long before the Day time shifts to Night time (or the other way around). Day to Night Lux &...
-
Page 65: Speed Dome Height
Night to Day Interval & Day to Night Interval Night to Day Level & Day to Night Level: Appoint desired lux values as a standard for switching Night to Day Interval & Day to Night Interval. IR Intensity Adjust the IR intensity level from Far, Middle or Near. Speed Dome Height Apply different value from 5~30 meters for heights regarding how high the camera is positioned. -
Page 66: Video System
Input Resolution without WDR features Input Resolution with WDR features: Video System Choose from NTSC or PAL for video signal. Streaming Setting: Basic Mode Resolution range varies depending on different modes. Resolution Choose a set for the camera resolution its drop-down list. Profile Chose Main or Baseline based on bandwidth consumption of the video. -
Page 67: Rtsp Path
Adjust the ROI Area Quality and FPS of None ROI values of each area from each drop down list. You can see the ROI Status once ROI is activated. RTSP Path Offers the RTSP output connecting path. Streaming Setting: Advanced Mode Resolution range varies depending on different modes. -
Page 68: Resolution Profile
Resolution Profile Bitrate Control Mode Choose CBR(Constant Bit Rate) or CVBR(Constrained Variable Bit Rate) modes. Video Bitrate Limit The higher the CBR is, the better the video quality is. Video Quantitative In a surveillance environment that needs to process more image details, the image quality will need to be configured with a higher parameter value. -
Page 69: Video Bitrate
Video Bitrate The higher Video Bitrate, the better the video quality is. Video Frame Rate The video refreshing rate per second. Video Format H.264+, H.264 RTSP Path Offers the RTSP output connecting path. Audio The user can send audio from the IP Camera built-in microphone to the remote PC and audio from remote PC to IP Camera’s external speaker. - Page 70 Please click on the button to keep the changes when all the settings are completed and confirmed.
-
Page 71: Event List
Event List Click to open the administration page as below from Live Video. Click the titles under the category on the left to enter the Event Setting menu. The IP Camera provides multiple event settings. Click to go back to the Live Video page. -
Page 72: Event Setting
Event Setting is a sign which appears on the preview screen as a Please change default password reminder, to suggest you change login settings in System Information to secure your account privacy. Motion Detection A motion detection operation allows user to define a certain area which detects anything moving or changing its position within. -
Page 73: Motion Area
Motion Area Assign the directory by checking on its checkbox for where notification is going to be sent whenever a motion event is triggered. Popped up after Save to SD card checkbox is ticked by your mouse. Check E-mail/ FTP/ Samba checkboxes on the Log option to send the motion detection log to E-mail/ FTP/ Samba simultaneously. -
Page 74: Record Time Setting
Record Time Setting When an event occurs, the IP camera can record a video clip or take a snapshot, and then send it via mail/ FTP/ Samba. Select the video recording length before and after the event is detected. Refer to the image below. Network Dis-connected The image will be recorded to the SD card after the IP Camera detects network disconnection once “Save to SD card”... -
Page 75: Schedule
After enabling IP Check, the IP camera can check if the network server is connecting. If the checking fails for 4 times, the camera will reboot. Click to update all the settings adjusted. Schedule Tick the grids on the calendar to manage the time of your schedule to automatically record video files, or take snapshots. -
Page 76: Record
Record After completing the Schedule, the camera data will be recorded according to the schedule made from the calendar. Beware that SD cards may fail being recorded for a long period of time. You may set up how much you would like the SD card memory to be used in order to estimate the right time to swap a new one. -
Page 77: I/O Pin Definition
Enter Setting, and mark the Out1 checkbox to enable I/O signal. You may also enter Live Video via internet browser & check Out1 to enable I/O signal. I/O PIN Definition GND (Ground): Initial state is LOW DO (Digital Output): Max. 50mA ,. DC 12V DI (Digital Input): Max. -
Page 78: Input Setting
Input Setting The IP camera supports both input and output operations. When the input condition is triggered, the relay will be also triggered & a notification will be sent depending what checkboxes are ticked. -
Page 79: Log
Tick Save to SD card to enable the you would like to save data with. Subject Input & edit the message you would receive for triggered alarm. Interval For example, if you select "10 sec" here, once the motion is detected and action is triggered, it cannot be triggered again within 10 seconds. -
Page 80: Log List
The camera triggers the external device and lasts for certain time according to the internal setting, and the user is not allowed to break off the alarm manually. Click on the button to keep all the changes. Log List The log keeps data for user to check through events which have occurred during the monitoring operation. - Page 81 …all events happened within that year/month/date will then appear in a list like the one below under the Video category. There are 3 types of file formats, with each represents a specific type of event. Each type of file formats is different depending on how your Event Setting been configured from the start.
- Page 82 Double-click on the file name to open the file in avi format. You need Microsoft Media Player which is supposedly built-in in your PC to open this file. Like the example below: The default Username & Password for playing the video file are both admin. Clicking on an IVS file (such as 215655i)…...
- Page 83 Clicking on any title that is formatted as a “time unit” (such as 21 o’clock)… …will summon a pop-up window indicating the snapshot taken as scheduled in Schedule mode and enabled in Snapshot mode. Click the icon to delete any file by marking on the checkbox under the Del category with a mouse click.
-
Page 84: Record
Record The recording mode is enabled after Record is set in Schedule mode. Take the schedule calendar below for example, the grids coloured in green between 3~12 are scheduled to start recording from 3 o’clock to 12 o’clock from Monday to Thursday. Once the recording mode is on, the video data recorded will be found and labelled as 2017/11/09. -
Page 85: Sd Management
The number at the bottom indicates the distributive law of the current SD Card memory which is divided and assigned to different types of recording purposes. The left side shows how much memory is still available, and the right side shows how much the total memory is. -
Page 86: Auto Deletion
Auto Deletion Choosing “The 1st day” means the recoding file will be kept for one day. Example: It is five o’clock now. Choose “The 1st day”. The files will be kept from five o’clock yesterday to five o’clock today. The oldest file will be deleted if the Micro SD Note : The use of the SD card will s l i g h t l y affect the operation of the card is full. -
Page 87: Copy To Pc
You may copy any of the protocol provided in the window and paste it on a web browser as a URL address to look at each file. Copy to PC You can insert the Micro SD card to the PC and read the files directly, or use FlashGet instead to download the files from the IP camera. - Page 88 Click OK to start download. FlashGet is free software that can be downloaded from FlashGet official website. The example above is based on FlashGet ver.1.9.6.
-
Page 89: Network Configuration
NETWORK CONFIGURATION Configuration I Internet Access: ADSL or Cable Modem IP address: One real IP or one dynamic IP Only the IP Camera is connected to the internet For fixed real IP, set up the IP into IP Camera. ... -
Page 90: Configuration Iii
IP address: More than one real IP or one dynamic IP IP Camera and PC connect to the internet Device needed: Switch Hub. For fixed real IP, set up the IP into IP Camera and PC. For dynamic IP, start PPPoE. -
Page 91: Package Contents
PACKAGE CONTENTS IP Speed Dome Quick Installation Guide Mount (Optional) Hex Wrench HEX SOCKET CAP SCREWS Anchor Bolt Power Cord (Optional) Adaptor (Optional) PoE Injector • The CD includes user manual and software tools... -
Page 92: Accessories (Optional)
Accessories (Optional) You can choose different accessories for your camera: Standard Bracket Mounting Bracket 1... -
Page 93: Mounting Bracket 2
Mounting Bracket 2 Mounting Bracket 3... -
Page 94: Mounting Bracket 4
Mounting Bracket 4 Mounting Bracket 5... -
Page 95: Mounting Bracket 6
Mounting Bracket 6 Mounting Bracket 7... -
Page 96: Micro Sd Card Compatibility (Optional)
MICRO SD CARD COMPATIBILITY (OPTIONAL) The following are the recommended Micro SD Cards: Transcend SDHC class4 16GB SD class4 16GB SDHC class4 32GB SD class4 32GB SD class6 4GB SDHC class6 4GB SD class6 8GB SDHC class6 8GB SD class6 16GB SDHC class6 16GB SDHC class10 4GB SDHC class10 8GB... -
Page 97: Tools Download
TOOLS DOWNLOAD The applications below are free downloading. Please refer to the official sites respectively for the newest version. Internet Explorer Version: 8.0 Official website: http://windows.microsoft.com/en-US/internet-explorer/products/ie/home DirectX Version: 9.0c Official website: http://www.microsoft.com/en-us/download/details.aspx?id=35 Adobe Reader Version: 10.1 Official website: http://get.adobe.com/reader/ FFdshow Version: rev4422_20120521 Official website: http://www.free-codecs.com/download/ffdshow.htm...
Need help?
Do you have a question about the HLT-S8KDH and is the answer not in the manual?
Questions and answers