Table of Contents
Advertisement
Available languages
Available languages
0.9 CU. FT. BUILT- IN CONVECTION MICROWAVE
OVEN WITH AIR FRYER
FOUR À MICRO-ONDES À CONVECTION EN-
CASTRABLE AVEC FRITEUSE DE 0,9 PI3
HORNO MICROONDAS EMPOTRADO DE 0,9 PIES
CÚBICOS CON FREIDORA DE AIRE
FMAN09-BL/2022007035
USER MANUAL/MANUEL D'UTILISATION/ MANUAL DEL USUARIO
* Picture shown here is for reference only.
* L'image présentée ici n'est qu'une référence.
* La imagen que se muestra es solo como referencia
Advertisement
Chapters
Table of Contents

Related Manuals for Furrion FMAN09-BL


Summary of Contents for Furrion FMAN09-BL
- Page 1 FOUR À MICRO-ONDES À CONVECTION EN- CASTRABLE AVEC FRITEUSE DE 0,9 PI3 HORNO MICROONDAS EMPOTRADO DE 0,9 PIES CÚBICOS CON FREIDORA DE AIRE FMAN09-BL/2022007035 USER MANUAL/MANUEL D’UTILISATION/ MANUAL DEL USUARIO * Picture shown here is for reference only. * L’image présentée ici n’est qu’une référence.
-
Page 2: Table Of Contents
Thank you for purchasing this Furrion® product. Before operating or installing, please read these instructions carefully. This instruction manual contains information for safe use, installation, and maintenance of the product. Please keep this instruction manual in a safe place for future reference. Be sure to pass on this manual to new owners of this product. -
Page 3: Explanation Of Symbols
Explanation of Symbols This manual has safety information and instructions to help WARNING you eliminate or reduce the risk of accidents and injuries. Always respect all safety warnings identified with these Indicates a potentially hazardous situation which, if not symbols. A signal word will identify safety messages and avoided, could result in death or serious injury. -
Page 4: Grounding Instructions
Grounding Instructions needed to handle the utensil. 15. Do not cover or block any openings on the appliance. This appliance must be grounded. In the event of an electrical 16. Do not store or use this appliance outdoors. Do not use short circuit, grounding reduces risk of electric shock by this product near water, for example, near a kitchen sink, providing an escape wire for the electric current. -
Page 5: California Residents Only
● This equipment has been tested and found to comply California Residents Only with Part 18 of the FCC Rules. Operation is subject to the following two conditions: (1) This device may not cause WARNING harmful interference, and (2) this device must accept any interference received, including interference that may Cancer and Reproductive cause undesired operation. -
Page 6: Installation
Installation the bottom of the microwave oven to the top of the range What’s in the Box hood refer to dimension E. Make sure all the following items are included in the packaging. If any item is damaged or missing, contact your dealer. -
Page 7: Electrical Connection
3. Slide the microwave oven into the cabinet opening. (Fig. 6) PMA Screws 5/16" x 4 Fig. 2 Fig. 6 4. Slide the microwave oven into the cabinet opening. (Fig. 3) 4. Attach the microwave into the cabinet with 4pcs M4 screw x 13/16”... -
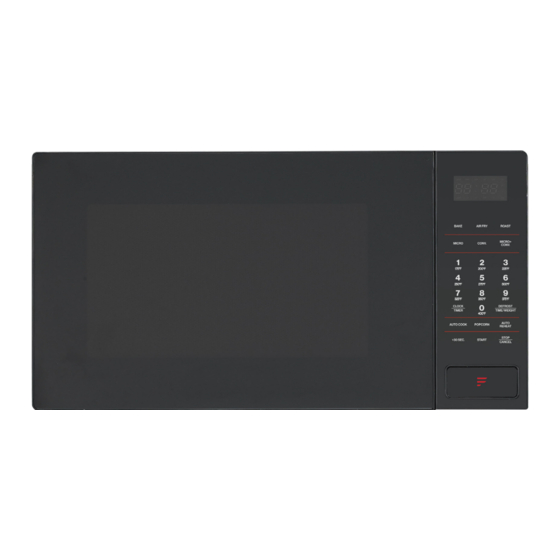
Page 8: Control Panel
Control Panel DISPLAY Cooking time, power, indicators and present time are displayed. BAKE Use to bake food. AIR FRY Use the air fry function to cook food. ROAST Use to roast food. MICRO Use to microwave food with selected power level. CONV. -
Page 9: Operation Instructions
Operation Instructions ● When the oven is first plugged in, a beep will sound and Press MICRO button Power (Display) the display will show “12:00” and “CLOCK”. Once 100% (P100) ● In the process of setting the program, if the start button Twice 90% (P-90) is not pushed within 30 seconds, the control will reset to... - Page 10 NOTE: During cooking, you can check the convection AIR FRY temperature by pressing MICRO+CONV. button. For food code “AF-1”~”AF-7”: TIME DEFROST 1. In standby mode, press AIR FRY button twice, then press the button repeatedly to select food code. 1. In standby mode, press DEFROST/TIME/WEIGHT 2.
- Page 11 Auto bake menus: Auto cook menus: Code Food Cooking Time Preheat Temperature Code Food Weight/Serving Time Ab-1 Cookies 11:00 350ºF 8 oz 2:40 Ab-2 Cake 16:00 350ºF AC-1 Beverage 10 oz 3:10 Ab-3 Brownies 45:00 350ºF 12 oz 3:30 6 oz 2:40 For others food: 1.
-
Page 12: Cooking Techniques
Microwave cooking Code Food Weight Time 4 oz 1:20 Microwave cooking (with lower power level) 8 oz 1:40 1. Input the first microwave cooking program. Do not press 12 oz 2:20 Mac and AH-4 START button. Cheese 16 oz 3:00 2. -
Page 13: Utensils Guide
To prevent overcooking, place delicate areas, such as Paper towels and napkins — Use for short-term heating asparagus tips, toward the center of the turntable. and covering; these absorb excess moisture and prevent spattering. Do not use recycled paper towels, which may SHIELDING contain metal and could ignite. -
Page 14: Troubleshooting
9. It is occasionally necessary to remove the glass tray 13. The oven should be cleaned regularly and any food for cleaning. Wash the tray in warm sudsy water or in a deposits removed. Failure to maintain the oven in a clean dishwasher. - Page 15 Nous vous remercions d’ a voir acheté ce produit Furrion®. Avant d’utiliser ou d’installer l’ a ppareil, veuillez lire attentivement ces instructions. Ce manuel d’instructions contient des informations pour une utilisation, une installation et une maintenance sûres du produit. Veuillez conserver ce manuel d’instructions dans un endroit sûr afin de pouvoir vous y référer ultérieurement. Veillez à transmettre ce manuel aux nouveaux propriétaires de ce produit.
-
Page 16: Explication Des Symboles
Explication des symboles Ce manuel contient des informations et des instructions de sécurité pour AVERTISSEMENT vous aider à éliminer ou à réduire les risques d’ a ccidents et de blessures. Respectez toujours tous les avertissements de sécurité identifiés par Indique une situation potentiellement dangereuse qui, si elle n’ e st pas ces symboles. -
Page 17: Instructions De Mise À La Terre
Instructions de mise à la terre 17. N’utilisez pas cet appareil si le cordon ou la fiche sont endommagés, s’il ne fonctionne pas correctement, s’il a été endommagé ou s’il est Cet appareil doit être mis à la terre. En cas de court-circuit électrique, la tombé. -
Page 18: Résidents De Californie Uniquement
● Cet équipement a été testé et déclaré conforme à la partie 18 des Résidents de Californie uniquement règles de la FCC. Le fonctionnement est soumis aux deux conditions suivantes : (1) Cet appareil ne doit pas causer d’interférences AVERTISSEMENT nuisibles, et (2) cet appareil doit accepter toute interférence reçue, y compris les interférences qui peuvent causer un fonctionnement Cancer et reproduction indésirable. -
Page 19: Installation
Installation Contenu de la boîte Assurez-vous que tous les éléments suivants sont inclus dans l’ e mballage. Si un élément est endommagé ou manquant, contactez votre revendeur. ● Corps du four à micro-ondes x 1 ● Anneau à rouleaux x 1 ●... -
Page 20: Connexion Électrique
3. Faites glisser le four du micro-ondes dans l’ o uverture de l’ a rmoire. Vis PMA 5/16 po x 4 (Fig. 6) Fig. 2 4. Faites glisser le four du micro-ondes dans l’ o uverture de l’ a rmoire. Fig. 6 (Fig. 3) 4. Fixez le micro-ondes dans l’ a rmoire avec les 4 vis M4 x 13/16 po fournis. -
Page 21: Panneau De Commande
Panneau de commande AFFICHEUR Le temps de cuisson, la puissance, les indicateurs et l’heure actuelle sont affichés. BAKE (CUIR) Permet de faire cuire des aliments. AIR FRY (FRITURE À L’AIR) Utilisez la fonction air fry pour cuire les aliments. ROAST (RÔTIR) Permet de faire rôtir des aliments. -
Page 22: Instructions D'utilisation
Instructions d’utilisation ● Lorsque le four est branché pour la première fois, un signal sonore Appuyez sur la touche MICRO. Alimentation (affichage) retentit et l’ a ffichage indique « 12:00 » et « CLOCK ». Une fois 100 % (P100) ● Pendant le réglage du programme, si vous n’ a ppuyez pas sur le Deux fois 90 % (P-90) bouton de démarrage dans les 30 secondes, la commande se remet... - Page 23 REMARQUE : Pendant la cuisson, vous pouvez vérifier la température AIR FRY (FRITURE À L’ A IR de convection en appuyant sur le bouton MICRO+CONV. Pour le code alimentaire « AF-1 »~"AF-7 » : TEMPS DE DÉGIVRAGE 1. En mode veille, appuyez deux fois sur la touche AIR FRY, puis appuyez plusieurs fois sur la touche pour sélectionner le code 1.
- Page 24 Menus de cuisson automatique : Menus de cuisson automatique : Température de Code Alimentation Poids/portion Temps Code Alimentation Temps de cuisson préchauffage 8 oz. 02:40 Ab-1 Biscuits 11:00 350 °F AC-1 Boissons 10 oz. 03:10 Ab-2 Gâteau 16:00 350 °F 12 oz. 03:30 Ab-3 Brownies 45:00 350 °F 6 oz.
-
Page 25: Techniques De Cuisson
Cuisson par micro-ondes Code Alimentation Poids Temps 4 oz. 01:20 Cuisson au micro-ondes (avec un niveau de puissance inférieur) 8 oz. 01:40 1. Saisissez le premier programme de cuisson au micro-ondes. 12 oz. 02:20 Mac et AH-4 N’ a ppuyez pas sur le bouton START. Fromage 16 oz. -
Page 26: Guide Des Ustensiles
SHIELDING (BLINDAGE) Serviettes en papier et serviettes de table - utilisez-les pour chauffer et couvrir à court terme; elles absorbent l’ e xcès d’humidité et empêchent Protégez les aliments avec des bandes étroites de papier d’ a luminium les éclaboussures. N’utilisez pas de serviettes en papier recyclé, qui pour éviter qu’ils ne soient trop cuits. -
Page 27: Dépannage
9. Il est parfois nécessaire de retirer le plateau en verre pour le nettoyer. 13. Le four doit être nettoyé régulièrement et les dépôts alimentaires Lavez le plateau dans de l’ e au chaude savonneuse ou dans un lave- doivent être éliminés. Le fait de ne pas maintenir le four dans un vaisselle. -
Page 28: Tabla De Contenidos
Gracias por adquirir este producto Furrion®. Antes de utilizarlo o instalarlo, lea atentamente estas instrucciones. Este manual de instrucciones contiene información para el uso, la instalación y el mantenimiento seguros del producto. Guarde este manual de instrucciones en un lugar seguro para futuras consultas. Asegúrese de entregar este manual a los nuevos propietarios de este producto. -
Page 29: Explicación De Los Símbolos
Explicación de los símbolos Este manual contiene información e instrucciones de seguridad para ADVERTENCIA ayudarlo a eliminar o reducir el riesgo de accidentes y lesiones. Respete siempre todas las advertencias de seguridad identificadas con estos Indica una situación de peligro potencial que, si no se evita, podría símbolos. -
Page 30: Instrucciones De Puesta A Tierra
Instrucciones de puesta a tierra 15. No cubra ni bloquee ninguna abertura del aparato. 16. No guarde ni use este aparato al aire libre. No utilice este producto Este aparato debe estar conectado a tierra. En caso de un cortocircuito cerca del agua, por ejemplo, cerca de un fregadero, en un sótano eléctrico, la conexión a tierra reduce el riesgo de descarga eléctrica húmedo, cerca de una piscina o lugares similares. -
Page 31: Solo Residentes De California
● Este equipo ha sido probado y cumple con la Parte 18 de las Reglas Solo residentes de California de la FCC. La operación está sujeta a las siguientes dos condiciones: (1) Este dispositivo no puede causar interferencia dañina y (2) este ADVERTENCIA dispositivo debe aceptar cualquier interferencia recibida, incluida la interferencia que pueda causar un funcionamiento no deseado. -
Page 32: Instalación
Instalación Qué hay en la caja Asegúrese de que todos los siguientes elementos se incluyan en el embalaje. Si algún elemento está dañado o falta, comuníquese con su distribuidor. ● Cuerpo de horno de microondas x 1 ● Anillo de rodillo x 1 ●... -
Page 33: Conexión Eléctrica
3. Deslice el horno de microondas en la abertura del gabinete. (Fig. 6) Tornillos PMA 5/16" x 4 Fig. 2 Fig. 6 4. Deslice el horno de microondas en la abertura del gabinete. (Fig. 3) 4. Fije el microondas en el gabinete con 4 tornillos M4 x 13/16” provistos. (Fig. -
Page 34: Panel De Control
Panel de control PANTALLA (DISPLAY) Se muestran el tiempo de cocción, la potencia, los indicadores y la hora actual. HORNEAR (BAKE) Úselo para hornear alimentos. FREIR AL AIRE (AIR FRY) Use la función de Air Fry para cocinar alimentos. ASADO (ROAST) Úselo para asar alimentos. MICRO Úselo para calentar alimentos en el microondas con el nivel de potencia seleccionado. -
Page 35: Instrucciones De Uso
Instrucciones de uso ● Cuando el horno se enchufa por primera vez, sonará un pitido y la Pulse el botón MICRO Potencia (pantalla) pantalla mostrará "12:00" y "CLOCK". Una vez 100% (P100) ● En el proceso de configuración del programa, si el botón de inicio no Dos veces 90% (P-90) se presiona dentro de los 30 segundos, el control se restablecerá... - Page 36 NOTA: Durante la cocción, puede verificar la temperatura de FREÍR AL AIRE (AIR FRY) convección presionando el botón MICRO+CONV. Para el código de alimento “AF-1”~”AF-7”: DESCONGELACIÓN POR TIEMPO 1. En el modo de espera, presione el botón AIR FRY dos veces, luego presione el botón repetidamente para seleccionar el código de 1.
- Page 37 Menús de horneado automático: Menús de cocción automática: Temperatura de Código Alimentos Peso/Porción Tiempo Código Alimentos Tiempo de cocción precalentamiento 8 onzas 02:40 Ab-1 Galletas 11:00 350ºF AC-1 Bebida 10 onzas 03:10 Ab-2 Pastel 16:00 350ºF 12 onzas 03:30 Ab-3 Brownies 45:00 350ºF...
-
Page 38: Técnicas De Cocina
Cocinar en el microondas Código Alimentos Peso Tiempo 4 onzas 01:20 Cocinar en el microondas (con nivel de potencia más bajo) 8 onzas 01:40 1. Introduzca el primer programa de cocción por microondas. No 12 onzas 02:20 Macarrones con AH-4 presione el botón START. -
Page 39: Guía De Utensilios
BLINDAJE Toallas y servilletas de papel: úselas para calentar y cubrir a corto plazo; estos absorben el exceso de humedad y evitan las salpicaduras. Cubra los alimentos con tiras estrechas de papel de aluminio para No use toallas de papel recicladas, que pueden contener metal y evitar que se cocinen demasiado. -
Page 40: Solución De Problemas
9. Ocasionalmente es necesario quitar la bandeja de vidrio para 13. El horno debe limpiarse con regularidad y eliminarse los restos limpiarla. Lave la bandeja en agua jabonosa tibia o en un lavavajillas. de comida. No mantener el horno en condiciones limpias 10. - Page 41 The contents of this manual are proprietary and copyright protected by Lippert. Lippert prohibits the copying or dissemination of portions of this manual unless prior written consent for an authorized Lippert representation has been provided. Any unauthorized use shall void any applicable warranty. The information contained in this manual is subject to change without notice and at the sole discretion of Lippert.
Need help?
Do you have a question about the FMAN09-BL and is the answer not in the manual?
Questions and answers