Advertisement
Quick Links
en
USER MANUAL
Range Hood
Power supply: 120V
Rated power: 248W
Frequency: 60Hz
Free 3 months
extension
of the
original limited warranty
period!* Simply text a
picture of your proof of
purchase to:
1-844-224-1614
*The warranty extension is for the
three months immediately following
the completion of the product's
original warranty period.
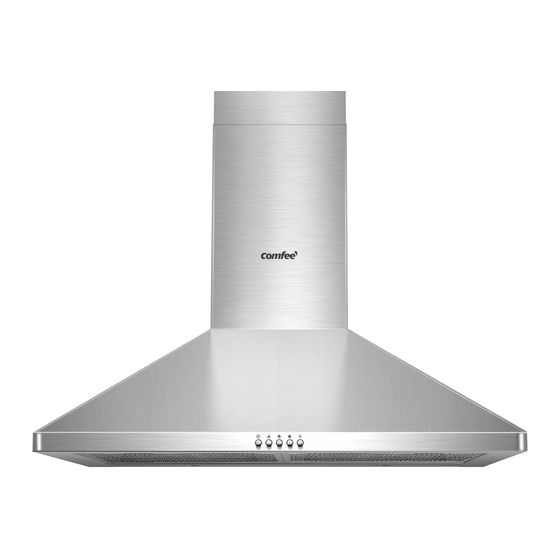
MODEL NUMBER CVP30W4AST
CVP36W4AST
version A - 11 - 2021
Advertisement

Subscribe to Our Youtube Channel
Related Manuals for Comfee CVP30W4AST


Summary of Contents for Comfee CVP30W4AST
- Page 1 Simply text a picture of your proof of purchase to: 1-844-224-1614 *The warranty extension is for the three months immediately following the completion of the product’s original warranty period. MODEL NUMBER CVP30W4AST CVP36W4AST version A - 11 - 2021...
- Page 3 INTENDED FOR RESIDENTIAL COOKING USE ONLY READ ALL INSTRUCTIONS BEFORE INSTALLATION AND USE WARNING CAUTION IMPORTANT WARNING alerts you to situations that may CAUTION indicates a potentially hazardous IMPORTANT indicates installation, operation, cause serious body harm, death or property situation which, if not avoided, may result in maintenance or valuable information that is not damage.
- Page 4 COMPONENTS Ref. Qty. Product Components Hood Body, complete with: Controls, Light, Blower, Filter. Lower Decorative Chimney Upper Decorative Chimney The Activated Charcoal filter (optional) Grease filter (30'') Grease filter (36'') Qty. Documentation Instruction Manual Ref. Qty. Optional Installation Components Screws M5 x 1.97'' Wall Plugs Screws M4.2 x 0.37'' Hood fixing bracket...
- Page 5 6.73" 9.0'' 18 .58" MVG36W7AST MVG30W7AST 30" 36"...
- Page 6 INSTALLATION PREPARATION 1. SELECT INSTALLATION TYPE A. Vented Installation B. Non-Vented / Recirculation Installation A. Vented Installation Roof Discharge This canopy hood is designed for venting through the roof or wall. A 6" round vent system is needed for installation (not included).
-
Page 7: Installation Preparation
INSTALLATION PREPARATION 8.5" 2" min. 6.5" Vent and power Vents and electrical should supply cable 8.5" entry location be installed in the gray shaded areas to provide a clean finished look 20" min. Side Side cabinet cabinet 30" or 36" Centerline Cooking surface CAUTION... -
Page 8: Installation
INSTALLATION Hood Mounting Screw Installation 1. Determine and mark the centerline on the wall where the hood will be installed. 2. Select a mounting height between a minimum of 25.6'' and a suggested maximum of 29.53'' above the range to the bottom of the hood. Mark a reference line on the wall. - Page 9 INSTALLATION WALL DRILLING AND BRACKET FIXING unit:inch 1.57" 1.57" 3.15" 3.15" 6.69" 6.69" Chimney 15.75" 15.35'' -24.41'' 15.75"+ 11.81'' Vertical reference line A vertical line up to the ceiling or up to the upper limit, at the center of the area in which the ...
- Page 10 Hang and Mount the Vent Hood: • Hang the vent hood onto fixing bracket 20 • Level the hood, and insert 2 long screws (10 ) into bracket 21 at level B • Insert 2 long screws (10) into the hood at level A IMPORTANT •...
- Page 11 Install Upper Decorative Chimney : • Install Chimney mounting bracket (21) at holes previously marked on level D. • Slide the upper decorative chimney 2.2 up to the horizontal line D. • Insert 2 small sheet metal screws into the sides of the bracket to secure the Upper Decorative Chimney.
- Page 12 Speed adjustment. ON/OFF MOTOR SWITCH: Press on this switch to turn on/off the motor. SPEED SWITCH: Press on this switch, the motor runs at LOW speed. SPEED SWITCH: Press on this switch, the motor runs at MEDIUM speed. SPEED SWITCH: Press on this switch, the motor runs at HIGH speed.
-
Page 13: Maintenance
MAINTENANCE GREASE FILTERS CLEANING METAL SELF-SUPPORTING GREASE FILTERS The filters must be cleaned frequently and can be washed in a dishwasher or a hot detergent solution. Depress the latch to remove the filters. Avoid bending the filters when washing, and allow the filters to ... - Page 14 LIGHTING LIGHT REPLACEMENT Replacing the light modules The entire light module must be replaced. Before changing the light module(s), unplug the appliance or switch off the circuit breaker in the fuse box. Remove the grease filter . Disconnect the terminal of LED light.
-
Page 15: Year Limited Warranty
1 YEAR LIMITED WARRANTY This is the only express warranty for this product and is in lieu of any other warranty or condition. This product is warranted to be free from defects in material and workmanship for a period of one (1) year from the date of original purchase. During this period, your exclusive remedy is repair or replacement of this product or any component found to be defective, at our option;... - Page 16 P/N:16173000A19609...
Need help?
Do you have a question about the CVP30W4AST and is the answer not in the manual?
Questions and answers