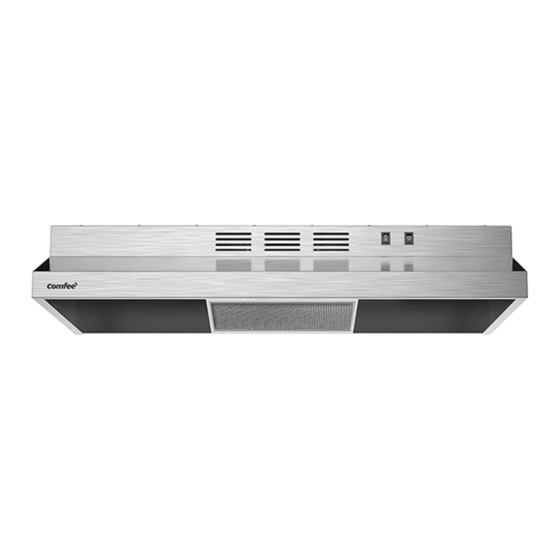
Comfee CVU30W2AST Instruction Manual
30 inch under cabinet 120v 70w 60hz
Hide thumbs
Also See for CVU30W2AST:
- Installation (4 pages) ,
- Installation manual ,
- User manual (37 pages)
Table of Contents
Advertisement
Comfee 30 inch
Under Cabinet
Range Hood
Power Supply: 120V
Rated Power: 70W
Frequency: 60Hz
INSTRUCTION MANUAL
Free 3 months
extension
of the
original limited warranty
period!* Simply text a
picture of your proof of
purchase to:
1-844-224-1614
*The warranty extension is for the
three months immediately following
the completion of the product's
original warranty period.
MODEL NUMBER CVU30W2AST
en
Advertisement
Table of Contents

Summary of Contents for Comfee CVU30W2AST
- Page 1 Free 3 months extension of the original limited warranty period!* Simply text a picture of your proof of purchase to: 1-844-224-1614 *The warranty extension is for the three months immediately following the completion of the product’s original warranty period. MODEL NUMBER CVU30W2AST...
- Page 2 READ AND SAVE THESE INSTRUCTIONS Read all instructions using this appliance. WARNING Save these instructions for future references TO REDUCE THE RISK OF FIRE, ELECTRIC Approved for residential appliances SHOCK, OR INJURY TO PERSONS, OBSERVE THE FOLLOWING: For residential use only Use this unit only in the manner intended by the manufacturer.
- Page 3 READ AND SAVE THESE INSTRUCTIONS WARNING WARNING To Reduce The Risk Of Fire Or Electric Shock, Do TO REDUCE THE RISK OF INJURY TO PERSONS, Not Use This Hood With Any External Solid State IN THE EVENT OF A RANGE TOP GREASE FIRE, Speed Control Device.
-
Page 4: List Of Materials
LIST OF MATERIALS ELECTRICAL REQUIREMENTS CAUTION Observe all governing codes and ordinances. Ensure that the electrical installation is adequate and in Remove carton carefully. Wear gloves to protect against sharp edges. conformance with National Electrical Code, ANSI/NFPA 70 (latest edition), or CSA Standards C22.1-94, Canadian LIST OF MATERIALS Electrical Code, Part 1 and C22.2 No. -
Page 5: Location Requirements
LOCATION REQUIREMENTS Cabinet Dimensions IMPORTANT Observe all governing codes and ordinances. It is the installer’s responsibility to comply with • installation clearances • Range hood location should be away from strong draft areas, such as windows, doors and strong heating vents. Cabinet opening dimensions that are shown must •... -
Page 6: Motor Switch
RANGE HOOD USE INSTRUCTIONS USE INSTRUCTIONS Cleaning The range hood is designed to remove smoke and cook- WARNING ing vapors from the cooktop area. For best results, start the hood before cooking and allow it to operate several To Reduce The Risk Of Fire Or Electrical shock minutes after the cooking is complete to clear all smoke disconnect from power supply before cleaning. - Page 7 RANGE HOOD CARE To clean or replace grease filter: WARNING Take down lamp-chimney,take down screw. Disconnect power before servicing. Replace all parts and panels before operating. Failure to do so can result in death or electrical shock. According to " "...
-
Page 8: Venting Requirements
VENTING REQUIREMENTS Do not terminate the vent system into an attic or other • Roof Venting Wall Venting enclosed area. Do not use a 4” (102 mm) laundry-type wall cap. • Use metal vent only. Rigid metal vent is recommended. •... - Page 9 VENTING REQUIREMENTS 0.08” drill bit and drill 4 pilot holes as shown PREPARE THE LOCATION for top range hood support. NOTE NOTE: Make the drill holes on the thin area of the slot. Before making cutouts, make sure there is A.
- Page 10 Range Hood Location Preparation Determine Wiring Hole Location Roof Venting Determine and clearly mark a vertical centerline on the wall and cabinet bottom. cutout on the underside of cabinet top and bottom: Mark lines from the back wall on the centerline of the underside of cabinet.
-
Page 11: Location Preparation
LOCATION PREPARATION Roof Venting(7" Circular interface) To make 7.5"(190mm) rectangular cutout on the underside of cabinet topand bottom: Mark lines from the back wall on the centerline ofthe underside of cabinet. Mark lines to the right and left of the centerline on the underside of cabinet. Use saber or keyhole saw to cut a rectangular opening for vent. -
Page 12: Install Range Hood
PREPARE THE LOCATION(200CFM Ducted version) Vent Damper Installation Install Vent System Install 3.25” x 10” (8.3 x 25.4 cm) vent damper. Install vent through the vent opening in upper cabinet Attach to range hood using the indicated screws INSTALL RANGE HOOD (Ducted provided in hardware kit. -
Page 13: Installing The Hood
INSTALLING THE HOOD Remove the power supply knockout from the top MAKE ELECTRICAL CONNECTION or rear of the vent hood (depending on the incoming location of your home power supply cable) and WARNING install a UL listed or CSA approved 0.5” strain relief. Electrical Shock Hazard Disconnect power before servicing. -
Page 14: Troubleshooting
TROUBLESHOOTING Problem Possible Causes Solutions After installation, 1. The power line and the cable connector 1. Check the power connections. the unit doesn’t is not connected properly. work. 2. The wires from the switches are disconnected 2. Make sure the wires on the switches are or loose. -
Page 15: Year Limited Warranty
1 YEAR LIMITED WARRANTY This is the only express warranty for this product and is in lieu of any other warranty or condition. This product is warranted to be free from defects in material and workmanship for a period of one (1) year from the date of original purchase. During this period, your exclusive remedy is repair or replacement of this product or any component found to be defective, at our option;...


Need help?
Do you have a question about the CVU30W2AST and is the answer not in the manual?
Questions and answers
Our vent is blowing out into the room instead of venting outside.