
Related Manuals for Ypsomed mylife YpsoPump


Summary of Contents for Ypsomed mylife YpsoPump
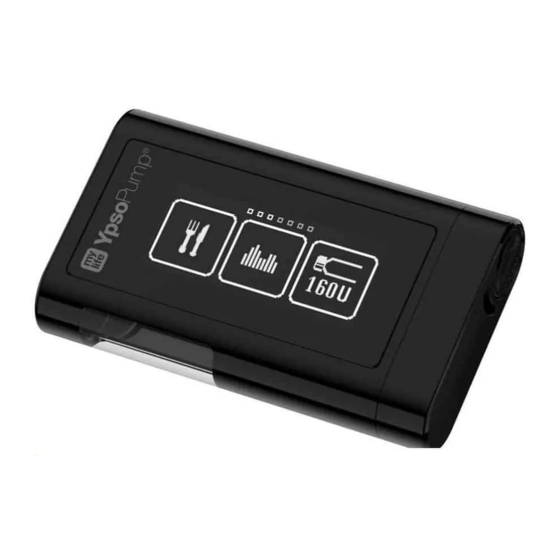
- Page 1 Caregiver Guide. Important information about the mylife YpsoPump insulin pump system. ™ ® More freedom. More confidence. With mylife ™...
-
Page 2: Table Of Contents
Contents Important contact information Tips for caregivers mylife YpsoPump system overview ™ ® Menu map Operation Access lock The mylife App bolus calculator ™ Bolus calculation How to deliver a bolus Standard bolus Extended bolus Combination bolus How to activate a temporary basal rate How to change the cartridge and the infusion set How to start insulin delivery How to stop insulin delivery... -
Page 3: Important Contact Information
Important contact information As a caregiver for a child with diabetes, you want to make sure that you are doing the right thing and providing proper care. This guide is intended to be used in conjunction with the child’s diabetes management plan, input from the parents/guardians as well as diabetes team and the mylife YpsoPump User Guide. -
Page 4: Tips For Caregivers
Tips for caregivers School and everyday life Nursery/School/Sport As a caregiver, you can discuss with the child whether they want to talk about their diabetes to the class. Perhaps they could deliver a presentation to the class about their therapy and what it means to have diabetes. To make sure they have what they need at school, it is important that you check they have emergency supplies somewhere in the school. - Page 5 School trips and overnight stays A school trip is similar to an overnight stay. There are a few things which need to be kept in mind. As a caregiver, it makes sense to discuss in advance with the child and their parents/ guardians what they can do on their own and how you can support them.
-
Page 6: Mylife ™ Ypsopump ® System Overview
mylife YpsoPump system overview ™ ® Cannula Tubing (soft or steel) Cannula base Tubing cap Adapter Tape Infusion set... - Page 7 Self-filled (mylife YpsoPump Function button ™ ® Reservoir) 1.6 ml reservoir or pre-filled 1.6 ml insulin cartridge Battery Touchscreen compartment Cartridge compartment with viewing window...
-
Page 8: Menu Map
Menu map Status screen Display of last bolus Bolus Basal rates Cartridge change Standard Extended Combination Temporary basal Switch basal Basal rate profiles bolus bolus bolus rate function rate profile A and B Therapy Alarm data history The mylife YpsoPump imagery in this Caregiver Guide is for illustrative purposes ™... - Page 9 Unlock screen Prime infusion set Data Stop / Run mode Settings Prime Prime tubing cannula Bluetooth ® Bluetooth ® Time Bolus Blind bolus Access lock Rotate inactive/active pairing screen of day Date increment inactive/active inactive/active...
-
Page 10: Operation
Operation Function button Function button The mylife YpsoPump has a function button. It is located next to the opening ™ ® of the cartridge compartment on the side. The function button has two different functionalities: Short press (for up to 0.8 seconds) Long press (for at least 2 seconds until the mylife YpsoPump vibrates) - Page 11 Operation Navigation Touchscreen The mylife YpsoPump has a touchscreen (referred to below as the screen). You control ™ ® the screen by using your finger to tap icons and values or swipe through menus and values. The screen of the mylife YpsoPump may only be controlled with one finger.
- Page 12 Active and inactive icons Active icons are bright. That means the Inactive icons are displayed in a darker function is available and can be selected grey. This means the function is not with your finger. available and cannot be selected with your finger.
- Page 13 Operation User interface Unlock screen 1/6: The status screen of the mylife 2/6: The mylife YpsoPump has a screen ™ ™ ® YpsoPump is switched on and lock. It is visualised by a padlock icon ® off by pressing the function button (short at the top right of the screen, next to the button press).
- Page 14 5/6: When the mylife 6/6: Swipe to the right to access the YpsoPump ™ ® been unlocked successfully, you are in unlocked status screen (no padlock icon). the main menu. Swipe to the left to access all available menu items. Make sure that the pump screen is switched off before storing the mylife YpsoPump ™...
- Page 15 Overview of the main menu On the screen, you will see three menu icons at a time. To see the other menu icons, swipe to the left across the screen with your finger. The navigation bar above the icons shows you the number of menu icons available. The small squares highlighted in white indicate where you currently are in the main menu.
-
Page 16: Access Lock
Access lock The access lock function offers access protection. When the access lock function is activated, only the following mylife YpsoPump ™ ® functions can be operated: Data: View therapy data and alarm history. Settings: Rotate screen. Settings: Deactivate access lock function. The following mylife YpsoPump functions cannot be operated when the... - Page 17 Activating access lock 1/5: Open the main menu and tap the 2/5: Swipe to the left and tap the “Settings” icon. “Access lock inactive / activate” icon. 3/5: Confirm by tapping . The mylife 4/5: The status screen appears. ™ YpsoPump vibrates briefly and The activated access lock function is...
- Page 18 Deactivating access lock 1/5: Open the main menu and tap the 2/5: Swipe to the left and tap the “Settings” icon. “Access lock active / deactivate” icon. 3/5: Confirm by tapping . The mylife 4/5: The status screen appears. ™ YpsoPump vibrates briefly and The access lock icon at the top of the...
-
Page 20: The Mylife ™ App Bolus Calculator
For further information, the mylife App User Guide is ™ available in the mylife App itself or on our website: ™ www.mylife-diabetescare.co.uk/downloads 13:34 13:34 Ypsomed 100% Ypsomed 100% Bolus calculator Bolus calculator Blood glucose Correction Blood glucose... -
Page 21: Bolus Calculation
Bolus calculation Method 1 The bolus calculation method 1 of the mylife App is based on the following bolus ™ calculator setting: Insulin on board (IOB) subtracted from correction bolus and meal bolus. A bolus suggestion consists of three parts: Correction bolus Meal bolus Insulin on board... - Page 22 Meal bolus How much insulin is needed to cover any planned food intake? The meal bolus compensates the consumed carbs in the food. Enter the amount of estimated carbs into the bolus calculator. You will receive an appropriate bolus suggestion for the food intake.
- Page 23 Bolus calculation Method 1 The bolus calculator suggests the amount of insulin required for the correction bolus and the meal bolus. If there is insulin still active in the body from a previous bolus, the calculator subtracts the insulin on board from the correction bolus and the meal bolus to achieve a bolus suggestion.
- Page 24 The result is displayed in the Suggested bolus field (see right-side image). Functions Press Reset to delete the values and the calculation or press Save to save the values and calculation details to the logbook. 13:34 Ypsomed 100% 13:34 Ypsomed 100%...
- Page 25 Bolus calculation Method 2 The bolus calculation method 2 of the mylife App is based on the following bolus ™ calculator setting: Insulin on board (IOB) only subtracted from correction bolus. Meal boluses are never reduced by any IOB in the child’s body. A bolus suggestion consists of three parts: Correction insulin Adjustment insulin on board...
- Page 26 Meal bolus Compensates for food intake Covers the carbs in any consumed food Adjustment insulin on board The number of insulin units of the insulin on board that are subtracted from the correction insulin. The value of this parameter depends on the magnitude of the correction insulin relative to the insulin on board in the child’s body.
- Page 27 Bolus calculation Method 2 Three components are considered within the equation to achieve an overall bolus suggestion. (Correction insulin – Adjustment insulin on board) + Meal bolus = Suggested bolus Correction bolus Meal bolus Blood glucose Correction insulin Adj. insulin on board...
- Page 28 The result is displayed in the Suggested bolus field (see right-side image). Functions Press Reset to delete the values and the calculation or press Save to save the values and calculation details to the logbook. 13:34 13:34 Ypsomed 100% Ypsomed 100% Bolus calculator Bolus calculator...
-
Page 30: How To Deliver A Bolus
How to deliver a bolus A bolus is an insulin dose administered in addition to the basal rate. To be able to deliver a bolus, the mylife YpsoPump must be in run mode (see page 50). ™ ® A bolus is administered in the following situations: Compensation for meal carbohydrates (a meal bolus) Reduction of blood glucose to correct a high blood glucose level Standard bolus... -
Page 31: Extended Bolus
Extended bolus The bolus amount entered is delivered over an adjustable extension time, spread equally. 1/6: Open the main menu and tap the 2/6: Tap the “Extended bolus” icon. “Bolus” icon. 3/6: Select a bolus amount (the selectable 4/6: Select the extension time during bolus amount depends on the set bolus which you wish to deliver the bolus increment) and confirm by tapping... -
Page 32: Combination Bolus
Combination bolus The total bolus amount entered is split adjustably between a standard bolus and an extended bolus. 1/8: Open the main menu and tap the 2/8: Tap the “Combination bolus” icon. “Bolus” icon. 3/8: Select a total bolus amount 4/8: Select the bolus amount that you (the selectable bolus amount want to deliver directly (immediate portion). - Page 33 5/8: The percentage of the immediate 6/8: Select the extension time during portion is displayed in grey under the which you wish to deliver the remaining bolus amount selected. This bolus amount portion of the bolus amount (extended must be confirmed by tapping portion).
- Page 34 09:08 0.90 7.2 mmol/L 11:43 55 g carbs 09:08 60 min 09:08 55 g carbs mylife Cloud 11:43 02.01.2020 13:30 mylife YpsoPump 60 min 09:08 connected mylife Unio Neva 7.2 mmol/L 09:08 connected 21.06.2020 6.0 U 09:08 9.5 mmol/L 09:08...
-
Page 35: How To Activate A Temporary Basal Rate
How to activate a temporary basal rate The temporary basal rate function allows to reduce or increase the basal rate for a limited period of time. When the temporary basal rate set has finished, the programmed basal rate profile (A or B) continues. 1/7 Open the main menu and tap the 2/7: Tap the “Temporary basal rate “Basal rates”... - Page 36 5/7: The percentage of the current basal 6/7: The status screen appears with rate is displayed to you in grey as the actual basal rate. A % sign next to the information under the period of time basal rate profile set indicates that a selected.
-
Page 37: How To Change The Cartridge And The Infusion Set
How to change the cartridge and the infusion set Removing the cartridge and the infusion set 1/8: Always disconnect the tubing cap 2/8: Open the main menu and tap the of the infusion set from the body first. “Cartridge change and current cartridge Then carefully remove the tape from the level”... - Page 38 7/8: Disconnect the infusion set by 8/8: Remove the empty cartridge and the turning the adapter on the mylife infusion set from the mylife YpsoPump ™ ™ ® YpsoPump counterclockwise until it and dispose of them in accordance with ® stops.
- Page 39 Priming the infusion set 1/6: Open the main menu and tap the 2/6: Tap the “Prime tubing” icon. “Prime infusion set” icon. 3/6: The screen for setting the priming volume appears. For the priming volume, select a value that is suitable for the infusion set, between 1.0 U and 30.0 U.
- Page 40 Priming volume for the tubing with adapter (volumes are approximate): 45 cm (18 inch): 10 units* (0.10 ml) 60 cm (24 inch): 12 units* (0.12 ml) 80 cm (31 inch): 15 units* (0.15 ml) 110 cm (43 inch): 18 units* (0.18 ml) * 100 U/ml insulin Priming volume when changing the cartridge only: Check the cartridge for air bubbles.
- Page 41 4/6: Confirm that you have disconnected 5/6: During the priming procedure, keep the infusion set from the body by remov- the insulin pump in an upright position, ing the tubing cap from the cannula base with the adapter facing upwards and tap and confirm by tapping .
- Page 42 Attaching the infusion set to the body If insulin has emerged from the end of the tubing and there are no more air bubbles in the cartridge, in the adapter or in the tubing, attach the infusion set to the body. Manual insertion 1/12: Wash your hands thoroughly.
- Page 43 5/12: Stabilise the infusion site and insert 6/12: Press the tape onto the skin and the cannula at an angle of 90° or run your fingers over the tape for a few alternatively use the mylife Orbit Inserter. seconds to optimise adhesion. ™...
- Page 44 9/12: Cover the removed introducer 10/12: Attach the tubing cap straight to needle with the blue protection cap and the cannula base of the infusion set. dispose of it in a safety bin. 11/12: Make sure you hear it click into 12/12: Rotate the tubing left and right, place.
- Page 45 Insertion with the mylife Orbit Inserter ™ ® To facilitate skin penetration with the mylife YpsoPump Orbit soft and mylife YpsoPump ™ ® ® ™ ® Orbit micro infusion sets, use the mylife Orbit Inserter. ® ™ ® 1/15: Place inserter. Hold the inserter and 2/15: Hold infusion set in position.
- Page 46 5/15: Remove cannula protector. 6/15: Place at infusion site. 7/15: Push button. Push the button until 8/15: Press the tape onto the skin and a “click” is heard. run your fingers over the tape for some seconds to optimise adhesion. Do not use the infusion set if the introducer needle has been damaged or bent.
- Page 47 9/15: Press the tape onto the skin with 10/15: Carefully remove the introducer one hand and grasp the infusion cap with needle (mylife YpsoPump Orbit soft) or ™ ® ® two fingers of your other hand. the introducer cap (mylife YpsoPump ™...
- Page 48 13/15: Make sure you hear it click into 14/15: Rotate the tubing left and right, at place. least one full turn in each direction while pulling upward on the cap to ensure the tubing cap is fully engaged and the fluid path is opened.
- Page 49 Priming the cannula After having attached the infusion set to the body, the cannula has to be primed with insulin. 1/4: Open the main menu and tap the 2/4: Tap the “Prime cannula” icon. “Prime infusion set” icon. 3/4: The screen for setting the priming 4/4: During the priming procedure, the volume appears.
-
Page 50: How To Start Insulin Delivery
How to start insulin delivery Run mode To start insulin delivery, put the insulin pump into run mode. 1/3: Open the main menu, swipe to the 2/3: Confirm by tapping . The mylife ™ left and tap the “Stop mode / switch to YpsoPump vibrates briefly. -
Page 51: How To Stop Insulin Delivery
How to stop insulin delivery Stop mode To switch the mylife YpsoPump from run mode to stop mode, open the main menu. ™ ® Insulin delivery is not possible in stop mode. 1/3: Open the main menu, swipe to the 2/3: Confirm by tapping . - Page 52 Status screen in run mode Access lock icon Bluetooth icon ® (appears only if activated) (appears only if activated) Current time of day Current date Battery charge level Current basal rate profile Padlock icon Current basal delivery Status screen in stop mode If the insulin pump is in stop mode, all insulin delivery is cancelled.
-
Page 53: How To Change The Battery
How to change the battery 1/5: If the “Battery charge level low” 2/5: Open the battery compartment by warning appears, the insulin pump can inserting a coin in the groove of the still be operated for at least two days. battery compartment lid and turn Replace the battery as soon as possible. - Page 54 3/5: The battery orientation screen shows 4/5: Insert a new, size AAA, alkaline the orientation of the AAA battery for battery (LR03). Make sure the negative insertion. It appears on the status screen. pole of the battery is inserted first. On the If the insulin pump is in run mode and back of the insulin pump, you will see a the battery is not inserted for more than...
- Page 55 If you remove the battery while you are in the main menu or in a submenu, all the current settings, which have not yet been confirmed, will be discarded and the battery orientation screen appears. After removal of the battery, the following functions are completed first before the battery orientation screen appears: Return of the threaded rod Priming in progress...
-
Page 57: Icon Overview
Icon overview Navigation aids Cancel Battery removed Confirm Remove battery Forward to unlock Threaded rod returning Forward Prime tubing in progress One menu level up Prime cannula in progress Disconnect infusion set from One step back body Ready for Bluetooth pairing ®... - Page 58 Icons in main menu and submenus Bolus Prime infusion set Standard bolus Prime tubing Prime cannula Extended bolus Data Combination bolus Therapy data Basal rates Alarm history Basal rate profile A Run mode / switch to stop mode Basal rate profile B Stop mode / switch to run mode Switch to basal rate profile A Settings...
- Page 59 Blind bolus inactive / activate No insulin Access lock active / deactivate Cartridge empty Access lock inactive / activate Auto stop Rotate screen Electronic error Bluetooth active / deactivate ® Warning icons Bluetooth inactive / activate ® Cartridge level low Bluetooth pairing ®...
-
Page 60: Warnings And Alarms
Warnings The mylife YpsoPump has a safety system that constantly monitors all functions. ™ ® If there is a deviation from the defined operating status, the insulin pump triggers a warning or an alarm, depending on the situation. Displayed warnings are primarily tactile and audible and there are 4 escalation levels. The levels escalate at intervals of 30 minutes. - Page 61 Alarms The mylife YpsoPump has a safety system that constantly monitors all functions. ™ ® If there is a deviation from the defined operating status, the insulin pump triggers a warning or an alarm, depending on the situation. Alarms given are primarily tactile and audible and there are 4 escalation levels. The levels escalate at intervals of 5 minutes.
- Page 62 No battery The “No battery” alarm appears if you remove the alkaline battery from the battery compartment for more than 5 minutes while the insulin pump is in run mode. Confirm by tapping and insert a new AAA alkaline battery (LR03). Follow the procedure on page 53 of this Caregiver Guide.
- Page 63 Battery not suitable The “Battery not suitable” alarm appears if you insert a battery whose voltage is too high. Confirm by tapping . Remove the unsuitable battery from the battery compartment and insert a new AAA alkaline battery (LR03). Follow the procedure on page 53 of this Caregiver Guide.
- Page 64 Occlusion The “Occlusion” alarm appears if the infusion path is blocked (e.g. adapter, infusion set, cannula).Confirm by tapping and disconnect the infusion set from the body. Then perform the following actions: Change the infusion set in accordance with the procedure on page 37 of this Caregiver Guide.
- Page 65 No insulin The “No insulin” alarm appears if after a threaded rod return no priming procedure is performed within 5 minutes or if the priming procedure failed. The “No insulin” alarm only appears if the insulin pump is in run mode. Confirm by tapping .
- Page 66 Electronic error If the mylife YpsoPump detects an internal malfunction, an electronic error is displayed. ™ ® All the functions of the insulin pump are cancelled. In the event of an electronic error, the insulin pump displays two different screens alternately which show you how to restart the insulin pump in a few steps.
-
Page 67: Supplies
Spare sensors if the child is using them for BG monitoring Disclaimer: The Bluetooth word mark and logos are registered trademarks owned by Bluetooth SIG, Inc., and any use of ® such marks by Ypsomed is under license. Other trademarks and trade names are those of their respective owners. - Page 68 Infusion systems Blood glucose Therapy Pen needles monitoring systems management With its mylife Diabetescare brand, Ypsomed offers a ™ comprehensive portfolio of products and services for people with diabetes. This allows users easy, discreet and reliable self-treatment. With mylife Diabetescare, ™...
Need help?
Do you have a question about the mylife YpsoPump and is the answer not in the manual?
Questions and answers