Table of Contents
Advertisement
Quick Links
Advertisement
Table of Contents

Related Manuals for Ypsomed mylife YpsoPump


Summary of Contents for Ypsomed mylife YpsoPump
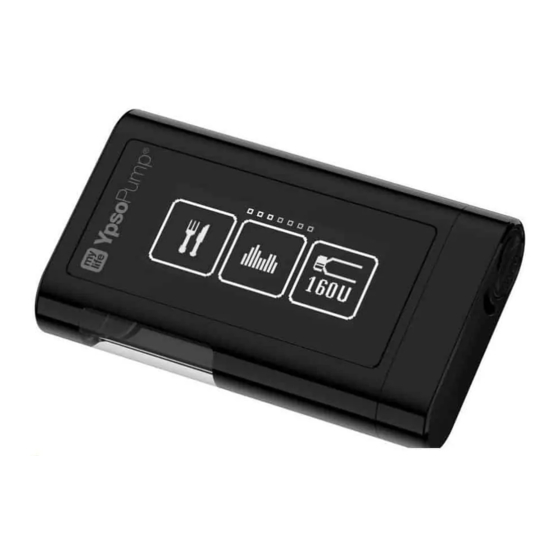
- Page 1 User Guide Insulin Pump More freedom. More confidence. With mylife ™...
-
Page 3: Table Of Contents
Contents 1 Introduction 2.5 Putting into operation 1.1 Note about the User Guide Inserting a battery 1.2 Warranty provisions Self-test Setting the time of day 1.3 Indication Setting the date 1.4 Disposal 3 Basal rate 2 Operation 3.1 Programming basal rate profile A 2.1 System overview 2.2 Navigation 3.2 Programming basal rate profile B 3.3 Switching basal rate profile Touchscreen 3.4 Changing a basal rate profile Function button 3.5 Temporary basal rate function Icons Active and inactive icons Activating the temporary basal rate function... - Page 4 6 Data/History 4.3 Deactivating blind bolus 4.4 Bolus types 6.1 Therapy data Standard bolus Example: combination bolus Extended bolus Possible events in therapy data Combination bolus 6.2 Alarm history Blind bolus Possible events in alarm history Blind bolus programming at a glance 7 Functions and settings 4.5 Display of last bolus 7.1 Changing the time of day 5. Changing the infusion set and cartridge 7.2 Changing the date...
- Page 5 8 Troubleshooting 9 Everyday situations 8.1 Incidents 9.1 General 8.2 Displayed warnings 9.2 Watertightness Cartridge level low 9.3 Travelling Battery charge level low 9.4 Sources of interference Threaded rod return not completed 9.5 Sport Priming not completed Bolus cancelled Temporary basal rate function completed or cancelled Insulin pump stopped Bluetooth connection failed...
- Page 6 Warning icons 10.6 Explanation of symbols mylife YpsoPump symbols ™ ® Warning and precaution mylife YpsoPump Orbit ™ ® ® mylife YpsoPump Reservoir symbols ™ ® 10.7 Glossary Read the User Guide 10.8 My pump settings Ypsomed AG, 3401 Burgdorf, Switzerland www.ypsomed.com...
-
Page 7: 1 Introduction
1 Introduction Warnings Not following the instructions in the User Guide of your mylife YpsoPump or not following warnings indicated in this ™ ® User Guide can lead to hypoglycaemia or hyperglycaemia (read warning in the box below). The mylife YpsoPump insulin pump is only available on prescription. -
Page 8: Note About The User Guide
1.1 Note about the User Guide 1.2 Warranty provisions This User Guide contains all the information required for Warranty conducting insulin pump therapy with the mylife YpsoPump Ypsomed AG gives you a warranty on your mylife YpsoPump ™ ® ™ ® safely and successfully. Make sure you read the entire covering manufacturing and material defects for a period of User Guide carefully. - Page 9 ™ ® by dropping, impact, application of force, contact with to Ypsomed, or a service point authorised by it, in writing or fluids listed in chapter 9.1, page 169, water damage due on the telephone within the term of warranty.
- Page 10 Headquarters: Authorised service point: Ypsomed AG Ypsomed Ltd. Customer Care: 0344 856 7820 Brunnmattstrasse 6 1 Park Court (Calls to this number are free of charge CH-3401 Burgdorf Riccall Road, Escrick from mobile phones and landlines, info@ypsomed.com GB-YO19 6ED, North Yorkshire plus your phone company’s access charge.)
-
Page 11: Indication
1.3 Indication Safety instructions The mylife YpsoPump is intended for subcutaneous insulin ™ ® delivery in diabetes mellitus therapy. Only rapid-acting insulin Read all the instructions in this User Guide attentively. Only at a concentration of 100 U/ml (insulin analogue) may be used use the mylife YpsoPump system after having received... -
Page 12: Operation
(read warning in the box on page 7). Make sure you carry the mylife YpsoPump in your trouser pocket or with a carrying system offered by ™ ® Ypsomed to protect your insulin pump. - Page 13 Never use objects to operate the mylife YpsoPump . They could damage the screen or the function button and com- ™ ® promise the operability of the mylife YpsoPump . If the insulin pump is damaged, correct delivery of insulin cannot be ™...
-
Page 14: System Overview
2.1 System overview Cannula (soft or steel) Tubing Function button Battery compartment lid Cannula Self-filled Touchscreen base (mylife YpsoPump ™ ® Reservoir) 1.6-ml reservoir or pre-filled (NovoRapid ® Tape Tubing cap Adaptor PumpCart ) 1.6-ml ® cartridge Cartridge compartment AAA alkaline Infusion set with viewing window battery (LR03) -
Page 15: Navigation
2.2 Navigation Touchscreen The mylife YpsoPump has a touchscreen (referred to below as the screen). You control the screen by using your finger ™ ® to tap icons and values or swipe through menus and values. The screen of the mylife YpsoPump may only be controlled ™... - Page 16 Using your finger, swipe up or down through the values displayed. In this way you can increase or reduce a value. You can also tap the upper or lower value directly in order to increase or reduce it by one unit. The value selected is always displayed at the centre of the visible values and it has a grey background.
-
Page 17: Function Button
Function button The mylife YpsoPump has a function button. ™ ® It is located next to the opening of the cartridge compartment at the side. The function button has two different functionalities: Short press (for up to 0.8 seconds) Long press (for at least 2 seconds until the mylife ™... -
Page 18: Icons
Icons The controls on the screen are called icons. Tap an icon with your finger to select it. The brightness of icons is inverted when you touch them with your finger. -
Page 19: Active And Inactive Icons
Active and inactive icons Active icons are bright. That means Inactive icons are displayed in a darker the function is available and can be grey. This means the function is not selected with your finger. available and cannot be selected with your finger. -
Page 20: Confirmation And Cancellation
Confirmation and cancellation To confirm a value or select a function To cancel a procedure or function, . Additionally, bolus cancellation always has to be confirmed by tapping... -
Page 21: Back Function
Back function If you have selected a function or value by mistake or made a wrong setting, you can go back at any time by swiping to the right once until appears. If appears, you go one step back. You do not quit the function and no set values are lost. -
Page 22: User Interface
2.3 User interface Unlock screen 1/6: The status screen of the mylife 2/6: The mylife YpsoPump has a 3/6: Swipe to the left to unlock the ™ ™ ® YpsoPump is switched on and off screen lock. It is visualised by a status screen and the main menu. ®... - Page 23 4/6: Tap the currently active number 5/6: When the mylife YpsoPump 6/6: Swipe to the right to access the ™ ® successively to unlock the status has been unlocked successfully, unlocked status screen (no padlock screen. If the three numbers on the you are in the main menu. Swipe to icon).
-
Page 24: Overview Of The Main Menu
Overview of the main menu On the screen you will see three menu icons at a time. To see the other menu icons, swipe to the left across Bolus Cartridge change Data Settings the screen with your finger. The navigation bar above the icons shows you the number of menu icons available. -
Page 25: Run And Stop Modes
2.4 Run and stop modes Run mode The mylife YpsoPump has two dif- ™ ® ferent operating modes, “Run” and “Stop”. The “Stop mode” and “Run mode” icons show the current operat- ing status of the insulin pump in each case. Insulin delivery (e.g. basal rate) is only possible in run mode. - Page 26 3/3: The status screen appears. Basal rate delivery starts according to the programmed profile.
-
Page 27: Stop Mode
Stop mode To switch the mylife YpsoPump from ™ ® run mode to stop mode, open the main menu. Insulin delivery is not possible in stop mode. 1/3: Open the main menu, swipe to 2/3: Confirm by tapping . The the left and tap the “Run mode/switch mylife YpsoPump vibrates briefly. - Page 28 3/3: The status screen appears. Insulin deliveries are stopped immediately. This is indicated on the screen. The screen of the mylife YpsoPump shows a stop warning if the insulin ™ ® pump has been in stop mode for more than one hour. The stop warning can be triggered prematurely, directly after the insulin pump has been set into stop mode, by giving the function button a long press and then confirming the warning.
-
Page 29: Status Screen In Run Mode
Access lock icon Status screen in run mode (appears Bluetooth icon ® only if activated) The status screen is the main display (appears only if activated) of information and it indicates the current operating status of the mylife Current time of day Current date ™... -
Page 30: Status Screen In Stop Mode
Access lock icon Status screen in stop mode (appears Bluetooth icon ® only if activated) If the insulin pump is in stop mode, (appears only if activated) all insulin delivery is cancelled. Current time of day Current date Battery level Basal rate stopped Padlock icon No insulin delivery The battery charge level is indicated by rectangles in the battery icon on the status screen of the pump. -
Page 31: Putting Into Operation
2.5 Putting into operation Inserting a battery 1/11: Insert a new AAA alkaline battery (LR03). Make sure 2/11: Lock the battery compartment by turning the groove the negative pole of the battery is inserted first. On the of the battery compartment lid clockwise until it is completely back of the insulin pump you will see a picture showing closed using the edge of a coin. -
Page 32: Self-Test
Self-test The self-test is used to check the op- erability of the mylife YpsoPump ™ ® and to give the user visual, tactile and audible feedback. A self-test is per- formed when putting the insulin pump into operation for the first time, after having started up the insulin pump from storage status and after 3/11: As soon as the battery has... - Page 33 5/11: Three test patterns appear on 6/11: Then the mylife YpsoPump ™ ® the screen one after the other. emits two vibration signals (tactile The 3 × 3 test rectangles must be signals). displayed in full with uniform bright- ness.
- Page 34 If the self-test is not confirmed within 5 minutes after having started up the insulin pump from storage status or after the threaded rod has been returned, the insulin pump indicates this with tactile and audible warnings. If 7/11: The tactile signals are followed 8/11: The self-test is completed.
-
Page 35: Setting The Time Of Day
Setting the time of day 9/11: The screen for setting the time of day appears. Set the current time of day (hours, minutes) by selecting the desired value. Confirm the values set by tapping... -
Page 36: Setting The Date
Setting the date To complete the putting into operation of your insulin pump, please program the basal rate profiles following the steps on page 38, insert a cartridge following the steps on page 91, prime the infusion set following the steps 10/11: After setting the time of day, 11/11: The status screen appears. -
Page 37: Basal Rate
3 Basal rate Warnings Use your own therapy settings. The values displayed on the following pages are only examples. Always make the first setting or changes to the basal rate in accordance with the recommendations from your doctor or diabetes advisor and never on your own. -
Page 38: Programming Basal Rate Profile A
3.1 Programming basal rate profile A The basal rate is a basic amount of in- sulin that is administered continuously in order to keep the blood glucose level within the target range. You have the option of programming two basal rate profiles (A and B). 1/8: Open the main menu and tap the 2/8: Tap the “Basal rate profile A”... - Page 39 3/8: The screen to set the basal rate 4/8: Select the value specified for you 5/8: By swiping to the right you can for the first hour appears, starting at by your doctor, between 0.00 U/h and step back one hour at any time and midnight (00 –...
- Page 40 6/8: Repeat step 4/8 for each individual 7/8: When all values have been entered, 8/8: The status screen appears. The hour segment until you have entered all the mylife YpsoPump shows you mylife YpsoPump is in stop mode. ™ ® ™ ® 24 basal rate values. the basal rate daily dose on a chart and To start insulin delivery switch the insulin as a value.
- Page 41 The total daily dose of the programmed basal rate profile is displayed in the basal rate submenu on the corresponding basal rate icon.
-
Page 42: Programming Basal Rate Profile B
3.2 Programming basal rate profile B In addition to basal rate profile A, you have the option of programming a second basal rate profile B. You can switch between basal rate profiles A and B at any time. 1/8: Open the main menu and tap the 2/8: Tap the “Basal rate profile B”... - Page 43 3/8: The screen to set the basal rate for 4/8: Select the value specified for you by 5/8: By swiping to the right you can the first hour appears, starting at your doctor, between 0.00 U/h and step back one hour at any time and midnight (00 –...
- Page 44 6/8: Repeat step 4/8 for each individual 7/8: When all values have been entered, 8/8: The status screen appears. The hour segment until you have entered all the mylife YpsoPump shows you mylife YpsoPump is in stop mode. ™ ® ™ ® 24 basal rate values. the basal rate daily dose on a chart and To start insulin delivery switch the insulin as a value.
- Page 45 The total daily dose of the programmed basal rate profile is displayed in the basal rate submenu on the corresponding basal rate icon.
-
Page 46: Switching Basal Rate Profile
3.3 Switching basal rate profile 1/4: Open the main menu and tap the 2/4: If basal rate profile A is active, 3/4: If basal rate profile B is active, “Basal rates” icon. tap the “Switch to basal rate profile B” tap the “Switch to basal rate profile A” icon. - Page 47 4/4: When you have made your selection, the mylife YpsoPump indicates the ™ ® relevant basal rate profile (A or B) with the basal rate daily dose. Confirm by tapping . The mylife YpsoPump vibrates briefly. ™ ® Switching basal rate profiles changes basal insulin delivery. Make sure such a change complies with your therapy recommendation.
-
Page 48: Changing A Basal Rate Profile
3.4 Changing a basal rate profile 1/4: Open the main menu and tap the 2/4: Tap the basal rate profile icon 3/4: The screen to set the basal rate “Basal rates” icon. The screen displays you want to change. for the first hour, starting after midnight the basal rate submenu. If the “Tempo- (00 –... - Page 49 4/4: Confirm by tapping . The mylife ™ YpsoPump vibrates briefly. The ® mylife YpsoPump saves the values, ™ ® writes an event to the therapy data for each changed value and indicates the basal rate daily dose.
-
Page 50: Temporary Basal Rate Function
3.5 Temporary basal rate function Activating the temporary basal rate function The temporary basal rate function allows you to reduce or increase the basal rate for a limited period of time. When the temporary basal rate set has finished, the programmed basal rate profile (A or B) continues. To use the temporary basal rate function the mylife YpsoPump... - Page 51 3/7: If you wish to reduce your current 4/7: Select the period of time in which 5/7: The percentage of the current basal basal rate, select a value between 0 % you want to reduce or increase the rate is displayed to you in grey as and 90 %.
- Page 52 6/7: The status screen appears with 7/7: In addition, the period of time remaining and the selected percentage of the actual basal rate. A % sign next to the basal rate are displayed alternately under the basal rate value. the basal rate profile set indicates that a temporary basal rate function is active.
-
Page 53: Cancelling The Temporary Basal Rate Function
Cancelling the temporary basal rate function 1/4: Open the main menu and tap the 2/4: Tap the “Temporary basal rate 3/4: Confirm cancellation of the tempo- “Basal rates” icon. function activated/cancel” icon. rary basal rate function by tapping The mylife YpsoPump vibrates briefly. ™... - Page 54 4/4: The status screen appears with the basal rate originally programmed.
-
Page 55: Bolus
4 Bolus Warnings Only change your specified bolus increment after consulting your doctor or diabetes advisor. Changing your bolus increment accidentally can lead to hypoglycaemia or hyperglycaemia (read warning in the box on page 7). If the bolus is cancelled prematurely, the “Bolus cancelled” warning appears. Premature cancellation happens if there is an alarm or if the insulin pump is put into stop mode. - Page 56 A bolus is an insulin dose administered A bolus is administered in the following in addition to the basal rate. To situations: be able to deliver a bolus the mylife Compensation for meal carbohy- ™ YpsoPump must be in run mode. drates (a meal bolus).
-
Page 57: Setting Bolus Increment
4.1 Setting bolus increment The bolus increment indicates the increase or decrease in bolus amount per touchscreen gesture. It also indi- cates the increase in bolus amount for each press of the function button when entering a blind bolus. 1/4: Open the main menu and tap the “Settings”... - Page 58 2/4: Tap the “Set bolus increment” 3/4: Select one of the following bolus icon. increments: 0.1 U, 0.5 U, 1.0 U, 2.0 U. Set the bolus increment value that was specified for you by your doctor. Confirm your setting by tapping The insulin pump vibrates briefly.
- Page 59 4/4: The status screen appears. Bear in mind that the bolus increment has a direct influence on the blind bolus function. The bolus increment set equals the insulin amount increase for each press of the function button.
-
Page 60: Activating Blind Bolus
4.2 Activating blind bolus When putting the mylife YpsoPump ™ ® into operation for the first time the blind bolus function is always inactive. To use the blind bolus function you must activate it first. 1/4: Open the main menu and tap the 2/4: Swipe to the left and tap the “Settings”... - Page 61 3/4: Confirm by tapping . The mylife 4/4: If you open the main menu again, ™ YpsoPump vibrates briefly and the tap the “Settings” icon and swipe to ® blind bolus function can be used. Follow the left, the “Blind bolus active/deacti- the procedure on page 72.
-
Page 62: Deactivating Blind Bolus
4.3 Deactivating blind bolus With the mylife YpsoPump ™ ® have the option of deactivating the blind bolus function. 1/4: Open the main menu and tap the 2/4: Swipe to the left and tap the “Settings” icon. “Blind bolus active/deactivate” icon. - Page 63 3/4: Confirm by tapping . The mylife 4/4: If you open the main menu again, ™ YpsoPump vibrates briefly and tap the “Settings” icon and swipe ® the blind bolus function is deactivated. to the left, the “Blind bolus inactive/ activate” icon now appears.
-
Page 64: Bolus Types
4.4 Bolus types The mylife YpsoPump has 4 bolus types: ™ ® Standard bolus The bolus amount entered is delivered immediately. Extended bolus The bolus amount entered is delivered over an adjustable extension time, spread equally. Combination bolus The total bolus amount entered is split adjustably between a standard bolus and an extended bolus. Blind bolus The blind bolus is a method of standard bolus delivery that can only be programmed by pressing the function button. -
Page 65: Standard Bolus
Standard bolus 1/4: Open the main menu and tap the 2/4: Tap the “Standard bolus” icon. 3/4: Select a bolus amount between “Bolus” icon. 0.1 U and 30.0 U. Bolus delivery commences immediately as soon as you confirm by tapping . If the default value of 0.0 U is confirmed, the standard bolus is cancelled. - Page 66 4/4: The mylife YpsoPump counts down the remaining ™ ® units on the status screen. You can cancel a bolus in progress at any time by tapping . Cancellation must always be confirmed by tapping...
-
Page 67: Extended Bolus
Extended bolus 1/6: Open the main menu and tap the 2/6: Tap the “Extended bolus” icon. 3/6: Select a bolus amount between “Bolus” icon. 0.1 U und 30.0 U and confirm by tapping . If the default value of 0.0 U is confirmed, the extended bolus is cancelled. - Page 68 4/6: Select the extension time during 5/6: The set bolus amount is displayed 6/6: The mylife YpsoPump counts ™ ® which you wish to deliver the bolus in grey below the extension time down the remaining units on the amount selected. The extension time selected.
-
Page 69: Combination Bolus
Combination bolus 1/8: Open the main menu and tap the 2/8: Tap the “Combination bolus” 3/8: Select a total bolus amount “Bolus” icon. icon. between 0.2 U and 30.0 U and confirm by tapping . If the default value of 0.0 U is confirmed, the combination bolus is cancelled. - Page 70 4/8: Select the bolus amount that 5/8: The percentage of the immediate 6/8: Select the extension time during you want to deliver directly (immediate portion is displayed in grey under which you wish to deliver the remaining portion). the bolus amount selected. This bolus portion of the bolus amount (extended amount must be confirmed by tapping portion).
- Page 71 7/8: The bolus amount of the extended 8/8: The mylife YpsoPump counts ™ ® portion is displayed in grey below down the remaining units on the the extension time selected. The mylife status screen. The immediate portion ™ YpsoPump starts bolus delivery after of the bolus is delivered first.
-
Page 72: Blind Bolus
Function button Blind bolus You have the option of programming a bolus only by pressing the function button, without using the touchscreen. This means you can deliver a bolus discreetly, when the mylife YpsoPump ™ ® is in your trouser pocket, for example. Make sure the blind bolus function has been activated according to the 1/7: Give the function button one... - Page 73 Function button 2/7: You are now in the blind bolus menu. Here you can 3/7: Set the bolus amount required by giving the function set the bolus amount required. Begin with entering an button a short press for each step of increase. The insulin amount within 4 seconds.
- Page 74 4/7: Each bolus amount set is displayed to you on the 5/7: The mylife YpsoPump confirms each step ™ ® screen. When you have entered the bolus amount required, of increase with a short vibration signal. you have to wait 4 seconds. The elapsed time is displayed to you by dots turning grey.
- Page 75 Function button 6/7: After a period of 4 seconds a long vibration signal is emitted. By giving the function button a long press, bolus delivery is confirmed. The long function button press must take place within 4 seconds after the long vibration signal. By giving the function button a short press or not reacting to the vibration signal, you have the option of quitting the blind bolus menu without any bolus delivery.
- Page 76 7/7: You can cancel a bolus in progress at any time by tapping . Cancellation must always be confirmed by tapping If the screen of your mylife YpsoPump is switched on during blind bolus programming: ™ ® the blind bolus delivery in progress is displayed on the screen. If the screen of your mylife YpsoPump is switched off during blind bolus programming:...
-
Page 77: Blind Bolus Programming At A Glance
Blind bolus programming at a glance Start programming Blind bolus delivery Act within Wait Wait Act within 4 seconds 4 seconds 4 seconds 4 seconds 1/5: Long press 2/5: Short press 3/5: Awaiting 4/5: Awaiting 5/5: Long press long vibration of function button of function button of function button confirmation to start blind for each step from the insulin signal from the to confirm bolus... -
Page 78: Display Of Last Bolus
4.5 Display of last bolus 1/4: Swipe to the right on the status 2/4: The icon of the bolus type appears 3/4: Example of an extended bolus: screen to display the last bolus on the left of the screen, the relevant if a bolus on the display of last bolus delivered. - Page 79 4/4: Example of a combination bolus: the display of the percentage value of the immediate portion alternates with the display of the extension time of the extended portion at intervals of 2 seconds.
-
Page 80: Changing The Infusion Set And Cartridge
5. Changing the infusion set and cartridge Warnings Only rapid-acting insulin at a concentration of 100 U/ml (insulin analogue) may be used with the mylife YpsoPump ™ ® system. Using different insulin can lead to incorrect dosages of insulin, which can cause hypoglycaemia or hyperglycaemia (read warning in the box on page 7). If you use different insulin, change the cartridge as well as the primed infusion set and continue therapy with the correct type of insulin. - Page 81 Remove air bubbles from the reservoir of the mylife YpsoPump Reservoir prior to insertion into the mylife YpsoPump ™ ® ™ ® Never pull the plunger of the mylife YpsoPump Reservoir further than the 1.6-ml mark. If you pull the plunger further ™...
- Page 82 Monitor the entire priming procedure continuously until the tubing of the infusion set has been filled without any air bubbles and until insulin emerges from the end of the tubing. If there are still air bubbles in the tubing or the adaptor, repeat the priming procedure.
-
Page 83: Mylife Ypsopump Reservoir
5.1 mylife YpsoPump Reservoir ™ ® The mylife YpsoPump Reservoir is The following components are required in order to ™ ® intended to be filled with a rapid- use the mylife YpsoPump Reservoir: ™ ® acting insulin at a concentration of 100 U/ml and used with the mylife YpsoPump... -
Page 84: Filling The Mylife ™ Ypsopump ® Reservoir
Filling the mylife YpsoPump Reservoir ™ ® The mylife YpsoPump Reservoir is sterile provided that ™ ® the packaging has neither been opened nor damaged. If the packaging shows signs of damage, use a different reservoir. The reservoir is solely intended for single use. To prevent risk of infection, never pull the stopper beyond the 1.6-ml mark and do not reuse the transfer adap- tor or the reservoir. - Page 85 1/12: Wash your hands thoroughly 2/12: Clean the septum of the insulin 3/12: Remove the reservoir and the with soap and water. vial with an alcohol swab. transfer adaptor from the packaging (see page 83) without touching the septum.
- Page 86 4/12: Attach the transfer adaptor to 5/12: Then pull the plunger rod back- 6/12: Attach the other end of the the reservoir and advance the stopper wards until the entire reservoir is filled transfer adaptor to the insulin vial. all the way forward. with air.
- Page 87 7/12: Inject all of the air into the insulin 8/12: Turn the reservoir, including the 9/12: Check the reservoir for air bub- vial. This will make it easier to insulin vial, upside down. Very gently bles. If air bubbles are in the reservoir, then withdraw insulin from the vial.
- Page 88 10/12: Remove the transfer adaptor 11/12: Twist off the plunger rod and 12/12: Follow the instructions on from the vial. Dispose of the transfer dispose of it. page 94 in order to insert the reservoir adaptor in accordance with local into the mylife YpsoPump ™...
-
Page 89: Disconnecting The Infusion Set
5.2 Disconnecting the infusion set The mylife YpsoPump Orbit soft and mylife YpsoPump ™ ® ® ™ ® Orbit micro infusion sets can be easily disconnected and ® reconnected, offering you the option of removing the insulin pump and tubing to take a bath, a shower or do sports. Gently press on the two marked sides of the cap and the tubing cap will disconnect from the infusion site. -
Page 90: Changing The Infusion Set
5.3 Changing the infusion set The mylife YpsoPump Orbit soft infusion set should not be used for more than 72 hours. ™ ® ® The mylife YpsoPump Orbit micro infusion set should not be used for more than 48 hours. ™... -
Page 91: Changing The Cartridge
5.4 Changing the cartridge Removing the cartridge 2/7: Open the main menu and tap 3/7: Tap the “Return threaded rod” the “Cartridge change and current icon. cartridge level” icon. 1/7: Always disconnect the infusion set from your body first according to the instructions on page 89. With your mylife YpsoPump , you are not required to change your infusion set every time you change your ™... - Page 92 4/7: Confirm by tapping . The 5/7: The threaded rod returns and mylife YpsoPump vibrates briefly. the percentage is reduced to 0 %. ™ ® Then the self-test is performed (as described on page 32). Do not insert the new cartridge until the threaded rod has completely returned and the mylife YpsoPump ™...
- Page 93 6/7: Disconnect the infusion set by 7/7: Remove the empty cartridge from turning the adaptor on the mylife the mylife YpsoPump and dispose ™ ™ ® YpsoPump counterclockwise until it of it in accordance with your national ® stops. environmental protection regulations.
-
Page 94: Inserting The Cartridge
Inserting the cartridge For the mylife YpsoPump you may ™ ® only use a self-filled 1.6-ml reservoir (mylife YpsoPump Reservoir) or a ™ ® pre-filled 1.6-ml cartridge (NovoRapid ® PumpCart ) compatible with the ® mylife YpsoPump ™ ® 1/2: Hold the mylife YpsoPump 2/2: Place the adaptor on the inserted ™... -
Page 95: Priming The Infusion Set
5.5 Priming the infusion set 1/6: Open the main menu and tap the 2/6: Tap the “Prime tubing” icon. “Prime infusion set” icon. Refer to the instructions for use of your mylife YpsoPump Orbit infusion set for the correct priming volume. ™ ®... - Page 96 Priming volume when only changing Priming volume when changing the cartridge: Check the cartridge the infusion set: For the priming vol- ume, select a value that is suitable for for air bubbles. If the cartridge contains air bubbles, select the appropriate your infusion set according to priming volume according to the the instructions for use of your mylife ™...
- Page 97 4/6: Confirm that you have discon- 5/6: During the priming procedure, keep nected the infusion set from your body the insulin pump in an upright position, by removing the tubing cap from the with the adaptor facing upwards and tap cannula base and confirm by tapping the insulin pump lightly on your open .
- Page 98 6/6: Repeat the priming procedure with the appropriate priming volume until there are no more air bubbles in the cartridge, in the adaptor or in the tubing and until insulin has emerged from the end of the tubing of the infusion set.
-
Page 99: Attaching The Infusion Set To Your Body
5.6 Attaching the infusion set to your body If insulin has emerged from the end of the tubing and there are no more bubbles of air in the cartridge, in the adaptor or in the tubing, attach the infusion set to your body. 1/12: Wash your hands thoroughly. These abridged instructions are intended to be a recommendation. - Page 100 2/12: Clean and dry the infusion site, making sure there 3/12: Peel the protective foil off the tape carefully. are no hairs where the set will be. Make sure you do not touch the adhesive film.
- Page 101 4/12: Remove the cannula protector from the cannula 5/12: Stabilise the infusion site and insert the cannula at an carefully. angle of 90° or alternatively use the appropriate inserter for the infusion set. The mylife YpsoPump Orbit micro has a steel cannula that can be applied to the body without any additional ™...
- Page 102 6/12: Press the tape onto the skin and run your fingers 7/12: Press the tape onto the skin with one hand and over the tape for a few seconds to optimise adhesion. grasp the introducer cap with two fingers of your other hand.
- Page 103 8/12: Carefully remove the introducer needle 9/12: Cover the removed introducer needle with the blue (mylife YpsoPump Orbit soft) or the introducer cap protection cap and dispose of it in a safety bin. ™ ® ® (mylife YpsoPump Orbit micro) by pressing on ™...
- Page 104 10/12: Attach the tubing cap straight to the cannula base 11/12: Make sure you hear it click into place. of the infusion set.
- Page 105 12/12: Rotate the tubing left and right, at least one full turn in each direction while pulling upward on the cap, to ensure the tubing cap is fully engaged and the fluid path is opened.
-
Page 106: Priming The Cannula
5.7 Priming the cannula After having attached the infusion set to your body, the cannula has to be primed with insulin. 1/4: Open the main menu and tap the 2/4: Tap the “Prime cannula” icon. “Prime infusion set” icon. - Page 107 3/4: The screen for setting the priming 4/4: During the priming procedure, the volume appears. For the priming screen counts the delivered priming volume, select a value that is suitable volume upwards until the set value has for your cannula, between 0.1 U and been reached.
-
Page 108: Data/History
6 Data/History 6.1 Therapy data You can view the saved events in the Alarm history lists all the alarms that data menu. have taken place. If the number of events exceeds the maximum number, The mylife YpsoPump has a data the oldest events are overwritten. ™... - Page 109 2/6: Tap the “Therapy data” icon. 3/6: For each event, the time of day and date are displayed inverted. As a result you can distinguish the event from a current display. The icon for the event appears on the left of the screen, the relevant value in the middle.
-
Page 110: Example: Combination Bolus
Example: combination bolus Three screens each containing different information are displayed one after the other at intervals of 2 seconds: 4/6: Display of total bolus amount. 5/6: Display of immediate portion. - Page 111 6/6: Display of extended portion and extension time. Remember to back up your therapy data regularly to prevent any loss of events.
-
Page 112: Possible Events In Therapy Data
Possible events in therapy data Battery removed Primed cannula Bolus increment changed Primed tubing Combination bolus Standard bolus or blind bolus Switched from basal rate profile A to basal rate Date changed profile B Switched from basal rate profile B to basal rate Extended bolus profile A Hourly value from basal rate profile A changed Switched to run mode... - Page 113 Temporary basal rate function Threaded rod returned Time of day changed Total insulin amount per day (basal and bolus)
-
Page 114: Alarm History
6.2 Alarm history 1/3: Open the main menu and tap the 2/3: Tap the “Alarm history” icon. 3/3: For each event, the time of day “Data” icon. and date are displayed inverted. As a result you can distinguish the event from a current display. The icon for the event appears on the left of the screen. -
Page 115: Possible Events In Alarm History
Possible events in alarm history Auto stop No insulin Battery empty Occlusion Battery not suitable Cartridge empty Charge internal rechargeable battery Electronic error No battery... -
Page 116: 7 Functions And Settings
7 Functions and settings Warnings Take special care when setting the time. If a wrong time of day is set, the times of the basal rate profile could be shifted. Only make changes to your settings after consulting your doctor or diabetes advisor. Incorrect programming of the insulin pump can lead to incorrect dosages of insulin, which can cause hypoglycaemia or hyperglycaemia (read warning in the box on page 7). -
Page 117: Changing The Time Of Day
7.1 Changing the time of day 1/3: Open the main menu and tap the 2/3: Tap the “Time of day” icon. 3/3: Set the current time of day, “Settings” icon. confirm by tapping and the mylife YpsoPump will vibrate briefly. ™ ® The time of day set is entered in the therapy settings. -
Page 118: Changing The Date
7.2 Changing the date 1/3: Open the main menu and tap the 2/3: Tap the “Date” icon. 3/3: Set the current date (day, month, “Settings” icon. year). Confirm your setting by tapping The values displayed are only examples. Always use your own settings. You can adjust the time of day and the date at any time in the settings menu. -
Page 119: Access Lock
7.3 Access lock The access lock function offers access protection (e.g. for The following mylife YpsoPump functions cannot be ™ ® children). operated when the access lock function is activated: All types of bolus delivery When the access lock function is activated, only the following Temporary basal rate function mylife YpsoPump... -
Page 120: Activating Access Lock
Activating access lock 1/5: Open the main menu and tap the 2/5: Swipe to the left and tap the 3/5: Confirm by tapping . The “Settings” icon. “Access lock inactive/activate” icon. mylife YpsoPump vibrates ™ ® briefly and the access lock function is activated. - Page 121 4/5: The status screen appears. 5/5: If you open the main menu again, The activated access lock function is tap the “Settings” icon and swipe visualised by an access lock icon at to the left, the “Access lock active/ the top of the screen. deactivate”...
-
Page 122: Deactivating Access Lock
Deactivating access lock 1/5: Open the main menu and tap the 2/5: Swipe to the left and tap the 3/5: Confirm by tapping . The “Settings” icon. “Access lock active/deactivate” icon. mylife YpsoPump vibrates ™ ® briefly and the access lock function is deactivated. - Page 123 4/5: The status screen appears. The ac- 5/5: If you open the main menu again, cess lock icon at the top of the screen tap the “Settings” icon and swipe disappears. All icons are now active and to the left, the “Access lock inactive/ the functions can be operated again.
-
Page 124: Rotating The Screen By
7.4 Rotating the screen by 180° You have the option of rotating the screen of the mylife YpsoPump ™ ® 180°. 1/3: Open the main menu and tap the 2/3: Swipe to the left and tap the “Settings” icon. “Rotate screen” icon. - Page 125 3/3: Confirm by tapping . The mylife YpsoPump vibrates ™ ® briefly and the orientation of the screen is rotated by 180°.
-
Page 126: Bluetooth
7.5 Bluetooth ® Activating Bluetooth ® Use the Bluetooth function to transfer ® your therapy data from your mylife ™ YpsoPump to another supported ® Bluetooth enabled device. If you want ® to use the Bluetooth connection ® to a Bluetooth enabled device, the ®... - Page 127 3/5: Confirm by tapping . The 4/5: The status screen appears. The 5/5: If you open the main menu mylife YpsoPump vibrates briefly and activated Bluetooth function is visu- again, tap the “Settings” icon and ™ ® ® the Bluetooth function is activated. alised by a Bluetooth icon at the top swipe to the left, the “Bluetooth...
-
Page 128: Deactivating Bluetooth
Deactivating Bluetooth ® If you do not want to use any Bluetooth ® enabled devices with the mylife ™ YpsoPump , the Bluetooth interface ® ® can be deactivated. 1/5: Open the main menu and tap the 2/5: Swipe to the left and tap the “Settings”... - Page 129 3/5: Confirm by tapping . The 4/5: The status screen appears. 5/5: If you open the main menu again, mylife YpsoPump vibrates The Bluetooth icon at the top of the tap the “Settings” icon and swipe ™ ® ® briefly and the Bluetooth function screen disappears.
-
Page 130: Bluetooth ® Pairing
Bluetooth pairing ® The first time you establish Bluetooth ® connectivity between the mylife ™ YpsoPump and another Bluetooth ® ® enabled device, you have to enter an identification code to allow Bluetooth ® connection between the two devices. To use the Bluetooth pairing function, ®... - Page 131 3/6: The mylife YpsoPump is ready 4/6: A six-digit number code appears 5/6: If Bluetooth pairing was suc- ™ ® ® for Bluetooth pairing and waits for on the screen of the mylife YpsoPump cessful, the display automatically ® ™ ® the pairing request of the Bluetooth and the arrows rotate.
- Page 132 6/6: If you open the main menu again, tap the “Settings” icon, swipe to the left and tap the “Bluetooth pairing” ® icon, the active connection is shown by the rotation of the arrows. An active Bluetooth connection to a Bluetooth enabled device is ®...
-
Page 133: Preparing For Storage
7.6 Preparing for storage If you will not be using the mylife After a restart all you have to do is ™ YpsoPump for a longer period, perform the self-test and reset ® set your insulin pump into stop mode the time of day and date. - Page 134 1/2: Set the mylife YpsoPump 2/2: Open the battery compartment ™ ® stop mode (see page 27). Remove lid and remove the battery. Close the cartridge and the infusion set as the battery compartment lid and store described on page 91. the mylife YpsoPump in a safe place.
-
Page 135: Internal Rechargeable Battery
7.7 Internal rechargeable battery The mylife YpsoPump has an internal rechargeable battery that is charged by the inserted alkaline battery. If the alkaline ™ ® battery is removed, all functions still work. If the insulin pump is in run mode and a new battery is not inserted within 5 minutes, the “No battery”... -
Page 136: Changing The Battery
7.8 Changing the battery 1/5: If the “Battery charge level low” 2/5: Open the battery compartment by inserting a coin in the groove of the battery warning appears, the insulin pump compartment lid and turn counterclockwise. Remove the empty battery from can still be operated for at least two the battery compartment and dispose of it in accordance with your national envi- days. - Page 137 3/5: The battery orientation screen 4/5: Insert a new, size AAA, alkaline battery (LR03). Make shows the orientation of the AAA sure the negative pole of the battery is inserted first. On battery for insertion. It appears on the the back of the insulin pump you will see a picture showing status screen.
- Page 138 5/5: Lock the battery compartment by inserting a coin in the groove of the battery compartment lid and turning it clockwise until it stops. When the battery has been inserted, the mylife icon appears first, followed by the status screen or ™...
- Page 139 If you remove the battery while you are in the main menu or in a submenu, all the current settings, which have not yet been confirmed, will be discarded and the battery orientation screen appears. After removal of the battery the following functions are completed first before the battery orientation screen appears: Return of the threaded rod Priming in progress...
-
Page 140: Troubleshooting
8 Troubleshooting Warnings You may only use the self-filled 1.6-ml reservoir (mylife YpsoPump Reservoir) or pre-filled 1.6-ml cartridge (NovoRapid ™ ® ® PumpCart ) that are compatible with the mylife YpsoPump . Using a different cartridge which is not declared by ®... - Page 141 At night it may not be possible to perceive alarms if the insulin pump is not positioned properly (e.g. if you are lying on the pump). Make sure the insulin pump is positioned properly while you are asleep so that you perceive any alarms. Alarms that have not been dealt with can lead to failure of the preset insulin delivery, which can cause hyperglycaemia (read warning in the box on page 7).
-
Page 142: Incidents
8.1 Incidents Air bubbles in the cartridge Check your blood glucose level. Disconnect the infusion set from your body and or in the infusion set prime the infusion set without any air bubbles in accordance with the procedure on page 95. “Basal rate profile A” icon If the temporary basal rate function is activated, the basal rate profile A function is is not available (shown in grey) not available and it is not possible to change the basal rate profile. - Page 143 “Bluetooth pairing” icon is not If the Bluetooth function is not activated, the Bluetooth pairing function cannot ® ® ® available (shown in grey) be activated. “Bolus” icon is not available Make sure the mylife YpsoPump is in run mode because the bolus function is not ™ ® (shown in grey) available in stop mode. Nor can the bolus function be performed if the cartridge is empty.
- Page 144 Dirt in the cartridge Set the insulin pump to stop mode. Disconnect the infusion set from your body. compartment Remove the cartridge from the cartridge compartment. Remove the dirt (crumbs, grains of sand, particles of dust, etc.) from the cartridge compartment by tapping the insulin pump lightly on your palm (with the cartridge opening facing your palm).
- Page 145 Insulin in the cartridge Check your blood glucose level. Set the insulin pump to stop mode. Disconnect the compartment infusion set from your body. Remove the cartridge from the cartridge compartment and check it for cracks and damage. If necessary, replace the cartridge and clean the cartridge compartment with a damp cotton cloth.
- Page 146 “Prime cannula” icon is not The tubing of the infusion set has not yet been primed. available (shown in grey) “Prime infusion set” icon is not If the temporary basal rate function is activated and/or if an extended bolus or available (shown in grey) combination bolus is active, the prime infusion set function is not available. The prime infusion set function cannot be executed if the cartridge is empty or if a previous threaded rod return has not yet been completed properly.
-
Page 147: Displayed Warnings
8.2 Displayed warnings The mylife YpsoPump has a safety system that constantly monitors all functions. If there is a deviation from the defined ™ ® operating status, the insulin pump triggers a warning or an alarm, depending on the situation. You will find a description of the alarms on page 156. -
Page 148: Cartridge Level Low
Cartridge level low The “Cartridge level low” warning is triggered if the programmed basal rate (including the temporary basal rate function) for the next 12 hours, together with the remaining amount of any bolus in progress, is greater than or equal to the remaining contents of the cartridge. -
Page 149: Battery Charge Level Low
Battery charge level low If the “Battery charge level low” warning appears, the mylife YpsoPump can still be operated for at least two days. ™ ® Confirm by tapping and insert a new AAA alkaline battery (LR03) as soon as possible. Follow the procedure on page 136. -
Page 150: Threaded Rod Return Not Completed
Threaded rod return not completed The “Threaded rod return not completed” warning appears if it has not yet been possible to perform the threaded rod return function properly. The warning can occur on account of dirt (sand, dried insulin, etc.) in the cartridge compartment or generally if the drive has a mechanical fault. -
Page 151: Priming Not Completed
Priming not completed The “Priming not completed” warning appears if: the drive is fully extended (cartridge empty) without a plunger having been detected. the priming procedure is cancelled by the user during plunger detection. the priming procedure is cancelled by an alarm. the force on the plunger holder decreases during the priming procedure, for example because the cartridge has been removed or a wrong cartridge has been inserted. -
Page 152: Bolus Cancelled
Bolus cancelled The “Bolus cancelled” warning appears if a bolus is cancelled prematurely. Premature cancellation happens if there is an alarm or if the insulin pump is put into stop mode. Confirm by tapping If your bolus in progress is cancelled prematurely, you can obtain the actual duration and the insulin amount delivered by referring to the therapy data or to the last bolus screen. -
Page 153: Temporary Basal Rate Function Completed Or Cancelled
Temporary basal rate function completed or cancelled The “Temporary basal rate function completed or cancelled” warning appears if the temporary basal rate function has been completed or if it is cancelled prematurely. Premature cancellation happens if there is an alarm or if the insulin pump is put into stop mode. -
Page 154: Insulin Pump Stopped
Insulin pump stopped The “Insulin pump stopped” warning appears if the insulin pump has been in stop mode for more than one hour. Confirm by tapping . The warning now no longer appears unless the insulin pump is set to run mode again and then back to stop mode. -
Page 155: Bluetooth ® Connection Failed
Bluetooth connection failed ® The “Bluetooth connection failed” warning appears if: ® the 30-second time limit to enter the identification code is exceeded during the pairing process. a wrong identification code is entered during pairing process. an active Bluetooth connection is accidentally disconnected. ®... -
Page 156: Alarms
8.3 Alarms The mylife YpsoPump has a safety system that constantly monitors all functions. If there is a deviation from the defined ™ ® operating status, the insulin pump triggers an alarm, depending on the situation. You will find a description of the warnings on page 147. - Page 157 Alarms given are primarily tactile and audible and there are 4 escalation levels. The levels escalate at intervals of 5 minutes. If an alarm is confirmed but not dealt with, it is given again by audible and tactile means after 30 minutes. An electronic error is the exception.
-
Page 158: No Battery
No battery The “No battery” alarm appears if you remove the alkaline battery from the battery compartment for more than 5 minutes when the insulin pump is in run mode. Confirm by tapping and insert a new AAA alkaline battery (LR03). Follow the procedure on page 136. -
Page 159: Battery Empty
Battery empty The “Battery empty” alarm appears if the battery no longer has sufficient power and has to be changed. Confirm by tapping and insert a new AAA alkaline battery (LR03). Follow the procedure on page 136. -
Page 160: Battery Not Suitable
Battery not suitable The “Battery not suitable” alarm appears if you insert a battery whose voltage is too high. Confirm by tapping Remove the unsuitable battery from the battery compartment and insert a new AAA alkaline battery (LR03). Follow the procedure on page 136. -
Page 161: Charge Internal Rechargeable Battery
Charge internal rechargeable battery The “Charge internal rechargeable battery” alarm appears if the internal rechargeable battery of the mylife YpsoPump ™ ® depleted on account of a high load. All the insulin deliveries in progress are cancelled: boluses, temporary basal rate and basal rate. -
Page 162: Occlusion
Occlusion The “Occlusion” alarm appears if the infusion path is blocked (e.g. adaptor, infusion set, cannula). Confirm by tapping and disconnect the infusion set from your body. Then perform the following actions:... - Page 163 Change the infusion set in accordance with the procedure on page 90. Prime the tubing with the priming volume specified for the tubing according to the instructions for use of your mylife ™ YpsoPump Orbit infusion set. ® ® If priming of the new infusion set can be completed without an occlusion alarm, therapy can be continued. If an occlusion alarm occurs again while the new infusion set is being primed, the cartridge must be changed in accord- ance with the procedure on page 91.
-
Page 164: No Insulin
No insulin The “No insulin” alarm appears if after a threaded rod return no priming procedure is performed within 5 minutes or if the priming procedure failed. The “No insulin” alarm only appears if the insulin pump is in run mode. Confirm by tapping . -
Page 165: Cartridge Empty
Cartridge empty The “Cartridge empty” alarm appears if the cartridge contains 0.0 U insulin. Confirm by tapping Change the cartridge in accordance with the procedure on page 91. -
Page 166: Auto Stop
Auto stop The “Auto stop” alarm appears if the mylife YpsoPump is in run mode and has not been operated within 24 hours. The ™ ® insulin pump is automatically put into stop mode and all insulin deliveries in progress are cancelled. Confirm the alarm by tapping . -
Page 167: Electronic Error
Electronic error If the mylife YpsoPump detects an ™ ® internal malfunction, an electronic error is displayed. All the functions of the insulin pump are cancelled. In the event of an electronic error the insulin pump displays two different screens alternately which show you how to restart the insulin pump in a few steps. -
Page 168: 9 Everyday Situations
9 Everyday situations Warnings Sport and physical activity can lead to a change in your insulin requirement, which can cause hypoglycaemia or hyperglycae- mia (read warning in the box on page 7). In case of doubt consult your doctor, diabetes advisor or Customer Service. Make sure the infusion set does not become detached from your body during sport or physical activity. -
Page 169: General
9.1 General Always wear the mylife YpsoPump in your trouser pocket or use a carrying system offered by Ypsomed. Position the ™ ® tubing in a way that strangulation is impossible, especially at night. Make sure the insulin pump is not subjected to any jolts, hard knocks or other mechanical interference. -
Page 170: Watertightness
9.2 Watertightness The mylife YpsoPump is waterproof according to IPX8 according to EN 60529 (immersion to a depth of 1 m for up to ™ ® 60 minutes). However, if the mylife YpsoPump has been dropped, it may no longer be waterproof due to undetected ™... -
Page 171: Travelling
9.3 Travelling Consult your doctor or diabetes advisor to find out what preparations have to be made in order to travel with the mylife ™ YpsoPump . Make sure you take sufficient supplies for your mylife YpsoPump and blood glucose meter with ®... -
Page 172: Sources Of Interference
9.4 Sources of interference The mylife YpsoPump meets the required standards for electromagnetic interference immunity. The functions of the ™ ® mylife YpsoPump should not be affected by security systems at airports or anti-theft systems in department stores. ™ ® However, malfunctions cannot be ruled out because numerous electrical appliances, e.g. -
Page 173: Sport
9.5 Sport Consult your doctor or diabetes advisor to find out what preparations have to be made in order to do sports with the mylife YpsoPump . Make sure you take sufficient supplies for your mylife YpsoPump and blood glucose ™... -
Page 174: 10 Annex
10 Annex 10.1 Product specifications Insulin pump dimensions: 7.8 × 4.6 × 1.6 cm Touchscreen dimensions: 4.1 × 1.6 cm Weight: 83 g (including battery and filled cartridge) Temperature range: Operation: from + 5 °C to + 37 °C Storage: from 0 °C to +40 °C Humidity range: Operation: 20 % to 95 % RH, non-condensing Storage: 20 % to 95 % RH, non-condensing... - Page 175 Minimum basal rate greater than 0.00 U/h: 0.02 U/h Basal rate increments: Range 0.02 U/h to 1.00 U/h: increment 0.01 U/h Range 1.00 U/h to 2.00 U/h: increment 0.02 U/h Range 2.00 U/h to 15.0 U/h: increment 0.1 U/h Range 15.0 U/h to 40.0 U/h: increment 0.5 U/h Bolus types: Standard bolus, extended bolus, combination bolus and blind bolus Minimum bolus:...
-
Page 176: E Mc Safety Distances
10.2 EMC safety distances according to Table 6 of EN 60601-1-2 To provide the mylife YpsoPump with optimal protection against electromagnetic fields the following precautions concerning ™ ® electromagnetic compatibility must be taken: The mylife YpsoPump must be put into operation in accordance with the instructions in this User Guide. ™... - Page 177 Examples: A Wi-Fi router has a transmitting power of 0.1 W limited by law and it operates in the frequency range of 2400 MHz. According to the table that means a recommended safety distance of 22 cm. A DECT cordless telephone has a peak power of 0.25 W and it operates in the frequency range of 1880 to 1900 MHz. According to the table that means a recommended safety distance of approx.
-
Page 178: Start-Up Graph
10.3 Delivery accuracy according to EN 60601-2-24 Start-up graph Set flow rate Measured values 1080 1200 1320 1440 Time (min) Material and conditions mylife YpsoPump Orbit soft, 110 cm tubing length ™ ® ® Ambient conditions 22 °C (± 2 °C), humidity uncontrolled (25 % to 75 %) -
Page 179: Trumpet Curve
Trumpet curve Maximum positive measured error Minimum negative measured error Set flow rate 1.0 U/h Overall percentage error Observation window (min) Material and conditions mylife YpsoPump Orbit soft, 110 cm tubing length ™ ® ® Ambient conditions 22 °C (± 2 °C), humidity uncontrolled (25 % to 75 %) -
Page 180: Menu Map
10.4 Menu map Status screen Display of last bolus Unlock screen Bolus Basal rates Cartridge change Prime infusion set Standard Extended Combination Temporary basal Switch basal Basal rate Prime Prime bolus bolus bolus rate function rate profile profiles A and B tubing cannula... - Page 181 Data Stop/Run mode Settings Therapy Alarm Time Bolus Blind bolus Access lock Rotate Bluetooth Bluetooth ® ® data history of day Date increment inactive/active inactive/active screen inactive/active pairing...
-
Page 182: Icon Overview
10.5 Icon overview Navigation aids General icons Cancel Warning Confirm Alarm Forward to unlock Audible signal Forward Vibration signal One menu level up Battery charge level One step back Battery removed Remove battery Threaded rod returning... -
Page 183: Icons In Main Menu And Submenus
Icons in main menu and submenus Prime tubing in progress Bolus Prime cannula in progress Standard bolus Disconnect infusion set from body Extended bolus Ready for Bluetooth pairing Combination bolus ® Bluetooth pairing in progress Basal rates ® Press function button for 2 seconds Basal rate profile A Total insulin amount per day (basal and bolus) Basal rate profile B Switch to basal rate profile A... - Page 184 Switch to basal rate profile B Data Temporary basal rate function Therapy data Temporary basal rate function activated/cancel Alarm history Cartridge change and current cartridge level Run mode/switch to stop mode Return threaded rod Stop mode/switch to run mode Prime infusion set Settings Prime tubing Time of day...
-
Page 185: Alarm Icons
Set bolus increment Bluetooth pairing ® Blind bolus active/deactivate Alarm icons Blind bolus inactive/activate Access lock active/deactivate No battery Access lock inactive/activate Battery empty Rotate screen Battery not suitable Bluetooth active/deactivate Charge internal rechargeable battery ® Bluetooth inactive/activate Occlusion ®... -
Page 186: Warning Icons
Warning icons No insulin Cartridge level low Cartridge empty Battery charge level low Auto stop Threaded rod return not completed Electronic error Priming not completed Bolus cancelled Temporary basal rate function completed or cancelled Insulin pump stopped Bluetooth connection failed ®... -
Page 187: Explanation Of Symbols
Bluetooth SIG, Inc., and any use of such directives and may be sold within the EU marks by Ypsomed AG is under license. Other trademarks (European Union) and in EFTA countries. and trade names are those of their respective owners. -
Page 188: Mylife ™ Ypsopump ® Orbit ® And Mylife ™ Ypsopump ® Reservoir Symbols
mylife YpsoPump Orbit and mylife YpsoPump Reservoir symbols ™ ® ® ™ ® The product was designed and manufactured Catalogue number in accordance with the relevant standards/ directives and may be sold within the EU Batch code (European Union) and in EFTA countries. Global trade item number Consult the instructions for use Date of manufacture... -
Page 189: Glossary
10.7 Glossary Adaptor Basal rate profile The adaptor fixes the cartridge in place in the mylife The mylife YpsoPump has 2 programmable basal rate ™ ™ ® YpsoPump and at the same time pierces the septum of profiles, A and B. A basal rate profile consists of 24 pro- ®... - Page 190 Bolus increment Cartridge The bolus increment relates to all four bolus types. It indicates The cartridge contains the insulin. The cartridge of the by how many units the bolus amount is increased/reduced mylife YpsoPump has a capacity of 1.6 ml (160 U) insulin ™...
- Page 191 Extended bolus Infusion site An extended bolus is delivered by the mylife YpsoPump An infusion site is the part of the body in which the infusion ™ ® over the period of time you select. set is applied and the cannula is inserted through the skin. Icon Insulin Icons are graphic symbols on the touchscreen of the...
- Page 192 Priming procedure Self-test The priming procedure is the procedure in which the infusion The self-test is the procedure that is automatically performed set is filled with insulin. when the device is put into operation for the first time and after every return of the threaded rod. The insulin pump Run mode tests the functions and the operability of the visual signal In run mode, insulin is delivered according to the settings.
- Page 193 Status screen Swipe The status screen indicates the current operating status of Swipe is the action taken on the screen of the mylife ™ the mylife YpsoPump (current time of day, current date, YpsoPump with which values are set. Set a value by swiping ™...
- Page 194 Threaded rod Touchscreen The threaded rod is a mechanical drive component of Touchscreen means a screen that is sensitive to touch. The the mylife YpsoPump which pushes the plunger of the touchscreen of the mylife YpsoPump responds to touch ™ ® ™...
-
Page 195: My Pump Settings
10.8 My pump settings Basal rate profile A Daily total U/day 00:00 to 01:00 12:00 to 13:00 01:00 to 02:00 13:00 to 14:00 02:00 to 03:00 14:00 to 15:00 03:00 to 04:00 15:00 to 16:00 04:00 to 05:00 16:00 to 17:00 05:00 to 06:00 17:00 to 18:00 06:00 to 07:00 18:00 to 19:00... - Page 196 Basal rate profile B Daily total U/day 00:00 to 01:00 12:00 to 13:00 01:00 to 02:00 13:00 to 14:00 02:00 to 03:00 14:00 to 15:00 03:00 to 04:00 15:00 to 16:00 04:00 to 05:00 16:00 to 17:00 05:00 to 06:00 17:00 to 18:00 06:00 to 07:00 18:00 to 19:00 07:00 to 08:00...
- Page 197 Temporary basal rate function Value Duration e.g. soccer training per cent hours per cent hours per cent hours per cent hours per cent hours per cent hours per cent hours per cent hours per cent hours per cent hours per cent hours per cent hours...
- Page 198 Notes...
- Page 200 ™ betes. It offers them everything they need for easy and reliable self-treatment, giving them more freedom and more confidence for the life they want to lead. Ypsomed Ltd. 1 Park Court Riccall Road Escrick North Yorkshire YO19 6ED info@ypsomed.co.uk...
Need help?
Do you have a question about the mylife YpsoPump and is the answer not in the manual?
Questions and answers
How do I change my insulin: carb ratio on my Android?