
Subscribe to Our Youtube Channel
Related Manuals for TRU-BLU K9000


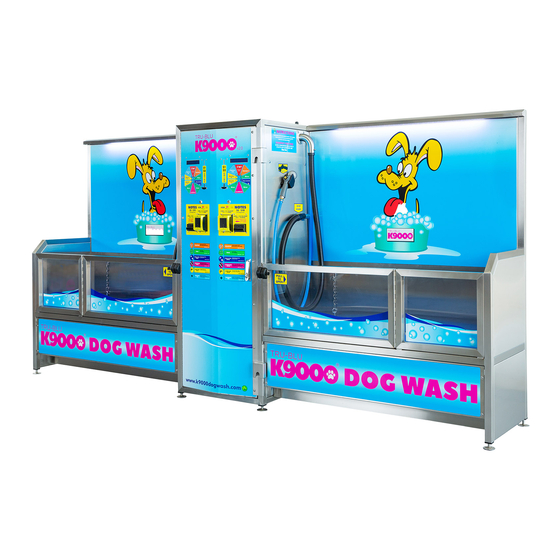
Summary of Contents for TRU-BLU K9000
- Page 1 Pet Stock Twin Dog Wash Operators Manual ® © Copyright 2016, Tru Blu Dog Wash, All rights reserved. K9000 is a registered trademark of Tru Blu Dog Wash. Z:\Build\Pet Stock\Pet Stock Twin Operators Manual Aug 2020 v7.0.docx...
- Page 2 © Copyright 2016, Tru Blu Dog Wash, All rights reserved. K9000 ® is a registered trademark of Tru Blu Dog Wash. All requests and enquiries regarding the use of, and availability of this manual are to be directed to: Tru Blu Dog Wash Factory No.
- Page 3 Explanation of symbols used in this manual Warning Important - Take note Regulatory Compliance Mark Electrical Hazard Date Summary of Changes Sections Changed/Added Author/s Version 05/09/2016 Updated to new format Previous version of manual had no Phil Worrell V0.01 New MSDS’s sections so all sections updated Updated Installation New Hot Water Unit...
-
Page 4: Table Of Contents
Table of Contents K9000 Twin Dog Wash System Specifications ............... 6 Installation ........................7 Assembling, Levelling and Positioning the Dog Wash ..........8 2.1.1 Levelling and Positioning the Dog Wash ............8 Connecting the Water Supply and Waste connection to the Dog Wash....10 2.2.1... - Page 5 Approved Products ......................36 Water Temperature Valve .....................37 K9000 Twin with Site Supplied Hot Water ..............37 K9000 Twin with On Board Hot Water Unit .............38 Cash Box Components ....................39 Coin Box with highlighted components ..............39 Note & Credit Card Acceptors ................39 Coin Acceptor –...
-
Page 6: K9000 Twin Dog Wash System Specifications
1 K9000 Twin Dog Wash System Specifications SYSTEM WITHOUT ON BOARD HOT WATER UNIT Power 240V 25 AMP WATER Inlet Pressure (Min) ½” Ball valve 40psi / 275kpa Cold ½” Ball valve WATER Inlet Pressure (Max) ½” Ball valve 72psi / 500kpa Cold ½”... -
Page 7: Installation
Caution should be taken when the Dog Wash has been delivered and is being unloaded. The K9000 Twin Dog Wash is delivered in two parts with a total weight of approximately 350kg. The larger of the two parts weighs approximately 260kg and measures 2100mm in length, 1850mm in height &... -
Page 8: Assembling, Levelling And Positioning The Dog Wash
2.1 Assembling, Levelling and Positioning the Dog Wash As the K9000 Twin Dog Wash is delivered in two parts you need to assemble the Dog Wash, to do this we need to firstly position and level the K9000 Twin Dog Wash. - Page 9 Now place the right and tub as near as possible to the left-hand tub, place a level along the back of the Dog Wash and adjust the feet according to get the Dog Wash Level. This will help assemble the two pieces. Positions of 4 of the Socket cap M6 x 50mm bolts and ¼”...
-
Page 10: Connecting The Water Supply And Waste Connection To The Dog Wash
72psi (0.5mpa / 500kpa). The picture at left shows the hot and cold-water entry points for a K9000 Twin without an on- board hot water unit. While the picture on the right shows the water entry point for a K9000 Twin with an on-board hot water unit. -
Page 11: Adjusting The Water Pressure
2.2.2 Adjusting the Water Pressure Once connected the regulators can be adjusted to ensure the Dog Wash has water pressure of 50 psi (0.35mpa / 345kpa). Ensure that the waste has been connected prior to testing, refer section 2.4.4 The below picture shows the pressure gauge and pressure regulator for each tub. You will also see a water pressure setting sticker confirming the settings. -
Page 12: Hot Water
2.2.3.1 Site Supplied Hot Water Shown below is a K9000 Twin that was installed at a site that supplied HOT water, and as such the unit did not require to have an on-board hot water service. *Please consult with Tru Blu Dog Wash to ensure your existing hot water supply is adequate. -
Page 13: Initial Start Up Of The Stiebel Eltron Dhb-E 27 Au Hot Water Unit
2.2.3.2.1 Initial Start Up of the Stiebel Eltron DHB-E 27 AU Hot Water Unit The initial start-up of the Stiebel Eltron should be conducted by an electrician referencing the Stiebel AU Operation and Installation guide. The below is an extract showing how to activate the safety pressure limiter for flow pressure using the reset button. - Page 14 Power can now be turned on. For detailed instructions refer to the Stiebel Eltron AU Operation and Installation guide supplied with the K9000 dog wash. Z:\Build\Pet Stock\Pet Stock Twin Operators Manual Aug 2020 v7.0.docx © Tru Blu Dog Wash 2016...
-
Page 15: Connecting The Waste
2.2.4.2 New Sites Shown below is a K9000 Twin that has been installed at a new site were the site has allowed for the waste points as part of construction (Note: only 1 of the 2 waste points shown in photo). -
Page 16: Back Flow Protection Device
2.2.5 Back Flow Protection Device Connections need to be protected by a “high hazard” backflow prevention device. The below picture highlights the use of a reduce pressure backflow preventer (“RPZ”). Refer to appendix 14.2.1, Plumbing Schematic Individual Protection drawing. 2.3 Connecting the Power – For Your Electrician The below picture below left, is the main electrical cable inside the cabinet. - Page 17 38.9 AMP *Note: This is in addition to the K9000 Twin power supply requirement, but only when a hot water unit is installed in the K9000 Twin Dog Wash. Refer to the Operation and Installation booklet for the Stiebel Eltron instantaneous water heater for full details.
-
Page 18: Main Board Components
Main Board Components 3.1 INDOOR (4 Pump) K9000 Twin Dog Wash 3.1.1 Control Module The Control Module contains the fuses, circuit breakers, transformer, relays etc. The cover from the Control Module should never be removed unless the power is disconnected. -
Page 19: Indoor Dog Wash Main Board With Iwaki Ej Series Pumps & 2X 1100 Dryers
3.1.2 Indoor Dog Wash Main Board with Iwaki EJ Series Pumps & 2x 1100 Dryers This back board has the standard 2x1100 Dryers which are not heated, the air is “warmed” just by the fact that it is running through the dryer motors. 3.1.2.1 Indoor Dog Wash Main Board with Iwaki EJ Series Pumps &... -
Page 20: Product Dosing Pump Factory Settings (Iwaki Ej & Es Series Pumps)
3.1.2.2 Product Dosing Pump Factory Settings (Iwaki EJ & ES Series Pumps) Settings are guidelines/recommendations for Fido’s or other approved high-quality concentrated products: Shampoo: 200 SPM* Condition rinse: 180 SPM* **Flea & Tick Rinse: 80 SPM* **Tub Disinfectant: 120 SPM* Note: Strokes Per Minute... -
Page 21: Iwaki Es Series Pump
3.1.2.2.2 Iwaki ES Series Pump To adjust settings, press either the up or down arrow until the recommended SPM rate is displayed, as detailed in section 4.1.2 above. Should you be using another approved product please contact Tru Blu on 03 5562 9088 for settings. -
Page 22: Bleeding Product Dosing Pumps (Iwaki - Ej & Es Series Pumps)
3.1.2.3 Bleeding Product Dosing Pumps (Iwaki - EJ & ES Series Pumps) The need to bleed product dosing pump will arise when products have run out or in some case when products have been replaced and air has become trapped in the tube. Bleeding procedure: 1. -
Page 23: Iwaki Dosing Pump Exploded Views
3.1.3 Iwaki Dosing Pump Exploded Views This section has diagrams of both the EJ & ES Series pumps completely dismantled. Do not dismantle pumps beyond the extent shown in this instruction manual. 3.1.3.1 Iwaki Dosing Pump – EJ Series Exploded View The pump in the diagram below is completely dismantled. - Page 24 3.1.3.2 Iwaki Dosing Pump – ES Series Exploded View The ES Series pump in the diagram below is completely dismantled. Do not dismantle the pump beyond the extent shown in this instruction manual. Z:\Build\Pet Stock\Pet Stock Twin Operators Manual Aug 2020 v7.0.docx ©...
-
Page 25: Standard 2X 1100 Dryer
3.1.3.3 Standard 2x 1100 Dryer The Pet Stock Twin Dog Wash comes with two fully fitted standard 2x1100 dryers. They do not require any action as part of the installation process. Please note these dryers are not heated but are designed to warm the air within each dryer. -
Page 26: Dryer Hose Connection
3.1.3.4 Dryer Hose Connection Z:\Build\Pet Stock\Pet Stock Twin Operators Manual Aug 2020 v7.0.docx © Tru Blu Dog Wash 2016... -
Page 27: Indoor Dog Wash Main Board With Iwaki Eb Series Pumps & Bypass Dryers
3.1.4 Indoor Dog Wash Main Board with Iwaki EB Series Pumps & Bypass Dryers This back board has the Bypass Dryers which allows the heating to be switched on and off dependent on the season and/or climate the dig wash is installed in. 3.1.4.1 Indoor Dog Wash Main Board with Iwaki EB Series Pumps &... -
Page 28: Product Dosing Pump Factory Settings (Iwaki - Eb Series Pumps)
3.1.4.2 Product Dosing Pump Factory Settings (Iwaki - EB Series Pumps) Settings are guidelines/recommendations for Fido’s or other approved high-quality concentrated products: Shampoo: Condition Rinse: *Flea & Tick Rinse: *Tub Disinfectant *Note: Not standard To adjust settings, rotate the ‘stroke rate’ dial to the recommended percentages as above. ‘Stroke Rate’... -
Page 29: Bleeding Product Dosing Pumps (Iwaki - Eb Series Pumps)
3.1.4.3 Bleeding Product Dosing Pumps (Iwaki - EB Series Pumps) The need to bleed product dosing pump will arise when products have run out or in some case when products have been replaced and air has become trapped in the tube. Bleeding procedure: 1. -
Page 30: Iwaki Dosing Pump Eb Series- Exploded View
3.1.4.4 Iwaki Dosing Pump EB Series– Exploded View Z:\Build\Pet Stock\Pet Stock Twin Operators Manual Aug 2020 v7.0.docx © Tru Blu Dog Wash 2016... -
Page 31: Bypass Dryers
3.1.4.5 Bypass Dryers Bypass dryers enable the operator to select whether the dryers blow heated or non-heated air. 3.1.4.5.1 Operation (Summer/Winter) NOTE: Set for summer operation when the weather is consistently warm and above 30deg C (86deg F) Set for winter operation when the weather is colder and you want the dryer to blow warmer air. -
Page 32: Outdoor (8 Pump) K9000 Twin Dog Wash
3.2 OUTDOOR (8 Pump) K9000 Twin Dog Wash 3.2.1 Outdoor Dog Wash Main Board - Iwaki EJ Series Pumps & 2x 1100 Dryers This back board has the standard 2x1100 Dryers which are not heated, the air is “warmed” just by the fact that it is running through the dryer motors. -
Page 33: Product Dosing Pump Factory Settings (Iwaki Ej Series Pumps)
3.2.1.2 Product Dosing Pump Factory Settings (Iwaki EJ Series Pumps) Settings are guidelines/recommendations for Fido’s or other approved high-quality concentrated products: Shampoo: 200 SPM* Condition rinse: 180 SPM* Flea & Tick rinse: 80 SPM* Tub disinfectant: 120 SPM* ... -
Page 34: Bleeding Product Dosing Pumps (Iwaki - Ej Series Pumps)
3.2.1.3 Bleeding Product Dosing Pumps (Iwaki - EJ Series Pumps) The need to bleed product dosing pump will arise when products have run out or in some case when products have been replaced and air has become trapped in the tube. Bleeding procedure: 5. -
Page 35: Iwaki Dosing Pump - Ej Series Exploded View
3.2.1.4 Iwaki Dosing Pump – EJ Series Exploded View Pet Stock Twin Operators Manual Aug 2020 v7.0 Page 35 © Tru Blu Dog Wash 2016... -
Page 36: Approved Products
4 Approved Products The only products that are approved for use in the Tru Blu K9000 ® Twin Dog Wash are Fido’s products produced in Australia by Mavlab Pty Ltd (www.mavlab.com.au) and those registered as a “veterinary chemical product” by the Australian Pesticides and Veterinary Medicines Authority (APVMA) for use on dogs. -
Page 37: Water Temperature Valve
Both guns will have the same water temperature. 5.1 K9000 Twin with Site Supplied Hot Water Where hot water is supplied by the site a temperature valve is fitted to allow adjustment of the water temperature. -
Page 38: K9000 Twin With On Board Hot Water Unit
5.2 K9000 Twin with On Board Hot Water Unit Where the K9000 Twin has a Stiebel Eltron DHB-E 27 AU hot water unit on board there are two ways to adjust the water temperature. 1. Using the dial on the Stiebel Eltron hot water unit, or 2. -
Page 39: Cash Box Components
Cash Box Components 6.1 Coin Box with highlighted components LED 6 Timer/Displays Warning Beeper Warning Beeper Override Override Coin Acceptors Interface Boards Coin Collection Tins 6.2 Note & Credit Card Acceptors Note & Credit Card Acceptors Pet Stock Twin Operators Manual Aug 2020 v7.0 Page 39 ©... -
Page 40: Coin Acceptor - Coin Activation
6.3 Coin Acceptor – Coin Activation If the coin acceptor does not accept a coin, then it may be because the line for that particular coin is switched OFF. I.e. coin is disabled. To turn a line ON and to enable a coin, press the button once, (light will flash green) then drop the coin in. - Page 41 Coin activation Cont’d… The Microcoin QL-Timer can be programmed using its On-Board Programming facility (OPB). Each OBP feature can be accessed by a series of button presses, using the OBP programming button, which is located below the LED indicators. ...
-
Page 42: Coin Acceptor - Removal
6.4 Coin Acceptor – Removal Always disconnect power before removal of unit Open the rear door of the customer control unit, the coin acceptor is mounted on the left- hand side. Shown on right is the stainless-steel vertical clip that holds the coin acceptor in place. -
Page 43: Coin Acceptor Cleaning
6.5 Coin Acceptor Cleaning Once the coin acceptor has been removed, it can be opened for cleaning. The coin acceptor is opened as shown on the right, the side that opens is spring loaded, and will close it self when released. Open the side completely as shown on the left. -
Page 44: Note Acceptor (Mei)
7 Note Acceptor (Mei) Note Acceptor Fault Codes The MEI note acceptor has built in diagnostics; this comes in the form of a flashing indicator light. The type of fault can be determined by the number of times this indicator light flashes. -
Page 45: Note Acceptor Removal
7.2 Note Acceptor Removal Always disconnect power before removal of unit To remove the note acceptor for either cleaning or servicing, there are four small nuts that need to be undone to slide the unit out of the back of the customer control unit. These nuts will need to be removed fully to allow the unit to come free. -
Page 46: Note Acceptor Cleaning
7.3 Note Acceptor Cleaning If the note acceptor shows signs of decreased performance, it may be in need of cleaning. To remove the stacker from the note acceptor, press the blue catch forward and slide the rear compartment up. Remove unit and clean with a slightly moist cloth. -
Page 47: Override Key (Wash Down Key)
Override Key (Wash down Key) The K9000 Twin is equipped with “OVERRIDE KEY’s”, one for each wash tub. Four keys are supplied which can be used on either tub. The operation of these keys enables the owner/attendant to operate the wash down facility without inserting any money. -
Page 48: Led 6 Operating And Programming Instructions
Money counts up as coins are inserted. BOTH Money counts up as coins are inserted, plus a prompt of “ADD $X MORE” if start K9000 set to Debit Mode price is not reached. [DELAYED START] Two second delay before timing starts after start price is reached. - Page 49 Horn output will pulse for amount of time set in HL CONTINUOUS HORN Horn output will stay on continuously for entire last minute. K9000 set to Pulsed Horn [RESTART OFF] Restart feature turned off. Full price required after time expires.
-
Page 50: Floor Lifting Tool
10 Floor Lifting Tool The following procedure is to be used for the lifting of the floors in the Dog Wash. Floor Lifting Tool The tool shown opposite is to be used for lifting the dog wash floor when needed. It is also required that “rigger”... -
Page 51: Operator Maintenance
11 Operator Maintenance The DOG WASH can operate in temperatures from 5-40 degrees Celsius if you experience temperatures outside of this range check with your plumber for appropriate insulation. To gain access to the cabinet, unlock the pad lock and open the door by using the handle. Use the override key supplied to access the dog wash functions. - Page 52 Empty product overflow bucket. Check condition of product line tubes (black & clear), no kinks, tube in product tubs touch the bottom etc. Check wash gun operation, head rotation and swivel. Check each of the dryer clamps, tighten as necessary. ...
-
Page 53: External Maintenance Items
Using warm water flush out flush out all 8 pumps, suction lines, foot valves and the actual product containers, replace as necessary. Yearly service to be carried out by authorized Technician At the completion of the yearly maintenance update the maintenance record, section 13 of this manual. -
Page 54: Dryer Maintenance
11.4 Dryer Maintenance Both dryers need to be cleaned by hand each month to remove any hair that may have collected. Ensure you clean the bottom off the dryer as the foam filter is at the base of the dryer. This picture highlights the 4 foam filters located at the base of the dyer that requiring cleaning... -
Page 55: Cleaning
11.5 Cleaning Put on suitable protective clothing, gloves, apron, and protective glasses. Use the wash down key to turn the machine on, select the rinse option on the rotary dial and wash the tub area of the dog wash using the dog washing gun, rinse all the excess under the edge of blue floor and turn the gun off. - Page 56 Turn the wash gun back on and wash anything that remains in the under-floor area down the drain in the middle of the floor area, take note to wash the bottom side of the blue tilt floor. Turn gun off. ...
-
Page 57: General Information
Turn the wash gun back on, select the disinfect option on the rotary dial and wash the under-floor area, return tilt floor to the down position. While still on disinfect, wash down the tub area of the dog wash. Turn gun off, remove wash down key and select the stop option on the rotary dial. -
Page 58: Instruction "How To Videos
& situation. Useful links for further information are listed below. http://en.wikipedia.org/wiki/Canine_parvovirus http://www.peteducation.com/article.cfm?c=2+1556&aid=467 12.2 Instruction “How to Videos” The Tru Blu K9000 website has a list of helpful videos to complement this manual, the link to the Tru Blu K9000 website is https://trubludogwash.com.au/resources/helpful-videos/ Videos Include: ... -
Page 59: Material Safety Data Sheet (Msds) Fido's Fre-Itch Rinse Concentrate
13.3 Material Safety Data Sheet (MSDS) Fido’s Fre-Itch Rinse Concentrate TB-MSDS-029 Fido's Fre-Itch Rinse Concentrate Summary.pdf 13.4 Material Safety Data Sheet (MSDS) Fido’s Hydrobath Flush TB-MSDS-028 Fido's Hydrobath Flush Summary.pdf 14 Maintenance Record The following record of maintenance needs to be completed at the time maintenance occurs. This will assist with any warranty claim.
Need help?
Do you have a question about the K9000 and is the answer not in the manual?
Questions and answers