Page 1
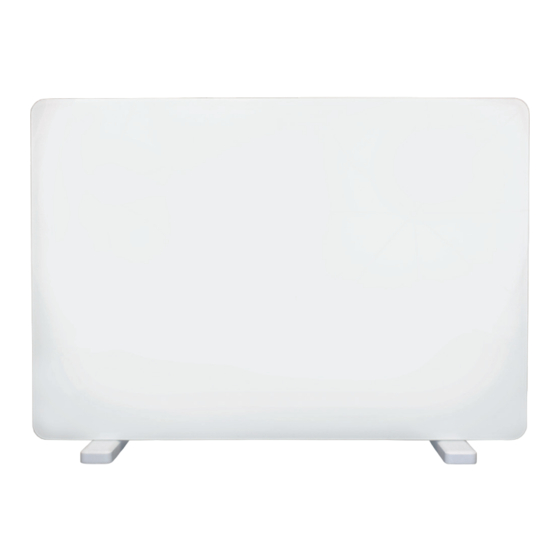
USER MANUAL 2kW Smart Glass Panel Heater IG9521WIFI / IG9521BLWIFI Please read these instructions carefully before use and retain for future reference Before switching on your appliance, always check for any damage which may have been caused in transit...
IMPORTANT SAFETY INSTRUCTIONS Read and follow all of the instructions even if you feel you are familiar with the product, and find a place to keep this manual handy for future reference. • The appliance should not be used if it has been dropped or if there are visible signs of damage •...
Page 4
• Never place the heater where it may fall into water, or stand on a damp floor • The appliance is not intended for use in bathrooms, laundry areas, near swimming pools or similar wet indoor locations • Do not cover or obstruct any of the heat outlet grilles •...
Page 5
power cord. Always grip the plug • Do not remove the plug from the socket until the appliance is switched off • Do not use the appliance to dry clothes • Do not operate the appliance with wet hands • The most common cause of overheating is deposits of dust or fluff in the appliance.
SPECIFICATION Product Wi-Fi Glass Panel Heater Model Number IG9521WIFI / IG9521BLWIFI Brand Igenix Colour White / Black Wattage (W) 2000 Voltage (V) 220-240V Frequency (Hz) 50-60 Product Dimensions (mm) H 430 x W 815 x D 66 Net Weight (kg)
APPLIANCE OVERVIEW 1. Control box cover plate 2. Control panel and digital display 3. Glass front cover 4. Feet 5. Rear cover 6. Wall hanging rack 7. Control box...
Control Panel and Digital Display Standby Mode selection WiFi Increase function 1. Standby: on/off Decrease function 2. Heating status 3. Wifi 4. Comfort mode Timer 5. ECO mode 6. Timer ASSEMBLY INSTRUCTIONS Before assembly: Take the heater out of the box and remove all packaging material.
Page 9
Wall Mounting Note: The wall mounting bracket is attached to the back of the appliance via two large plastic screws. These need to be released and the bracket removed before the appliance can be mounted to the wall. 1. Remove bracket from the back of the appliance 2.
Page 10
3. Fasten the hanging rack on the wall with the screws, do make sure the hanging rack is in correct direction and position (fig C) Note: The panel heater should not be placed near inflammable objects such as soft furnishings (e.g. curtains, furniture.) The panel heater should be placed at least 20cm away from any nearby wall sockets and floor 4.
OPERATING INSTRUCTIONS • Plug the appliance into socket, and press down on/off switch, located on the side of the heater. The heater will make a beep sound. The indicator light turns on • Press to turn on the heater • To stop the heater working, press to turn off the heater •...
Page 12
• P1/P2/P3: Pre-set heating program NOTE: For these programs you will need to set day and clock setting in advance P1: (Monday-Sunday) Fixed program and cannot be altered P2:(Monday-Friday) Fixed program and cannot be altered P2:(Saturday-Sunday) Fixed program and cannot be altered P3:(Monday-Friday) Adjustable program P3:(Saturday-Sunday) Adjustable program P3 adjusting the program setting...
Page 13
Press to choose heating mode for every hour (Comfort mode ECO mode or no 2 lights for Anti-frost mode) Repeat the operation until you have completed the schedule of every hour and every day. NOTE: After setting heating mode for hour 23, press to come back to day setting.
SETTING UP WI-FI FUNCTION 1. Setting up the igenix app • Download the igenix app from the Apple store (for iOS devices)or from Google Play (for Android devices) and install the app on your device. • Register your new igenix account and sign in to the app.
Page 15
‘Glass Panel Heater,’ as this will have a much greater compatibility with Alexa. SYNCING DEVICE WITH AMAZON ALEXA 1. Set up Amazon Echo and enable igenix app • Search the ‘Amazon Alexa’ app from the Apple store (for iOS devices)or from...
Page 16
1a. Set up Echo with Alexa app Note: You will need to purchase an Amazon Echo device to utilise this functionality. If you already have an echo device that is set up, you can skip this step. • Plug your Echo device (Echo, Echo Tap or Echo Dot) into a power socket and turn it •...
Page 17
• Select your Echo model (fig. 6), choose the appropriate language (fig. 7) and then tap ‘CONNECT TO WI-FI’ (fig. 8). fig.6 fig.7 fig.8 • Long press the dot button on the top of your Echo device until the orange light shows up (fig.
Page 18
• Select a Wi-Fi network to let Echo access the internet (fig. 12). Type in the Wi-Fi password and then tap ‘CONNECT’ (fig. 13). Echo may take several minutes to connect to the network (fig. 14). fig.12 fig.13 fig.14 • Tap ‘CONTINUE’...
Page 19
You will be redirected to the account link page. • Type in your igenix account and password and then tap ‘Link Now’ to link your igenix account (fig. 19). Note: The country, the account and the password must match the exact content in step 2.
Page 20
‘DISCOVER’ to discover the smart devices (fig. 21). Discovered devices will be shown in the list (fig. 22). Note: Every time you change the device’s name in the igenix app, Echo must rediscover before you can control them. fig.20 fig.21...
Page 21
3. Control your Glass Panel Heater through the Igenix app Options for individual heater information Set temperature Current mode Current room temperature Decrease temperature Increase temperature Decrease timer duration Increase timer duration Current setting is highlighted Set programs On/Off...
CLEANING AND MAINTENANCE • Before attempting any cleaning of the appliance, allow it to cool completely and ensure that the plug is removed from the power supply • To clean the appliance, use a soft damp cloth without any abrasives or detergents on •...
Page 23
TROUBLESHOOTING GUIDE If you experience difficulties with the appliance, please check the suggestions below before contacting customer services on 01473 271272: Problem Possible Cause Possible Solution The appliance does not The appliance is not Plug the appliance in firmly. work. properly plugged into the wall socket.
MAINS PLUG FUSE REPLACEMENT Fuse Cover Fuse Replacement (Class I) This appliance must be earthed. Remove the fuse cover with a small flat head screw driver. Take out the fuse and replace with a new fuse of the same Amp. Replace the fuse cover and push back into place.
Igenix Warranty Terms & Conditions This product is guaranteed for a period of 12 months as standard from the date of purchase against mechanical and electrical defects. You can extend your warranty for a further 12 months by registering your product.
Page 27
To qualify for the 2 year warranty you must register your product within 30 days of purchase. The full Terms & Conditions of our warranty policy are shown on the opposite page. They are also available on our website. www.igenix.co.uk...
Page 28
EU Address: Castle Electrical Factors Ltd., Dundalk, A91 KA9R, IR Tel. 01473 271 272 Disclaimer: Igenix operate a policy of continual improvement and development. We therefore reserve the right to change/alter the specification and appearance of our appliances without prior notice.
Need help?
Do you have a question about the IG9521WIFI and is the answer not in the manual?
Questions and answers