Table of Contents
Advertisement
Advertisement
Table of Contents

Related Manuals for Leica X1


Summary of Contents for Leica X1
- Page 1 LEICA X1 Instructions...
- Page 2 1.4a 1.17 1.16 1.15 1.14 1.13 1.12 1.27 1.18 1.19 1.20 1.26 1.25 1.24 1.23 1.22 1.21 1.11c 1.11b 1.11a 1.11 1.10 1.28 1.29...
- Page 3 1.38 1.37 1.39 1.30a 1.30 1.31 1.32 1.40 1.36a 1.36 1.33 1.34 1.35...
-
Page 4: Fcc Note
Any changes or modifications not expressly approved by the party respon- sible for compliance could void the user’s authority to operate this equip- ment. Trade Name: LEICA Model No.: LEICA X1 Responsible party/ Support contact: Leica Camera Inc. 1 Pearl Count, Unit A Allendale, New Jersey 07401 Tel.: +1 201 995 0051 232... - Page 5 LEICA X1 Instructions...
-
Page 6: Foreword
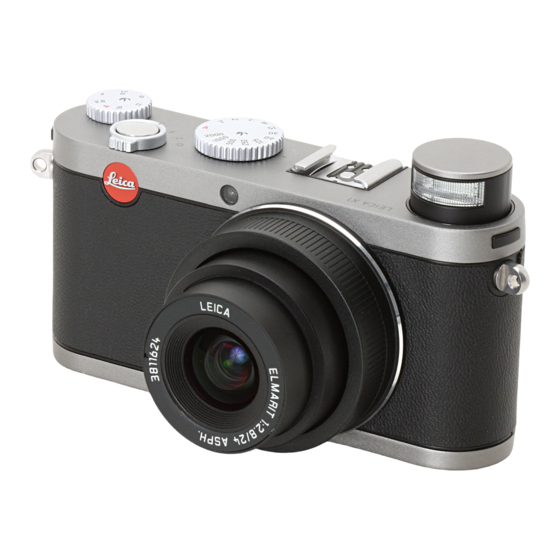
Foreword Dear Customer, We wish you a great deal of pleasure and success using your new LEICA X1. The high-performance LEICA DC ELMARIT 24 mm f/2.8 ASPH. lens will give you excellent picture quality. Thanks to its fully automatic programmed exposure control mode and auto- flash feature, the LEICA X1 provides uncomplicated photography. -
Page 7: Ce Notice
As people can easily pick up charges of tens of thousands of volts, by walking on synthetic carpets for example, a discharge can occur when you touch your LEICA X1, particularly if it is placed on a conductive surface. If only the camera housing is affected, this discharge is harmless to the electronics. -
Page 8: Table Of Contents
Menu items ......80 Using the LEICA X1 for the first time ..81 Preparation . - Page 9 Technical data ..... . . 130 Leica Academy ..... . 132 Leica on the Internet .
-
Page 10: Designation Of Parts
Designation of parts Front view (optional Hand Grip attached, flash retracted) Eyelets for carrying strap 1.2 Self timer LED/AF assist light 1.3 Lens 1.4 Hand Grip (optional) with a. Fastening screw Top view 1.5 Flash 1.6 Attachment thread protection ring 1.7 Main switch with detent positions for –... - Page 11 1.20 Setting dial for – scrolling in menu and submenu item lists – setting an exposure compensation, exposure bracketing, flash ex- posure bracketing value – scrolling through picture memory – enlarging/reducing the pictures viewed 1.21 /Direction button for – calling up exposure compensation, exposure bracketing, and flash exposure compensation menus –...
-
Page 12: Displays In The Monitor
Displays in the monitor 2.1 In record mode 2.1.1 2.1.2 2.1.3 2.1.4 2.1.25 2.1.24 2.1.23 2.1.22 2.1.18 2.1.16 2.1.21 2.1.20 2.1.17 2.1.15 2.1.14 2.1.20 2.1.17 2.1.1 Exposure mode a. P: Programmed automatic exposure mode b. A: Aperture priority mode c. T: Speed priority mode d. - Page 13 2.1.6 Frame counter Number of pictures remaining (If memory capacity is low, the 0 flashes as a warning) 2.1.7 Indication that internal memory is used to store images (when no memory card is inserted) 2.1.8 Spot autofocus metering field (alternatively to 2.1.9) 2.1.9 Normal autofocus metering field 2.1.10 Indication that spot exposure metering is switched on 2.1.11 Self-timer...
- Page 14 Displays in the monitor 2.1 In record mode 2.1.26 INFO screen with settings for – Resolution – File format/Compression rate (see 2.1.4) – White balance (Symbols with additional *– if white balance fine tuning is set) a. No display: automatic setting : For tungsten lighting : For daylight : For electronic flash units...
-
Page 15: In Review Mode
In review mode 2.2.1 2.2.2 2.2.3 2.2.19 2.2.18 2.2.17 2.2.16 2.2.15 2.2.14 2.2.13 2.2.12 2.2.11 2.2.10 2.2.1 Review mode indication 2.2.2 Resolution 2.2.3 File format/Compression rate (see 2.1.4) 2.2.4 Protected picture 2.2.5 Battery charge level (see 2.1.5) 2.2.6 Folder/picture number 2.2.7 Indication that internal memory is used to store images (when no memory card is inserted) 2.2.4... -
Page 16: Menu Items
Menu items Resolution File size Compression File format/Compression rate AUTO ISO Settings Auto ISO settings Metering Mode Exposure metering Continuous Series exposure frequency AF Assist Lamp Low light AF function MF Assist Monitor image enlargement Image Stabilization Anti camera shake settings Preset Film Color bias settings Sharpening... -
Page 17: Using The Leica X1 For The First Time
Exposure metering mode to (see p. 101). The settings recommended above ensure simple, quick and reliable pho- tography for your first shots with the LEICA X1. Details on the various modes/functions can be found in the relevant sections on the pages indi- cated. -
Page 18: Preparation
Preparation Attaching the carrying strap Charging the battery The LEICA X1 is supplied with the required power by a lithium ion battery (A). Attention: • Only the battery type specified and described in this manual, and/or battery types specified and described by Leica Camera AG, may be used in this camera. - Page 19 Leaked fluid can catch fire. • Only the charger specified and described in this manual, or other charg- ers specified and described by Leica Camera AG, may be used. The use of other chargers not approved by Leica Camera AG can cause damage to the batteries and, in extreme cases, serious or life-threatening injuries.
- Page 20 • Rechargeable lithium ion batteries generate power through internal chemi- cal reactions. These reactions are also influenced by the external tem- perature and humidity. To ensure a maximum service life of the battery, it should not be exposed to constant extremes (high or low) of tempera- ture (e.g.
-
Page 21: Inserting/Removing The Battery
Charging the battery 1. Connect the charger to a power outlet. 2. Insert the battery into the charger by a. positioning it with its contacts face down and pointing at the counter- parts (1.36a) in the battery bay, and b. pushing it down until it lies flat in the bay. Charge status indications Correct loading is indicated by the status LED (1.37) glowing red, when it turns green the battery is completely charged. -
Page 22: Charge Level Displays
(see p. 84). Inserting and removing the memory card The LEICA X1 takes SD or SDHC memory cards. These cards have a write- protection switch that can be used to prevent unintentional storage and deletion of pictures. - Page 23 • If you cannot insert the memory card, check that it is aligned correctly. • The range of memory cards available is constantly changing; some cards may result in malfunctions when used in the LEICA X1. • Do not open the compartment and do not remove the memory card or the battery for as long as the LED 1.26 indicating that the camera access-...
-
Page 24: The Most Important Settings/Controls
The most important settings/controls Switching the camera on/off The LEICA X1 is turned on and off using the main switch (1.7). This is done by turning it to the appropriate position, marked with (continuous shooting, see p. 112), and • The monitor image (2.1) appears. -
Page 25: Menu Control
Menu control Most settings on the LEICA X1 are performed in the menu. Navigating in the menu involves only the setting dial (1.20) and the 4 direction buttons (1.21/.22/.24/.25). To enter the menu press the MENU button (1.23). • The menu list appears. The active menu item is boxed, i.e. outlined in red with white characters on a black background. - Page 26 To call up a menu item’s submenu press the right direction button (1.22). • The submenu list appears, it is boxed, i.e. outlined in red. The active item is indicated by white characters on a black background. To select a setting/a value in a submenu rotate the setting dial (1.20) or press the upper (1.21) or lower (1.24) direc- tion button.
-
Page 27: Presets
Notes: • Some functions are not available depending on other settings, in this case the menu item is displayed in grey and cannot be selected. • The menu usually opens at the position of the last item that was set be- fore. -
Page 28: Automatic Stand-By Mode
(1.7). Key acknowledgement (response) and shutter sounds With the LEICA X 1, you can decide whether you want your settings and other functions to be acknowledged by an acoustic signal – two volumes are available, or whether operation of the camera and actually taking pho- tographs should be predominantly free of noise. -
Page 29: Monitor Timeout Mode
The sequences: In record mode a. all displays (see p. 76, plus histogram if set, see p. 102) b. basic exposure settings (see p. 76) and AF and exposure metering areas only c. b. with gridlines (plus histogram if set, see p. 102) In review mode a. -
Page 30: Basic Picture Settings
Basic picture settings JPEG-image resolution When one of the JPG formats is selected (see next section) image record- ing is possible with 4 different resolutions (numbers of pixels). This allows you to adjust the pictures precisely to the intended use or to the available memory card capacity. -
Page 31: Direct Color Temperature Setting
Direct color temperature setting Press the button (1.14), and in the menu appearing on the monitor, se- lect SET K. Use the setting dial (1.20) or the up and down direction buttons (1.21/1.24) to change the figure in the box appearing in the center of the monitor image. -
Page 32: Image Properties/Contrast, Sharpness, Color Saturation
One of the many advantages of digital photography is that it is very easy to change critical properties of an image, i.e. those that determine its charac- ter. The LEICA X 1 allows you to influence three of the most important image properties even before taking the picture: –... -
Page 33: Record Mode
(together with the exposure settings). See p. 106 for de- tails. AF metering modes The LEICA X1 offers a choice of six AF metering modes. This allows you to adapt the AF system to cope best with different subjects, situations, and compositional ideas. -
Page 34: Point Modes
1 point modes Focusing is based on the area indicated by an AF frame in the center of the monitor screen. Since the area is larger than with Spot mode, targeting is less discriminate and therefore easier, while still allowing selective me- tering. -
Page 35: Spot Mode
Face detection mode In this mode the LEICA X1 automatically recognizes faces in the image and bases the focus on the closest ones registered. If no faces are detected, the 11 point mode is used. -
Page 36: Manual Focusing
The larger subject details are shown in the monitor, the better their focus can be assessed, and the more accurate the focusing. For this purpose, the LEICA X1 offers an optional help of a magnification function, where a central section of the monitor image is reproduced in enlarged form. -
Page 37: Exposure Metering And Control
Exposure metering and control Exposure metering modes The LEICA X1 offers you a choice of three exposure metering modes. They allow adjustment to the prevailing light conditions, the situation and your style of work and your creative ideas. In the menu, select Metering mode (3.4), and in the submenu the desired setting. -
Page 38: The Histogram
• When playing back a picture the histogram can differ slightly from that while the picture was taken. Exposure control The LEICA X 1 offers you a choice of four exposure modes, with which you can adjust the camera perfectly to your preferred working method or the relevant subject. -
Page 39: Programmed Automatic Exposure Mode
Programmed automatic exposure mode For fast, fully automatic photography. In this mode, exposure is controlled by automatic setting of shutter speed and aperture. To set this mode, turn both dials to their positions. • The mode is indicated by P (2.1.1). To take a picture with this mode 1. -
Page 40: Speed Priority Mode
Speed priority mode The speed priority mode automatically controls the exposure based on the manually set shutter speed. It is therefore particularly well suited for tak- ing pictures of moving subjects, where the sharpness of the movement portrayed – which is determined by the shutter speed used – is the crucial element of composition. -
Page 41: Manual Mode
To set this mode, turn the shutter speed dial (1.10) to the set the desired aperture with the respective dial (1.9). • The mode is indicated by A (2.1.1). In addition, the manually set aperture appears in white (2.1.20). To take a picture with this mode 1. -
Page 42: Metering Memory-Lock
The result would then be that the main subject is out of focus and/or rendered unfavorably dark or light. As a solution, the LEICA X1’s metering memory-lock function allows you to measure the main subject first and then to retain this setting until you have decided on your final trimming and take the picture. -
Page 43: Automatic Exposure Bracketing
Notes: • An exposure compensation cannot be set when using manual exposure mode (see p. 105) • The /direction button is also used to call up the menus for exposure bracketing (see next section) and flash exposure compensation (see p. 111). -
Page 44: Flash Photography
Flash photography Taking photographs with the built-in flash unit The LEICA X 1 is equipped with a built-in flash unit (1.5) that rests hidden in the camera body when not in use. For flash photography, it must be ex- tended. -
Page 45: Automatic Flash And Pre-Flash Activation
Automatic flash and pre-flash activation – (to reduce “red eye” effect) “Red eye” effect is caused by light from the flash reflecting off the cornea straight back to the camera and can occur when taking portrait and group photos. It is therefore best if the people being photographed do not look straight at the camera. -
Page 46: Studio Mode
“overtaken” by the traces of its own taillights. The LEICA X1 gives you a choice between this normal flash firing moment and synchronization to the end of the exposure, i.e. immediately before the shutter begins to close again. -
Page 47: Flash Exposure Compensation
2.), i.e. after any number of shots and even if the camera is switched off. Using external flash units The ISO flash shoe (1.11) of the LEICA X 1 also allows the use of more powerful, external flash units. We specifically recommend using dedicated units such as the LEICA SF 24D (order no. -
Page 48: Additional Functions
• Progress – with 12 s delay – is indicated by flashing of the self-timer LED (1.2). On the monitor, a message counts down the remaining time. , the LEICA X1 is in self direction button (1.25), and in the appearing menu, se- button (1.23). -
Page 49: Formatting The Memory Card Or The Internal Memory
• Do not switch off the LEICA X1 while the memory card is being format- ted. • If the memory card has been formatted in another device, such as a computer, you should reformat it in the LEICA X1. -
Page 50: Working Color Space
Copying image data from the internal memory to a memory card Thanks to its approx. 50 MB internal memory, the LEICA X1 can store sev- eral images without a card in the camera. If you wish to save these images permanently though, you should copy the image data to a memory card. -
Page 51: User Profile
Especially in low light situations, the necessary shutter speed may be too slow to ensure sharp pictures, even with the activated AUTO ISO function (see p. 95). The LEICA X1 offers a function that will often produce sharp pictures even with such slow shutter speeds. -
Page 52: Review Mode
• The LEICA X1 saves pictures according to the DCF standard (Design Rule for Camera File System). • It may not be possible to review files not created by the LEICA X1. • In some cases, the monitor image may either be of poorer quality than usually, or the monitor may even remain black except for the displayed file name. -
Page 53: Enlarging The Picture/Simultaneous Review Of 16 Pictures
Enlarging the picture/Simultaneous review of 16 pictures The LEICA X1 allows you to enlarge a section of the picture by up to 16 x, e.g. in order to study it more closely. Conversely, it is also possible to si- multaneously view 16 pictures, e.g. to gain an overview or to find the pic- ture you want more quickly. -
Page 54: Deleting Pictures
The LEICA X1 also offers you the option of deleting single or all pictures at the same time, as required. -
Page 55: Protecting/Unprotecting Pictures
Protecting/Unprotecting pictures The pictures saved on the memory card and in the internal memory can be protected against being accidentally deleted. 1. In the menu, select Protect (3.30). • After a short moment the picture shown before reappears along with a menu. -
Page 56: Review Of Portrait-Format Pictures
The LEICA X1 offers a remedy for this. In the menu, select Auto Rotate Display (3.28), and in the submenu the desired setting. -
Page 57: Playback With Hdmi Equipment
Playback with HDMI equipment The LEICA X1 allows you to view your pictures with a TV, projector, or mon- itor equipped with HDMI input, thus ensuring the best possible rendition. In addition, you can choose between three resolution levels: 1080i, 720p, and 480p. -
Page 58: Connecting And Transferring Data Using Card Readers
Important: • Only use the USB cable (C) supplied. • While data is being transferred from the LEICA X1 to the computer, the connection may not under any circumstances be broken by removing the USB cable, as otherwise the computer and/or the LEICA X1 may “crash”... -
Page 59: Working With Dng Raw Data
Leica after you have chosen to download the software. Should you need any support concerning Adobe® Photoshop® Lightroom®: You will find a support form on the Leica Camera AG homepage in the owners area where you registered your camera and downloaded the soft- ware. -
Page 60: Accessories
(Order no. 18 711) LEICA X1 Bright Line Finder 36 mm High quality external 0ptical viewfinder especially designed for the LEICA X1. Bright line fames indicate the image field both for normal distances, as well as for distances down to 60 cm. -
Page 61: Handgrip
Battery case ........423-089.003-012 LEICA BC-DC8 Charger ......423-089.803-008 (includes exchangeable plugs) AC-plug EU . -
Page 62: Precautions And Care Instructions
• If you place the LEICA X1 on or very close to a television set, its mag- netic field could interfere with picture recordings. • The same applies for use in the vicinity of cell phones. -
Page 63: Care Instructions
Very high or low temperatures reduce the life of the bat- tery. • Always remove the battery if you will not be using the LEICA X1 for a long period of time. Otherwise, after several weeks the battery could be- come totally discharged, i.e. -
Page 64: For The Charger
• Do not drop or bend a memory card as this can damage it and result in loss of the stored data. • Always remove the memory card if you will not be using the LEICA X1 for a long period of time. -
Page 65: Storage
Storage • If you are not using the LEICA X1 for an extended period of time, we re - commend that you: a. switch it off (see p. 88), b. remove the memory card (see p. 86), and c. remove the battery (see p. 85) (after a maximum of 3 days, the time and date will be lost, see p. -
Page 66: Technical Data
3264 x 2160 pixels (7M), 2144 x 1424 pixels (3M), 1632 x 1080 pixels (1.8M), DNG: 4288 x 2862 pixels. Lens LEICA ELMARIT 1:2.8/24 mm ASPH. (corresponds to 36 mm with 35 mm-format), 8 lens elements in 6 groups, 1 aspherical surface. - Page 67 Charging unit Input: Alternating current 100–240 V, 50/60 Hz, automatic reversing; Housing Housing in Leica Design made of solid, ultra-light magnesium and aluminium, two eyelets for carrying strap. ISO flash shoe with central and control contacts for connection of external, more powerful flash units, e.g.
-
Page 68: Leica Academy
Internet at: http://www.leica-camera.us http://www.leica-camera.co.uk Leica information service The Leica information service can provide you with an answer to any tech- nical questions relating to the Leica range either in writing, on the telephone or by e-mail. Leica Camera AG... - Page 69 Trademark of the Leica Camera Group/ Registered Trademark © 2009 Leica Camera AG...
- Page 70 Leica Camera AG / Oskar-Barnack-Str. 11 / D-35606 Solms www.leica-camera.com / info@leica-camera.com Telefon +49 (0) 64 42- 208-0 / Telefax +49 (0) 64 42- 208-333...
Need help?
Do you have a question about the X1 and is the answer not in the manual?
Questions and answers