Leica CL Instruction Manual
Hide thumbs
Also See for CL:
- Instruction manual (99 pages) ,
- Instructions for use manual (33 pages) ,
- Quick start manual (13 pages)
Table of Contents
Advertisement
Quick Links
Advertisement
Table of Contents

Related Manuals for Leica CL


Summary of Contents for Leica CL
- Page 1 LEICA CL Instruction manual...
-
Page 2: Foreword
We wish you a great deal of fun and success taking photographs accessories supplied are complete. with your new Leica CL. Please read this manual thoroughly to familiarize yourself with the full scope of functions your camera has – Leica CL to offer. -
Page 3: Replacement Parts/Accessories
Please read the chapters “Legal information”, “Safety remarks”, and “General information” before using your camera Please visit the Leica Camera AG website for information on the for the first time. Knowledge of the content will prevent extensive range of Leica replacement parts/accessories: inadvertent damage to the product, possible injuries and other http://en.leica-camera.com/Photography/Leica-APS-C/... -
Page 4: Legal Information
LEGAL INFORMATION REGULATORY INFORMATION You will find the manufacturing date of your camera on the stickers in the Warranty Card and/or on the packaging. LEGAL INFORMATION The date format is year/month/day. • Compliance with copyright laws is mandatory. The recording and publication of pre-recorded media, e.g. - Page 5 Type Type Type Frequency band (central frequency) Maximum power (dBm e.i.r.p.) Frekvensbånd (centralfrekvens) Maksimal effekt (dBm e.i.r.p.) Banda de frecuencia (frecuencia central) Potencia máxima WLAN WLAN WLAN 2412 – 2462 MHz/ 2412 – 2462 MHz/ 2412 – 2462 MHz/ 5180 – 5240 MHz/ 5180 –...
- Page 6 WLAN devices. • Leica Camera AG shall not accept liability for damages arising from the use of the camera for purposes other than as a WLAN device.
-
Page 8: Safety Remarks
SAFETY REMARKS bayonet with grains of sand or similar particles, as these could cause irreparable damage. This component must only be cleaned with a dry cloth (in system cameras). GENERAL INFORMATION • Use a cotton or linen cloth instead of a microfiber cloth from an optician's (synthetic) when cleaning the contacts. - Page 9 Leaked fluid can catch fire! ideally in its camera case, will help prevent damage to the • The use of other chargers not approved by Leica Camera AG can interior of the camera. cause damage to the batteries – and in extreme cases – cause serious or life-threatening injuries.
- Page 10 CHARGER MEMORY CARD • Using the charger in the vicinity of broadcasting receivers may • Never remove the memory card during a datasave or card interfere with reception. Ensure a distance of at least 1 m (3 ft) reading process. The camera must not be switched off or be between the charger and the receiver.
- Page 11 CARRY STRAP • Carry straps are usually made of very robust material. You should therefore keep it out of the reach of children. A carry strap is not a toy and poses a strangulation risk. • Use the carry strap only for its intended purpose on a camera or on binoculars.
-
Page 12: General Information
LCD PANEL ture conditions are met and then restart the charging process. Please contact your dealer, the Leica office in your country or • Condensation may form on the LCD panel if the camera is Leica Camera AG if the problem persists. - Page 13 • The range of available SD/SDHC/SDXC cards on the market is battery retains the date and time for some weeks. Once the too extensive for Leica Camera AG to test for compatibility and backup battery is depleted, it must be replenished by inserting a quality.
- Page 14 Camera homepage. Visit the download section or the "Customer Area" for information about how to register or how to get firmware updates for your Leica CL. Additionally, you can find information about changes or additions to the manual at: https://owners.leica-camera.com...
-
Page 15: Warranty
In addition to your statutory warranty rights regarding your dealer, you will receive an additional Leica Camera AG product warranty valid from the date of purchase at an authorized Leica retailer. For more information regarding the warranty scope, services and... -
Page 16: Table Of Contents
TABLE OF CONTENT FOREWORD ..................2 Right settig wheel ..................... 38 RIGHT SETTING WHEEL BUTTON ..............38 SCOPE OF DELIVERY ............... 2 DIRECTIONAL PAD/CENTER BUTTON .............. 39 REPLACEMENT PARTS/ACCESSORIES .......... 3 PLAY BUTTON/FN BUTTON/MENU BUTTON ..........40 LEGAL INFORMATION ..............4 TOUCH SCREEN .................... - Page 17 COLOR PROFILE ....................60 COMPATIBLE FLASH UNITS ................95 MONOCHROME PROFILE .................. 60 FLASH EXPOSURE METERING (TTL METERING) ..........96 IMAGE STABILIZATION ..................61 FLASH MODES ....................97 FLASH CONTROL ....................98 VIDEO ......................62 VIDEO MODE ................102 FILE FORMAT ..................... 62 VIDEO RESOLUTION ..................
- Page 18 USING RAW DATA (DNG) ................127 RESETTING THE CAMERA TO FACTORY SETTINGS ................127 FIRMWARE UPDATES ................127 LEICA FOTOS ................130 CONNECTION .................... 130 REMOTE CAMERA CONTROL ..............132 CARE/STORAGE ................134 FAQ ....................135 INDEX ....................141 MENU OVERVIEW ................144 TECHNICAL DATA .................145 LEICA CUSTOMER CARE ..............150...
- Page 19 Definition of the various categories of information found in this manual Note Additional information Important Failure to observe the instructions may result in damage to the camera, the accessories or the pictures. Attention Non-compliance may result in personal injury...
-
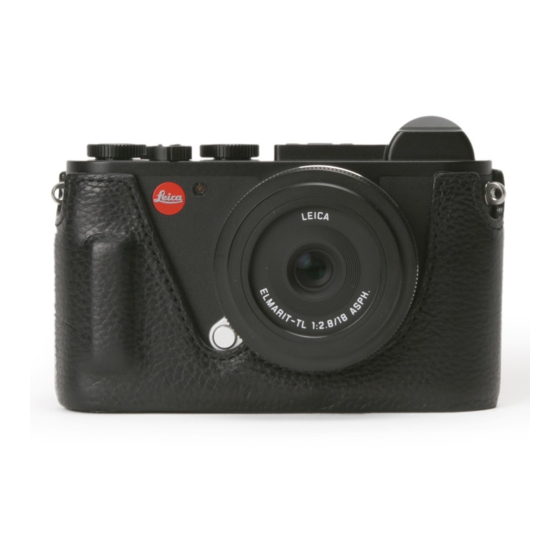
Page 20: Part Designations
PART DESIGNATIONS... - Page 21 Strap lugs LCD panel Main switch Directional pad Shutter button Center button Right setting wheel Status LED Right setting wheel button Speaker Left setting wheel Tripod thread Left setting wheel button Cover for battery compartment and memory card slot Top display Release lever Accessory shoe Battery release lever...
-
Page 22: Displays
DISPLAYS The images displayed on the LCD panel and in the viewfi nder are identical. PHOTO IN REVIEW MODE WHEN TAKING A PICTURE All displays/values refer to the displayed image All displays/values refer to the actual settings... - Page 23 Activated Focus mode Capture Assistants White balance mode 1/8000 12500 File format/compression level/resolution 999-9000 Exposure metering method Picture mode ( Picture sequence Flash mode/fl ash exposure compensation Color rendering ( Film Style Stabilization activated Battery capacity Remaining number of exposures incl. trend detection via bar chart = remaining capacity of the inserted memory card Shutter speed...
- Page 24 VIDEO WHEN TAKING A PICTURE IN PLAYBACK MODE All displays/values refer to the actual settings All displays/values refer to the displayed image 27 28...
-
Page 25: Video
DISPLAYS IN THE TOP DISPLAY Focus mode White balance mode When the camera is switched on Video Resolution Color rendering ( Video Style Stabilization activated Light balance Exposure compensation scale Microphone recording level Camera name Battery capacity Battery status Histogram Video mode ISO Sensitivity Standard view... -
Page 26: Preparation
PREPARATION PREPARING THE CHARGER Use the mains cable with the matching regional plug to connect the charger to mains electricity. ATTACHING THE CARRY STRAP Note The charger will automatically adapt to local mains voltage. Attention Once you have attached the carry strap, please make sure that the clips are mounted correctly to prevent the camera from falling. -
Page 27: Charging The Battery
CHARGING THE BATTERY CHARGE STATUS INDICATORS ON THE CHARGER The camera is powered by a lithium-ion battery. INSERTING THE BATTERY IN THE CHARGER The status LED indicates a correct charging process. Display Charge status lights up green battery is charging ▸... -
Page 28: Inserting/Removing The Battery
INSERTING/REMOVING THE BATTERY INSERTION ▸ Ensure that the camera is switched OFF (see p. 36) ▸ Open the cover of the battery compartment/memory card slot and close it again afterwardsn (see p. 31) Important Removing the battery while the camera is switched on may result in the loss of custom settings or damage to the memory card. - Page 29 REMOVAL CHARGE STATUS INDICATOR ON THE LCD PANEL The battery charge status is displayed on the LCD panel (see p. 23). ▸ Press the battery locking latch as shown • The battery will spring out a little. ▸ Removing the battery...
-
Page 30: Inserting/Removing The Memory Card
INSERTING/REMOVING THE MEMORY CARD ▸ Ensure that the camera is switched OFF (see p. 36) ▸ Open the cover of the battery compartment/memory card slot The camera will save exposures to an SD (Secure Digital), SDHC and close it again afterwards (see p. 31) (High Capacity) or SDXC (eXtended Capacity) memory card. - Page 31 REMOVAL OPENING/CLOSING THE COVER OVER THE BATTERY COMPARTMENT/MEMORY CARD SLOT OPEN "click" ▸ Push down on the card until you hear a click • The card pushes out slightly. ▸ Remove the memory card ▸ Push the release lever in the direction of the arrow •...
-
Page 32: Diopter Settings
CLOSE DIOPTER SETTINGS The viewfi nder has a diopter setting function with a range between +4 and -4 diopter to allow glasses wearers the use of the camera without eyeglasses (Diopter adjustment). ▸ Close and hold the cover. ▸ Push the release lever in the direction of the arrow. ▸... -
Page 33: Changing The Lens
CHANGING THE LENS ATTACHING THE LENS DETACHING THE LENS ▸ Ensure that the camera is switched OFF ▸ Ensure that the camera is switched OFF ▸ Hold the lens on the fi xed ring ▸ Hold the lens on the fi xed ring ▸... -
Page 34: Compatible Lenses
Leica CL Vario lenses have an additional zoom setting ring with its own alignment point. - Page 35 You can shorten the lens lists by deleting all unnecessary lens types to simplify operation: Leica M and R lenses can be attached via Leica M or R L adapters. There are lens profi les stored in the camera, which allow the ▸...
-
Page 36: Camera Operation
CAMERA OPERATION SWITCHING THE CAMERA OFF OPERATING ELEMENTS MAIN SWITCH The main switch switches the camera on and off . SWITCHING THE CAMERA ON Note The function (see p. 53) deactivates the camera Auto Shutdown automatically if no operation occurs within a preset time. Use the main switch to deactivate the camera if this function is prevent inadvertent exposures and battery discharge when the camera is not in use. -
Page 37: Shutter Button
SHUTTER BUTTON Notes • Press down the shutter button in a smooth motion until you hear the click of the shutter to prevent camera shake. • The shutter button remains locked – if the memory card inserted and the internal buffer memory are (temporarily) full. -
Page 38: Left Setting Wheel
LEFT SETTING WHEEL Right settig wheel – Toggling between operating modes – Menu navigation – Setting of exposure compensation, aperture, shutter speed or – Setting of exposure compensation, aperture, shutter speed or program shift (depending on operating mode setting wheel program shift (depending on operating mode setting wheel assignments) assignments) -
Page 39: Directional Pad/Center Button
SETTING WHEEL FUNCTIONS DIRECTIONAL PAD/CENTER BUTTON IN RECORDING MODE LEICA CAMERA WETZLAR GERMANY LEICA CAMERA WETZLAR GERMANY The function of each of the setting wheels depends on the active operating mode. PLAY PLAY Left setting wheel Right setting wheel Exposure compensation... -
Page 40: Play Button/Fn Button/Menu Button
PLAY BUTTON/FN BUTTON/MENU BUTTON TOUCH SCREEN LEICA CAMERA WETZLAR GERMANY LEICA CAMERA WETZLAR GERMANY TOUCH CONTROL PLAY PLAY Tap briefly Double tap MENU MENU PLAY BUTTON – Activation and deactivation of the (continuous) review/playback mode Touch and hold, horizontal/vertical – Return to full-screen display... -
Page 41: Top Display
TOP DISPLAY In picture mode – Set the exposure metering fi eld position (tap the desired location) – Changing to video mode (horizontal swipe) – Changing to review mode (vertical swipe) In Playback/Review mode – Changing to picture mode (vertical swipe) –... -
Page 42: Menu Control
MENU CONTROL CONTROL ELEMENTS The following elements are used for menu control. Menu sections: Main menu Favorites Main Menu – contains all menu items Favorites PLAY – your custom list (see p. 49 for details on how to manage this list) Note MENU... -
Page 43: Structure Of The Menu Screen
STRUCTURE OF THE MENU SCREEN MAIN MENU SUBMENU Current menu item Menu section: Main Menu Favorites Submenu item Menu item name Reference to other submenus Menu item setting Submenu reference Note Scrollbar: current position in the menu list In some cases, an additional scale will be available, where values can be set or function options can be selected. -
Page 44: Menu Navigation
MENU NAVIGATION SHOW SUBMENU DISPLAY “HOME” SCREEN (INITIAL MENU CONTROL SCREEN) In picture mode – if there are no menu items assigned to the favorites menu: ▸ Press the button 1x MENU • appears. Main Menu – if at least one menu item was assigned to the favorites menu: ▸... - Page 45 NAVIGATING WITHIN THE MENUS Line by line navigation (Function/function option selection) Page by page navigation PLAY PLAY MENU MENU MENU MENU ▸ Press the directional pad up/down ▸ Press the button MENU ▸ Turn the right setting wheel • Continuous scrolling will return the main menu to Screen 1 (to the right = down, to the left = up) after Screen 5.
- Page 46 CONFIRM SELECTION OPERATING THE KEYBOARD/NUMBER PAD ▸ Press the center button ▸ Press the right setting wheel button • The screen image changes back to the active menu item. The set function variant is shown on the right in the relevant menu line.
- Page 47 Using button control Using touch control ▸ Press the button of your choice To move left or right To save ▸ Press the directional pad left/right ▸ Select button ▸ Turn the right setting wheel To exit the menu To go up or down ▸...
- Page 48 USING THE MENU BAR USING THE SCALES SUBMENUS PLAY MENU Using button control Using button control ▸ Press the directional pad left/right ▸ Press the directional pad left/right ▸ Turn the right setting wheel ▸ Turn the right setting wheel Using touch control Using touch control ▸...
-
Page 49: Favorites Menu
FAVORITES MENU MANAGE FAVORITES MENU Assign you most frequently used menu items to a favorites menu ▸ Select in the main menu Customize Control (up to 15 items) for quick and easy access. The available functions ▸ Select in the submenu Edit favorites are shown in the list on p. -
Page 50: Direct Access To Menu Functions
DIRECT ACCESS TO MENU FUNCTIONS Creating the custom list ▸ Select in the main menu You can assign specific menu functions to the following operating Customize Control ▸ Select in the submenu elements for extra quick direct access to menu items in recording FN button Right setting wheel button ▸... -
Page 51: Keylock
KEYLOCK LOCKING THE SETTING WHEELS The function of both setting wheels can be locked/unlocked. Various buttons can optionally be locked in recording mode. LOCK ALL BUTTONS Using touch control ▸ Tap the relevant function display (with cogwheel icon), until All buttons (except the shutter button) are locked. appears at the bottom center of the screen (after To lock all buttons approx. -
Page 52: Camera Default Settings
CAMERA DEFAULT SETTINGS For details on how to navigate in the menus and for inputs see chapter "Menu control" (p. 42). PLAY MENU LANGUAGE Factory setting: English MENU Available menu languages: German, French, Italian, Spanish, Russian, Japanese, Korean, Traditional or Simplifi ed Chinese ▸... -
Page 53: Power Save Mode (Standby Mode)
TIME POWER SAVE MODE (STANDBY MODE) ▸ Select in the main menu The camera will switch to the power-saving standby mode after a Date & Time ▸ Select in the submenu preset time to extend battery life if this function is activated. Time Setting ▸... -
Page 54: Lcd Panel/Viewfinder (Evf) Settings
LCD PANEL/VIEWFINDER (EVF) SETTINGS LCD PANEL/EVF USE You can preset the situations in which EVF and LCD panel should The camera comes equipped with a 3" LCD color screen. be used. The displays appearing on screen and in the viewfinder The following functions can be configured and used individually: are identical. -
Page 55: Eye Sensor Sensitivity
EYE SENSOR SENSITIVITY BRIGHTNESS You can adjust the eye sensor sensitivity to ensure that the You can adjust brightness for best visibility in various lighting changeover functions reliably if you wear eyeglasses. conditions. It is set individually for the LCD panel, top display and Factory setting: the viewfinder. -
Page 56: Information Displays
INFORMATION DISPLAYS AUTOMATIC DEACTIVATION OF ALL DISPLAYS The picture data can be displayed in picture mode and in review This function allows you to set a time after which the top display, mode. screen and viewfinder are powered down to extend battery life. ▸... -
Page 57: Acoustic Signals
ACOUSTIC SIGNALS AUTOFOCUS CONFIRMATION A signal sound can be selected for successful AF settings. Some functions can be acknowledged with acoustic signals. The following special functions can be configured separately: ▸ Select in the main menu Acoustic Signals – Electronic shutter sound ▸... -
Page 58: Basic Picture Settings
BASIC PICTURE SETTINGS JPG RESOLUTION format setting offers 3 image resolution (number of pixels) options. The following file formats are available: (24 MP), L-JPG PHOTO (12 MP) and (6 MP). You can therefore adjust your M-JPG S-JPG settings to the intended use and available memory card capacity. FILE FORMAT ▸... -
Page 59: Image Properties
IMAGE PROPERTIES COLOR SATURATION The saturation factor in color images determines, whether colors in One of the many advantages of digital photography is that it is very the picture appear “pale” and pastel-like or “bright” and colorful. easy to change key image properties. While you can’t do anything about weather conditions (clear/ You can manipulate contrast, sharpness and color saturation misty), you can change the way an image is rendered. -
Page 60: Color Profile
COLOR PROFILE Customizing photo profiles Additionally, you can adjust the values for contrast, sharpness and Three pre-configured color profiles are available: saturation (saturation only for color pictures) for each profile Factory setting: Standard separately. – Standard ▸ Select in the main menu –... -
Page 61: Image Stabilization
Visual image stabilization is a great tool for preventing out-of-focus images due to blurring. When using Leica SL lenses equipped with OIS, your Leica CL can utilize their built-in stabilization function. Factory setting: Auto ▸... -
Page 62: Video
VIDEO MICROPHONE Sound is recorded in stereo via the built-in microphones. You can FILE FORMAT configure the sensitivity setting of the built-in microphone. Factory setting: Videos are recorded in MP4 format. Medium ▸ Select in the main menu Video Settings VIDEO RESOLUTION ▸... -
Page 63: Video Stabilization
VIDEO STABILIZATION IMAGE PROPERTIES The stabilization function helps to reduce blurring for handheld The color space is set to sRGB for video recording. Other image recordings. properties can be set for video recordings. ▸ Select in the main menu Video Settings VIDEO PROFILES ▸... -
Page 64: Picture Mode
AF mode is shown in the header line. FOCUSING AFs (single) Your Leica CL allows automatic as well as manual focusing. There are 2 operating modes and 3 metering methods available for AF Suitable for objects with little or no movement. Focusing is done photography. -
Page 65: Autofocus Metering Methods
• You can also use the focus setting ring on the lens to manually off. change the automatically set focus while the shutter button is pressed to the first pressure point. • Only manual focusing is available when using Leica M or R lenses with the optional Leica M or R Adapter L. - Page 66 FACE DETECTION This fi eld metering variant helps in the capture of moving objects. In this metering method, the Leica CL automatically detects faces The focus on the object in the metering fi eld is continuously in the image fi eld. The focus is set automatically on the faces adjusted, once it is detected.
-
Page 67: Limiting The Autofocus Setting Range
▸ Select Some Leica TL lenses1 allow a limiting of their setting ranges to speed up focusing. This is advisable if you know that you will only ▸ Briefl y tap the LCD panel in the desired position need the close range or only the long range for specifi c exposures. -
Page 68: Mf Assist Functions
ACOUSTIC AF CONFIRMATION Notes • The function is also available for specific Leica SL A successful focus metering in AF mode can be confirmed with an Focus Limit lenses (see relevant manual), but not for lenses attached via an acoustic signal (see p. -
Page 69: Manual Focusing (Mf)
MANUAL FOCUSING (MF) MF ASSIST FUNCTIONS Focusing manually may in some situations be a better choice than The following assist functions are available in MF mode. autofocus. FOCUS PEAKING – the same setting is used for several exposures – it would take longer to use the metering memory lock function This assist function highlights in focus object sections in color. - Page 70 Setting the sensitivity ENLARGEMENT ▸ Select the Turning the focus ring will automatically enlarge the image section Sensitivity ▸ Select the desired setting in the center, which means the focus quality can be better assessed. High Any image section can be selected for checking correct focus. Note Selection occurs via key control or touch control.
-
Page 71: Iso Sensitivity
ISO SENSITIVITY LIMITING SETTING RANGES A max. ISO value can be set, which will then limit the automatic The ISO setting covers a range between ISO 100 and ISO 50000, setting range ( ). A max. exposure time can also Max. -
Page 72: White Balance
WHITE BALANCE AUTOMATIC CONTROL/FIXED SETTINGS In digital photography, white balance ensures neutral color rendering in any light. White balance is based on the camera being preset to render a particular light color as white. Four methods are available: – automatic control –... - Page 73 MANUAL SETTING VIA METERING DIRECT SETTING OF THE COLOR TEMPERATURE Values between 2000 and 11,500 K (Kelvin) can be set directly. Gray Card That gives you a very wide range, which covers virtually all color temperatures occurring in real life and within which you can adapt color rendering to any light color and your personal preferences with incredible detail.
-
Page 74: Exposure
EXPOSURE SPOT METERING – Spot metering only captures and analyzes a small area in the EXPOSURE METERING METHODS middle of the screen image, which is shown in a circle. Optional methods are spot metering, center-weighted metering and CENTER-WEIGHTED METERING – multi-fi eld metering. - Page 75 F0.0 SELECTING A MODE • Should a Leica TL or SL lens be attached again later, and you ▸ Press the left setting wheel button want to use or a...
-
Page 76: Fully Automatic Exposure Setting - P
FULLY AUTOMATIC EXPOSURE SETTING – P CHANGING THE PRESET SHUTTER SPEED/ APERTURE COMBINATIONS (SHIFT) AUTOMATIC PROGRAM – P Changing the preset values using the Shift function combines the reliability and speed of fully automatic exposure control with the The automatic program mode facilitates fast and fully automatic opportunity to vary the speed/aperture combination selected by photography. -
Page 77: Scene Mode
SCENE MODE ▸ Select in the main menu Scene Mode ▸ Select the desired setting in the submenu 13 additional automatic program variants are available under the ▸ Select the operating mode (see p. 75) menu item . All 13 off er automatically controlled shutter Scene Modes speed and aperture for extra easy photography as with the –... -
Page 78: Exposure Simulation Is Active In All Modes
MINIATURE EFFECT Notes • The camera switches automatically to operating mode if a The effect will make the picture look similar to a closeup photo with is accessed directly (see p. 50). Scene mode its characteristically shallow depth of field. Normal sized objects •... - Page 79 PANORAMA IMAGES The Leica CL can capture classic horizontal, as well as vertical panorama images. to switch to a vertical frame ▸ Press the directional pad left/right to switch to a horizontal frame ▸ Select in the main menu Scene Mode ▸...
- Page 80 Switching between landscape or portrait orientation • Panorama pictures may not be possible for the following object types, under the following exposure conditions or the individual ▸ Press the directional pad images may not be joined up correctly if: Notes –...
-
Page 81: Semi-Automatic Exposure Setting - A/S
SEMI-AUTOMATIC EXPOSURE SETTING – A/S generates a picture in which the “overlay” of three different SHUTTER SPEED PRIORITY – S exposures (-2 EV/0 EV/+2 EV) reproduces an improved image of lighter and darker parts of the object, i.e. with less overexposure in Shutter speed priority mode will set exposure automatically the highlights and more definition in the darkest areas. - Page 82 APERTURE PRIORITY - A Notes Aperture priority mode sets the exposure automatically according • The remaining exposure time after shutter release is counted to the manually selected aperture. This mode is suitable for down in seconds on the display for shutter speeds greater than pictures in which the depth of field is a critical compositional 2 s.
-
Page 83: Manual Exposure Setting - M
MANUAL EXPOSURE SETTING – M EXPOSURE CONTROL (FUNCTIONS FOR AUTOMATIC EXPOSURE) The following manual settings for shutter speed and aperture are a good choice: EXPOSURE SIMULATION – to create a special image mood that can only be achieved with a very specific type of exposure With factory settings in place, the brightness of the screen image –... - Page 84 METERING MEMORY LOCK AE-L (Auto Exposure Lock) The camera stores the exposure value. The focus can therefore be We often want to arrange important subject elements outside the set on another object, no matter which exposure value is selected. center of the picture for reasons of picture composition and these elements may sometimes be very bright or very dark.
- Page 85 Via the shutter button Notes • Only one of the two metering memory locks ( ), or AF-L AE-L ▸ Aim at the key subject element (using the metering field for spot both at the same time (with ) can be set for a AF-L + AE-L metering) or alternatively at another detail with average recording.
- Page 86 EXPOSURE COMPENSATION ▸ Select in the main menu Exposure Compensation • A scale appears as a submenu item. Exposure meters are calibrated for a medium gray scale value, which matches a standard, i.e. average image object. Should the ▸ Set the value on the scale measured image detail not fulfill that requirement, then the a •...
- Page 87 BRACKETING 3 graduations ( ) and 3 or 5 pictures per series are available. Many attractive objects are rich in contrast, which means they have very bright and very dark areas. The image effect can be ▸ Select in the main menu Picture Series dramatically different, depending on which of these areas you ▸...
-
Page 88: Other Functions
OTHER FUNCTIONS Notes • Active bracketing is indicated by on screen. You can watch the eff ect of the function on screen while the pictures are taken AUXILIARY DISPLAYS (brighter or darker). Four functions are available. • Depending on the exposure mode chosen, graduations are generated by changing the shutter speed ( ) or the aperture value (... - Page 89 HISTOGRAM GRID LINES Histogram represents the brightness distribution in the picture. The The grid divides the image field into 3 x 3 equal fields. horizontal axis shows the graduated values from black (left) through gray to white (right). The vertical axis corresponds to the number of pixels at each brightness level.
- Page 90 HORIZON DISPLAY Two long lines to the left and right of the image center indicate the longitudinal axis on screen. The integrated sensors of the camera show its orientation. These – in zero position = green indicators ensure exact camera orientation along the longitudinal –...
-
Page 91: Serial Exposures
SERIAL EXPOSURES CLIPPING The Clipping display marks very bright image areas. This function is The camera is set to single shot exposures by default ( ). Serial Single a very easy and exact tool for checking the correct exposure exposures can also be created to e.g. capture motion sequences at setting. -
Page 92: Interval Shooting
INTERVAL SHOOTING Notes • We recommend deactivating the preview review mode This camera allows you to capture motion sequences over ) when using this function. Auto Playback/Review extended periods of time automatically using the interval shooting • The specified picture sequence stated in the technical function. - Page 93 To get started • The interval function remains active after a picture series is completed, and also after the camera is switched off and on ▸ Press the shutter button again, until another exposure mode (picture series) is set. • The time until the first picture and the number of pictures to •...
-
Page 94: Self-Timer
ELECTRONIC SHUTTER The self-timer function allows taking pictures with a preset time The Leica CL comes equipped with a mechanical shutter and a delay. We recommend that the camera is placed on a tripod. purely electronic shutter function. The electronic shutter expands the available shutter area and functions completely noiseless, ▸... -
Page 95: Flash Photography
The display for the set fl ash mode appears in white (see next – The Leica system fl ash units SF 40, SF 58 and SF 64 pages). The fl ash mode will blink red if the fl ash unit is not fully –... -
Page 96: Flash Exposure Metering (Ttl Metering)
FLASH EXPOSURE METERING (TTL METERING) SETTINGS ON THE FLASH UNIT The camera offers a fully automated, camera-controlled flash mode Operating mode in conjunction with system-compatible flash units (see p. 95) Automatic camera control and for the auto modes aperture priority and manual setting. In aperture priority mode and with manual setting, the camera also Aperture priority allows the use of additional flash techniques like flash synchroniza-... -
Page 97: Flash Modes
FLASH MODES AUTOMATIC FLASH ACTIVATION AT SLOWER SHUTTER SPEEDS (LONG-TERM SYNCHRONIZATION) Select one of the three available operating modes. – Automatic This mode ensures appropriately exposed, brighter dark back- – Manual grounds and bright foreground. – Long-term exposure The shutter speed is not extended beyond 1⁄30 s in the other flash Factory setting: Auto modes to minimize the risk of blurring. -
Page 98: Flash Control
FLASH CONTROL A flash is usually fired at the start of exposure ( ), right Start of Exp. after the first shutter curtain has completely opened the image The settings and functions described in the following sections only window. This may result in apparent contradictions, e.g. the picture apply to settings and functions available in this camera and in of a vehicle being overtaken by its own light trail. - Page 99 FLASH RANGE FLASH EXPOSURE COMPENSATION The usable flash range depends on the aperture and sensitivity This function can be used to selectively reduce or enhance flash values set manually or calculated by the camera. It is important to exposure regardless of ambient light, e.g. to brighten the face of a ensure that the subject is within the relevant flash range for person in the foreground when taking a picture outdoors in the sufficient illumination.
- Page 100 • The flash unit may not fire if this step is missed by pressing a Leica SF 60 and a compensation value is entered on that flash the shutter button down completely and skipping these unit.
- Page 101 • Use a tripod to prevent blurring at slow shutter speeds. Alternatively, you can select a higher sensitivity. • A flash unit and the Leica Visoflex electronic viewfinder cannot be used simultaneously.
-
Page 102: Video Mode
VIDEO MODE There are two methods for toggling between Picture and Video mode: START/EXIT VIDEO MODE Using touch control Photo Video This camera is equipped to take pictures and record video. You can choose one of two video recording modes: –... -
Page 103: Start / End Video Recording
START END VIDEO RECORDING EXPOSURE CONTROL Exposure control for video recording is completely independent of the exposure mode or the shutter speed and aperture settings for photos. Aperture Automatic Manual Shutter speed Automatic (max. shutter speed limited by Video resolution Automatic ISO 100 to ISO 3200 ▸... -
Page 104: Playback/Review Mode
PLAYBACK/REVIEW MODE INITIATE/EXIT PLAYBACK/REVIEW MODE There are two completely independent playback/review functions Using touch control available: Recording Review/Playback – short-term rendering directly after exposure (Preview) – normal Review mode, in which the stored recordings can be 1/8000 12500 viewed and managed for any length of time The switchover between recording and playback/review mode, as well as most other actions can be completed using gesture or key control. -
Page 105: Selecting/Scrolling Through Recordings
SELECTING/SCROLLING THROUGH RECORDINGS DISPLAYS IN PLAYBACK/REVIEW MODE The recordings are visually arranged in a horizontal reel. When the With the factory settings in place, recorded pictures will be end of an image series is reached, the display automatically jumps displayed without the information in the header and footer lines for back to the fi rst image in the series. -
Page 106: Displaying Assist Functions
DISPLAYING ASSIST FUNCTIONS Notes • Recorded pictures are not automatically rotated in Review mode The display of histogram and clipping in playback/review mode can to utilize the full screen area. be set separately from the relevant settings for the recording •... -
Page 107: Cropped Section Zoom
CROPPED SECTION ZOOM You can zoom in to any section of an image for closer inspection. Zooming via the right setting wheel is done in four increments; zooming is stepless via touch control. Using touch control ▸ Swiping will allow you to move the position of an enlarged cropped section •... -
Page 108: Displaying Multiple Recordings At Once
DISPLAYING MULTIPLE RECORDINGS AT ONCE Using button control ▸ Turn the right setting wheel The camera off ers an overview function in which several thumbnail (to the right: increase magnifi cation, to the left: decrease images can be viewed on one screen, which makes it easier to fi nd magnifi cation) a specifi c image. - Page 109 To navigate between recordings Using button control ▸ Turn the right setting wheel to the left ▸ Press the directional pad left or right as needed • 12 thumbnails are shown at the same time. Another turn on the thumbwheel increases the number of displayed recordings ▸...
-
Page 110: Tagging/Rating Of Recordings
TAGGING/RATING OF RECORDINGS DELETING RECORDINGS Recordings can be tagged as favorites to fi nd them quicker or to There are several methods available to delete recordings: simplify the later deletion of multiple recordings. Tagging can be – Deleting individual recordings done in regular view mode or in the overviews. -
Page 111: Deleting Individual Recordings
DELETING INDIVIDUAL RECORDINGS To cancel deletion and return to the normal Playback/Review mode ▸ Press the button MENU ▸ Press the button ▸ Select in the Playback/Review menu PLAY Delete ▸ Tap the "Go back" icon briefly ▸ Press the button •... -
Page 112: Deleting Multiple Recordings
DELETING MULTIPLE RECORDINGS Any number of recordings can be selected in this view. ▸ Select a recording using the directional pad. Several recordings can be marked in a Delete overview with twelve ▸ Press the center button/right setting wheel button thumbnails and can then be deleted all at once. -
Page 113: Deleting All Recordings
DELETING ALL RECORDINGS DELETING UNRATED RECORDINGS ▸ Press the button MENU ▸ Press the button MENU ▸ Select in the Review menu Delete all ▸ Select in the Review menu Delete unrated • The prompt appears. Delete all files? • The prompt Do you really want to delete all unrated images? appears. -
Page 114: Deleting Unrated Recordings
PREVIEW OF LATEST RECORDING Notes • All buttons except the button, the menu button and the right Photo and video recordings can be displayed automatically directly setting wheel button button change to the regular Review mode after they are taken to e.g. check the success of the recording and execute their normal functions there for the duration of the quickly and easily. -
Page 115: Slide Show
SLIDE SHOW STARTING THE SLIDE SHOW A slide show function is available in Review mode, in which the saved images are shown automatically in series. The user can choose to see all recordings ( ), only photos ( ) or Show all Pictures only only videos (... -
Page 116: Video Playback
VIDEO PLAYBACK ACCESSING THE CONTROL ELEMENTS The control elements are displayed when playback is stopped. appears on screen if you have selected a video fi le in playback mode. Using touch control ▸ Briefl y tap the LCD panel 1/8000 12500 INFO 12MP... - Page 117 PAUSE PLAYBACK Using button control ▸ Press the center button ▸ Touch the LCD panel briefl y (anywhere) Note The control elements disappear after about 3 s. Touching the LCD ▸ Press the center button panel or pressing the center button will cause them to be displayed RESUMING PLAYBACK/REVIEW again.
- Page 118 CONTINUE PLAYBACK FROM ANY POINT END PLAYBACK IN THE FILE Using touch control While the control elements are visible: When control elements are visible: ▸ Touch the playback status bar briefl y at the desired position ▸ Tap the "Go back" icon briefl y 1/8000 12500...
- Page 119 SETTING THE VOLUME VIDEO EDITING Using touch control Using touch control When control elements are visible: ▸ Access the video editing function (tap the icon at the top left) ▸ Set the left and right cutting position ▸ Tap the volume icon briefl y ▸...
-
Page 120: Video Editing
Using button control ▸ Select a function from the menu Video editing Save as new Overwrite Preview Accessing the video editing function The new video is additionally saved, the original Save as new ▸ Press the button video remains unchanged. •... -
Page 122: En Other Functions
OTHER FUNCTIONS SAVING CURRENT SETTINGS AS A USER PROFILE CREATING PROFILES USER PROFILES Saving settings/Creating a profile This camera allows the permanent storage of any menu settings, to ▸ Create custom settings for the desired functions via menu e.g. access them quickly and easily for recurring conditions/image control objects. - Page 123 APPLY/ACTIVATE PROFILES EXPORTING/IMPORTING PROFILES TO/FROM THE MEMORY CARD Factory setting: Default Profile ▸ Select in the main menu ▸ Select in the main menu User Profile User Profile ▸ Select in the submenu Manage Profiles • A list of profile names will appear if user profiles are saved ▸...
-
Page 124: Data Management
DATA MANAGEMENT Notes • When using memory cards that were not formatted with this camera, the file numbering will begin with 0001 again. Should DATA STRUCTURE ON THE MEMORY CARD the memory card already contain a file with a higher number, then numbering will be continued from that number. -
Page 125: Edit File Names
EDIT FILE NAMES CREATING A NEW FOLDER ▸ Select in the main menu ▸ Select in the main menu Edit File Name Reset Image Numbering • A keyboard submenu is displayed. • A relevant prompt is displayed. • The input line contains the factory setting "L" as the first letter ▸... -
Page 126: Formatting A Memory Card
• A memory card should be formatted again in the camera if it was formatted in another device, e.g. a computer. • Contact your retailer or Leica Customer Care if the memory card cannot be formatted/overwritten (see p. 151). -
Page 127: Data Transfer
Alternatively, the This function allows you to reset all your custom menu settings data can be transferred to a mobile device via the Leica FOTOS back to the factory settings. You can optionally exclude the user app (see p. -
Page 128: Firmware Updates
▸ Select in the submenu Start Update Leica will notify you of any new updates, once you have registered • The update will start automatically. your camera. Notes • The message will appear if the battery is not... -
Page 130: Leica Fotos
CONNECTION The camera can be controlled remotely using a smartphone/tablet CONNECTION METHOD PC. This will require an installation of the Leica FOTOS app on the There are two methods for establishing a connection between the mobile device. camera and a mobile device. - Page 131 WLAN network. registered on the same WLAN network. In this method, the camera generates an access point for registering your mobile device. ▸ Select in the main menu Leica FOTOS ▸ Select in the main menu ▸ Select in the submenu...
-
Page 132: Remote Camera Control
WLAN, where the mobile device is registered as appear if the camera is operated manually. well ( Join WLAN • The Status LED will flash green while Leica FOTOS is connected. On the mobile device ▸ Launch the Leica FOTOS app ▸... -
Page 134: Care/Storage
CARE/STORAGE • Empty you camera bag completely if it ever gets wet during use. Your equipment might otherwise be subjected to moisture and We recommend the following if the camera will not be used for an tanning residue released by the moist leather. extended period of time: •... -
Page 135: Faq
• All mechanical bearings and sliding surfaces on your lens are lubricated. Make sure to periodically move the focus ring and the aperture setting ring to prevent seizing if the lens will not be used for an extended period of time. VIEWFINDER/LCD PANEL •... - Page 136 Charge or replace the battery Battery is too cold Warm the battery (e.g. in pants pocket) The camera doesn't respond The camera is connected to Leica FOTOS app Terminate the connection Camera is heating up Heat development due to high-res video recording (4K) Not a fault;...
- Page 137 Camera is processing a picture Wait No picture is taken The camera is connected to the Leica FOTOS app End connection and reconnect Image noise appears on the LCD panel/in the The gain is increased to aid image composition if the Not a fault –...
- Page 138 The display switches off after the picture is taken/ Flash loads after picture is taken, LCD panel Wait until the flash is loaded the LCD panel goes dark after the picture is taken deactivates during load time Camera does not focus Desired object part is too close to the camera Increase the distance to the subject Object not suitable for AF...
- Page 139 No AF metering field selectable Lock lever for AF in locked position Move lock lever (on the lens) to unlocked position Automatic Metering Field Control, Portrait Mode in the Select other control mode Scene Modes menu or Face Detection in AF mode is selected Image Review is activated Deactivate Image Review...
- Page 140 Images cannot be displayed File name of the image was changed on a PC use appropriate software for image transfers from a PC to the camera; available from the Leica AG website Video quality Video recordings show flickering/stripes Light source interference in artificial lighting...
- Page 141 No sound on video recording Playback volume is set too low Increase playback volume Microphone was covered during recording Make sure the microphone is not obstructed while recording video Speakers are covered Make sure that speakers are unobstructed during playback Microphone was deactivated while recording Activate the microphone Flickering or horizontal stripes in the video...
-
Page 142: Index
INDEX Care ........... 134 Editing, video ........119 Symbole Carry strap ........... 26 Electronic shutter ........94 Center button ........39 Electronic shutter sound ....... 57 4K ............62 Center-weighted metering ..... 74 EVF ............54 Charger ..........151 Exposure compensation ......86 Charger, preparation ...... - Page 143 Monochrome ........60 Home screen ........43 Legal information ........4 Monochrome photography ....60 Horizon ..........90 Leica Customer Care......152 Monochrome recording, video ....63 Horizon display ........90 Leica FOTOS ....6 Monochrome, video ......63 Lens ............. 33...
- Page 144 Rechargeable battery ......151 Sharpness, video........63 Recording, delete ........ 110 Shift ............. 76 Number pad .......... 46 Recording, interval ........ 92 Shortcut ..........50 Recording, marking ......110 Shutter button........37 Recording mode ........64 Shutter, electronic......... 94 Operating elements ....... 34 Recording mode, video ......
- Page 145 TTL metering ......... 96 USB ............ 127 User profiles ........122 Video mode ........102 Video stabilization ......... 63 Video Style ........... 63 Viewfinder, setting......... 54 Volume, video ........119 Warning signal ........57 Warranty ..........15 White balance ........72 Wind noise reduction ......
-
Page 146: Menu Overview
MENU OVERVIEW DIRECT ACCESS Right setting Available settings: menu FN button Page Favorites wheel button Factory setting: 87, 91-92 Picture series Interval Bracketing 50, 94 Self-timer 64-70 Focusing AF-L 66, 84-85 AE-L 84-85 66, 84-85 AF-L + AE-L Focus mode Focus Limit 67-68 AF mode... - Page 147 Optical Image Stabilization Electronic Shutter Flash Settings 98-100 Exposure Preview 122-123 User Profile Video Resolution Video Style EVF LCD Lens Profiles M lenses R lenses 39, 49-50, 85 Customize Control Edit Favorites Leica FOTOS 130-131 Wheel Lock in Live View Format Card...
-
Page 148: Technical Data
(1280 x 720 pixels): 30 fps camera Compatible lenses VIEWFINDER/LCD PANEL Leica TL and SL lenses, Leica M and R lenses via Leica M or R adapter Viewfinder (EVF) Resolution: 1024 x 768 pixels (2.36 MP), magnification: 0.74x, aspect Tripod thread ratio: 4:3, exit pupil position: 20 mm, setting range +4/-4 diopters,... - Page 149 Top display Autofocus metering methods Resolution: 128 x 58 pixels (can be shifted), (can be shifted), Spot Field Multi-field Face detection object , optional Tracking Touch AF SHUTTER Shutter type EXPOSURE Focal Plane Shutter Exposure metering Shutter speeds TTL (exposure metering through the lens) Mech.
- Page 150 Speaker Mono WLAN The Leica FOTOS app is required to use of the WLAN function. The Leica app is available from the Apple App Store™ or the Google Play Store™. Complies with IEEE 802.11b/g/n standard (standard WLAN protocol), channel 1-11, encryption method: WLAN-compatible WPA™/ WPA2™, Access method: Infrastructure mode...
-
Page 151: Leica Customer Care
Please contact the Customer Care department of Leica Camera AG workshops on the topic of photography at: for the maintenance of your Leica equipment and for help and us.leica-camera.com/Leica-Akademie/Global-Leica-Akademie advice regarding Leica products and how to order them. You can...
Need help?
Do you have a question about the CL and is the answer not in the manual?
Questions and answers