Advertisement
Quick Links
Advertisement

Subscribe to Our Youtube Channel
Related Manuals for Player One Planetary Camera


Summary of Contents for Player One Planetary Camera
- Page 1 Planetary Camera Manual V1.1...
-
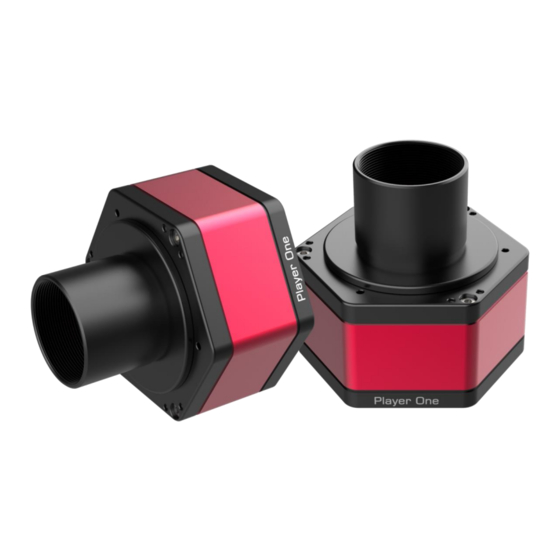
Page 2: Product Design
Product Design Regular Hexagon Innovation Scientific and technological, look luxurious and Focus on independent intellectual property cool, highlighting the style of top players rights and product innovation High Quality Various Product line Use high quality electronic components Covers all aspects of astrophotography... - Page 3 When do solar imaging with prominence telescope, the Newton ring is annoying. Smoother solar image without Newton ring could be taken by adjusting the sensor tilt plate. Besides, when you use a planetary camera for DSO lucky imaging, if you found the stars in corner are not perfect, you can adjust the sensor tilt plate to obtain a flatter image field.
- Page 4 Catalog How to setup your camera Driver and software installation and setup How to get preview image Familiar with capture through a telescope How to do real astrophotography Start from Lunar imaging How to use ASCOM ASCOM platform and camera driver installation...
-
Page 5: How To Setup Your Camera
How to setup your camera Driver and software installation and setup... - Page 6 1.Driver and Software installation 1. Open Player One website to download: https://player-one-astronomy.com/service/software/ For planetary imaging, Sharpcap 3.3 and upper is supported. For DSO imaging, ASCOM 6.5 is supported. Windows 7/8/10 is supported. Linux and Mac OS will be supported soon.
- Page 7 1.Driver and Software installation 5) After installation, connect the camera to the computer USB3.0 port 6) View the camera status in Device Manager through USB cable, and the camera will be automatically recognized.
- Page 8 1.Driver and Software installation 3. Install capture software 5) Check FPS 1) After the installation of the driver, you will need to install FPS is a very important parameter, if FPS show a normal value such like 99.8fps, means the camera can transmit a capture software such as SharpCap.
- Page 9 1.Driver and Software installation 6) Remove the camera cover 7) Check the preview. Adjust the exposure, watch the preview, you will see the change of brightness. That means the camera is working normally.
- Page 10 Level 1 - How to get preview image Familiar with capture through a telescope...
- Page 11 2. Level 1 How to get preview image At the beginning, it was very hard to handle planetary imaging. We can start with an object 20 meters away and practice using telescope and camera.
- Page 12 2. Level 1 How to get preview image 2-1 Connect camera to telescope 1. First find a target through the eyepiece. 2. Remove the eyepiece and Diagonal of the telescope and 3. Connect camera and PC through USB3.0 cable. install the camera (A refractor may need an extender to reach focus point better.)
- Page 13 2. Level 1 How to get preview image 2-2 Preview on your screen 1. Adjust exposure 2. Refocus Open SharpCap and adjust the exposure to make the image bright but not totally white. Turn the focusing wheel of the telescope to focus again until get sharp previews.
- Page 14 2. Level 1 How to get preview image 2-3 Detailed explanation of camera shooting parameters 1. Capture Format 1)Capture Area (Resolution): There are several preset options and you can also customize the resolution. For the first use, it is recommended to shoot at the default highest resolution.
- Page 15 2. Level 1 How to get preview image 2-3 Detailed explanation of camera shooting parameters 2. Camera Control 1) Exposure: the exposure time of a single frame of the camera can be controlled (32us-2000s).Exposure for planetary photography is usually around 10-50ms. 2) Gain: similar to ISO of DSLR, the lower the gain, the more delicate the image looks and the larger the dynamic range;...
- Page 16 2. Level 1 How to get preview image 2-4 Camera indoor testing(use Mars-C as example) 1. Setup suitable parameters 1) The output is set to AVI video 2) Select the maximum resolution of 1944*1096 3) Color video shooting in RGB24 mode 4) Set the exposure to 25ms (can be appropriately reduced according to the image brightness)
- Page 17 2. Level 1 How to get preview image 2-4 Camera indoor testing(use Mars-C as example) 2. Start capture a video 1) Find the shooting button in the top bar of SharpCap and click the “Start Capture” button to pop up the dialog box. 2) Set the number of frames or the capture time limit.
- Page 18 Level 2 - How to do real astrophotography Start from Lunar imaging...
- Page 19 3. Level 2 - How to do real astrophotography 3-1 Aim at the moon Install astronomical equipment and aim at the moon I believe you have some experience in astronomical observation, now the first step is to install the telescope according to your habits, aim it at the moon, and turn on the automatic tracking function.
- Page 20 3. Level 2 - How to do real astrophotography 3-2 Shooting the moon The basic process of lunar photography 1) Connect the camera to your PC, open the Sharpcap and start to get the preview. 2) Adjust the exposure and do coarse focusing. Only requires a rough view of the lunar surface.
- Page 21 3. Level 2 - How to do real astrophotography 3)Accurate focusing: You can choose the light and shadow 4) Adjustment of Exposure and Gain: it needs to be determined according to the brightness of the boundary, or the edge of the moon, to do accurate focusing, where moon surface, and is not constant.
- Page 22 3. Level 2 - How to do real astrophotography 6) Post-processing: Use AS!3 open the video to generate a single image with high signal-to-noise ratio, 5) Capture: Record a 2000 frames video in RAW8 format and Registax6 was used for sharpening and other processing. AS!3 and Registax6 download page:...
- Page 23 How to use ASCOM ASCOM platform and camera driver installation...
- Page 24 Many DSO imaging softwares (such as SGP and Maxim dl) require ASCOM platform and camera ASCOM driver to control the camera for DSO imaging. The ASCOM driver of Player One camera is developed based on ASCOM 6.5, so you need to download the latest ASCOM6.5 platform and camera ASCOM driver from the official website to control the camera normally.
- Page 25 4. Camera ASCOM driver installation 4-2. install ASCOM platform 1) Double-click the driver installation package to enter the installation page 2) Automatically detect necessary files and click "Next" to continue. 3) Click "Install" to Install the platform 4) Installation completed...
- Page 26 4. Camera ASCOM driver installation 4-3. install camera ASCOM driver 1) Double-click the driver installation package to enter the installation page. 2) Select the language, it is recommended to choose Chinese, and then click "OK" button. 3) Select "I Accept the Agreement" and click the "Next" button. 4) Click the "Install"...
- Page 27 4. Camera ASCOM driver installation 4-5. ASCOM setup window 1. ASCOM window introduction 2. Detailed explanation of Gain preset values 1) Zero Gain: Maximum dynamic range can be obtained, suitable for long exposures. 2) Low Gain (Open HCG Mode) : it is the lowest trigger gain to start the HCG mode of ASCOM driver version Camera SN number camera, and can obtain high dynamic and low readout noise.
- Page 28 4. Camera ASCOM driver installation 4-6 Setup in SGP Open the SGP Shooting Plan window and go to the Camera section. Select Player One Camera from the dropdown list.
- Page 29 4. Camera ASCOM driver installation 4-7 Setup in NINA 1) Open the Equipment Bar 2) Open the Camera bar 3) Select Player One Camera(ASCOM) on the right.
- Page 30 2) Select Camera1 or Camera2 as required and click Setup Camera. 3) Select the ASCOM option in Camera Model. 4) Click Advanced..Pop up the Ascom Camera Chooser. 5) Select Player One Camera from the dropdown list. 6) Click Properties to set ASCOM camera parameters...
- Page 31 4-9 Setup in PHD2 1) Click the button to open the page of connected device. 2) Select "Player One Camera(ASCOM)" from the Camera dropdown list. 3) Click the button to set ASCOM parameters of the camera. 4) Click the "Connect" button to turn on the camera.
- Page 32 Choose Player One, to be Player One!
Need help?
Do you have a question about the Planetary Camera and is the answer not in the manual?
Questions and answers