Table of Contents
Advertisement
Quick Links
July 30, 2009
Revision 0
Duplex Color Image Reader - B1
Service Manual
Reader- Product Outline
Reader- Technology
Reader- Periodic Servicing
ADF- Product Outline
ADF- Technology
ADF- Periodic Servicing
Parts Replacement and Cleaning Procedure
Adjustment
Appendix
1
2
3
4
5
6
7
8
Advertisement
Table of Contents

Related Manuals for Canon Duplex Color B1


Summary of Contents for Canon Duplex Color B1
- Page 1 July 30, 2009 Revision 0 Duplex Color Image Reader - B1 Service Manual Reader- Product Outline Reader- Technology Reader- Periodic Servicing ADF- Product Outline ADF- Technology ADF- Periodic Servicing Parts Replacement and Cleaning Procedure Adjustment Appendix...
- Page 2 This manual is copyrighted with all rights reserved. Under the copyright laws, this manual may changes in the contents of this manual over a long or short period, Canon will issue a new not be copied, reproduced or translated into another language, in whole or in part, without the written consent of Canon Inc.
- Page 3 The following rules apply throughout this Service Manual: Explanation of Symbols The following symbols are used throughout this Service Manual. Each chapter contains sections explaining the purpose of specific functions and the relationship between electrical and mechanical systems with reference to the timing of Symbols Explanation Symbols...
- Page 4 Blank Page...
- Page 5 Reader - Product Outline ■ Features ■ Specifications ■ Names of Parts Reader - Product Outline...
- Page 6 Reader - Product Outline > Specifications Specifications Features Adapting Reading sensor, allows low power consumption and high-speed trigger. • Specification/function Item Remarks Exposure to light by white color LED, enables low power consumption, size reducing, and • High-brightness white LED + reflection plate Exposure system color balance improvement.
- Page 7 Reader - Product Outline > Names of Parts > Cross Section Names of Parts Cross Section Stream reading glass Copyboard glass External View Copyboard glass PCB cover Right cover Scanner unit Rear cover Front cover Left cover Glass retainer Stream read glass Reader - Product Outline >...
- Page 8 Reader - Technology ■ Basic Configuration ■ Technology Reader - Technology...
- Page 9 Reader - Technology > Basic Configuration > Parts Configuration > Scanner Unit Basic Configuration Function/specification Component part Symbol 2 phase pulse motor: pulse control Scanner motor Scanner unit exhaust fan Exhaustion of scanner unit Parts Configuration Scanner unit cooling fan Cooling of scanner unit ■...
-
Page 10: Motor
Reader - Technology > Controls > Control Overview ● LED lamp unit Controls On LED lamp unit, the light is generated from the 2 LED lamp PCBs (LED chip: 48 pieces per PCB). Control Overview Generated light is exposed to the original through the reflection plate. Controls of reader and DADF are performed by the reader controller PCB. - Page 11 Reader - Technology > Controls > Control Overview > Original Size Detection ■ Original Size Detection Inch size 0 mm 311 mm In horizontal direction: scanner unit (AB type: 9 point measurement, Inch type: 6 point • 20 mm Original measurement) push-on position Original size...
- Page 12 Reader - Technology > Controls > Control Overview > Limited Functions Mode ■ ■ Scanner Drive Control Dust Detection Control Based on the scanner unit home position sensor (SR2) output signal, the reader controller Refer to this Trainee Text 3-4 (5) (p.18-27). PCB performs drive control of the scanner motor (M1).
- Page 13 Reader - Technology > Controls > Service Tasks > Durable Parts Service Tasks ■ Periodically Replaced Parts None ■ Durable Parts None Reader - Technology > Controls > Service Tasks > Durable Parts...
- Page 14 Reader - Periodic Servicing ■ List of Work for Scheduled Servicing Reader - Periodic Servicing...
- Page 15 Reader - Periodic Servicing > List of Work for Scheduled Servicing List of Work for Scheduled Servicing CL: Cleaning LU: Lubricate AD: Adjustment CH: Inspection Work Interval Parts name Parts No. Number Reference Installation timely FL2-9792-000 Copyboard glass (Surface) Item performed by user. Including the white plate positioning of the glass surface.
- Page 16 ADF - Product Outline ■ Features ■ Specifications ■ Names of Parts ADF - Product Outline...
- Page 17 ADF - Product Outline > Specification Specification Characteristic Following shows the specification list of this equipment Next Generation Scanner Unit (DADF/Reader) Specification Item Remarks Adapting Reading sensor, allows low power consumption and high-speed trigger. • Original pickup Auto pickup/delivery method Simultaneous 2-sided Exposure to light by white color LED, enables low power consumption, size reducing, and •...
- Page 18 ADF - Product Outline > Specification > External View External View Specification Item Remarks Mix of same configuration Mixed mode - Original should be set at the Rear cover function mode rear side. Original pickup tray - Assured combination for mix Mix of different configuration with different configuration mode...
- Page 19 ADF - Product Outline > Specification > Original Set Display Cross-section View Original Set Display The original set display LED is activated when the original is set on the original pickup tray. Scanner unit Pickup roller unit Original pickup tray When a jam is detected while the original is scanned, the original set display LED starts flashing.
- Page 20 ADF - Technology ■ Basic Configuration ■ Technology ADF - Technology...
- Page 21 ADF - Technology > Adjustment > Function Configuration > List of Major Electric Parts Adjustment ■ List of Major Electric Parts Motor driver cooling fan (FM1) Read motor cooling fan (FM2) Function Configuration Pickup roller unit lifter motor (M10) Functions are listed below: Pickup motor (M1) Read motor (M4) Tray lifter motor (M8)
-
Page 22: Table Of Contents
ADF - Technology > Adjustment > Function Configuration > Drive Configuration ■ Drive Configuration List of Rollers This equipment is a device to feed the original solely for stream scanning. This equipment has 10 motors and 1 solenoid as drive load. There is also 1 scanner unit for the original (for the back side). - Page 23 ADF - Technology > Adjustment > Function Configuration > Sensor List ■ Sensor List Jam detection Code Name Detection content Delay Stationary Residue Others Jam detection Code Name Detection content - Leading edge position PCB2 Post-separation Delay Stationary Residue Others just after the pickup sensor 3 Original sensor...
- Page 24 ADF - Technology > Adjustment > DADF Driver PCB DADF Driver PCB Indicate the destination of the DADF driver PCB. Jack No. Destination J401 Reader controller PCB (for communication) J402 Feed motor (M2) Registration motor (M3) J403 Pickup roller unit lifter motor (M10) J404 Read motor cooling fan (FM1) Motor driver cooling fan (FM2)
-
Page 25: Motor
ADF - Technology > Adjustment > DADF Driver PCB > Overview ■ Overview Electric Circuit Diagram The control of this equipment is performed on the reader controller PCB. The operation mode of this equipment is classified as below. Following shows the relation of each electrical parts. Name of 2-sided scanning Operation overview... - Page 26 ADF - Technology > Adjustment > DADF Driver PCB > 1-Sided Original (Small Size) ■ 1-Sided Original (Small Size) 4) 2nd side arch creation 1) 1st side pickup 5) 2nd side scanning 2) 1st side arch creation 3) 1st side feeding & 2nd side pickup ADF - Technology >...
- Page 27 ADF - Technology > Adjustment > DADF Driver PCB > 1-Sided Original (Large Size) ■ 1-Sided Original (Large Size) 4) 2nd side arch creation 1) 1st side pickup 5) 2nd side scanning 2) 1st side arch creation 3) 2nd side pickup ADF - Technology >...
- Page 28 ADF - Technology > Adjustment > DADF Driver PCB > 1-Sided Original with Mix of Same Configuration (Small Size) ■ 1-Sided Original with Mix of Same Configuration (Small Size) 4) 2nd side arch creation 1) 1st side pickup 5) 2nd side stop (1st side is also stopped) 2) 1st side arch creation 6) 2nd side scanning 3) 1st side stop &...
- Page 29 ADF - Technology > Adjustment > DADF Driver PCB > 2-Sided Original (Simultaneous Scanning of Both Sides) (Small Size) 5-10 ■ 2-Sided Original (Simultaneous Scanning of Both Sides) (Small Size) 4) 2nd side arch creation 1) 1st side pickup 5) 2nd side feeding 2) 1st side arch creation 6) 2nd side scanning 3) 1st side feeding &...
- Page 30 ADF - Technology > Adjustment > Scanner Unit 5-11 Scanner Unit Reading sensor For exposure and scanning of original, this equipment uses an integrated scanner unit Black & white (B/W) line consists of the LED, the mirror, the lens and the Reading sensor. Red (R) line The light emitted from the LED is reflected to the original, and then received by the Reading Green (G) line...
- Page 31 ADF - Technology > Adjustment > Scanner Unit > Glass Shift Control 5-12 ■ ■ 2-Sided Scanning Control Glass Shift Control Scanning of 2-sided original is performed by simultaneous 2-sided scanning method. This equipment has a scanning glass on the undersurface of the scanner unit. A standard white plate is attached to this scanning glass for shading correction and dust (reversing 2-sided scanning is not performed).
- Page 32 ADF - Technology > Adjustment > Scanner Unit > Dust Detection Control 5-13 ■ Dust Detection Control DADF driver PCB ● Overview The timing of dust detection is as follows. Start key Before stream 1st sheet Between 2nd sheet After scan Standby reading scanned...
- Page 33 ADF - Technology > Adjustment > Scanner Unit > Dust Detection Control 5-14 ● White plate dust detection control In this machine, the fans cool down the inside of the DADF to prevent the overheating at stream reading operation. As a result, dust in the DADF may stick to the white plate and it may cause the lines on the image.
- Page 34 ADF - Technology > Adjustment > Scanner Unit > Dust Detection Control 5-15 ● Scanning glass dust detection control DADF driver PCB In the case of 2-side scanning with this equipment, dust and smudges on the scanning glass (attached when scanning the back side) can cause lines on the image. To prevent this symptom, there is a dust detection correcting function with this equipment.
- Page 35 ADF - Technology > Adjustment > Scanner Unit > Dust Detection Control 5-16 ● Dust detection correction control (continuous lines) This control detects and corrects lines caused by dust that has been detected between sheets. Correction is performed symmetrically for lines (caused by dust) detected by scanning glass dust detection. In the case of detecting lines caused by specified amount of dust, an alarm is displayed to encourage cleaning.
-
Page 36: Roller
ADF - Technology > Adjustment > Scanner Unit > Dust Detection Control 5-17 ● Dust detection correction control (noncontinuous lines) This control detects and corrects lines caused by dust that failed to be detected between sheets. Dust attached to the original is not detected at the lead edge of the original. This dust can be attached to the original again after being remained at the scanning position due to friction with the scanning glass while this dust passes through the scanning position. - Page 37 ADF - Technology > Adjustment > Scanner Unit > Detection at Start of Pickup 5-18 ■ Overview ■ Detection at Start of Pickup The following shoes the detection list of original size. ● Detection in feed direction The size of original is determined whether it is LTR-R or LGL by LTR-R/LGL identification Mode sensor (SR8).
- Page 38 ADF - Technology > Adjustment > Scanner Unit > Detection at Start of Pickup 5-19 ● Detection of width direction The stop position of the slide guide can be changed by changing (turning around) the attaching of the positioning roll [1] of the slide guide as shown below. The size of original in width direction is detected by the original width volume (VR) and the There is a groove on the rail of the slide guide so that the slide can stop at specific default AB/ Inch identification sensor (SR7) on the original pickup tray.
- Page 39 ADF - Technology > Adjustment > Scanner Unit > Detection at Feeding 5-20 ■ ● Detection in width direction Detection at Feeding The size is detected by the original size sensor 1 to 4 (SR17 to 20). ● Detection in feed direction Original size in feed direction is calculated by using the detection signal of post-separation sensor 3 (PCB2) and the lead sensor 1 (PCB4).
- Page 40 ADF - Technology > Adjustment > Scanner Unit > Original Size Identification 5-21 ■ Original Size Identification b. Inch type (Unit: mm) ● Normal Mode Post- LTR-R/LGL AB/Inch Measurement a. AB type Original width separation identification identification Detected size (Unit: mm) value in feed volume (VR) sensor...
- Page 41 ADF - Technology > Adjustment > Scanner Unit > Original Size Identification 5-22 ● Mix of same configuration mode c. AB/ Inch mixed (Unit: mm) a. AB Type (Unit: mm) Post- Original width LTR-R/LGL AB/Inch Measurement separation identification identification Detected size Post- volume value in feed...
- Page 42 ADF - Technology > Adjustment > Scanner Unit > Original Size Identification 5-23 b. Inch Type c. AB/ Inch mixed (Unit: mm) (Unit: mm) Post- Post- LTR-R/LGL LTR-R/LGL AB/Inch AB/Inch Measurement Measurement Original width Original width separation separation identification identification Detected size identification identification...
- Page 43 ADF - Technology > Adjustment > Scanner Unit > Original Size Identification 5-24 ● Mix of different configuration mode b. Inch Type (Unit: mm) a. AB Type (Unit: mm) Original Original Original Original Post- Measurement Original width size size size size separation Detected...
- Page 44 ADF - Technology > Adjustment > Scanner Unit > Original Pickup Tray Lifter Control 5-25 ■ ■ Original Pickup Tray Lifter Control Original Detection Control The original sensor (SR1) identifies whether the original is present or not on the original ●...
-
Page 45: Pickup Roller
ADF - Technology > Adjustment > Scanner Unit > Original Pickup Tray Lifter Control 5-26 ● Original Pickup Tray Drive Unit ● Pickup Operation This detects the drive of the tray up/down arm as well as the lowest position of the original a. - Page 46 ADF - Technology > Adjustment > Scanner Unit > Original Pickup Tray Lifter Control 5-27 4) Tray lifter motor (M8) starts driving and the tray lifter arm pushes the original pickup tray b. Pickup completion (upper) upward. 1) When the original sensor (SR1) cannot detect an original, the tray lifter motor (M8) drives the tray lifter arm (opposite direction to at the time of pickup) to move down the original 5) The pickup roller unit is pushed up until the original contacts the pickup roller unit and the paper surface sensor (SR6) detects it.
- Page 47 ADF - Technology > Adjustment > Scanner Unit > Original Pickup/Separation Control 5-28 ■ Original Pickup/Separation Control MEMO : Additional functions (Timing to Raise Feeder Tray) To reduce the time from when the start key is pressed until pickup is stared, the timing Pickup operation is performed by the pickup roller, the separation roller and the feed roller 1.
- Page 48 ADF - Technology > Adjustment > Scanner Unit > Original Feed Control 5-29 ■ Overview b. Temporary stop position At the time of 1-sided mode with mix of same configuration, feeding is once stopped where This equipment is a 1-path 2-sided model and does not perform reversing operation. paper is at downstream from the lead roller 1 while at upstream from the scanning position of Refer to the following for the movement of original when it is being fed.
- Page 49 ADF - Technology > Adjustment > Scanner Unit > Roller Disengaging Control 5-30 ■ Roller Disengaging Control Description wheel Lead roller 1 wheel Lead roller 3 wheel wheel To prevent the breakage of original or blurring of scanned image, wheel are disengaged at 3 Roller ( Delivery roller rollers.
- Page 50 ADF - Technology > Adjustment > Scanner Unit > Overview 5-31 ■ Overview Display Adjust Function Option Test Counter < > < 1/ 7 > < READY > This equipment uses the sensors shown in the figure to detect jam of originals. The jam No.
- Page 51 ADF - Technology > Adjustment > Scanner Unit > Jam Type 5-32 ■ ● Others Jam Type ● Occurrence Feed type Jam type Sensor name Sensor number Section Code Jam type Occurrence Sensor 0090 DADF open Sensor name DADF open/closed (reader: SR1, SR3) Section code...
- Page 52 ADF - Technology > Adjustment > Power Supply Assembly 5-33 Power Supply Assembly This equipment is equipped with 3 fans. Power supply schematic diagram is shown below. This equipment receives 4 systems (24, 6, 5, 4.5 V) of power supply from the reader unit. Code Function 24V is mainly used for the motor, the solenoid, the fan, and the LED lamp unit.
-
Page 53: Feed Roller 1
ADF - Technology > Adjustment > Power Supply Assembly > Periodical Service 5-34 ■ ■ Measurement during Parts Replacement Periodical Service Perform adjustment and clear counters for the below parts replacement. When it gets close to its duration period, be sure to clean or replace the concerned parts. (For the detail procedure, refer to the adjustment description.) Item Parts name... - Page 54 ADF - Periodic Servicing ■ List of Work for Scheduled Servicing ADF - Periodic Servicing...
- Page 55 ADF - Periodic Servicing > Periodic Servicing List Periodic Servicing List PR: Replace ( Periodical parts replacement ) CR: Replace ( Consumable parts ) CL: Cleaning LU: Lubricate AD: Adjustment CH: Inspection Work interval Reference Adjustment Category Parts/ Parts name Parts No.
- Page 56 ADF - Periodic Servicing > Periodic Servicing List MEMO: • The indication of replacement is described on the central value of the evaluation result date. The indication of replacement might change, depending on the environment setting and condition. • Part No. might change following the design change etc. •...
- Page 57 ADF - Parts Replacement and Cleaning Procedure ■ List of Parts ■ External Covers ■ Main Units ■ Consumable Parts Requiring Periodic Replacement and Cleaning Points Parts Replacement and Cleaning Procedure...
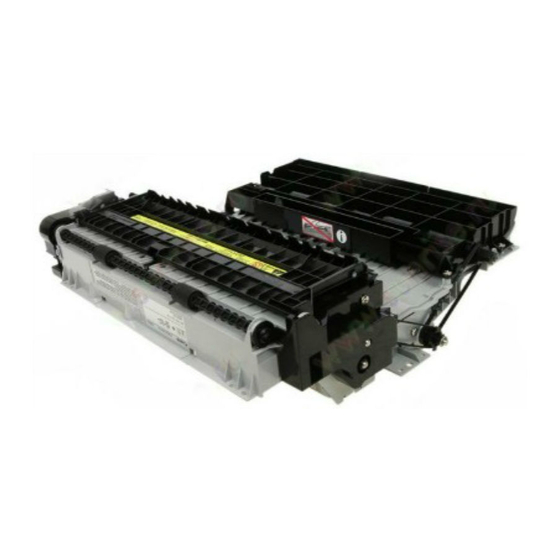
- Page 58 Main Unit External Covers Parts Name Reference Parts Name Parts No. Reference Front cover Scanner unit FM3-5471-000 p. 7-11 Left cover FM3-6206-000 (PartsCatalog: Arm unit) Pickup roller unit p. 7-13 Rear cover Feeder cover Pickup roller unit Rear cover Feeder cover Scanner unit Front cover Left cover...
- Page 59 Solenoid Motor Parts Name Parts No. Reference Parts Name Parts No. Reference Disengaging solenoid FK2-7179-000 Pickup motor FK2-7174-000 Feed motor FK2-7175-000 Registration motor FK2-7181-000 Read motor FK2-7173-000 Delivery motor FK2-3714-000 FK2-7646-000 Disengaging motor 1 FK2-7646-000 Disengaging motor 2 FK2-7176-000 Tray lifter motor Glass shifting motor FK2-7178-000 Pickup roller unit lifter motor...
- Page 60 Lamps, Heaters, and Others Parts Name Parts No. Reference Parts Name Parts No. Reference FL2-9587-000 Original display LED PCB Read motor cooling fan FM2-1023-000 Motor driver cooling fan FK2-7243-000 Scanner unit cooling fan FK2-3149-000 Motor driver cooling fan (FM1) Read motor cooling fan (FM2) Original display LED PCB (LED) Scanner unit cooling fan (FM3)
- Page 61 Sensor Parts Name Parts No. Reference WG8-5783-000 Original sensor FK2-6470-000 Post-separation sensor 1 FK2-6470-000 Post-separation sensor 2 SR12 WG8-5783-000 Delay sensor SR13 Lead sensor 2 WG8-5783-000 WG8-5783-000 Paper surface sensor AB/ Inch identification sensor WG8-5783-000 SR10 LTR-R/ LGL idenfication sensor WG8-5783-000 WG8-5783-000 Tray open/closed sensor...
- Page 62 Parts Name Parts No. Reference FM3-7561-000 PCB1 DADF driver PCB Scanner Unit PCB (DADF) LED lamp PCB (left) LED lamp PCB (right) DADF driver PCB (PCB1) Scanner unit PCB LED lamp PCB (right) LED lamp PCB (left)
- Page 63 Parts Replacement and Cleaning Procedure Removing the DADF Unit MEMO: When removing the ADF Unit and the Reader Unit from the host machine, remove the ADF Unit first and then, remove the Reader Unit because the accuracy of scanner systems may be deteriorated. 1) Open the ADF 2) Remove the Reader Cable Cover.
- Page 64 Parts Replacement and Cleaning Procedure 3) Remove the cable from the wire saddle. 4) Remove the cable from the wire saddle. 4 screws • wire saddle 5) Remove the cable. • 1 edge saddle • 2 connectors Parts Replacement and Cleaning Procedure...
- Page 65 Parts Replacement and Cleaning Procedure MEMO: Remove the flat cable. 6) Remove the 4 screws. 4 screws • • 1 reuse band • 1 edge saddle • 1 harness retainer • 3 connectors Note: Be sure not to get scratches on the White Sheet on the removed ADF. Parts Replacement and Cleaning Procedure...
- Page 66 Parts Replacement and Cleaning Procedure 7-10 Note: Be careful not to damage the Reader Communication Cable Guide when placing 7-10 Parts Replacement and Cleaning Procedure...
- Page 67 Parts Replacement and Cleaning Procedure 7-11 Removing the Scanner Unit 2) Open the open/close guide (lower). 1) Open the feeder cover. 3) Remove the delivery guide (lower). 4) Remove the registration inner guide. 2 screws • 2 screws • • 1 connector 2 wire saddles •...
- Page 68 Parts Replacement and Cleaning Procedure 7-12 5) Remove the cooling fan duct. CAUTION: 2 claws • Do not touch the scanner unit by hand, except for the both edges (the place where it fixes in the guide). Specially be sure not to touch Scanner Unit PCB and mirror. 6) Disconnect the connector and remove the Scanner Unit in the direction of the arrow.
- Page 69 Parts Replacement and Cleaning Procedure 7-13 Removing the Pickup Roller Unit 1) Open the feeder cover. 2) Remove the inner cover. 3) Remove the 2 springs. 3 screws • 4) Remove the pickup roller unit. • 2 resin rings • 2 bushings 7-13 Parts Replacement and Cleaning Procedure...
- Page 70 Parts Replacement and Cleaning Procedure 7-14 Removing the Pickup Roller / Feed Roller 1 <Preparation> 1) Remove the pickup roller and the roller shaft from the pickup roller unit. 2) Remove the pickup roller. • • 1) Remove the pickup roller unit. 2 resin rings 1 resin ring (Refer to page 7-13)
- Page 71 Parts Replacement and Cleaning Procedure 7-15 Removing the Separation Roller 1) Remove the pickup guide (lower). <Preparation> 2) Remove the separation roller unit. 2 screws 2 screws • • 1) Remove the pickup roller unit. (Refer to page 7-13) 3) Remove the separation roller and the roller 4) Remove the separation roller.
- Page 72 Parts Replacement and Cleaning Procedure 7-16 Removing the Stamp Solenoid 1) Open the ADF 2) Open the White Copyboard to open the Stamp Cover. 3) Remove the Stamp Inner Cover. 1 screw • 7-16 Parts Replacement and Cleaning Procedure...
- Page 73 Parts Replacement and Cleaning Procedure 7-17 4) Remove the Stamp Solenoid 7-17 Parts Replacement and Cleaning Procedure...
- Page 74 Parts Replacement and Cleaning Procedure 7-18 Turndown Mirror/Free Curved Mirror Cleaning 1) Remove the connector. <Preparation> 1) Remove the scanner unit. (Refer to page 7-11) CAUTION: When moving the LED lamp unit, be sure not to put too much tension on the connected harness, as it might break.
- Page 75 Parts Replacement and Cleaning Procedure 7-19 2) Remove the 2 screws, move the LED lamp unit. 3) Clean the turndown mirror and free curved mirror. turndown mirror free curved mirror turndown mirror free curved mirror 7-19 Parts Replacement and Cleaning Procedure...
- Page 76 Parts Replacement and Cleaning Procedure 7-20 Cleaning the Backside of Scanning Glass Remove the Front Cover. 2) Release the claw and remove the Scanning Glass by sliding it in the direction of the arrow. Scanning Glass Claw 3) Wipe the backside of Scanning Glass with cloth or lint-free paper moistened with water and tightly wrung.
- Page 77 Adjustment ■ Adjustment Adjustment...
- Page 78 Adjustment > Overview Overview The following is adjustment items list. At main parts replacement Post-separation sensor 1/2/3 DADF (including when it is Original width Registration sensor Scanner unit As needed Lead sensor 1 Item engaged or disengaged) volume Reference basis Delivery sensor (Refer to page (Refer to page 7-7)
- Page 79 Adjustment > Overview > Preparation or Creation of Test Chart Service mode backup Preparation or Creation of Test Chart The machine is adjusted one by one at the factory shipment and the adjustment values are Prepare a test chart. If there is no test chart, create a test chart. written on the service label.
- Page 80 Adjustment > Overview > Tray Width Adjustment Tray Width Adjustment Angle Restriction Release (Opening Angle at 90 deg) Execute either [a. AB type adjustment] or [b. Inch type adjustment] in this adjustment. Change the opening angle of DADF from 70 deg to 90 deg. a.
- Page 81 Adjustment > Overview > Height Adjustment Tilt Adjustment Height Adjustment 1. Check the height. CAUTION: 1) Close the DADF. Execute this adjustment after releasing the angle restriction (opening angle at 90 deg). 2) Check that the 2 height adjustment rolls on the front/rear left come contact with the stream reading glass.
- Page 82 Adjustment > Overview > Height Adjustment a. Checking the height of front height adjustment roll. b. Checking the height of rear height adjustment roll. 1) Push the paper (plain paper) to the protrusion of the stream reading glass and set it in the 1) Push the paper (plain paper) to the protrusion of the stream reading glass and set it in the position where the sheet of the stream reading glass is fully covered.
- Page 83 Adjustment > Overview > Right Angle Adjustment Right Angle Adjustment 2. Adjustment procedure 1) Rotate the fixing screw on top of the left hinge to adjust it. To remove the space on the front: rotate it clockwise (black arrow direction) MEMO: To remove the space on the rear or both sides: rotate it counterclockwise (white arrow There are 2 adjustment methods;...
- Page 84 Adjustment > Overview > Right Angle Adjustment 3) Loosen the 2 knurled screws on front of right hinge unit. 2. Adjustment for back side reading 4) Open the rubber cover on the back of right hinge unit and loosen the screw, and then make 1) Set a test chart to DADF upside down and make a 2-sided print.
- Page 85 Adjustment > Overview > Registration Roller Wheel Skew Adjustment Registration Roller Wheel Skew Adjustment 2. Adjustment procedure 1) Remove the front cover. 2) Remove the left cover. CAUTION: 3) Remove the following parts. Execute this adjustment after the right angle adjustment. •...
- Page 86 Adjustment > Overview > Stream Reading Adjustment 8-10 Stream Reading Adjustment 6) Remove the screw and temporary tighten it in the screw hole. 1) Create a read position adjustment paper with the paper that is used by customer (white Screw hole Plate paper).
- Page 87 Adjustment > Overview > Side Registration Adjustment 8-11 Side Registration Adjustment 2) Align the straight line with the clearance between the miler and the mold, and fix the read position adjustment paper with a piece of elastic tape. Position accuracy of read position adjustment paper: -/+0.3 mm MEMO: Elastic tape There are 2 adjustment methods;...
- Page 88 Adjustment > Overview > Side Registration Adjustment 8-12 b. Adjustment for back side reading Leading Edge Registration Adjustment 1) Set a test chart on the original pickup tray upside down and make a 2-sided print. MEMO: 2) Overlap the printed paper with the test chart. There are 2 adjustment methods;...
- Page 89 Adjustment > Overview > Magnification Adjustment 8-13 Magnification Adjustment b. Adjustment for back side reading 1) Set a test chart on the original pickup tray upside down and make a 2-sided print. 2) Overlap the printed paper with the test chart. MEMO: 3) Check that the leading edge of the printed image is within the standard.
- Page 90 Adjustment > Overview > Magnification Adjustment 8-14 5) If it is out of standard, make an adjustment in service mode. b. Adjustment for back side reading FEEDER > ADJUST > 1) Set a test chart on the copyboard glass of the connected device and make a print. This is LA-SPEED deemed as print1.
- Page 91 Adjustment > Overview > Hinge Pressure Adjustment 8-15 White Level Adjustment Hinge Pressure Adjustment 1) Set A4 or LTR paper on the copyboard glass and close the DADF. 1) Open the DADF and measure the lowest position where the DADF opens by itself. 2) Check that the height of the position measured in step 1) is within the standard.
- Page 92 Adjustment > Overview > Processing after Scanner Unit Replacement 8-16 Processing after Scanner Unit Replacement 2) Perform sampling of B&W shading target. COPIER > FUNCTION > CCD > BW-TGT MEMO: The adjustment method differs depending whether the unit replaced is Reader Scanner 3) Perform white level adjustment.
- Page 93 Adjustment > Overview > Processing after Scanner Unit Replacement 8-17 4) Set the scanner unit replacement flag. a. Reader COPIER > ADJUST > CCD > CCD-CHNG b. DADF COPIER > ADJUST > CCD > CCD- CHG2 5) Check the copy image. If moiré appears, adjust the MTF. a.
- Page 94 Appendix ■ Special Tools ■ General Circuit Diagram...
- Page 95 Adjustment > Service Tools > Special Tools Service Tools Special Tools In addition to the standard tools set, the following special tools are required when servicing the machine: Use/Remarks Tool Name Tool No. Rank Figure FY9-2002-000 Electric check, etc Digital multi meter Reference: Category A: Must be kept by each service engineer.
- Page 96 General Circuit Diagram General Circuit Diagram (1/2) PCB2 SR13 Post- Post- Post-separation Original SR12 AB/ Inch LTR-R/ LGL Tray home position Tray Original sensor 3 separation separation Delay width identification Pickup roller unit lifter idenfication sensor open/closed Paper surface sensor sensor 2 sensor 1 sensor...
- Page 97 General Circuit Diagram (2/2) PCB1 DADF driver PCB J412 J405 J409 J410 J411 J415 9 10 J1101D J1102D J1104D J1105D J1100D 13 12 11 10 9 J1105L J1104L J1102LH J1100LH J1101LH 9 10 12 13 14 15 16 17 18 19 20 21 22 23 24 25 26 27 J1102L J1105LH J1100L...
Need help?
Do you have a question about the Duplex Color B1 and is the answer not in the manual?
Questions and answers