Table of Contents
Advertisement
Quick Links
H
O
B
O
H
O
B
O
®
®
U
3
0
G
S
M
U
3
0
G
S
M
R
e
m
o
t
e
M
R
e
m
o
t
e
M
S
y
s
t
e
m
S
y
s
t
e
m
onset
®
Part #: MAN-U30-GSM
Doc #: 11343-D
o
n
i
t
o
r
i
n
g
o
n
i
t
o
r
i
n
g
User's Guide
DANGER! HIGH VOLTAGE HAZARD!
This logger can be used with sensors that may be installed in an energized
electrical enclosure or on an energized conductor. Installation of sensors in an
energized electrical enclosure or on an energized conductor can result in severe
injury or death. These sensors are for installation by qualified personnel only.
To avoid electrical shock, do not install or service these sensors unless you are
qualified to do so. Disconnect and lock out all power sources during installation
and servicing. Please read the user's manual for instructions and use.
WARNING
This device contains a radio and is not approved for use on airplanes.
Disconnect the batteries before flight.
ii
HOBO U30 Remote Monitoring System User's Guide
Advertisement
Table of Contents

Related Manuals for Onset HOBO U30 GSM


Summary of Contents for Onset HOBO U30 GSM
- Page 1 Please read the user’s manual for instructions and use. WARNING User’s Guide This device contains a radio and is not approved for use on airplanes. Disconnect the batteries before flight. onset ® Part #: MAN-U30-GSM Doc #: 11343-D HOBO U30 Remote Monitoring System User’s Guide...
- Page 2 Hours of Operation: 8 AM to 5 PM ET, Monday through Friday E-mail: loggerhelp@onsetcomp.com Main Onset Web site: www.onsetcomp.com If you purchased the products through an Onset Authorized Dealer, you can also refer to www.hobohelp.com for support information. Part #: MAN-U30-GSM Doc #: 11343-D ©...
-
Page 3: Table Of Contents
Contents Chapter 6: Reference ............57 Detailed specifications ........... 57 Chapter 1: Introduction ............1 Supported Smart Sensors and Accessories ....60 Overview ................1 U30 Accessories ............62 Key features ..............2 ... -
Page 4: Chapter 1: Introduction
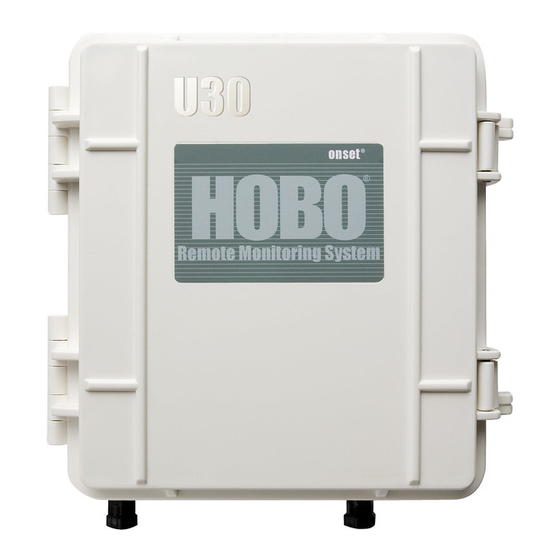
• Grounding Wire range of Onset and third-party sensors with 0-20 V or 0-20 mA output. The • Analog Sensor Port is factory-installed. Cable Entry and Sealing Kit •... - Page 5 Chapter 1: Introduction Chapter 1: Introduction HOBO U30 Station components Name Description 1. Internal 2. Indicator 3. Connection LEDs (on board enclosure LEDs in internal enclosure) Internal This provides a second weatherproof housing 4. SMA antenna 15. Battery enclosure for the electronics in the HOBO U30 Station. connector (behind internal There is no need to ever open this, and opening...
-
Page 6: Chapter 2: Setting Up The System
Chapter 1: Introduction Chapter 2: Setting up the System Chapter 2: Setting up the system Vent This vent allows pressure to equalize inside the enclosure, but does not allow liquid to pass This chapter discusses the following topics: through. Note: The pressure inside the case does not •... - Page 7 Chapter 2: Setting up the System Chapter 2: Setting up the System Step 2: Register the HOBO U30 Station. Each individual HOBO U30 Important: The connection interval that you select is not only the schedule Station must be registered with HOBOlink.com before you can launch or upon which newly recorded data will be transmitted back to configure it further.
- Page 8 Chapter 2: Setting up the System Chapter 2: Setting up the System If you will be using the optional Smart Sensor expander board (S-ADAPT- Important: Once you are satisfied everything is working properly, you may X5-10), you may install it at this time if necessary and plug in additional want to change the logging interval in the Launch Configuration Smart Sensors as described in the next section, or wait until you assemble and the connection interval in the Readout Configuration to a...
-
Page 9: Assembling The System
Chapter 2: Setting up the System Chapter 2: Setting up the System Assembling the system Steps for assembly This section explains how to set up your system for deployment. The Step 1: Install the mounting plates. Screw the mounting plates onto the instructions assume that you have already communicated with back of the HOBO U30 Station case using a Phillips-head screwdriver. - Page 10 Chapter 2: Setting up the System Chapter 2: Setting up the System Step 2: Mount the HOBO U30 Station to a pole or wall. Mount the Step 4: Knock out secondary access opening and install the optional HOBO U30 Station vertically to a mast or pole using the U-bolts and a Smart Sensor Expander board.
- Page 11 Chapter 2: Setting up the System Chapter 2: Setting up the System 3. Punch through along the bottom of the knockout and then tap 5. File any rough edges. For best results, the surfaces in the cable sharply in the middle to break into the opening. Remove the access opening should be smooth so that the rubber cable channel hanging ‘flap’...
- Page 12 Chapter 2: Setting up the System Chapter 2: Setting up the System Alternate method: Place expander (without the screws) onto the Step 5: Plug in all Smart Sensors into the HOBO U30 Station (if not standoffs. Apply a small amount of clear grease (the grease supplied already plugged in) making sure all cables are routed through the cable with this kit can be used) at the end of the screwdriver to hold access opening(s).
- Page 13 Chapter 2: Setting up the System Chapter 2: Setting up the System Step 6: Install sensors to the optional Analog Sensor Port. Make sure all Step 7: Install the optional relay output wire. Make sure any wire you use wires attached to the Analog Sensor Port are routed through the cable access is routed through the cable access opening (see the tip in the previous step opening.
- Page 14 Chapter 2: Setting up the System Chapter 2: Setting up the System Step 8: Install grounding wire if applicable. Insert the grounding wire 1. Apply a small amount of silicone grease (about the size of a pea) through the opening and plug it into the ground connector. The grounding onto your fingertip and then work a light coating into the top, wire is recommended if you are using the Wind Speed and Direction Smart bottom, and two ends (the sides with no holes) of the rubber cable...
- Page 15 Chapter 2: Setting up the System Chapter 2: Setting up the System 3. Close the channel, making sure the cables, wires, and any plugs Step 11: Plug in the battery first and then the solar panel or AC remain in their grooves. Press the channel into the opening. To adapter, and then verify that the HOBO U30 Station powers up reduce the amount of excess cable in the case (especially when properly.
-
Page 16: Chapter 3: Using The Hobo U30 Station
Chapter 3: Using the HOBO U30 Station Chapter 3: Using the HOBO U30 Station Chapter 3: Launching Using the HOBO U30 Station Because this system is designed to allow continuous logging and transmission of data, once you launch the HOBO U30 station it will always This chapter discusses the following topics: use the schedule you have selected in HOBOlink.com for logging and •... - Page 17 Chapter 3: Using the HOBO U30 Station Chapter 3: Using the HOBO U30 Station Launch Configuration Description Configuring alarms Feature You can set two types of alarms for the HOBO U30 Station: system alarms Note: The HOBO U30 Station will continue to and sensor alarms.
-
Page 18: Working With Hoboware Pro
Chapter 3: Using the HOBO U30 Station Chapter 3: Using the HOBO U30 Station If the connection to HOBOlink is not successful, the HOBO U30 Station will try to connect again in about 10 minutes, then again in 20 minutes, If this alarm is tripped: Do this: continuing to double in time until it reaches six hours. - Page 19 This two-channel port can accept, and provide excitation power to, a wide you may have to wait while it completes the connection. range of Onset and third-party sensors with 0–20 V or 0–20 mA output, including devices with 4–20 mA current loop interface, and sensors with 0–...
- Page 20 Chapter 3: Using the HOBO U30 Station Chapter 3: Using the HOBO U30 Station Connecting sensors to the Analog Sensor Port Configuring channels Refer to the sensor documentation for terminal connection details and use The channels in the Analog Sensor Port can be individually configured to the pinout diagram below to connect a two- or three-wire sensor or measure either current or voltage.
- Page 21 Chapter 3: Using the HOBO U30 Station Chapter 3: Using the HOBO U30 Station Sensor excitation Changing the Relay Contact setting The Analog Sensor Port supports optional, user-configurable sensor The HOBO U30 Station has a built-in relay that can be activated by an excitation power and warm-up.
-
Page 22: Working With Sensors
Chapter 3: Using the HOBO U30 Station Chapter 3: Using the HOBO U30 Station Removing or replacing sensors Viewing data files If you remove a Smart Sensor while the HOBO U30 Station is logging, the Data files stored in your user account in HOBOlink.com can be downloaded Logging LED will blink red, and the logger will record erroneous data for and saved to your computer. -
Page 23: Time Accuracy
Chapter 3: Using the HOBO U30 Station Chapter 3: Using the HOBO U30 Station Testing Smart Sensors Use HOBOware Pro if you need to verify the accuracy of the Smart Sensors, which is recommended on a yearly basis, or if you need to isolate a Smart Sensor that is generating an error. -
Page 24: Power
Chapter 3: Using the HOBO U30 Station Chapter 3: Using the HOBO U30 Station Power Here are some tips to maximize battery life: • The HOBO U30 Station uses a GSM radio to make connections to mobile Reduce the connection interval. The single most significant factor network towers and transmit the data to HOBOlink.com. - Page 25 Chapter 3: Using the HOBO U30 Station Chapter 3: Using the HOBO U30 Station The voltage used in determining behavior in the chart above is based on a 20-minute average. Even though battery voltage is recorded in the data file at Battery voltage Details each logging interval and sent to HOBOlink at each connection, the HOBO...
-
Page 26: Chapter 4: Maintenance
You can always use HOBOlink.com to make sure the HOBO U30 Station is For a fee, Onset can verify the accuracy of a sensor. It may be possible to operating as expected, data is still being recorded, and regular readouts are recalibrate some sensors. - Page 27 Chapter 4: Maintenance Chapter 4: Maintenance If the voltage is still low after attempting to recharge the battery with an AC Replacing the battery adapter for 24 hours, then you may need to charge it with a current limited If the battery is completely dead and recharging it is not an option, then variable power supply or replace it (both tasks are described below) follow these steps to replace the battery: Important: Due to the self-discharge characteristics of this type of battery, it...
-
Page 28: Chapter 5: Diagnostics And Troubleshooting
Smart Sensors one at a time to make sure they are all communicating. If you find a bad Network Status sensor, or if no sensor communicates, contact your Onset Authorized Dealer ACTIVE EX. ON or Onset Technical Support. Alarm Blinking An alarm was tripped. -
Page 29: Problems And Solutions
Problem Solution double-blink No status The indicators are very faint under direct sunlight. If Miscellaneous Various causes. Contact your Onset indicators are no indicators appear to be blinking, shield the logger blink patterns Authorized Dealer or Onset Technical blinking from the light and check the indicators again. - Page 30 Intermittent errors can occur from a variety of causes fails even after a full 12 hour charge), you may need such as: to replace the battery. Contact your Onset Authorized RF interference Dealer or Onset Technical Support. Nearby lightning strikes The logger uses very durable, high-capacity Flash memory.
- Page 31 Chapter 5: Diagnostics and Troubleshooting Chapter 5: Diagnostics and Troubleshooting Problem Solution Problem Solution Device is not Check USB cable connections. The HOBO U30 The HOBO U30 Station may be deployed in a location found when Station is logging where the cellular signal isn’t strong enough to make a Check the computer’s COM port/USB settings.
-
Page 32: Chapter 6: Reference
2 kg (4 lbs 10 oz) Antenna Connector Reverse Polarity SMA Alarm notification latency Logging interval plus 2–4 minutes (typical). Onset is not responsible for failed connections or undelivered mail/text messages. HOBO U30 Remote Monitoring System User’s Guide HOBO U30 Remote Monitoring System User’s Guide... - Page 33 Sensor Network Cable 100 m (328 ft) maximum Length • 4-20mA Input Adapter External Power External power is required. The system S-CIA-CM14 optionally accepts the following Onset solar panels (see the next section): • Leaf Wetness SOLAR-1.2W S-LWA-M003 SOLAR-3W SOLAR-6W •...
-
Page 34: U30 Accessories
0-5 Volt Input Adapter U30 Accessories S-VIA-CM14 The following accessories can be used with the HOBO U30 Station. These accessories can be purchased from an Onset Authorized Dealer, or directly • 5-to-10 Input Expander Kit for U30 from Onset Computer Corporation. -
Page 35: Warranty
In the unlikely event any significant defect is create or contribute to a situation where personal injury or death may occur. found, Onset will notify you. If you find a defect, please e-mail us at Products supplied by Onset are not designed, intended, or authorized for use loggerhelp@onsetcomp.com. -
Page 36: Repair Policy
Products that are returned after the warranty period or are damaged by the support for HOBO products. Be prepared to provide the following customer as specified in the warranty provisions can be returned to Onset information: with a valid RMA number for evaluation. Contact Onset for details and A data file showing any anomalies. -
Page 37: Index
INDEX INDEX Index Data channels, 38 Logging interval, 26 Launch Configuration, 7 Logging LED, 4, 50 Launching, 26 Low battery, 28, 29 A Maintaining, 45 Low memory, 28, 29 D Mounting, 13 AC Adapter, 5, 21 Power, 41 Data, 30 M ... - Page 38 INDEX INDEX Sensor excitation, 35 Support, 65 Sensor failure, 29 System alarms, 28 Sensor failure alarm, 28 Sensors T Adding, 37 Connecting to Analog Sensor Port, Technical Support, 65 Time, 39 Excitation, 35 Time zone, 7 Mounting, 13 Troubleshooting, 52 Removing, 38 Server/USB communication LED, 50 U ...
Need help?
Do you have a question about the HOBO U30 GSM and is the answer not in the manual?
Questions and answers