
Related Manuals for FODSPORTS FX30C PRO


Summary of Contents for FODSPORTS FX30C PRO
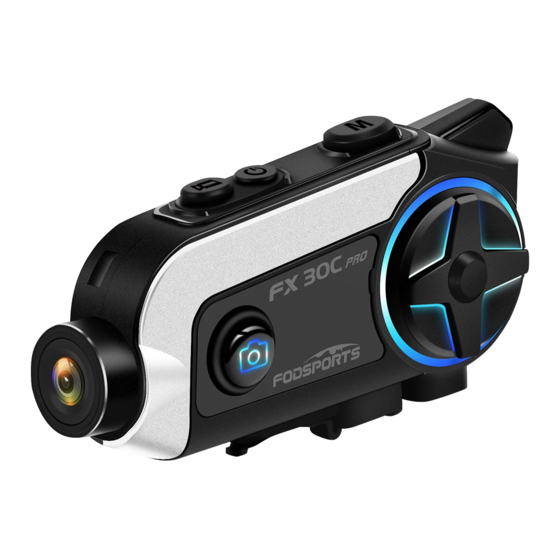
- Page 1 HELMET BLUETOOTH INTERCOM WITH CAMERA User Manual Attention: Thank you for purchasing the FX 30C PRO helmet Bluetooth intercom with camera . For optimum use, please read the manual before use.
-
Page 3: Table Of Contents
CONTENTS 1.Package Include.................................... 2.Charging......................................3.Installation....................................... 4.Camera & Video Function................................5.Button and Basic Function Operation............................6.Device Pairing and Connection..............................7.Technical Specifications................................8.Q&A / Warning....................................9.Statement / Warranty................................... -
Page 4: Package Include
Speakers&Hard Tube Microphone USB Cable Button Microphone Plastic Clip Rotating Plastic Clip Metal Clip rubber stickers Rubber Mat 3M Glue Velcro START GUIDE Long Distance Communication 2-Way Intercom Smart Noise Reduction https://www.fodsports.com Velcro one-sided rubber sticker Start Guide Eva rubber... -
Page 5: Charging
2.Charging: 2.1 When charging, the LED indicator will light up in red, and the indicator light goes out after the charging is completed(As shown below). Please charge it before using it for the first time. 2.2 Please use 5V/1A±0.5A qualified charger to charge the device. Unstable current may damage the equipment. 2.3 Please keep charging at least once every 2 months If the product is not used for a long time. -
Page 6: Installation
3.Installation 3.1 Speaker Installation 1. Open the inner lining of the 2. Fit the headset to the Velcro 3. Stick the microphone and helmet ear position and fix the and fix it to the ring position. (The Velcro on the left side of the Velcro to the ring position. - Page 7 3.2 Clip Installation Method 1: Metal Clip + Rotating Parts + Plastic Clip Helmet Rubber Pads for Rotating Parts Metal Clip Rotating Parts Plastic Clip FX 30C PRO Recommended method 1 1.Assemble the Rotating Parts to vvthe Plastic Clip 2.Fix the Rubber Pads to the Rotating Parts; 3.Install the Rotating Parts to helmet Assemble the Metal Clip to the Rotating Parts...
- Page 8 Method 2: 3M Stickers + Rotating Parts+Plastic Clip Helmet Rotating Parts 3M Stickers Rotating Parts Plastic Clip FX 30C PRO Assemble the Rotating Parts to the Plastic Clip 2.Fix the Rotating Parts 3M Stickers 3.Install the FX 30C PRO to the helmet to the Rotating Parts...
- Page 9 Method 3: Metal Clip + Plastic Clip Helmet Plastic Clip FX 30C PRO Metal Clip Rubber Pads for Plastic Clip Install the FX 30C PRO into the Plastic Clip 2.Assemble the Plastic Clip and Metal clip 3.Install the FX 30C PRO to the helmet...
- Page 10 3.3 Insert the headset / Pull out headset Pull out the headset plug. Insert the microphone and earphone connection line, installation complete.
-
Page 11: Camera & Video Function
4.Camera & Video Function Video Mode Power Button & WiFi ON/OFF Camera Indicator Camera Mode TF Card Slot TYPE-C Port(Charging) 4.1 Camera ON/OFF... - Page 12 Press camera Power button and hold for 2 seconds to switch on or off the camera function . Note:Before turning on the camera, please insert the TF card first. 4.2 Camera Mode When Camera function switched on , camera mode button button once to take photo , the voice prompt will remind "Photo"...
- Page 13 4.4.2.2 Open smartphone settings , and find "FX30C PRO-XXXXX "(X for headset proprietary Numbers)in your WLAN setting list, click and connect to FX 30C PRO, input WIFI code"12345678", WIFI connected and blue light on.
- Page 14 Album of photos , We can preview videos and photos . Note: When the FX 30C PRO is connected to the mobile via WIFI,start and stop recording can only be operated on the mobile phone,and the record button of the FX30C PRO will not work.
- Page 15 4.4.2.4 Quickly exit WIFI connection & Quickly take photos and videos. ①Exit WIFI connection: When connecting to WIFI with the mobile phone, click the WiFi ON/OFF button to exit the connection with the mobile phone. ② Take photo: When connecting to the preview screen of the mobile phone, you need to click the WiFi ON/OFF button to exit the connection with the mobile phone.
- Page 16 When the FX30C PRO is connected to the mobile phone via WIFI, start and stop recording can only be operated on the mobile phone, and the record button of the FX30C PRO will not work.
- Page 17 4.4.3 Settings Click enter settings , you can setting the APP as you want Tips: after WIFI connected, angle confirmed and setting done, we suggest to shut down the WIFI function so that the device can work more time. *Camera Function: While the Video function is in use recording, you can't take photos at the same time.If you need to take photos, that need to pause the recording first.
- Page 18 4.4.4 TOGGLE MICROPHONE & CAMERA RESET Toggle Microphone: When the camera recording function is activated, click the camera mode button to toggle the recording microphone. Camera Reset: If the camera freezes and doesn't work, press and hold the WiFi ON/OFF button for 15 seconds to reset the camera.
- Page 19 Situation Voice prompts Without memory card inserted Please insert card TF Card Identification Card Error Damaged memory card Power lower than 15% Insufficient camera power Note:Power lower than 10%, the camera stops recording. 4. 7 Camera Indicator Red Light: ① Flash one time when switch on , keep in red light on when stand by . ②...
-
Page 20: Button And Basic Function Operation
5.Button and Basic Function Operation Mode Button Function Button [volume + / - ; Next / Previous] Intercom Button LED Indicator Mic & Earphone Jack TYPE-C Port(Charging) Power On / OFF Power On: When the device is off, press intercom and function button at the same time for 3 seconds. About 3 seconds... - Page 21 Power Off: When the device is on, press intercom and function button at the same time for 3 seconds. About 3 seconds *On initial use, charge the device until the red light turn off. Power Detect & Notification Function Low Power Notification: When the power is lower than 10%, the red light in the function button will flash and a voice message will remind you that he power is lower than 10%.
- Page 22 Redial: Press the Function button briefly twice. Volume Up: Rotate Function button forward once while talking. Volume Down:Rotate Function button backward once while talking. Manual/Auto Switch: Press and hold “Function” and "Mode" button at the same time for 3 seconds when the device is in standby.(Default:answer automatically)...
- Page 23 Volume Down:Rotate Function button backward once while playing. Play Next: Rotate Function button forward for 1 second while playing. Play Previous: Rotate Function button backward for 1 second while playing. EQ Sound Selection Under the music playing state, short press the Mode button EQ sound effect selection button, you can switch the sound effect when listening to different types of songs.
- Page 24 *Start Sharing Music For example: (No.1) share music with (No.2). Step 1: (No.1) connect with phone(refer to 6.3). Step 2: (No.1) and (No.2) establish intercom connection(refer to 6.2). Step 3: Short press (No.1) Intercom button to exit intercom mode. Step 4: Long press (No.1) Intercom button and Mode button about 3 seconds, voice notice“Start Sharing Music”. Step 5:Turn on (No.1) Music player on your phone and play songs.
-
Page 25: Device Pairing And Connection
Switch intercom on: When the device is disconnected, briefly press the intercom button once. Switch intercom off: When talking, briefly press the intercom button once. Volume Up: Rotate Function button forward once while talking. Volume Down:Rotate Function button backward once while talking. Memory Clear Memory Clear: When the device is on, press "Mode"... - Page 26 6.1.2 Passive pairing mode Hold down for 3 seconds When device is on, press and hold the Function button for about 6 seconds, the red and blue indicator lights flash alternately quickly, enter the pairing search mode, and the voice prompt "pairing". The passive pairing mode is used to connect to Bluetooth devices such as mobile phones and GPS.
- Page 27 STEP1.When device is on,long press Function button,red and blue light flash quickly, entering passive pairing mode.(refer to 6.1.2) Hold down for 3 seconds STEP2.Turn on cellphone Bluetooth,select FODSPORTS FX 30C PRO,the pairing is complete.Voice message will also say “Device Connected”. FODSPORTS FX 30C PRO FODSPORTS FX 30C PRO...
- Page 28 6.4 Pairing Connection Occasions: Rider A connect with Passenger B for intercom. Then A connect with one Bluetooth devices and B connect with one Bluetooth device(as shown below). Step 1: (A) FX 30C PRO connect with (B) FX 30C PRO(refer to 6.2). Step 2: Short press one time A or B intercom button to disconnect intercom.
- Page 29 Notice 2: Intercom is interrupted and reconnected: In the 2 people intercom state, if there is a mobile phone call, the intercom will be automatically disconnected, and the intercom state will be automatically connected after the call is over. If it is interrupted due to distance or poor signal, please click the intercom button to return to the intercom state.
-
Page 30: Technical Specifications
6.6. FX 30C PRO can connect up to 2 devices. FX 30C PRO can not pair with three devices at same time. 7.Technical Specifications Bluetooth 5.0 ; Support: HSP,HFP,A2DP,AVRCP, AGHSP... -
Page 31: Q&A / Warning
Battery: lithium battery, 2000mA , 3.7v Dimensions: 99mm X 50mm X 29mm Weight: 80G, 145G(Include Headphone & Mic Kits) Frequency Range: 2.4G-2.485G Operating temperature: -20℃-50℃ Certification: CE FCC ROHS BQB TELEC USB Adapter standard charge voltage: DC 5V±0.2V USB Adapter standard charge circuit: DC 0.5A~1.5A Charging time: 3-5 hours 8.Q&A / Warning 8.1 Q&A... -
Page 32: Statement / Warranty
8.2 Warning 8.21 Sound Volume Warning Long periods of listening or having the volume too high may damage your hearing. 8.22 Disassembly or Modification The FX 30C PRO is precisely manufactured at the factory. Any disassembly or modification may damage the device. Do not remove any of the safety regulation or serial number stickers from the device, as that will void the warranty. - Page 33 This device complies with part 15 of the FCC rules. Operation is subject to the following two conditions (1) this device may not cause harmful interference, and (2) this device must accept any interference received, including interference that may cause undesired operation. This device has been evaluated to meet general RF exposure requirement.
- Page 35 User Manual Download https://community.fodsports.com/support/fx-30c-pro-user-manual/...
- Page 36 fodsports.com...
Need help?
Do you have a question about the FX30C PRO and is the answer not in the manual?
Questions and answers