
Related Manuals for 1byone ROCK PIGEON 1-AD07US03


Summary of Contents for 1byone ROCK PIGEON 1-AD07US03
- Page 1 1byone Products Inc. 1230 E Belmont Street, Ontario, CA, USA 91761 Customer Service: +1 909-391-3888 www.1byonebros.com Made in china...
- Page 2 Belt Drive Turntable System Instruction Manual...
-
Page 4: Important Safety Instructions
Introduction Thank you for purchasing Rock Pigeon Belt Drive Turntable System. This instructio manual contains important information about safety, usage and disposal. Use t product as described and keep this manual for future reference. If you sell this turntable or pass it on, also give this manual to the new owner. Important Safety Instructions 1. -
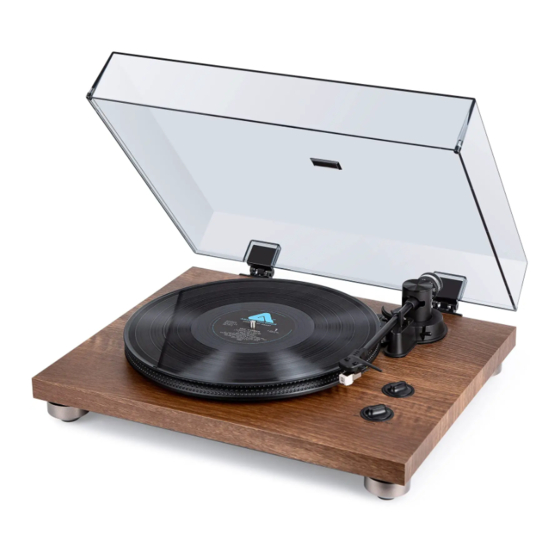
Page 5: Product Description
Product Description 1. Counterweight 2. Tonearm Lift Lever 3. Tonearm Rest 4. Turntable Platter 5. Tonearm 6. 33/45 RPM Selector 7. Cartridge 8. STOP/VOLUME urer. ets. 9. Lid 13. Phono/Line Out/Turntable Switch 10. Lid Hinge 14. DC Power Jack 11. Ground Connector 15. - Page 6 This turntable is supplied with a factory-fitted cartridge that’s already adjusted Note: Instructions provided in this manual for adjusting the cartridge are provid in case the cartridge is replaced at a later date by a different model. Installing the Lid 1.
- Page 7 Turntable Platter and Belt Setup 1. Set the platter on the spindle. • Make sure that the platter is fully seated on the spindle. Platter Opening Motor Pulley Spindle 2. Place the belt on the motor pulley. • Align one of the platter openings with the motor pulley, stretch the belt and it on the motor pulley, as per the diagram.
- Page 8 Cartridge Tracking Force Adjustment 1.Gently push the counterweight onto the rear of the tonearm. 2.Carefully push and pull the Counterweight and stop when it reaches the tick m recommended tracking force. wist Counterweight Tonearm Note: Each mark on the dial represents 0.5g. The recommended tracking force the factory-installed cartridge is 2.5g±0.5g.
-
Page 9: Main Power Connection
Setting Phono/Line Out/Turntable Switch This product has a built-in Phono equalizer function. You can use the turntable e if you do not have a Phono amplifier or connectable equipment with a built-in amplifier. Phono/Line Out/Turntable Switch Use the to set the output, as shown below. Connectable device being used Position of Phono-Line Out Switch Device with Phono input... -
Page 10: Operation
Operation Turntable Operation 1. Connect the AC-DC Adapter to the AC-DC POWER Jack on the back of the unit. 2. Remove the stylus protector from the stylus. 3. Place a record on the slip mat. If using 45 RPM records, put the 45 RPM adapter on the center spindle before placing the record on the platter. -
Page 11: Maintenance And Cleaning
Maintenance and Cleaning NOTE: Disconnect the power cable plug from the outlet as a precaution befor maintenance or cleaning. Turntable Body Your turntable requires little to no regular maintenance. Remove dust with a slig damp antistatic cloth; never use a dry cloth as this will create static electricity a attract more dust! Antistatic cleaning agents are available at specialist stores, b be applied sparingly to avoid damage to rubber parts. -
Page 12: Cartridge Replacement
Installing a New Replacement Stylus 1. Grasp both sides of the stylus holder and insert the stylus grip into the rear tab the cartridge. Stylus Holder must Stylus Grip 2. Push up the stylus holder until it clicks and locks completely in place. l the Do not leave any space Cartridge Replacement... - Page 13 NOTE: If you are unfamiliar or uncomfortable with completing this procedure, w recommend consulting with a professional to perform the installation. Turntable 1-AD07US03, TT-678 Model 33 1/3 & 45RPM Nominal Speeds ±1.5% Speed Variance ≤0.15% Wow and Flutter 35dB Signal to Noise 0~3.5g Tracking Force Range 8.5 ”...
- Page 14 There is no power: - The turntable is not connected to the power adapter. - No power at the outlet. The platter doesn’t turn although the unit is switched on: - The unit is not connected to the main power supply. - No power at the outlet.
- Page 15 Needle is scratching the record's surface: - Gently turn the tonearm rest screw anticlockwise to move the needle stylus aw from the turntable. The speed is too fast or too slow: - Start the turntable. When the platter is spinning, use a slotted/flathead screwd to turn the pitch adjustment screws carefully to adjust the speed.
- Page 16 Email: ushelp@1byonebros.com CANADA Email: cahelp@1byonebros.com Phone: +44 158 241 2681 (Mon-Fri 9:00am - 6:00pm UTC) UNITED KINGDOM Email: ukhelp@1byonebros.com GERMANY/FRANCE Email: euhelp@1byonebros.com ITALY/SPAIN BRAND OWNER 1byone Products Inc. 1230 E Belmont Street, Ontario, CA, USA 91761 Customer Service: +1 909-391-3888 www.1byonebros.com...
Need help?
Do you have a question about the ROCK PIGEON 1-AD07US03 and is the answer not in the manual?
Questions and answers