Table of Contents
Advertisement
Available languages
Available languages
Advertisement
Table of Contents

Related Manuals for 1byone Audio-Technica AT3600


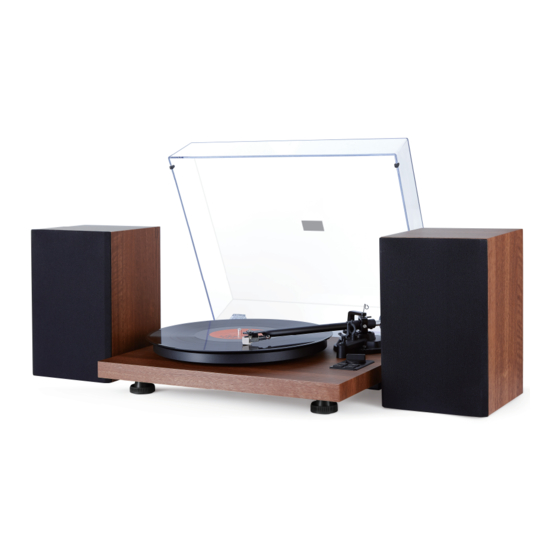
Summary of Contents for 1byone Audio-Technica AT3600
- Page 1 Turntable Hi-Fi System with Speakers 1byone Products Inc. 1230 E Belmont Street, Ontario, CA, USA 91761 Customer Service: +1 909-391-3888 Instruction Manual/ Bedienungsanleitung/ Manuel d'instructions/ www.1byonebros.com Manual de instrucciones/ Manuale di istruzioni...
-
Page 2: Safety Instructions
Introduction Thank you for purchasing 1byone Turntable Hi-Fi System with Speakers. This instruction manual contains important information about safety, usage and disposal. Use the product as described and keep this manual for future reference. If you sell this turntable or pass it on, also give this manual to the new owner. -
Page 3: Product Description
Product Description 11. Slots and openings in the cabinet are provided for ventilation and to ensure reliable operation of the product and to protect it from overheating. Do not block or cover these openings. 12. Unplug the product during lightning storms or when unused for long periods of time. -
Page 4: Included Items
Counterweight without moving it, and gently rotate the tracking force dial until the 5. Place the slip mat on top of the platter. Make sure the 1byone logo on the mat is zero is in line with black center line on the rear of the tonearm. Check whether the facing up (Figure 2). -
Page 5: Anti-Skating Force Adjustment
Connection to the Speakers 7. Rotate the counterweight counter clockwise (seen from the front) to adjust the tracking force according to the cartridge manufacturer’s recommendations. 1. Connection to the Included Speakers This turntable includes a built-in preamp and supplied with Hi-Fi speakers. Connect the speakers using the included audio cable (black cable to black cable clamp and red cable to red cable clamp). -
Page 6: Main Power Connection
3. Turn on the Bluetooth feature of your media device and search for and select make sure they are correct and secure. Always turn off the turntable before connecting “1byone BS017” to pair the media device and turntable. or disconnecting from power. - Page 7 2. Recording NOTE: You need to check your computer audio properties, the sound recording should be selected: SSS USB Audio Device” as below: 2.1 Open the software 2.2 Choose “Edit” menu, then choose “Preferences”; 2.4 Adjust the output and input volume Output Volume Input Volume 2.3 Audacity Preferences...
- Page 8 3. Export the Music Files for WAV, MP3, Format. 2.5 Select the record button to record the disc, the left and right tracks will show on the interface: • Once you have finished recording, you should save your music to the computer. •...
-
Page 9: Maintenance And Cleaning
Maintenance and Cleaning 3. After opened, it will come to the following menu, click “YES” to go to “Llame_enc.dll”, and find the file’s location. NOTE: Disconnect the power cable plug from the outlet as a precaution before maintenance. Turntable Body Your turntable requires little of no regular maintenance. -
Page 10: Troubleshooting
Installing a new replacement stylus No signal through one or other channel or both channels: 1. Grasp both sides of the stylus holder and insert the stylus grip into the cartridge rear - Phone input not selected at amplifier. tab of the cartridge. - Amplifier not switched on. - Page 11 Einführung Stylus Model Audio-Technica AT3600 Vielen Dank, dass Sie sich für das 1byone Turntable Hi-Fi-System mit Lautsprechern Frequency Response 20Hz - 20kHz entschieden haben. Diese Betriebsanleitung enthält wichtige Informationen über Channel Balance Sicherheit, Gebrauch und Entsorgung. Verwenden Sie das Produkt wie beschrieben <2.5dB...
- Page 12 Produktbeschreibung 10. Nur auf einen flachen, stabilen Tisch stellen oder mit dem Wagen, Ständer, Stativ oder der Halterung verwenden, wie vom Hersteller angegeben oder mit dem Plattenspieler verkauft wird. Wenn ein Wagen verwendet wird, ist beim Bewegen der Wagen/Plattenspieler- Kombination Vorsicht geboten, um Verletzungen durch Umkippen zu vermeiden.
- Page 13 Sie den Drehknopf für die Spurfolge leicht, bis die Null mit der schwarzen 5. Legen Sie die Rutschmatte auf die Platte. Stellen Sie sicher, dass das 1byone Logo auf der Mittellinie auf der Rückseite des Tonarms übereinstimmt. Prüfen Sie, ob der Arm Matte nach oben zeigt (Abbildung 2).
- Page 14 Anschluss an die Lautsprecher 7. Drehen Sie das Gegengewicht (von vorne gesehen) gegen den Uhrzeigersinn, um die Spurkraft gemäß den Empfehlungen des Patronenherstellers einzustellen. 1. Anschluss an die mitgelieferten Lautsprecher Dieser Plattenspieler verfügt über einen eingebauten Vorverstärker und wird mit HiFi-Lautsprechern geliefert.
- Page 15 Plattenspieler zusammenbau fertiggestellt ist. Überprüfen Sie vor dem Einschalten des Plattenspielers alle Verbindungen, um sicherzustellen, dass sie richtig 3. Aktivieren Sie die Bluetooth-Funktion Ihres Mediengeräts und suchen Sie nach „1byone verbunden und sicher sind. Schalten Sie den Plattenspieler immer aus, bevor Sie ihn BS017“, um das Mediengerät und den Plattenspieler zu koppeln.
- Page 16 2. Aufnahme HINWEIS: Sie müssen die Audioeigenschaften Ihres Computers überprüfen. Die Tonaufnahme sollte ausgewählt werden: “USB-Audiogerät” wie folgt: 2.1 Öffnen der Software 2.2 Wählen Sie das Menü "Bearbeiten" und anschließend "Einstellungen". 2.4 Ausgangs- und Eingangslautstärke einstellen Ausgangslautstärke Eingangslautstärke 2.3 Audacity-Einstellungen...
- Page 17 3. Exportieren Sie die Musikdateien für WAV, MP3, Format. 2.5 Wählen Sie die Aufnahmetaste, um die Platte aufzunehmen. • Wenn Sie mit der Aufnahme fertig sind, sollten Sie Ihre Musik auf dem Computer speichern. • Klicken Sie auf Datei und gehen Sie zu WAV-Format, MP3-Format oder Ogg- Format.
-
Page 18: Wartung Und Reinigung
Wartung und Reinigung 3. Nach dem Öffnen gelangen Sie zum folgenden Menü. Klicken Sie auf "YES", um zu "Llame_enc.dll" zu gelangen und den Speicherort der Datei zu ermitteln. HINWEIS: Trennen Sie den Netzstecker vor der Wartung vorsichtshalber von der Steckdose. Plattenspieler-Gehäuse Ihr Plattenspieler benötigt ein wenig regelmäßige Wartung. -
Page 19: Fehlerbehebung
Austauschen des Stiftes Fehlerbehebung Entfernen des Stiftes Diese Plattenspieler werden nach höchsten Standards hergestellt und vor Verlassen des Werks strengen Qualitätskontrollen unterzogen. Möglicherweise auftretende • Zusätzlich zur Verschlechterung der Tonqualität können auch Schallplatten Fehler beruhen nicht unbedingt auf Material- oder Produktionsfehlern, können jedoch beschädigt werden, wenn die Stiftspitze der Kassette sich verbraucht. -
Page 20: Technische Daten
Starkes Brummen am Phonoeingang: Stift - Keine Masseverbindung von der Patrone, dem Arm oder Armkabel zum Verstärker Modell Audio-Technica AT3600 oder der Erdschleife. Frequenzbereich 20Hz - 20kHz - Plattenspieler zu nahe an den Lautsprechern. Kanal-Balance <2.5dB Kanalabstand >18dB Verzerrter inkonsistenten Klang von einem oder beiden Kanälen: Ausgangsspannung 2.5mV... -
Page 21: Instructions De Sécurité
10. Ne placer le produit que sur des surfaces plates, dures et utiliser avec le socle ou trépied comme indiqué par le fabricant ou vendu avec le Merci pour l’achat de ce tourne-disque Hi-Fi 1byone avec enceintes. Ce manuel tourne-disque. Lorsqu’un caddie est utilisé, utiliser avec précaution d’instructions contient d’importantes informations concernant la sécurité, l’utilisation... -
Page 22: Description Du Produit
5. Veuillez placer le tapis anti-dérapant sur le haut du plateau. S’assurer que le logo 4. Plateau Secondaire du Lecture 22. Port USB pour Connecxion 1byone est bien situé sur le la partie supérieure du tapis (Image 2). Tourne-Disque 13. Commande / Contrôle 5. Plateau Primaire du Tourne- Volume 23. - Page 23 Ajustement de la Force de la Cartouche 7. Faire pivoter le contre-poids dans le sens des aiguilles d’une montre (vu d’en face) pour ajuster la force conformément aux recommandations du fabricant. Le contre-poids fourni est adapté pour Contre-poids les cartouches dont le poids varie entre 3 et 6 grammes.
-
Page 24: Instructions D'utilisation
Connexion aux Enceintes Alimentation Principale 1. Connexion aux Enceintes Inclus 1. Insérer la prise DC de l’adaptateur AC dans le jack d’entrée au dos du tourne-disque. Ce tourne-disque inclut des enceintes Hi-Fi intégrées et fournies avec les enceintes 2, Brancher l’adaptateur AC dans une prise de courant traditionnelle. Hi-Fi. - Page 25 3. Activer le Bluetooth sur votre smartphone / tablette / ordinateur , ... chercher puis sélectionner “1byone BS017” pour synchroniser votre appareil avec le tourne-disque. 4. Une fois que votre appareil multimédia est synchronisé avec succès avec le tourne- disque, le tourne-disque enverra un son court de confirmation.
- Page 26 REMARQUE : Vous devez vérifier les propriétés audio de votre ordinateur, le son que 2.5. Sélectionner la commande “Enregistrer” pour enregitrer le disque, les pistres vous devez choisir pour les enregistrement est : “SSS USB Audio Device” gauches et droites vont montrer les interfaces suivantes : •...
- Page 27 3. Exporter les fichiers de musique en format WAV, MP3 3. Après avoir ouvert le logiciel, vous arriverez sur le menu, cliquer ensuite sur ”YES” pour aller sur “Llame_enc.dll” et trouver la localisation du fichier. • Une fois que vous avez fini d’enregistrer la musique, vous devriez la sauvegarder sur votre ordinateur.
-
Page 28: Maintenance Et Nettoyage
Maintenance et Nettoyage Installer une aiguille de remplacement REMARQUE : Débrancher le câble électrique de la prise électrique comme précaution 1. Saisir les deux facettes du support de la tête de lecture et insérer le support dans la avant d’effectuer la maintenance. cartouche / récipient pour coquille. -
Page 29: Caractéristiques Techniques
Tëte de Lecture Fort bourdonnement en position phono : - Aucune prise terre pour les cartouches, bras de lecture, câble , préamplificateur ou Modele Audio-Technica AT3600 boucle de terre. Fréquence de Réponse 20Hz - 20kHz - Tourne-disque trop près des enceintes, Equilibre des Canaux <2.5dB... -
Page 30: Mise Au Rebut
Introducción Mise au rebut de l'appareil Gracias por comprar 1byone tocadiscos Hi-Fi con altavoces. Este manual de instrucciones contiene información importante sobre seguridad, uso y eliminación. Use el producto tal y como se describe y guarde este manual para futuras referencias. -
Page 31: Descripción Del Producto
Descripción del producto 10. Solo colóquelo sobre una mesa plana y resistente o úselo con un carrito, soporte, trípode o un soporte según lo especificado por el fabricante o vendido con el tocadiscos. Cuando se usa un carro, tenga cuidado al mover la combinación carrito / tocadiscos para evitar lesiones por vuelco. -
Page 32: Artículos Incluidos
Sostenga el contrapeso sin moverlo, y gire suavemente el dial de fuerza de que el logotipo de 1byone del tapete esté hacia arriba (Figura 2). seguimiento hasta que el cero esté alineado con la línea central negra en la parte posterior del brazo. -
Page 33: Conexión A Los Altavoces
Conexión a los altavoces 7. Gire el contrapeso en sentido contrario a las agujas del reloj (visto desde la parte frontal) para ajustar la fuerza de seguimiento de acuerdo con las recomendaciones 1. Conexión a los altavoces incluidos del fabricante del cartucho. Este tocadiscos incluye un preamplificador incorporado y viene con altavoces Hi-Fi. -
Page 34: Instrucciones De Operación
Antes de encender la alimentación 3. Active la función Bluetooth desde su dispositivo y busque y seleccione “1byone BS017” del tocadiscos, vuelva a verificar todas las conexiones para asegurarse de que estén para emparejar el dispositivo y el tocadiscos. - Page 35 2. Grabación NOTA: Debe verificar las propiedades de audio de su ordenador, la grabación de sonido debe seleccionarse: Dispositivo de audio USB SSS "como se muestra a 2.1 Abrir el software continuación: 2.2 Elija el menú "Editar", luego elija "Preferencias"; 2.4 Ajustar la salida y el volumen de entrada.
- Page 36 3. Exportar los archivos de música al formato WAV, MP3. 2.5 Seleccione el botón de grabación para grabar el disco, las pistas izquierda y derecha se mostrarán en la interfaz: • Una vez que haya terminado de grabar, debe guardar su música en el ordenador. •...
-
Page 37: Mantenimiento Y Limpieza
Mantenimiento y limpieza 3. Una vez abierto, aparecerá el siguiente menú, haga clic en "SÍ" para ir a "Llame_enc. dll" y busque la ubicación del archivo. NOTA: Desconecte el enchufe del cable de alimentación de la toma como precaución antes del mantenimiento. Cuerpo del tocadiscos Su tocadiscos requiere poco o ningún mantenimiento regular. -
Page 38: Solución De Problemas
Reemplazar la aguja Solución de problemas Quitar la aguja Estos tocadiscos se fabrican con los más altos estándares y se someten a estrictos controles de calidad antes de salir de fábrica. Los fallos que pueden tener • Además del deterioro de la calidad del sonido, los discos también pueden dañarse a posiblemente no se deban necesariamente a fallos materiales o de producción, sino medida que la punta de la aguja del cartucho se desgasta. -
Page 39: Especificaciones
Sonido distorsionado o inconsistente de uno o ambos canales: Aguja - El tocadiscos está conectado a la entrada incorrecta del amplificador. Modelo Audio-Technica AT3600 - Aguja o su suporte dañado. Respuesta frecuente 20Hz - 20kHz - Correa de transmisión estirada o sucia. -
Page 40: Istruzioni Di Sicurezza
11. Le bocchette e le aperture nella scocca servono per la ventilazione, per garantire un funzionamento affidabile del prodotto e per proteggerlo dal surriscaldamento. Grazie per aver acquistato il Giradischi con Hi-Fi 1byone. Questo manuale d’istruzioni Non bloccare o coprire queste aperture. -
Page 41: Descrizione Del Prodotto
4. Monta con attenzione il piatto principale sopra al sottopiatto (Figura 1). volume collegamento al PC 3. Perno di centraggio 5. Metti il tappetino antiscivolo sopra al piatto. Accertati che il logo 1byone sul 14. Indicatore 23. Jack del cavo di 4. Sottopiatto del giradischi tappetino sia rivolto in alto (Figura 2). -
Page 42: Regolazione Dell'anti-Skating
Regolazione della Pressione della Testina 7. Ruota il contrappeso in senso orario (guardando da davanti) e regola la pressione in base alle raccomandazioni del produttore della testina. Il contrappeso fornito è adatto a testine Contrappeso con peso compreso tra 3,0 e 6,0 g. Ghiera per la Pressione della Testina Linea centrale 1. -
Page 43: Istruzioni Operative
Connessione agli Altoparlanti Connessione Principale per Alimentazione 1. Connessione agli altoparlanti inclusi 1. Collega la presa CC dell’alimentatore CA nel Jack d’ingresso CC sul retro del giradischi. Questo giradischi ha un preamplificatore integrato e altoparlanti Hi-Fi. Collega gli altoparlanti usando i cavi audio (fissa il cavo nero al morsetto nero e quello rosso al 2. - Page 44 3. Attiva la funzione bluetooth del dispositivo multimediale; poi cerca e seleziona la voce "1byone BS017" per collegare il dispositivo multimediale e il giradischi. 4. Una volta associato il dispositivo multimediale al giradischi, il giradischi emetterà un 2.2 Selezione “Edit” dal menu e poi “Preferenze”.
- Page 45 NOTA: Dovrai controllare le proprietà audio del tuo computer e selezionare l’audio da 2.5 Seleziona il tasto di registrazione per registrare il disco, le tracce a sinistra e a registrare come qui di seguito: “SSS USB Audio Device”: destra compariranno sull’interfaccia: •...
- Page 46 3. Esporta la musica per formati WAV e MP3. 3. Dopo l’apertura, si aprirà il seguente menu, clicca su “YES” per andare su “Llame_enc. dll” e trova la collocazione del file. • Una volta ultimata la registrazione, devi salvarla su computer. •...
-
Page 47: Manutenzione E Pulizia
Manutenzione e Pulizia Installazione di una nuova puntina Nota: Per sicurezza, prima delle operazioni di manutenzione, scollega sempre il cavo 1. Afferra entrambi i lati del sostegno dello stilo e inserisci il gancetto della puntina d’alimentazione. stilo nella cartuccia a conchiglia. Corpo del Giradischi Il tuo giradischi richiede poca o nessuna manutenzione. - Page 48 - Nessun collegamento di messa a terra dal cavo della testina al braccio oppure dal braccio all'amplificatore o al circuito di massa. Modello Audio-Technica AT3600 - Il giradischi è troppo vicino agli altoparlanti. Frequenza di Risposta 20 Hz – 20 kHz Bilanciamento Canale <2.5dB...
-
Page 49: Declaration Of Conformity
Declaration of Conformity Smaltimento dell’elettrodomestico We, the 1byone Products Inc. confirm that the appliance as detailed below do comply Non gettare mai l’elettrodomestico tra i normali rifiuti domestici. with all essential requirements of the EMC directive 2014/35/EU and governing EU- Lo smaltimento di questo prodotto è... - Page 50 Customer Service/Kundenservice Service Clients/Atención al cliente/Assistenza Clienti To ensure speedy handling of your issue, Für eine zügige Bearbeitung ihres please call or email us for assistance. Problems, melden Sie sich bei uns wie folgt. Phone: +1 909-391-3888 Email: euhelp@1byonebros.com (Mon-Fri 9:00am - 6:00pm PST) Email: ushelp@1byonebros.com Pour vous assurez une assistance rapide en cas de problème, veuillez envoyer un...
Need help?
Do you have a question about the Audio-Technica AT3600 and is the answer not in the manual?
Questions and answers