Table of Contents
Advertisement
Quick Links
Advertisement
Table of Contents

Subscribe to Our Youtube Channel
Related Manuals for Electrolux EOC2401AOX


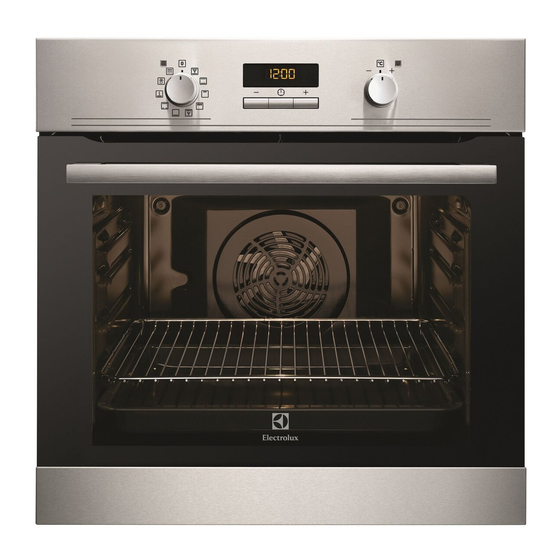
Summary of Contents for Electrolux EOC2401AOX
- Page 1 EOC2401AOX Oven User Manual...
-
Page 2: Table Of Contents
13. ENERGY EFFICIENCY.................. 27 WE’RE THINKING OF YOU Thank you for purchasing an Electrolux appliance. You’ve chosen a product that brings with it decades of professional experience and innovation. Ingenious and stylish, it has been designed with you in mind. So whenever you use it, you can be safe in the knowledge that you’ll get great results every time. -
Page 3: Safety Information
ENGLISH SAFETY INFORMATION Before the installation and use of the appliance, carefully read the supplied instructions. The manufacturer is not responsible for any injuries or damages that are the result of incorrect installation or usage. Always keep the instructions in a safe and accessible location for future reference. -
Page 4: Safety Instructions
Always use oven gloves to remove or put in • accessories or ovenware. Before maintenance cut the power supply. • Ensure that the appliance is switched off before • replacing the lamp to avoid the possibility of electric shock. - Page 5 ENGLISH • Do not let mains cables touch or • Do not apply pressure on the open come near the appliance door, door. especially when the door is hot. • Do not use the appliance as a work • The shock protection of live and surface or as a storage surface.
- Page 6 2.4 Care and cleaning The appliance becomes very hot and hot air is released from the front WARNING! cooling vents. Risk of injury, fire, or • Pyrolytic cleaning is a high damage to the appliance. temperature operation that can release fumes from cooking residues •...
-
Page 7: Product Description
ENGLISH 2.7 Disposal • Remove the door catch to prevent children or pets from becoming WARNING! trapped in the appliance. Risk of injury or suffocation. 2.8 Service • Disconnect the appliance from the • To repair the appliance contact an mains supply. -
Page 8: Daily Use
Accessories can become hotter than 3. Set the function and set the usual. The appliance can emit an odour maximum temperature. and smoke. This is normal. Make sure 4. Let the appliance operate for 15 that the airflow in the room is sufficient. - Page 9 ENGLISH Oven function Application Fast Grilling To grill flat food in large quantities and to toast bread. Turbo Grilling To roast larger meat joints or poultry with bones on one shelf position. Also to make gratins and to brown. Bottom Heat To bake cakes with crispy bottom and to preserve food.
-
Page 10: Clock Functions
5.5 Heat-up indicator one. The bars show that the oven temperature increases or decreases. When you activate an oven function, the bars in the display come on one by 6. CLOCK FUNCTIONS 6.1 Clock functions table Clock function Application TIME OF DAY To show or change the time of day. -
Page 11: Using The Accessories
ENGLISH 6.4 Setting the END stops at the set END time. At the set time an acoustic signal sounds for 2 minutes. 1. Set an oven function. and time setting flash in the display. 2. Press again and again until The appliance deactivates. -
Page 12: Additional Functions
8. ADDITIONAL FUNCTIONS 8.1 Using the Child Lock Temperature (°C) Switch-off time When the Child Lock is on, the appliance cannot be activated accidentally. 120 - 195 The door is locked , symbols 200 - 245 SAFE and come on the... -
Page 13: Hints And Tips
ENGLISH 9. HINTS AND TIPS baking results and cause damage to WARNING! the enamel. Refer to Safety chapters. 9.2 Baking cakes The temperature and baking times in the tables are • Do not open the oven door before 3/4 guidelines only. They of the set cooking time is up. - Page 14 Food Top / Bottom Heat Fan Cooking Time Com‐ (min) ments Tempera‐ Shelf po‐ Tempera‐ Shelf po‐ ture (°C) sition ture (°C) sition Buttermilk 70 - 80 In a 26 cm cheese‐ cake cake mould on a wire shelf...
- Page 15 ENGLISH Food Top / Bottom Heat Fan Cooking Time Com‐ (min) ments Tempera‐ Shelf po‐ Tempera‐ Shelf po‐ ture (°C) sition ture (°C) sition 15 - 20 In a bak‐ Buns ing tray Eclairs 25 - 35 In a bak‐ ing tray Plate tarts 180 45 - 70...
- Page 16 Food Top / Bottom Heat Fan Cooking Time Com‐ (min) ments Tempera‐ Shelf po‐ Tempera‐ Shelf po‐ ture (°C) sition ture (°C) sition Vegetable 45 - 60 In a mould flan 50 - 60 In a mould Quiches 180 - 190...
- Page 17 ENGLISH Food Top / Bottom Heat Fan Cooking Time Com‐ (min) ments Tempera‐ Shelf po‐ Tempera‐ Shelf po‐ ture (°C) sition ture (°C) sition Goose 150 - 200 Whole Rabbit 60 - 80 Cut in pieces Hare 150 - 200 Cut in pieces Pheasant...
- Page 18 Food Quantity Tempera‐ Time (min) Shelf po‐ ture (°C) sition Pieces 1st side 2nd side Hambur‐ max. 20 - 30 Fish fillet max. 12 - 14 10 - 12 Toasted 4 - 6 max. 5 - 7 sandwich‐ Toast 4 - 6 max.
- Page 19 ENGLISH Lamb Food Quantity (kg) Temperature Time (min) Shelf position (°C) Leg of lamb, 1 - 1.5 150 - 170 100 - 120 1 or 2 roast lamb Saddle of lamb 1 - 1.5 160 - 180 40 - 60 1 or 2 Poultry Food...
- Page 20 Food Temperature Time (min) Shelf posi‐ (°C) tion Apple cake 150 - 160 75 - 85 White bread 180 - 190 50 - 60 9.9 Defrost Food Quantity Defrosting Further defrost‐ Comments time (min) ing time (min) Chicken 1000...
-
Page 21: Care And Cleaning
ENGLISH Fruit Food Temperature Time (h) Shelf position (°C) 1 position 2 positions Plums 60 - 70 8 - 10 1 / 4 Apricots 60 - 70 8 - 10 1 / 4 Apple slices 60 - 70 6 - 8 1 / 4 Pears 60 - 70... - Page 22 10.5 Cleaning the oven door Option Description The oven door has three glass If the oven is panels.You can remove the oven door not very and the internal glass panels to clean dirty. Time of them. the proce‐ dure: 1 h.
- Page 23 ENGLISH Make sure that you put the glass panels (A and B) back in the correct sequence. The middle panel (B) has a decorative frame. The screen-printing zone must face the inner side of the door. Make sure that after the installation the surface of the glass panel frame (B) on the screen-printing zones is not rough when you touch it.
-
Page 24: Troubleshooting
2. Remove the fuses from the fuse box 2. Clean the glass cover. or deactivate the circuit breaker. 3. Replace the lamp with a suitable 300 °C heat-resistant lamp. The back lamp 4. Install the glass cover. 1. Turn the lamp glass cover counterclockwise to remove it. - Page 25 ENGLISH Problem Possible cause Remedy The display shows "C3". The cleaning function does Fully close the door. not operate. You did not fully close the door, or the door lock is defective. The display shows "F102". • You did not fully close •...
-
Page 26: Installation
We recommend that you write the data here: Model (MOD.) ......... Product number (PNC) ......... Serial number (S.N.) ......... 12. INSTALLATION 12.2 Securing the appliance to WARNING! the cabinet Refer to Safety chapters. 12.1 Building In min. 550 min. 560 12.3 Electrical installation... -
Page 27: Energy Efficiency
3680 3 x 1.5 13. ENERGY EFFICIENCY 13.1 Product Fiche and information according to EU 65-66/2014 Supplier's name Electrolux Model identification EOC2401AOX Energy Efficiency Index 81.0 Energy efficiency class Energy consumption with a standard load, con‐ 0.93 kWh/cycle ventional mode Energy consumption with a standard load, fan- 0.68 kWh/cycle... - Page 28 Keep food warm differ from the temperature indicated on Choose the lowest possible temperature the display during a cooking cycle and setting to use residual heat and keep a cooking times may be different from the meal warm. The display shows the cooking times in other programmes.
- Page 29 ENGLISH...
- Page 30 www.electrolux.com...
- Page 31 ENGLISH...
- Page 32 www.electrolux.com/shop...
Need help?
Do you have a question about the EOC2401AOX and is the answer not in the manual?
Questions and answers