Corsair K100 AIR RGB - Wireless Mechanical Gaming Keyboard Manual
- Manual (142 pages)
Advertisement
- 1 GETTING TO KNOW YOUR KEYBOARD
- 2 BEFORE FIRST USE
- 3 FACTORY RESET
- 4 CHARGING & BATTERY LIFE
- 5 CONNECTING VIA SLIPSTREAM WIRELESS
- 6 CONNECTING VIA BLUETOOTH WIRELESS
- 7 CONNECTING VIA USB WIRED
- 8 CONNECTING TO SONY PLAYSTATION
- 9 SOFTWARE MODE
- 10 HARDWARE MODE
- 11 ONBOARD FUNCTIONS
- 12 ONBOARD LIGHTING
- 13 MACRO RECORDING
- 14 BATTERY REMOVAL INFORMATION
- 15 Videos
- 16 Documents / Resources
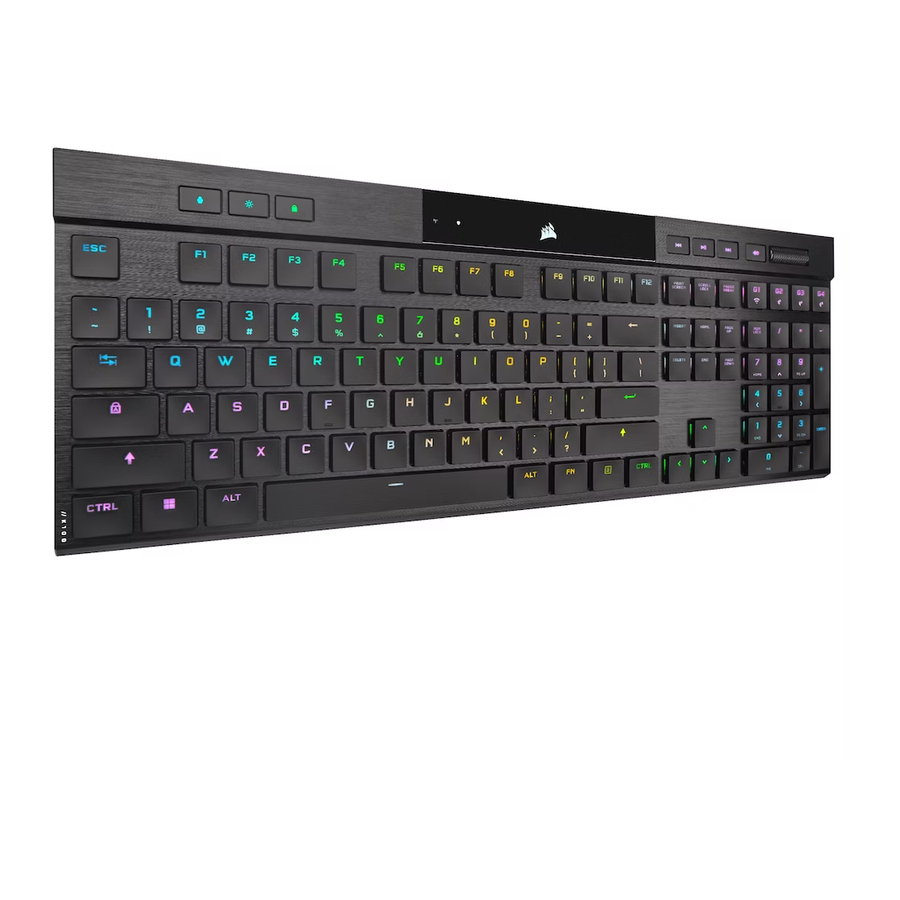
GETTING TO KNOW YOUR KEYBOARD


- PROFILE KEY
- BRIGHTNESS KEY
- WINDOWS LOCK KEY
- WIRELESS INDICATOR
- ENCRYPTION INDICATOR
- BATTERY INDICATOR
- MACRO INDICATOR
- NUM LOCK INDICATOR
- CAPS LOCK INDICATOR
- SCROLL LOCK INDICATOR
- WINDOWS LOCK INDICATOR
- MEDIA CONTROL KEYS
- MUTE KEY
- VOLUME ROLLER
- MACRO G-KEYS / WIRELESS FN KEYS
- SLIPSTREAM WIRELESS ADAPTER
- USB TYPE-C PORT
- POWER SWITCH
- USB TYPE-C TO TYPE-A CABLE
BEFORE FIRST USE
Charge the keyboard fully before first use by connecting the USB cable (S) to the keyboard USB Type-C port (Q) and to an available USB 3.0 or better Type-A port on a compatible device including:
| Windows® PC | Apple Mac® | Microsoft Xbox One* Microsoft Xbox Series X|S* | PlayStation 4** PlayStation 5** |
*Keyboard is compatible out of the box, see corsair.com/xbox-support for details.
**See Connecting to Sony PlayStation section.
FACTORY RESET
Hold the ESC key while turning the power switch (R) to on, then release the ESC key after two seconds. The keyboard will then power on normally and be reset to factory defaults.
CHARGING & BATTERY LIFE
The battery indicator (F) will denote charging status when plugged into a compatible device via USB cable.
| STATUS | INDICATION | INDICATOR |
| Fully Charged | Solid Green |  |
| Charging | Blinking Green |
Upon powering on the keyboard or using the check battery life shortcut below, the battery indicator (F) will denote current battery charge level.
| SHORTCUT | STATUS | INDICATION | INDICATOR |
 | Fully Charged | Solid Green | |
| High Charge | Blinking Green | ||
| Medium Charge | Blinking Amber | ||
| Low Charge | Blinking Red | ||
| Critically Low Charge | Pulsing Red |
TIPS AND TRICKS:
- If left on and idle, the keyboard will go to sleep to conserve battery (adjustable in iCUE)
- Reduce brightness or turn off backlighting to extend battery life (and increase charging speed)
- Charge as soon as possible when critically low charge to maximize battery longevity
- Always plug into a USB 3.0 port or better to ensure adequate charging current
CONNECTING VIA SLIPSTREAM WIRELESS

- Plug in the SLIPSTREAM wireless adapter (P) to an available USB 2.0 or better Type-A port
- Slide the keyboard power switch (R) to on
- Switch to SLIPSTREAM wireless mode (see below)
- After SLIPSTREAM connects automatically, the wireless indicator (D) and encryption indicator (E) both turn solid white for 3 seconds
| SHORTCUT | FUNCTION | STATUS | INDICATION | INDICATOR |
 (Press) (Press) | Switch to SLIPSTREAM wireless mode | Connected | Solid White (3 sec) |  |
| Disconnected | Pulsing White |
NOTE: To complete pairing to a SLIPSTREAM wireless adapter, initiate adapter pairing in iCUE device settings.
CONNECTING VIA BLUETOOTH® WIRELESS
- Initiate Bluetooth pairing on the host device such as a phone or tablet (Bluetooth 4.0 or higher)*
- Start Bluetooth host pairing on the keyboard, up to three devices can be paired (see below)
- Input the code from the Bluetooth device screen on the keyboard if requested
- When pairing completes, the wireless indictor (D) turns solid blue/cyan/magenta for 3 seconds
| SHORTCUT | FUNCTION | STATUS | INDICATION | INDICATOR |
 (Press) (Press) | Switch to Bluetooth host 1 mode | Connected | Solid Blue (3 sec) |  |
| Disconnected | Pulsing Blue | |||
| (Hold) | Start Bluetooth host 1 pairing* | Pairing | Blinking Blue | |
 (Press) (Press) | Switch to Bluetooth host 2 mode | Connected | Solid Cyan (3 sec) | |
| Disconnected | Pulsing Cyan | |||
| (Hold) | Start Bluetooth host 2 pairing* | Pairing | Blinking Cyan | |
 (Press) (Press) | Switch to Bluetooth host 3 mode | Connected | Solid Magenta (3 sec) | |
| Disconnected | Pulsing Magenta | |||
| (Hold) | Start Bluetooth host 3 pairing* | Pairing | Blinking Magenta |
*Bluetooth host device must support standard keyboard HID input.
CONNECTING VIA USB WIRED
- Connect the keyboard via USB cable to a USB 3.0 Type-A port or better
- The keyboard will automatically switch to USB wired mode
- Go to iCUE device settings to select up to 8,000Hz hyper-polling with CORSAIR AXON*
![]()

*Polling rates higher than 1,000Hz are not support by Xbox or PlayStation consoles.
NOTE: Wireless modes can be switched to at any time by pressing a wireless shortcut. Pressing the same shortcut again will switch back to USB wired mode.
CONNECTING TO SONY PLAYSTATION
The keyboard also has a special mode to support Sony PlayStation 4 and 5 via SLIPSTREAM wireless and USB wired modes that can be activated via shortcut.
| SHORTCUT | FUNCTION | INDICATION | INDICATOR |
 (Hold for 5 sec) (Hold for 5 sec) | Switch to PlayStation mode | Blinks White (5 sec) then Solid White |  |
 (Hold for 5 sec) (Hold for 5 sec) | Switch back to standard mode | Pulses White (6 sec) |  (On-key) (On-key) |
NOTE: Available functions may be limited depending on gaming console support and application.
SOFTWARE MODE
When iCUE is running the keyboard operates in software mode and is controlled by iCUE.

Download iCUE from corsair.com/downloads and install on a Windows PC or Apple Mac to connect all of your CORSAIR iCUE compatible products together in a single interface, giving you complete control of everything from lighting to powerful macros.
HARDWARE MODE
When iCUE is not running or the keyboard is connected to a device that does not support iCUE, the keyboard operates in hardware mode which uses profiles and settings saved to the onboard storage.
With iCUE and AXON Hyper-Processing Technology, you can create as many custom profiles as can fit onto the 8MB of onboard storage. Each profile can store complex backlighting effects (up to 20 layers), actions & macros, and settings.*
* The number of lighting effects layers per profile and total number of profiles that can be saved to onboard storage will vary based on complexity.
ONBOARD FUNCTIONS
The keyboard features many onboard functions to change profiles, adjust backlighting, lock the windows key, and control media playback, and adjust volume with convenient hotkeys.
 | The keyboard features adaptive brightness where backlighting intensity will automatically change based on ambient light sensing to ensure great visibility in all environments and maximize battery life. This can be disabled by manually adjusting brightness or via iCUE. |
| HOTKEY | FUNCTION |
 | Cycle through available profiles |
| Manually adjust backlighting brightness in 20% decrements* |
| (Hold for 2 sec) | Re-enable adaptive brightness |
| Disables key (Win Lock) |
| (Hold for 2 sec) | See Macro Recoding section |
*Temporarily disables automatic backlighting adjustment.
With iCUE you can program Win Lock to not only disable the Windows key, but other key combinations that could interrupt your game, as well as create new profiles and assign unique colors.
ONBOARD LIGHTING
Keyboard lighting effects can be controlled via the onboard shortcuts below when iCUE is not running or the keyboard is connected to a device that does not support iCUE.
| SHORTCUT | LIGHTING EFFECT |
| FN + 1 | Spiral Rainbow |
| FN + 2 | Rain |
| FN + 3 | Rainbow Wave |
| FN + 4 | Visor |
| FN + 5 | Type Lighting (Per-key) |
| FN + 6 | Type Lighting (Ripple) |
| FN + 7 | Color Shift |
| FN + 8 | Color Pulse |
| FN + 9 | Color Wave |
| FN + 0 | Static Color (Press to cycle colors) |
| FN + ' | Reset to onboard stored effect |
| FN + - | Reduce effect speed* |
| FN + = | Increase effect speed* |
| FN + [ | Rotate effect left* |
| FN + ] | Rotate effect right* |
*Functions supported on select effects.
MACRO RECORDING
Macros can be recorded at any time via the below process. In hardware mode your macros are recorded to onboard storage and in software mode your macros are recorded to the current iCUE profile.
| Macro Recording Process | Hold (2 seconds) | > |
Press keys to record | > | Press | > | Press any key or FN + key combination to save |
Recording Indication | Pulses White | > | Blinks White | > | Rapidly Blinks White | Hold to cancel (2 seconds) |

ㅤ
| Macro Clearing Process | Hold (2 seconds) | > | Press | > | Press any key or FN + key combination to clear |
| Recording Indication | Pulses White | > | Rapidly Blinks White | Hold to cancel (2 seconds) |
Keys that can be recorded:
- Standard keys
Macros can be recorded to:
- Any standard key
- G-keys
- FN + key*
*Hotkeys and wireless/console onboard functions cannot be recorded over with onboard macro recording.
NOTE: Saving a macro to a key or existing shortcut will overwrite that function until cleared.
With iCUE you can edit recorded macros and assign additional actions to keys.
BATTERY REMOVAL INFORMATION
This product uses a rechargeable battery and safety guidelines must be followed in the event that the product is disabled for disposal and recycling. To safely remove the battery for disposal and recycling, follow the numbered steps with the below diagrams.


CORSAIR MEMORY, Inc. encourages customers to recycle used electronic hardware and rechargeable batteries in accordance with local laws and regulations.
FCC ID: 2AAFMRGP0120 (Keyboard)
FCC ID: 2AAFMRGP0119 (Wireless Adapter)
IC: 10954A-RGP0120 (Keyboard)
IC: 10954A-RGP0119 (Wireless Adapter)
Web: corsair.com
Phone: (888) 222-4346
Warranty: corsair.com/support/warranty
Support: support.corsair.com
Blog: corsair.com/blog
Forum: forum.corsair.com
YouTube: youtube.com/corsairhowto
© 2022 CORSAIR MEMORY, Inc. All rights reserved. CORSAIR and the sails logo are registered trademarks of CORSAIR in the United States and/or other countries. All other trademarks are the property of their respective owners. Product may vary slightly from those pictured.
49-002516 AC


VideosCorsair K100 Air - Review Video
Documents / Resources
References
http://corsair.com/xbox-support
http://corsair.com
http://corsair.com/support/warranty
http://corsair.com/blog
Home - Corsair Community
![youtube.com]() CORSAIR LAB - YouTube
CORSAIR LAB - YouTube
Download manual
Here you can download full pdf version of manual, it may contain additional safety instructions, warranty information, FCC rules, etc.
Download Corsair K100 AIR RGB - Wireless Mechanical Gaming Keyboard Manual
Advertisement


Need help?
Do you have a question about the K100 AIR and is the answer not in the manual?
Questions and answers