Analog way Picturall Series User Manual
Hide thumbs
Also See for Picturall Series:
- User manual (112 pages) ,
- Quick manual (2 pages) ,
- Quick start manual (2 pages)
Table of Contents
Advertisement
Quick Links
USER MANUAL
Picturall Series Media Servers (V3.5)
References: MST02-R1, MSTC02-R1, MSQ04-R1, MSQC04-R1, MSP16-R1,
MST02-R2, MSTC02-R2, MSQ04-R2, MSQC04-R2, MSP16-R2,
1
www.analogway.com
MSTC02-MkII, MSQ04-MkII, MSQC04-MkII, MSP16-MkII
USER MANUAL
USER MANUAL
USER MANUAL
USER MANUAL
USER MANUAL
USER MANUAL
USER MANUAL
USER MANUAL
Advertisement
Table of Contents

Related Manuals for Analog way Picturall Series


Summary of Contents for Analog way Picturall Series
- Page 1 USER MANUAL USER MANUAL USER MANUAL USER MANUAL USER MANUAL Picturall Series Media Servers (V3.5) USER MANUAL USER MANUAL References: MST02-R1, MSTC02-R1, MSQ04-R1, MSQC04-R1, MSP16-R1, MST02-R2, MSTC02-R2, MSQ04-R2, MSQC04-R2, MSP16-R2, USER MANUAL MSTC02-MkII, MSQ04-MkII, MSQC04-MkII, MSP16-MkII USER MANUAL www.analogway.com...
- Page 2 USER MANUAL USER MANUAL Information contained in this document, in particular data, pictures, information, trademarks and logos are exclusive property of Analog Way and are protected by copyrights and other intellectual property rights. 2018, Analog Way, all rights reserved – 10/2022 Consequently, any representation and/or reproduction, in part or in full, is prohibited and would be considered a violation of Analog Way’s copyright and other intellectual property rights.
-
Page 3: Table Of Contents
Picturall Pro Mark II rear panel ......................24 3.5.10 Hardware and license options ......................25 3.5.11 Audio support (optional) ........................25 Precautions when Mounting Picturall Series Media Server ............26 Start the Picturall Series Media Server ..................26 Web configurator ........................27 5.1.1 Dashboard ............................27 5.1.2... - Page 4 7.2.6 Encode a media file present on the server ..................66 7.2.7 Encoding media to AWX format without a Picturall Series Media Server ........... 67 Edit server filenames and location ....................68 Add inputs to a media collection ....................68 Add web pages and video streams .....................
- Page 5 USER MANUAL Add a custom text ........................70 USER MANUAL Add SPX graphics ......................... 70 USER MANUAL Manage Media Collections ......................70 Default Media transition ......................70 USER MANUAL 7.9.1 End action (Media) ..........................70 7.9.2 Media Crossfade ..........................71 USER MANUAL 7.9.3 Media Fade in / Fade out ........................
- Page 6 USER MANUAL 9.8.1 Create a layer macro ......................... 108 USER MANUAL 9.8.2 Load a layer macro ..........................108 USER MANUAL Geometry ..........................109 9.10 Set default show on server boot – Export show ............... 109 USER MANUAL 10.1 Presentation ..........................110 10.1.1 How cues work ..........................
- Page 7 USER MANUAL 11.2.4 Framelock menu on front panel display .................... 133 USER MANUAL 11.3 Performance ..........................133 USER MANUAL 11.3.1 Toggle view ............................134 11.3.2 Refresh ............................... 134 USER MANUAL 11.3.3 Color ..............................134 11.4 Timecode out ..........................134 USER MANUAL 11.5 Control Model ...........................
-
Page 8: Copyrights
1.4 Liability Analog Way shall not be liable for any loss or damage, be it direct or indirect in regards to the utility or contents of the software or hardware, except to the extent provided by law. Notwithstanding the above, liability for indirect, special, incidental or consequential loss or damage that may arise in respect of the software or hardware, is expressly excluded. -
Page 9: General Safety Instructions
USER MANUAL USER MANUAL 2 Hardware Specifications USER MANUAL 2.1 General safety instructions USER MANUAL 2.1.1 English USER MANUAL All of the safety and operating instructions should be read before the product is operated and should be USER MANUAL maintained for further reference. Please follow all of the warnings on this product and its operating instructions. -
Page 10: French
USER MANUAL your device to electric shocks or other hazards. The internal Lithium cell battery is not replaceable. In case of problem, contact your supplier or Analog Way. USER MANUAL • OPENINGS: Never push objects of any kind into this product through the openings. If liquids have been... -
Page 11: Italian
USER MANUAL Si un des cordons d’alimentation est endommagé, débranchez-le immédiatement de la prise murale. Il est USER MANUAL dangereux de faire fonctionner un appareil avec un cordon endommagé ; un câble abîmé peut provoquer un USER MANUAL risque d’incendie ou un choc électrique. Vérifiez les câbles d’alimentation de temps en temps. Contactez votre revendeur ou le service après-vente pour un remplacement. -
Page 12: German
La batteria al litio all’interno dell’apparato non e’ sostituibile. In caso di problemi contattare il fornitore o Analog Way. • APERTURE DI VENTILAZIONE: Le apparecchiature possono comportare delle aperture di ventilazione, si prega di non introdurre mai oggetti o ostruire le sue fessure. - Page 13 Schrauben zu Stromschlägen oder anderen Gefahren für den Benutzer führen kann. Die im Gerät eingebaute Lithium Batterie ist nicht austauschbar. Im Falle eines Problems nehmen Sie Kontakt mit Ihrem Lieferanten auf oden au Analog Way. • ÖFFNUNGEN UND MUNDUNGEN: Die Geräte können über Öffnungen verfügen (Belüftung, Schlitze, usw.).
-
Page 14: Spanish
USER MANUAL USER MANUAL 2.1.5 Spanish USER MANUAL Para comprender mejor el funcionamiento de este aparato, le recomendamos que le acuidadosamente todas las consignas de seguridad y de funcionamiento del aparato antes de usarlo. Conserve las instrucciones de USER MANUAL seguridad y de funcionamiento para que pueda consultarlas posteriormente. -
Page 15: Symbols On Product Identification And Warning Labels
USER MANUAL incidente. La batería interna de litio no es reemplazable. En caso de problema, contacte con su proveedor o Analog Way. USER MANUAL • ABERTURAS Y ORIFICIOS: Los aparatos pueden contener aberturas (aireación, ranuras, etc.). Nointroduzca allí... - Page 16 USER MANUAL USER MANUAL USER MANUAL USER MANUAL USER MANUAL USER MANUAL USER MANUAL USER MANUAL www.analogway.com...
-
Page 17: Environmental Specifications For All Picturall Models
USER MANUAL USER MANUAL 2.1.7 Environmental specifications for all Picturall models USER MANUAL Picturall Twin Compact Mark II and Quad Compact Mark II: • Dimensions without rack mount and handles: W 440 x H 88 x D 640 mm USER MANUAL •... -
Page 18: Picturall Series Media Servers
Lighting consoles. USER MANUAL Picturall Series Media Servers are 19” wide and 4 rack units (4U) high, following the industrial rack mounting standard. The Twin and Quad are also available in Compact versions (2U) with the same number of outputs and the same efficiency as their 4U counterparts. -
Page 19: Front Panel
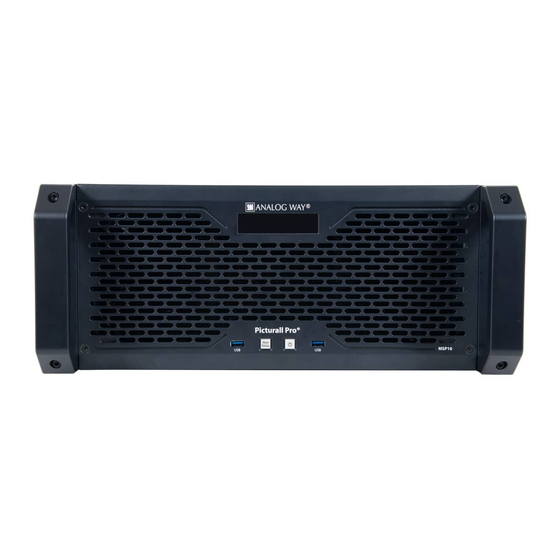
USER MANUAL USER MANUAL 3.4 Front panel USER MANUAL All the Media Servers have the same front panel. It is composed of one OLED display, two USB ports, a Power button and a Next/Status button. USER MANUAL USER MANUAL USER MANUAL USER MANUAL USER MANUAL Fig. -
Page 20: Rear Panels And Connections
USER MANUAL USER MANUAL 3.5 Rear panels and Connections USER MANUAL The Media Server chassis and the hardware are designed to produce the best possible performance in a sleek, rack-mountable unit. USER MANUAL 3.5.1 Picturall Twin rear panel USER MANUAL USER MANUAL USER MANUAL USER MANUAL... -
Page 21: Picturall Twin Compact Mark Ii Rear Panel
USER MANUAL USER MANUAL 3.5.3 Picturall Twin Compact Mark II rear panel USER MANUAL USER MANUAL USER MANUAL USER MANUAL USER MANUAL USER MANUAL Fig. 4 - Picturall Twin Compact Mark II rear panel 1. Power supply 2. Two USB ports and two 10Gb/s Ethernet plugs 3. -
Page 22: Picturall Quad Mark Ii Rear Panel
USER MANUAL USER MANUAL 3.5.5 Picturall Quad Mark II rear panel USER MANUAL USER MANUAL USER MANUAL USER MANUAL USER MANUAL USER MANUAL Fig. 6 - Picturall Quad Mark II rear panel 1. Two balanced XLR inputs (for timecode LTC) and 2x balanced XLR outputs (optional audio interface) 2. -
Page 23: Picturall Quad Compact Mark Ii Rear Panel
USER MANUAL USER MANUAL 3.5.7 Picturall Quad Compact Mark II rear panel USER MANUAL USER MANUAL USER MANUAL USER MANUAL USER MANUAL USER MANUAL Fig. 8 - Picturall Quad Compact Mark II rear panel 1. Power supply 2. One USB port and two 10Gb/s Ethernet plugs 3. -
Page 24: Picturall Pro Mark Ii Rear Panel
USER MANUAL USER MANUAL 3.5.9 Picturall Pro Mark II rear panel USER MANUAL USER MANUAL USER MANUAL USER MANUAL USER MANUAL USER MANUAL Fig. 10 - Picturall Pro Mark II rear panel 1. Two balanced XLR inputs (for timecode LTC) and 2x balanced XLR outputs (Optional audio interface) 2. -
Page 25: Hardware And License Options
USER MANUAL USER MANUAL 3.5.10 Hardware and license options USER MANUAL The Picturall Series Media Servers can be equipped with various options. These options are available depending on the model. USER MANUAL Option Description USER MANUAL Dual Power supply unit... -
Page 26: Precautions When Mounting Picturall Series Media Server
This helps identifying displays and checking the setup is correct. Tip: Connect all displays before starting the media server for the first time. To start the Picturall Series Media Server safely and correctly: 1. Connect the power cable to the server and then plug it into a mains socket. -
Page 27: Web Configurator
Fig. 11 - Web configurator connection All devices default IP addresses are 192.168.2.140. Note: The Picturall Series Media Server and the computer must be connected to the same network to run the Web configurator. 5.1.1 Dashboard Fig. 12 - Web configurator Dashboard The Dashboard is the home page of the Web configurator. -
Page 28: Server Configuration
USER MANUAL USER MANUAL 5.1.2 Server configuration USER MANUAL USER MANUAL USER MANUAL USER MANUAL USER MANUAL USER MANUAL Fig. 13 - Server configuration Set server settings from the Server configuration: Number of layers: Set the number of layers to use and patch to Art-Net (max 200). This affects the number of available layers in Picturall Commander. -
Page 29: Display Configuration
Manual: set the output resolution and refresh rate manually o Custom: select a custom display configuration o Special: select a preset mode for display signal splitters (Analog Way DPH104, Matrox TH2GO and DH2GO) 3. If needed, select Signal: HDMI to force the HDMI signal on any DisplayPort output (adapter needed). - Page 30 USER MANUAL USER MANUAL 5.1.4.3 Display division USER MANUAL Displays can be divided into grids of virtual displays with Display division. This separates all Displays into independent displays. These displays are affected independently (Keystone, Angle, Crop). This is very useful USER MANUAL for complex screens and Led walls.
- Page 31 USER MANUAL A streaming display is composed of a virtual display and audio device, which is sent to a network destination USER MANUAL instead of physical display connector. One output card can have multiple streams. One stream can have USER MANUAL multiple destination with the same configuration.
-
Page 32: Custom Display Resolutions
5. Number of DMX displays: Enter the number of the displays controlled with DMX DMX control for the Picturall Series Media Server consists of two elements: layers and master block. The master block controls general functions that are not specific to any layer such as choosing display preset (for more information, see APPENDICES page 138). -
Page 33: Audio Configuration (Optional)
USER MANUAL USER MANUAL Universe Layer Universe Layer USER MANUAL Layer 1 Layer 19 USER MANUAL Layer 2 Layer 20 Layer 3 Layer 21 USER MANUAL Layer 4 Layer 22 USER MANUAL Layer 5 Layer 23 Layer 6 Layer 24 USER MANUAL Layer 7 Layer 25... - Page 34 USER MANUAL USER MANUAL 5.1.7.1 Automatic channel routing USER MANUAL USER MANUAL USER MANUAL USER MANUAL USER MANUAL USER MANUAL Fig. 20 - Audio settings in web configurator By default, audio is configured with Automatic channel routing. The audio device channels will be automatically connected to mixer channels when they are available (according to audio device priority list available below).
- Page 35 USER MANUAL USER MANUAL 5.1.7.2 Manual audio channel routing USER MANUAL Manual channel routing mode to manually configure the server audio output channels for different audio devices and sources. USER MANUAL 1. Select Manual channel routing mode then Save. 2. In Audio interfaces, click + Add new to add new audio interface. USER MANUAL a.
-
Page 36: Network Configuration
USER MANUAL USER MANUAL 5.1.7.3 Dante audio configuration USER MANUAL If the server has been licensed with Dante (optional), the Dante audio device will be present in the Audio device drop-down menu. Configure the Dante audio interface as needed. For configuring the network USER MANUAL interfaces see 5.1.7 Audio configuration (optional) page 33. - Page 37 USER MANUAL USER MANUAL 5.1.8.1 Network configuration with two network ports USER MANUAL USER MANUAL USER MANUAL USER MANUAL USER MANUAL USER MANUAL Fig. 25 - Network configuration (Picturall Pro with dual network interface and 10GB option) Picturall Mark II servers and 1 generation Picturall Pro servers support two different networks with separate network connectors.
-
Page 38: Time Configuration
USER MANUAL USER MANUAL 5.1.9 Time configuration USER MANUAL The system time and date can be set manually, or the server can be configured to acquire time and date from a NTP server. Time zone must be configured manually. These time settings are used for Wallclock timecode USER MANUAL provider and cue scheduling features (See 9.6 Triggering cues with Timecode page 117 and 9.7 Scheduling cues and playback page 123) - Page 39 USER MANUAL USER MANUAL 5.1.10.1 Set a server synchronization USER MANUAL The role of the server can be set either as a Client or a Server. Each server is by default a client. 1. On the Web configurator of the Picturall media server to use as the source of the synchronization, USER MANUAL set the system role to Server.
-
Page 40: Import And Export Configuration
USER MANUAL USER MANUAL 5.1.10.2 Legacy backup tool USER MANUAL To clone all media files from the media server to another Picturall media server without continuous synchronization, the legacy backup tool can be used. USER MANUAL The following example shows how to back from a Server A to a Server B. USER MANUAL 1. -
Page 41: Format Media Drives - Storage Configuration
USER MANUAL Note: If the formatting method is modified, all media on hard drives will be deleted. Note: Two media drive configuration is a hardware option for Twin and Quad servers. Contact Analog Way support for more details. USER MANUAL 5.1.13 Conflicting Settings... -
Page 42: Spx Graphics
USER MANUAL USER MANUAL 5.2 SPX graphics USER MANUAL SPX is a graphics overlay that can be used to display and control animated lower thirds, countdowns, headlines, titles, and other animated graphics. SPX is developed especially for professional broadcast and USER MANUAL streaming video workflows. - Page 43 TIP: New SPX graphics templates can be purchased from the SPX Store and fully customized templates can be designed with the SPX team. Template customization is a paid service provided by Softpix Ltd. Contact Analog Way sales to get more information. www.analogway.com...
-
Page 44: Adding Spx Graphics To Playback
USER MANUAL USER MANUAL 5.2.2 Adding SPX graphics to playback USER MANUAL Using SPX graphics in playback requires creating a graphics rundown with the SPX graphics controller and adding a SPX graphics layer to Commander GUI. USER MANUAL USER MANUAL 5.2.2.1 Creating a graphics rundown with SPX graphics controller Open the SPX graphics controller from USER MANUAL... - Page 45 USER MANUAL USER MANUAL USER MANUAL USER MANUAL USER MANUAL USER MANUAL USER MANUAL USER MANUAL Fig. 32 - SPX new project setup Click to browse installed templates from the server and to select required templates. Pressing this button will bring up a file browser containing folders with SPX templates. The selected templates will be listed under the project.
- Page 46 USER MANUAL USER MANUAL USER MANUAL USER MANUAL USER MANUAL USER MANUAL USER MANUAL USER MANUAL Fig. 34 - SPX template edit options These edit options only include the overall appearance of the templates, but the actual presented content will be available for modifying in the project rundown (see 5.2.2.3). All the templates that will be required in a project or a show can be selected here.
- Page 47 USER MANUAL A new rundown will open a new page, where the templates that were selected for the project can be added USER MANUAL to this specific rundown. Pressing the will open the list of selected SPX templates. USER MANUAL USER MANUAL USER MANUAL USER MANUAL...
- Page 48 USER MANUAL See the instructions for using cue macros to control SPX from chapter 5.2.3. USER MANUAL USER MANUAL After modifying the content and pressing save, the template can be activated either by pressing spacebar from the keyboard, or by pressing the green Play button from the bottom of the screen. If the template has USER MANUAL more than one phases, the continue button will be used to trigger the following phases.
- Page 49 USER MANUAL USER MANUAL 5.2.2.4 Commander GUI: SPX graphics layer USER MANUAL With the Picturall Commander (3.5.0 or newer), go to Server files and select Generators. From there select SPX graphics and drag and drop it to a free media collection slot. USER MANUAL USER MANUAL USER MANUAL...
- Page 50 USER MANUAL USER MANUAL USER MANUAL USER MANUAL USER MANUAL USER MANUAL USER MANUAL USER MANUAL Fig. 40 - Setting up the SPX graphics layer After adding a SPX graphics to a media collection proceed to Picturall Commander Layers tab. For this example, we have a simple display setup of one 1080p display.
-
Page 51: Controlling Spx Graphics With Cues
USER MANUAL USER MANUAL USER MANUAL USER MANUAL USER MANUAL USER MANUAL USER MANUAL USER MANUAL Fig. 41 - Commander: media layer and SPX layer in use 5.2.3 Controlling SPX graphics with cues SPX graphics can be controlled with cues. Create a cue for triggering an SPX event. This cue can be an empty cue or related to something else. - Page 52 USER MANUAL USER MANUAL USER MANUAL USER MANUAL USER MANUAL USER MANUAL USER MANUAL USER MANUAL Fig. 42 - Cue Macro to control SPX graphics "Invoke SPX template function on a SPX layer" can be used to invoke a custom javascript function on a SPX template.
-
Page 53: User Management
USER MANUAL USER MANUAL 5.3 User management USER MANUAL In Tools > User management, create admin user accounts to prevent other users from accessing server configuration settings, server tools and media manager using the web configurator. USER MANUAL Note: - By default and when there is no admin user account created, the access to the server settings has no password restriction. - After adding an admin user account, logging in becomes required immediately. -
Page 54: Manage Firmware
5.4.1 Firmware update Fig. 44 - Manage firmware configuration page 1. Download the latest firmware update image from the Analog Way website. 2. After downloading the firmware updater image file, click Select file and select the file on your computer. -
Page 55: Updating The Server Firmware With An Usb Drive
USER MANUAL Tip: Use a high-quality USB memory stick, a low-quality USB memory might cause problems when installing the software. Note: The Picturall Series Media Server installer for legacy products (before Picturall Mark II) runs only on Windows. On a computer: 1. - Page 56 USER MANUAL Note: Picturall Series Media Server installer for Mark 2 products is available for both Windows and Mac. Caution: During the installation, a window prompt will ask to Format or to Reconnect the USB drive. Click Cancel. Do not USER MANUAL confirm the format or the installation will fail.
-
Page 57: Media Manager
USER MANUAL USER MANUAL 5.5 Media manager USER MANUAL Tip: To limit the access to server configuration and tools, use the address (server ip)/mediamanager/fullscreen/ to view the media manager without the web configurator navigation bar. USER MANUAL Use Media manager to access media collections and media files via the web configurator. Media manager is available in the Dashboard page and in the top bar. -
Page 58: Upload Media Files To Specific Folders
USER MANUAL USER MANUAL 5.5.2 Upload media files to specific folders USER MANUAL Uploading a file directly to the collection will save the file to the Media root folder. To upload a media file to a specific folder: USER MANUAL 1. -
Page 59: Fading Settings
USER MANUAL Right click a media in a collection will bring up options to move (cut, copy, paste), rename, edit fading settings USER MANUAL or remove the media from the collection. USER MANUAL 5.5.4 Fading settings USER MANUAL Fading settings can be defined for each media file on the collection. Either set the fading settings directly on the collection or right click a media and select Edit media fading settings for more precise fading controls. -
Page 60: Installing / Updating Picturall Commander
USER MANUAL Fig. 50 - Picturall Commander Picturall Commander is the software used to control the Picturall Series Media Server. This chapter describes the installation and the top-level parts of the Picturall Commander user interface. 6.1 Installing / Updating Picturall Commander Caution: Picturall Commander must always be in the same version as the Server software. -
Page 61: Connecting To Picturall Series Media Server
6. Under Advanced, change the values for Text protocol port and Data protocol port if needed. 7. If needed, uncheck Connect immediately. 8. Click Finish to Create the Connection. A message confirms the connection to the Picturall Series Media Server. -
Page 62: Arrange Windows
USER MANUAL Layers: Control all layer parameters. This is the main menu for controlling the Picturall Series Media USER MANUAL Server with Picturall Commander. For more information, see Layers page 93. USER MANUAL Layers Graph: Open the Layers Graph in a whole tab for precise adjustment, see Layers page 93. -
Page 63: Media Types
• H.264 • H.265 • PRKL (also with alpha channel) is a format designed by Analog Way specifically for the Picturall Series Media Servers. Encoding high resolution files (4K and higher) to AWX format is recommended for optimal performance. www.analogway.com... -
Page 64: Importing And Encoding Media Files
USER MANUAL All codecs can be played with nearly any frame rate and bit rate within the server performance limits. USER MANUAL Audio is supported in PCM, WAV and AAC formats (up to 24 output channels). Picturall media server also USER MANUAL supports audio input from network streams, Chromium sources, and live input sources (with optional input card). -
Page 65: Import And Encode A File To Awx Format
Tip: Importing media using FTP can slow down the media server. Avoid transferring large files during a show or while making changes to the configuration. To import media through FTP connection, follow these steps: 1. Open an FTP connection to the Picturall Series Media Server. 2. Log in: Username: picmedia Password: aidemcip 3. -
Page 66: Reuse Imported Media Files - Add Server Files To A Media Collection
USER MANUAL USER MANUAL 7.2.5 Reuse imported media files – Add server files to a media collection USER MANUAL To add media files already present on the server to a media collection, follow these steps: 1. Select a media file in the Server path list. Hold Ctrl or Shift to select multiple files. USER MANUAL 2. -
Page 67: Encoding Media To Awx Format Without A Picturall Series Media Server
3. In the Video tab, set video settings and select which AWX codec to use in the Codec dropdown menu. Files encoded to AWX format is ready to be uploaded to a Picturall Series Media Server for playback. Fig. 57 - AWX plugin encoding options... -
Page 68: Edit Server Filenames And Location
7.5 Add web pages and video streams 7.5.1 Add a web page to a media collection Picturall Series Media Servers connected to the internet support web page playback. Multiple web pages can be played at the same time and background transparency is supported. -
Page 69: Import A Web Page Using Ftp
Caution (Risk of server crashing): Do not overwrite files that are playing on the server through an FTP connection. To import a web page through FTP connection, follow these steps: USER MANUAL 1. Open an FTP connection to the Picturall Series Media Server. 2. Log in: USER MANUAL... -
Page 70: Add A Custom Text
USER MANUAL USER MANUAL 7.6 Add a custom text USER MANUAL Create a text with custom settings (font, style, size, color and resolution). USER MANUAL To add a custom text to a media collection, follow these steps: 1. In the Server path list, under Generators, select Text generator. USER MANUAL 2. -
Page 71: Media Crossfade
USER MANUAL USER MANUAL End action Description (at the end of the media) USER MANUAL Loop Loop the media file. Loop collection Play the next media in collection and loop. At the end of the last media, replay the USER MANUAL collection from the first media. - Page 72 USER MANUAL USER MANUAL 8 Displays USER MANUAL In the Displays menu, configure the displays of the show. Default display name includes display resolution and refresh rate when available. USER MANUAL USER MANUAL USER MANUAL USER MANUAL USER MANUAL Fig. 61 - Picturall Commander Display Menu 1.
-
Page 73: Display Menu Icons
USER MANUAL USER MANUAL 8.1 Display menu icons USER MANUAL Icon Description USER MANUAL Show / hide the display list. USER MANUAL Select all enabled displays. USER MANUAL Enable selected displays. USER MANUAL Disable selected displays. USER MANUAL Opens the Display wizard to create a group of displays (see Multi-display screen - Display wizard page 75). -
Page 74: Positioning And Grouping Displays
USER MANUAL USER MANUAL Test image Description USER MANUAL Line width Adjust the line width in a test image using the slide bar. Blue background Show display areas that are not drawn in blue. Use when adjusting Keystone or USER MANUAL curved surface correction. -
Page 75: Multi-Display Screen - Display Wizard
USER MANUAL USER MANUAL Tips: - Right-click a parameter and select Edit to enter numerical values. - Position the displays from the same graphics card close to each other to avoid performance loss. USER MANUAL - For best performance, disable displays when they are not used. - Copy and paste settings from one display to the other by selecting displays and clicking Copy and Paste buttons. -
Page 76: Reset Display
USER MANUAL USER MANUAL 8.4.2 Reset Display USER MANUAL Hold Ctrl and click a field to reset the value. Use the Adjustment tab Reset button to reset the corresponding parameter for the selected USER MANUAL display. Use the Upper right Reset button to reset all parameters from the selected display. USER MANUAL Use the Reset all button to reset all displays. -
Page 77: Edge Blending Panel
USER MANUAL USER MANUAL 8.6.2 Edge Blending panel USER MANUAL 1. Open the Test images side panel and enable the Blend areas test image. 2. Open the Edge Blending panel, then click the Display Wizard button to create a display grid. USER MANUAL 3. -
Page 78: Adjust Curved Surface Projection - Warp Correction
Autocalibration requirements: • Analog Way Picturall Media server (compatible with firmware 3.5.0 or newer) • Analog Way Vioso tools (for Windows only / downloadable from AW website) • Projectors (connected to the AW Picturall server) • Camera (connected to a Windows pc running the AW Vioso tools) - Page 79 USER MANUAL Install the Analog Way Vioso tools from the AW website to the Windows 10 or 11 PC which has the camera USER MANUAL connected. USER MANUAL NOTE: Vioso calibration tools and the Picturall server communicate over the network via NDI signals (to send test images and patterns).
- Page 80 USER MANUAL Once these settings are done, you can click close. The software will prompt you to start the calibrator USER MANUAL application. Clicking Yes will open the Projector and display setup tool. USER MANUAL USER MANUAL USER MANUAL USER MANUAL USER MANUAL USER MANUAL 8.8.1.2 Projector and Display setup...
- Page 81 USER MANUAL USER MANUAL USER MANUAL USER MANUAL USER MANUAL USER MANUAL USER MANUAL USER MANUAL Fig. 68 - Autocalibration process begins Select the server outputs connected to the displays/projectors you wish to calibrate, and the camera. In this example we are doing a curved screen with two projectors. Then define how the projectors are mounted. Projectors are selected to be in an arbitrary grid for the how the projectors are placed.
- Page 82 USER MANUAL USER MANUAL USER MANUAL USER MANUAL USER MANUAL USER MANUAL USER MANUAL USER MANUAL Fig. 69 - Autocalibration: outputs, camera, and projector arrangement Next, we adjust the camera and its options. If the color is clearly off, you can test to set the white balance to automatic.
- Page 83 USER MANUAL Next, create a mask for what the camera sees. This is not to limit where the projection will go, but to tell the USER MANUAL calibrator which portions of what the camera sees it can ignore. The tools to draw the required masked areas USER MANUAL are located on the left-hand side tool bar and can be made to any shape and size (within the camera view).
- Page 84 USER MANUAL Next, we are ready to start scanning and calibrating the first projector. The previous configuration steps will USER MANUAL be done to each projector defined for the project. If a scan was previously done, it can be reused, but it will USER MANUAL only be valid if the projectors or the camera have not moved.
- Page 85 USER MANUAL Dial the threshold to get just clean lines with as little of additional distortion around and with no blackouts USER MANUAL in the middle. USER MANUAL USER MANUAL USER MANUAL USER MANUAL USER MANUAL USER MANUAL Fig. 75 - Autocalibration: Adjusting projection thresholds when you have a good plate of green dots, you click next, and the automatic calibration will start.
- Page 86 USER MANUAL USER MANUAL USER MANUAL USER MANUAL USER MANUAL USER MANUAL USER MANUAL USER MANUAL Fig. 77 - Autocalibration: test images after the initial calibration process (2 projectors) The calibration process is repeated for all the displays or projectors that were defined in the calibration first phase.
- Page 87 USER MANUAL The projection is now calibrated based on the camera view, so it will require some adjusting to be sharp and USER MANUAL clear. This can be done by selecting Edit from the first page of the Projector and Display setup and enabling USER MANUAL the show test image USER MANUAL...
- Page 88 USER MANUAL USER MANUAL USER MANUAL USER MANUAL USER MANUAL USER MANUAL USER MANUAL USER MANUAL Fig. 81 - Autocalibration: mask projection edges Select new/edit mask, and for this example, we’ll be adding a polygon mask and drag it to full size. Tools to edit the mask are available on the left-hand side and the list of created masks are on the right-hand side.
- Page 89 USER MANUAL USER MANUAL USER MANUAL USER MANUAL USER MANUAL USER MANUAL USER MANUAL USER MANUAL Fig. 83 - Autocalibration: Exporting the calibration to the server This will begin the export of the calibration to the defined Picturall server. The process will be presented with following progress bar.
-
Page 90: Vioso Autocalibrated Outputs In Picturall Commander
For more complex projection setups, see the instructions and documentation from the Vioso website contact Analog way support. 8.8.2 Vioso autocalibrated outputs in Picturall Commander The calibration will be enabled automatically to defined outputs. In the Picturall Commander UI the calibration can be enabled and disabled from Window →... - Page 91 USER MANUAL USER MANUAL USER MANUAL USER MANUAL USER MANUAL USER MANUAL USER MANUAL USER MANUAL Fig. 87 - Vioso calibration controls in Picturall Commnader UI If a display is calibrated and the calibration enabled, the display will use special icon in display list and (VIOSO)-prefix to indicate that the display is using Vioso-calibration.
-
Page 92: Color Correction (Display)
USER MANUAL USER MANUAL 8.9 Color correction (Display) USER MANUAL 8.9.1 Adjust display color USER MANUAL Adjust color correction independently for each display. 1. Go to Displays and select one or more displays in the Display list. USER MANUAL 2. Open the Color Correction panel to set the Gamma, Saturation, Contrast and Brightness levels for each display. -
Page 93: Layers Tab
USER MANUAL USER MANUAL 9 Layers USER MANUAL In the Layers menu, control and program layers. Layers are the elements containing the media, one layer contains one media file. USER MANUAL Note: - The Layer menu is not needed if using external controller (lighting consoles or show control systems). USER MANUAL - Playing back too many large resolution files may cause playback issues or even a unit crash. -
Page 94: Select And Play A Media - Media Selection
USER MANUAL USER MANUAL 9.2 Select and play a media – Media selection USER MANUAL In Media Selection, assign a media to a layer and choose playback mode. 1. Go to Layers and select the layer to control in the Layer list. USER MANUAL 2. -
Page 95: Composition
USER MANUAL USER MANUAL 9.2.3.1 Layer Crossfade USER MANUAL Select the transition between two media played in the same layer. The Media Server starts to play the next media at the same time as the end of the current one for a smooth crossfade. USER MANUAL Crossfade setting Description... -
Page 96: Draw Modes
USER MANUAL USER MANUAL 9.3.1 Draw modes USER MANUAL Draw mode determines how a layer is drawn and how it affects the layers beneath it. The following table describes the different draw modes: USER MANUAL USER MANUAL USER MANUAL USER MANUAL Fig. -
Page 97: Graph
USER MANUAL USER MANUAL Equation: L1+L2-1 USER MANUAL Linear burn Variant of the Subtract mode. The result is a darker image. USER MANUAL USER MANUAL Equation: 1-(1-L1)x(1-L2) Screen Opposite of the multiply mode. The result is a USER MANUAL brighter image. USER MANUAL Table 6 - Draw modes USER MANUAL... -
Page 98: Color Correction (Layer)
USER MANUAL USER MANUAL 9.4 Color correction (layer) USER MANUAL Adjust color correction independently for each layer. 1. Go to Layers and select one or more layers to control in the Layer list. USER MANUAL 2. Open the Color Correction panel to set the Gamma, Saturation, Contrast and Brightness levels for each display. -
Page 99: Audio Channel Mixer (Optional)
USER MANUAL USER MANUAL 9.6 Audio channel mixer (optional) USER MANUAL Note: - Audio is grayed-out if Audio configuration is not enabled in Configuration mode. - If the audio mode is set to Automatic audio channel routing, the audio card channels are listed based on the audio card prioritization. USER MANUAL (see 5.1.7 Audio configuration (optional) page 33). -
Page 100: Using Effects
USER MANUAL USER MANUAL 9.7 Using Effects USER MANUAL In Effect1(Fx1) and Effect2(Fx2), use effects on the media in the layers (keying, blur, waves, glow, etc.). Two effects per layer can be used at the same time and both panels are identical. USER MANUAL Note: Effect1 is applied on the layer before Effect2. - Page 101 USER MANUAL USER MANUAL Effect Image Description USER MANUAL USER MANUAL Reshape the layer into a 3D sphere. Adjust 3D Sphere USER MANUAL rotation speed and axes. USER MANUAL USER MANUAL Uses this layer as the Fill Layer for alpha USER MANUAL Alpha Fill keying when using the Alpha Key effect (see...
- Page 102 USER MANUAL USER MANUAL Effect Image Description USER MANUAL USER MANUAL Create a color key compositing function with Chromakey inverse USER MANUAL inverse values to the Chromakey effect. USER MANUAL USER MANUAL USER MANUAL Reduce the number of colors and hues used Comic in the layer, creating a comic book-like effect.
- Page 103 USER MANUAL USER MANUAL Effect Image Description USER MANUAL USER MANUAL Detect edges in the layer by adding blur and Edge Laplace subtract the result from the original layer USER MANUAL image gradually using the mixing parameter. USER MANUAL USER MANUAL USER MANUAL Detect edges in the layer by adding blur and Edge Laplace add...
- Page 104 USER MANUAL USER MANUAL Effect Image Description USER MANUAL USER MANUAL Modify the layer from continuous colors to Halftone advanced single-colored USER MANUAL dots. Adjust dots size, background color and alpha channel. USER MANUAL USER MANUAL USER MANUAL Add a large amount of blur by comparing Heavy blur surrounding pixels with a large radius.
- Page 105 USER MANUAL USER MANUAL Effect Image Description USER MANUAL USER MANUAL Create a luminance key compositing function Lumakey for the layer, making the bright areas USER MANUAL transparent. USER MANUAL USER MANUAL USER MANUAL Create a luminance key compositing function Lumakey inverse with inverse values to the Lumakey effect.
- Page 106 USER MANUAL USER MANUAL Effect Image Description USER MANUAL USER MANUAL Blur and color the outer border of the layer. Quick border Similar to the Edge blur effect with more USER MANUAL parameters. USER MANUAL USER MANUAL USER MANUAL Blur the layer by smearing pixels around the Radial blur center point.
- Page 107 USER MANUAL USER MANUAL Effect Image Description USER MANUAL USER MANUAL Tiles Create scaled-down, tiled copies of the layer. USER MANUAL USER MANUAL USER MANUAL USER MANUAL Add a distortion on the layer resembling a Water ripple ripple on water. Add distortion to the layer to create the Wave impression of waves.
-
Page 108: Alpha Fill And Alpha Key - Cut & Fill
USER MANUAL USER MANUAL 9.7.1 Alpha Fill and Alpha Key – Cut & Fill USER MANUAL Create a Cut & Fill effect using Alpha keying to limit the way the fill layer is displayed. Note: The lower layer is always the Alpha Fill layer and the upper layer is always the Alpha Key layer. USER MANUAL Tip: To use Cut &... -
Page 109: Geometry
9.10 Set default show on server boot – Export show USER MANUAL Use Export to set the current show as a default show. This show will be loaded every time the Picturall Series USER MANUAL Media Server is turned on. When starting with exported show, Playback 1 automatically starts playing assigned cue stack if any is assigned. -
Page 110: Presentation
USER MANUAL USER MANUAL 1 0 Program a Show - Cue USER MANUAL USER MANUAL USER MANUAL USER MANUAL USER MANUAL USER MANUAL Fig. 92 - Cues panel In the Cue menu, create presets of Layers (with their parameters) and order them with timing settings. A cue holds visual and non-visual information about the state of one or more layers. - Page 111 USER MANUAL USER MANUAL USER MANUAL USER MANUAL USER MANUAL USER MANUAL USER MANUAL Fig. 93 - Cue timing example The previous example shows two cues: Cue 1 and Cue 2. USER MANUAL Cue 1 has an intensity value of 100. Cue 2 has an intensity value of 0.
-
Page 112: Trigger
USER MANUAL USER MANUAL 10.1.3 Trigger USER MANUAL A trigger is the transition from one cue to the next inside a cue stack. These are the different types of triggers: Manual: The user must click the Go button to trigger the next cue. USER MANUAL Automatic: The next cue is triggered after the previous cue has been completed (wait + fade + hold). -
Page 113: Edit A Cue
USER MANUAL USER MANUAL 10.2.2 Edit a Cue USER MANUAL All the created cues are available in the Cue List. To edit a cue: Select a cue in the Cue list, Cue stack or Playback. USER MANUAL Click Edit. The Cue content is copied to the Programmer. Make adjustments on the layer controls. -
Page 114: Timing And Running Cues In Playback
10.4 Timing and Running Cues in Playback USER MANUAL Picturall Series Media Servers can run up to eight cue stacks simultaneously using the eight different playback areas in the cue system. Separate playbacks are useful for example to play different sequences of media on USER MANUAL different displays. -
Page 115: Example Without Cue Tracking
USER MANUAL USER MANUAL 10.5.1 Example without cue tracking USER MANUAL Without cue tracking, jumping from Cue 1 to Cue 4 only executes Cue 4 and ignores Cues 2 and 3. The only parameter that changes is the x position. USER MANUAL USER MANUAL USER MANUAL... -
Page 116: Full Tracking
USER MANUAL USER MANUAL 10.5.4 Full tracking USER MANUAL With full tracking, the server resets the show to the beginning of the playback and jumps to the target cue while applying all changes from the first cue to the target cue of the jump. Full tracking ignores and removes USER MANUAL all manual changes that happened during the playback. -
Page 117: Triggering Cues With Timecode
USER MANUAL USER MANUAL 10.6 Triggering cues with Timecode USER MANUAL The Picturall media server supports many kinds of timecode providers, which can be used timecode, schedule and synchronize several different server functionalities. Supported timecode providers include: USER MANUAL • Server internal wallclock •... - Page 118 USER MANUAL - The Input offset adjusts the offset applied to incoming timecode to this playback. USER MANUAL - The Output offset adjusts the offset which is applied to timecode signal outgoing from this playback. USER MANUAL - Network items can be connected to a remote timecode provider on a different Picturall media server. To connect or disconnect network item, right-click the item.
-
Page 119: Set Trigger Timecoded With System Wallclock
USER MANUAL USER MANUAL 10.6.2 Set trigger timecoded with System Wallclock USER MANUAL The Wallclock timecode provider emits the server time and date. It can be used to run cues at set times or even more complex scheduling patterns. USER MANUAL - Select a cue stack playback and select Wallclock as timecode provider. -
Page 120: Media Layer & Cue Stack Playback As Timecode Providers
USER MANUAL USER MANUAL 10.6.3 Media layer & Cue stack playback as timecode providers USER MANUAL Media layers can be used as timecode providers for cue stack playbacks. The layers carry the timecode of the currently playing media. If no media is playing, the timecode provider value does not update, and no USER MANUAL timecoded trigger can occur. -
Page 121: Timecode Generator
USER MANUAL USER MANUAL 10.6.4 Timecode generator USER MANUAL Timecode generators can be used to generate timecode and emit it to connected timecode targets. Set the timecode generator by opening the menu below the cues or from the top icon row. USER MANUAL USER MANUAL Fig. -
Page 122: Linear Timecode (Ltc)
USER MANUAL USER MANUAL 10.6.6 Linear timecode (LTC) USER MANUAL Linear Timecode (LTC) is an encoding of SMPTE timecode data in an audio signal. LTC inputs can be configured from the web configurator in Configuration > LTC configuration (see 4.1.4 LTC configuration page 28). USER MANUAL The defined LTC inputs can be set as timecode provider from the Picturall Commander timecode menu. -
Page 123: Synchronizing Layer Timecode Over Network
USER MANUAL USER MANUAL 10.6.7 Synchronizing layer timecode over network USER MANUAL Synchronize layer timecode between two Picturall media servers from the Picturall Commander timecode menu. Up to four network timecode synchronization sources can be configured under the Network timecode USER MANUAL provider list. - Page 124 USER MANUAL USER MANUAL Supported scheduling conditions for repeat within day: USER MANUAL • Enabled • Every X hours/minutes/seconds USER MANUAL • Stop time USER MANUAL Common scheduling conditions: USER MANUAL • Start date • Start time (mirrors timecode) USER MANUAL Scheduling conditions can be combined in arbitrary ways.
- Page 125 USER MANUAL The system automatically suggests the date and time when the menu is opened based on the server time USER MANUAL settings. USER MANUAL - Edit the start date by clicking on the calendar button and setting the start time by typing in the USER MANUAL value or from the time drop down list.
-
Page 126: Playback Schedule View
USER MANUAL USER MANUAL 10.7.1 Playback schedule view USER MANUAL Playback view contains a table icon which opens/closes playback schedule view. - The schedule view shows each scheduled cue and when the cue will be played according to the schedule. USER MANUAL - The schedule column in cue stack playback summarizes the entry schedule (if defined). -
Page 127: Show Example
USER MANUAL USER MANUAL 10.8 Show example USER MANUAL Let us create a simple show in which one media layer is playing in the background and another layer is on top of it with a logo (still image) on it. Using cues, the logo will move from the left side of the projection area to USER MANUAL the right side. -
Page 128: Cue Macro
USER MANUAL USER MANUAL 10.10 Cue macro USER MANUAL A cue macro is an action associated to a Cue or a Cue stack. Note: - Cue macro and Layer macro are different concepts. USER MANUAL - A saved show (.pcf file) containing Cue macros can only be loaded on Picturall Commander from version 2.6 and onwards. USER MANUAL 10.10.1 Cue macro and Cue stack macro USER MANUAL... -
Page 129: Cue Macro Actions
USER MANUAL USER MANUAL 10.10.2 Cue macro actions USER MANUAL Tip: A little “M” appears next to the Cue number (or Cue stack number) to indicate that a Cue macro is enabled. When creating a Cue macro, the following window opens and four macro actions are available: USER MANUAL Trigger a specific cue Trigger a specific playback... -
Page 130: Edit Or Remove A Cue Macro
USER MANUAL USER MANUAL 10.10.2.4 Macro content and Custom macro command USER MANUAL When creating a cue macro, the content of the macro is displayed in the Macro content section. USER MANUAL USER MANUAL USER MANUAL Fig. 115 - Macro content USER MANUAL Cue macros are written in Lua scripting language, and support complex interactions. -
Page 131: Automatic Show Start On System Start Up
USER MANUAL USER MANUAL 10.11 Automatic show start on system start up USER MANUAL It is possible to start a show (cue stack) on system start up using an entry macro. Create an entry macro for a cue stack which is needed to run immediately after a system has booted up USER MANUAL (without separately triggering a cue in Commander). -
Page 132: Save A Show
USER MANUAL USER MANUAL 1 1 Miscellaneous USER MANUAL 11.1 Save a show USER MANUAL Save a show to recover it or to reuse it on another computer using Picturall Commander. USER MANUAL 1. Run Picturall Commander. 2. Go to File > Save show. USER MANUAL 3. -
Page 133: Framelock Menu On Front Panel Display
USER MANUAL USER MANUAL 11.2.4 Framelock menu on front panel display USER MANUAL GPU sync status can be verified from the server front panel display. Press the Next/Status button on the front panel to show the Framelock menu. The OLED display menu shows the status of House sync, sync rate USER MANUAL and the sync status of each available output card. -
Page 134: Toggle View
USER MANUAL USER MANUAL 11.3.1 Toggle view USER MANUAL On the top left of the Performance tab toolbar are the view buttons: USER MANUAL Toggle between graph and table view, or both of them side by side horizontally or vertically. USER MANUAL 11.3.2 Refresh USER MANUAL... -
Page 135: Control Model
USER MANUAL USER MANUAL 11.5 Control Model USER MANUAL The Control Model is a tree structure of all the control groups, the controls and the attributes in them. Control model can be useful when integrating the server into custom control systems. USER MANUAL USER MANUAL USER MANUAL... -
Page 136: User Maintenance - Air Filter
Tip: For optimal performance, this air filter must be cleaned by the user regularly (once a year). USER MANUAL The Picturall Series Media Server is equipped with a removable air filter at the front of the media server. 12.1.1 Air filter cleaning - Picturall Twin, Quad and Pro USER MANUAL Note: This user maintenance is applicable to both First generation and Mark II series. -
Page 137: Troubleshooting
USER MANUAL USER MANUAL 12.3 Troubleshooting USER MANUAL The network cannot connect to a Picturall Mark II media server Make sure to use a 1GB network connection. USER MANUAL Picturall Commander installation failure USER MANUAL Make sure to install the latest version of Picturall Commander as it corrects all known issues USER MANUAL Layer control >... - Page 138 USER MANUAL USER MANUAL APPENDICES USER MANUAL Appendix A. DMX chart USER MANUAL DMX Chart - Layer full USER MANUAL LAYER SIZE AND POSITION: USER MANUAL Composition canvas has coordinates from 0,0 to 1,1 with 0,0 being the bottom left corner USER MANUAL Layer default position is 0.5, 0.5 (32768, 32768 in DMX values).
- Page 139 USER MANUAL USER MANUAL Default Home/ Name Description Values Values description COARSE FINE Value locate value USER MANUAL 31404 – 32767 Layer downscaling, 0.75 x – 1 x 32768 Layer original aspect ratio, 1 x USER MANUAL 32769 - 34587 Layer upscaling, 1 x –...
- Page 140 USER MANUAL USER MANUAL Default Home/ Name Description Values Values description COARSE FINE Value locate value USER MANUAL Default 129 – 255 Increase Red USER MANUAL Brightness Green 0 – 255 0 – 127 Reduce Green USER MANUAL Default USER MANUAL 129 –...
- Page 141 USER MANUAL USER MANUAL Default Home/ Name Description Values Values description COARSE FINE Value locate value USER MANUAL Reserved Reserved No value No value Reserved Reserved No value No value USER MANUAL USER MANUAL RANGES: Parameter Value Name Description USER MANUAL Draw mode Additive Add layer intensities...
- Page 142 USER MANUAL EFFECTS: USER MANUAL FX NAME Library Index Parameter 1 Parameter 2 Parameter 3 Parameter 4 Parameter 5 Parameter 6 USER MANUAL Wave Amplitude Amplitude aspect Frequency Frequency aspect Speed Water Ripple Size USER MANUAL Blur Size Heavy blur Blur size USER MANUAL Gaussian blur...
- Page 143 USER MANUAL DMX Chart - Layer mini USER MANUAL USER MANUAL LAYER SIZE AND POSITION: Ranges are same as in full layer USER MANUAL DMX COARSE DMX FINE NAME USER MANUAL Intensity USER MANUAL Rotation USER MANUAL Scale USER MANUAL Aspect Draw mode Media index...
- Page 144 USER MANUAL USER MANUAL Default Home/ Name Description Values Values description COARSE FINE Value locate value USER MANUAL DN + Layer borders Layer numbers (disables Display numbers) USER MANUAL DN + Blue background DN + Canvas grid USER MANUAL DN + Canvas lines all (horizontal, vertical, diagonal) USER MANUAL DN + Canvas lines only horizontal DN + Canvas lines only vertical...
- Page 145 USER MANUAL DMX Chart - Display USER MANUAL Default Home/ Name Description Values Values description USER MANUAL COARSE FINE Value locate value Display position 0 – 255 USER MANUAL Display not affected by setup, keeps previously set values 1 – 254 Display position.
- Page 146 USER MANUAL USER MANUAL Appendix B. BIOS setup USER MANUAL Press the Del button on startup to access BIOS settings. Tip: Load default settings and reboot the server before modification (Exit > Load Setup Defaults). USER MANUAL Here are the default Pro BIOS settings: USER MANUAL Advanced >...
- Page 147 USER MANUAL USER MANUAL Appendix C. Optimize GPU resolution and drawing performance USER MANUAL This chapter describes how to optimize the GPUs performance when positioning displays. C.a. Definitions USER MANUAL GPU Output board consisting of two outputs. USER MANUAL Output Physical output connector. Display estination where the picture will be displayed.
- Page 148 USER MANUAL USER MANUAL C.d. Calculating pixels USER MANUAL Drawing is done independently on all GPUs and each GPU draws only the part of the canvas that is needed by all the displays connected to that GPU. Then GPU draws one rectangular area that covers all the displays. USER MANUAL GPU allocates drawing area that has same resolution as all outputs combined.
- Page 149 USER MANUAL GPU_w = 2 _ 1280 = 2560 Then: USER MANUAL GPU_h = 1024 0.18 ��������ℎ ∶ 2560 × = 460 USER MANUAL Total_w = 1 1.00 Total_h = 0:28 0.10 ℎ������ℎ�� ∶ 1024 × = 365 USER MANUAL Display 2 w = 0:18 and h = 0:10.
- Page 150 USER MANUAL USER MANUAL Appendix D. Picturall Server communication protocol specifications USER MANUAL D.a. Locating Pro on network USER MANUAL Pro listens to multicast group 224.0.0.180 port 11009. When it receives message "HELLO", it responds with a UDP packet containing following data: USER MANUAL /** Structure for Pro identification over network.
- Page 151 USER MANUAL USER MANUAL D.c. Control model USER MANUAL Pro has three layers of control abstractions: objects, controls and parameters. Objects are independent units that implement some parts of Pro’s functionality. Objects usually have some user controllable parameters to USER MANUAL control functionality.
- Page 152 USER MANUAL "Parameter" text (always the same) USER MANUAL Name of the parameter USER MANUAL Parameter type Parameter description USER MANUAL undefined Default value USER MANUAL Minimum value (only for numbers) Maximum value (only for numbers) USER MANUAL Table 11 - Fields in parameter descriptions USER MANUAL Looking at the above, you can see that there are 7 controls, although you might be interested in only some...
- Page 153 USER MANUAL Additive USER MANUAL Replace USER MANUAL Subtract Darken USER MANUAL Lighten Multiply USER MANUAL Linear burn Screen USER MANUAL Table 13 - Draw modes USER MANUAL D.d.b. Playback information USER MANUAL When video is playing on any layer, the source for layer actively updates Source / info control. D.d.c.
- Page 154 USER MANUAL USER MANUAL D.e.c. Control status USER MANUAL Control status message is generated either by directly requesting it by running command ctrl_status or by changing a parameter in control. For example, if you change layer intensity from lighting console, you USER MANUAL should get control status message to all clients connected to Pro.
- Page 155 USER MANUAL USER MANUAL D.e.e. Object list USER MANUAL Object list is result of enum_objects. It lists objects and their object ID:s. It is used to translate object IDs to object names. USER MANUAL Message content is list of all the objects in object_number:object_name format separated by \n. USER MANUAL Example message (linefeeds added for better readability and message is clipped): MSG(100002, 1, 15, 101:gl_help:\n102:canvas1:\n103:artnet1:\n104:encoder:...
- Page 156 USER MANUAL USER MANUAL D.f.c. enum_objects USER MANUAL This command sends a list of objects defined in the Pro show. The list is sent both as human readable format and as a message. USER MANUAL D.f.d. loglevel USER MANUAL This command allows the client to specify whether debugging log messages and human readable messages from commands should be sent to this client.
- Page 157 USER MANUAL USER MANUAL D.g. system and system_bg USER MANUAL These commands execute arbitrary command as Linux shell command. Difference between system and system_bg is that system blocks while the command is running and then gives all of the command output in USER MANUAL one message.
- Page 158 USER MANUAL USER MANUAL Appendix E. Cue macro Lua API USER MANUAL E.a. Lua related console commands USER MANUAL lua cmd Execute given piece of lua code, quotation marks must be escaped with a backslash. USER MANUAL For example, lua "dmesg(\"hello\"); dmesg(\"world\")" USER MANUAL lua_file filepath Execute given Lua script from the filesystem.
- Page 159 USER MANUAL function get_object_controls(object) -> table USER MANUAL Returns a table containing names of all the controls in an object. USER MANUAL Parameters: USER MANUAL object string: Name of the object to use USER MANUAL If an argument with an invalid type is given, error is raised. USER MANUAL function connect(output, output_id, input_name,...
- Page 160 USER MANUAL If the parameter does not exist on the object, is returned. USER MANUAL If an argument with an invalid type is given, error is raised. USER MANUAL function set_pda_value_by_index(object, control, parameter, index, value) -> USER MANUAL Similar to set() but assigns value to an array type parameter USER MANUAL...
- Page 161 USER MANUAL function runcue(cue_number) -> USER MANUAL Run the specified cue. USER MANUAL Parameters: USER MANUAL cue_number number: Number of the cue to run. USER MANUAL function transaction() -> TransactionObject Returns a new transaction object. USER MANUAL Transaction objects can be used to change values of multiple parameters USER MANUAL in a synchronized manner.
- Page 162 USER MANUAL USER MANUAL E.c. Cue macro Lua functions USER MANUAL Following functions are available inside custom cue macros USER MANUAL function print_macro_info() -> Log information about the current cue macro. USER MANUAL function cue_wait_fade() -> Sleep until previous cue has started fading. USER MANUAL function cue_wait_hold() ->...
- Page 163 Appendix F. Interact with web pages sources (mouse and keyboard) USER MANUAL Analog Way Picturall Media Servers support the displaying of web pages. Internally this is handled by the Chromium Embedded Framework. "Web API UIEvents" can be sent to a webpage with the "send_ui_event"...
- Page 164 USER MANUAL USER MANUAL F.b.b. Moving the mouse USER MANUAL send_ui_event("source1", "Mouse Move 800 600") USER MANUAL The website received the UI event as: OnConsoleMessage: type:mousemove, x:800, y:600, ctrlKey:false USER MANUAL F.b.c. Clicking the "A" key on keyboard USER MANUAL send_ui_event("source1", "Keyboard KeyDown Name KeyA") USER MANUAL send_ui_event("source1", "Keyboard KeyChar Name KeyA")
- Page 165 USER MANUAL KeyA, Digit1, NumLock, USER MANUAL KeyB, Digit2, NumpadDivide, USER MANUAL KeyC, Digit3, NumpadMultiply, KeyD, Digit4, NumpadSubtract, USER MANUAL KeyE, Digit5, NumpadAdd, KeyF, Digit6, NumpadEnter, USER MANUAL KeyG, Digit7, Numpad1, KeyH, Digit8, Numpad2, USER MANUAL KeyI, Digit9, Numpad3, KeyJ, Digit0, F10, USER MANUAL...
- Page 166 USER MANUAL USER MANUAL F.c.c. Mouse events USER MANUAL [event_message] is of format "Mouse [event_type] [x] [y]" USER MANUAL where [event_type] is one of Move, ButtonLeftDown, ButtonLeftUp, ButtonMiddleDown, ButtonMiddleUp, ButtonRightDown, ButtonRightUp USER MANUAL where [x] [y] are the x y coordinates. Their range is related to the browser window width and height of the webpage, which can be configured in media manager and commander.
- Page 167 USER MANUAL - Set JavaScript to execute when web page is loaded to: USER MANUAL var state_scroll_down = true; USER MANUAL setInterval(function() { var old_y = window.pageYOffset; USER MANUAL window.scrollBy(0, state_scroll_down ? 1 : -1); var new_y = window.pageYOffset; USER MANUAL if (old_y == new_y) { state_scroll_down = !state_scroll_down;...
- Page 168 USER MANUAL USER MANUAL USER MANUAL USER MANUAL USER MANUAL Analog Way Inc. Analog Way SAS - Headquarters Analog Way Ltd Tel.: +1 212 269 1902 Tel.: +33 (0)1 81 89 08 60 Tel.: +852 2967 0428 3047 Summer Oak Place...
- Page 169 USER MANUAL USER MANUAL USER MANUAL USER MANUAL USER MANUAL USER MANUAL USER MANUAL USER MANUAL www.analogway.com...
Need help?
Do you have a question about the Picturall Series and is the answer not in the manual?
Questions and answers