Analog way Picturall Series User Manual
Hide thumbs
Also See for Picturall Series:
- User manual (169 pages) ,
- Quick manual (2 pages) ,
- Quick start manual (2 pages)

Subscribe to Our Youtube Channel
Related Manuals for Analog way Picturall Series


Summary of Contents for Analog way Picturall Series
- Page 1 USER MANUAL USER MANUAL Picturall Series Media Servers (V3.1) References: MST02-R1, MST02-R2, MSTC02-R1, MSTC02-R2, MSQ04-R1, MSQ04-R2, MSQC04-R1, MSQC04-R2, MSP16-R1, MSP16-R2 www.analogway.com...
- Page 2 USER MANUAL Information contained in this document, in particular data, pictures, information, trademarks and logos are exclusive property of Analog Way and are protected by copyrights and other intellectual property rights. 2018, Analog Way, all rights reserved – 01/2021 Consequently, any representation and/or reproduction, in part or in full, is prohibited and would be considered a violation of Analog Way’s copyright and other intellectual property rights.
-
Page 3: Table Of Contents
Optional Hardware ..........................14 2.4.7 External Audio support (optional) ....................... 14 Getting Started ....................15 Precautions when Mounting Picturall Series Media Server ............15 Start the Picturall Series Media Server ..................15 Configuration ....................16 Web configurator ........................16 4.1.1 Dashboard ............................ - Page 4 6.2.6 Encode a media file present on the server ..................37 6.2.7 Encoding media to AWX format without a Picturall Series Media Server ........... 38 Edit server filenames and location ....................39 Add inputs to a media collection ....................39 Add web pages and video streams .....................
- Page 5 USER MANUAL 7.4.2 Reset Display ............................47 Optimize pixel space - GPUs tab ....................47 Edge Blending..........................47 7.6.1 Keystone and Angle Correction ......................47 7.6.2 Edge Blending panel ..........................48 7.6.3 Edge blending example........................48 Adjust curved surface projection - Warp correction ..............49 Color correction (Display) ......................
- Page 6 USER MANUAL Cue Stacks ........................... 68 9.3.1 Create a cue stack ..........................68 9.3.2 Remove a cue from a cue stack ......................68 9.3.3 Change trigger type ..........................68 9.3.4 Order cues in the stack – Index number ....................68 Timing and Running Cues in Playback ..................
- Page 7 USER MANUAL 11.3 Troubleshooting .......................... 90 APPENDICES ........................91 CONTACT INFORMATION .................... 111 www.analogway.com...
-
Page 8: Disclaimer
1.4 Liability Analog Way shall not be liable for any loss or damage, be it direct or indirect in regards to the utility or contents of the software or hardware, except to the extent provided by law. Notwithstanding the above, liability for indirect, special, incidental or consequential loss or damage that may arise in respect of the software or hardware, is expressly excluded. -
Page 9: Introducing Picturall Series Media Servers
Lighting consoles. Picturall Series Media Servers are 19” wide and 4 rack units (4U) high, following the industrial rack mounting standard. The Twin and Quad are also available in Compact versions (2U) with the same number of outputs and the same efficiency as their 4U counterparts. -
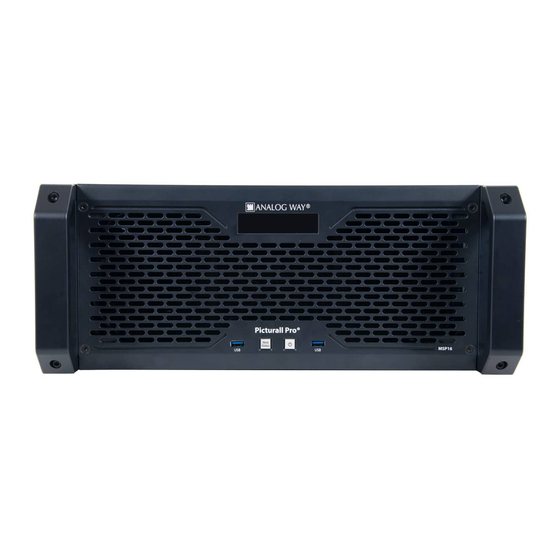
Page 10: Front Panel
USER MANUAL 2.3 Front panel All the Media Servers have the same front panel. It is composed of one OLED display, two USB ports, a Power button and a Next/Status button. Fig. 1 - Front panel 2.3.1 Display screen The front panel displays information such as device IP address, firmware version, or CPU. Press the Next/Status button to wake the display and show server information. -
Page 11: Picturall Twin Rear Panel
USER MANUAL 2.4.1 Picturall Twin rear panel Fig. 2 - Picturall Twin rear panel 1. Power supply (optional redundant and hot-swappable power supplies) 2. Two-channel audio interface with balanced XLR outputs (optional) 3. RS232 plug (optional) 4. Ethernet plug 5. USB plug 6. -
Page 12: Picturall Quad Rear Panel
USER MANUAL 2.4.3 Picturall Quad rear panel Fig. 4 - Picturall Quad rear panel 1. Power supply (optional redundant and hot-swappable power supplies) 2. Two-channel audio interface with balanced XLR outputs (optional) 3. RS232 plug (optional) 4. Ethernet plug 5. USB plug 6. -
Page 13: Picturall Pro Rear Panel
USER MANUAL 2.4.5 Picturall Pro rear panel Fig. 6 - Picturall Pro rear panel 1. Power supply (optional redundant and hot-swappable power supplies) 2. Two-channel audio interface with balanced XLR outputs (optional) 3. RS232 plug (optional) 4. Primary Ethernet plug (left), secondary Ethernet plug (right) 5. -
Page 14: Optional Hardware
USER MANUAL 2.4.6 Optional Hardware The Picturall Series Media Servers can be equipped with various options. Option Description Dual Power supply unit* Redundant, hot-swappable power supplies Audio XLR output Two-channel audio interface with balanced XLR outputs SSD storage device Replaces the default SSD for more storage... -
Page 15: Getting Started
This helps identifying displays and checking the setup is correct. Tip: Connect all displays before starting the media server for the first time. To start the Picturall Series Media Server safely and correctly: 1. Connect the power cable to the server and then plug it into a mains socket. -
Page 16: Configuration
Fig. 7 - Web configurator connection All devices default IP addresses are 192.168.2.140. Note: The Picturall Series Media Server and the computer must be connected to the same network to run the Web configurator. 4.1.1 Dashboard Fig. 8 - Web configurator Dashboard The Dashboard is the home page of the Web configurator. -
Page 17: Server Configuration
USER MANUAL 4.1.2 Server configuration Fig. 9 - Server configuration Set server settings from the Server configuration: Number of layers: Set the number of layers to use and patch to Art-Net (max 200). This affects the number of available layers in Picturall Commander. Max layer width and height: Set the maximum resolution to be processed by the media server. -
Page 18: Ltc Configuration
USER MANUAL 4.1.3 LTC configuration Set the Linear timecode (LTC) sources for playback. Configured LTC sources can be used as timecode providers in Picturall Commander. (see 9.6.6 Linear timecode (LTC) page 7676). Fig. 11 - LTC configuration Note: Audio card is required for LTC. Check that Audio support is enabled in Server configuration Different audio channels can be defined for different incoming Timecodes. - Page 19 Manual: set the output resolution and refresh rate manually o Custom: select a custom display configuration o Special: select a preset mode for display signal splitters (Analog Way DPH104, Matrox TH2GO and DH2GO) 3. If needed, select Signal: HDMI to force the HDMI signal on any DisplayPort output (adapter needed).
- Page 20 USER MANUAL 4.1.4.3 Display division Displays can be divided into grids of virtual displays with Display division. This separates all Displays into independent displays. These displays are affected independently (Keystone, Angle, Crop). This is very useful for complex screens and Led walls. Display division can also be used for setting up display signal splitters such as Datapath X4 and FX4.
-
Page 21: Dmx Configuration
8. Number of DMX displays: Enter the number of the displays controlled with DMX DMX control for the Picturall Series Media Server consists of two elements: layers and master block. The master block controls general functions that are not specific to any layer such as choosing display preset (for more information, see APPENDICES page 91). -
Page 22: Network Configuration
USER MANUAL Universe Layer Universe Layer Layer 1 Layer 19 Layer 2 Layer 20 Layer 3 Layer 21 Layer 4 Layer 22 Layer 5 Layer 23 Layer 6 Layer 24 Layer 7 Layer 25 Layer 8 Layer 26 Layer 9 Layer 27 Layer 10 Layer 28... -
Page 23: Time Settings
USER MANUAL 4.1.6.1 Network configuration for Picturall Pro Fig. 16 - Network configuration (Picturall Pro with dual network interface and 10GB option) Picturall Pro has supports two different networks. Enable the Secure mode to prevent incoming connections. Note: At least one interface must be enabled and at least one interface must be non-secure. An additional 10GB network ethernet interface is available as an option for the Picturall Pro. -
Page 24: Import And Export Configuration
USER MANUAL 4.1.8 Import and Export configuration 4.1.8.1 Export configuration (save) Tip: Export server configuration before updating the Server Software as this deletes Configuration options. To save the current configuration: 1. On a web browser, enter the media server IP address in the address bar. 2. -
Page 25: Format Media Drives - Storage Configuration
In Tools / Format media drives, set the hard drives formatting method. In the following example, a Picturall Series Media Server has two hard drives of 1TB capacity. RAID 0 (striped): 2TB of storage with fastest writing speed. Media drive failure loses all media files. -
Page 26: User Management
USER MANUAL 4.2 User management In Tools > User management, create admin user accounts to prevent other users from accessing server configuration settings, server tools and media manager using the web configurator. Note: - By default and when there is no admin user account created, the access to the server settings has no password restriction. - After adding an admin user account, logging in becomes required immediately. -
Page 27: Media Manager
USER MANUAL 4.3 Media manager Use Media manager to access media collections and media files via the web configurator. Media manager is available in the Dashboard page and in the top bar. Use Media manager to: Create media collections with media files located in the media server local storage •... -
Page 28: Contextual Menus
USER MANUAL Fig. 20 - Upload content to the server folder A transfer dialogue will appear after the files have been selected for upload. 3. Select to maintain the original encoding or to encode the content to AWX formats. After confirming the upload, a transfer progress bar will appear above the Media library indicating the transfer status. -
Page 29: Configuration Mode
USER MANUAL 4.4 Configuration mode The Configuration mode allows the user to configure directly on the media server using a connected keyboard. This mode includes all the functionality of Web configurator. To enter the Configuration mode: 1. Make sure a USB Keyboard is connected to the media server. 2. -
Page 30: Update Server Software
4.5.1 Creating an installation USB stick Tip: Use a high-quality USB memory stick, a low-quality USB memory might cause problems when installing the software. Note: At the moment, the Picturall Series Media Server installer only runs on Windows. On a computer: 1. -
Page 31: Configure Picturall Commander
5 Configure Picturall Commander Fig. 23 - Picturall Commander Picturall Commander is the software used to control the Picturall Series Media Server. This chapter describes the installation and the top-level parts of the Picturall Commander user interface. 5.1 Installing / Updating Picturall Commander Caution: Picturall Commander must always be in the same version as the Server software. -
Page 32: Connecting To Picturall Series Media Server
6. Under Advanced, change the values for Text protocol port and Data protocol port if needed. 7. If needed, uncheck Connect immediately. 8. Click Finish to Create the Connection. A message confirms the connection to the Picturall Series Media Server. -
Page 33: Arrange Windows
USER MANUAL Layers: Control all layer parameters. This is the main menu for controlling the Picturall Series Media Server with Picturall Commander. For more information, see Layers page 50. Layers Graph: Open the Layers Graph in a whole tab for precise adjustment, see Layers page 50. -
Page 34: Media
H.264 • • H.265 • PRKL (also with alpha channel) is a format designed by Analog Way specifically for the Picturall Series Media Servers. Encoding high resolution files (4K and higher) to AWX format is recommended for optimal performance. www.analogway.com... -
Page 35: Importing And Encoding Media Files
USER MANUAL All codecs can be played with nearly any frame rate and bit rate within the server performance limits. Audio is supported in PCM, WAV and AAC formats (up to 24 output channels). 6.2 Importing and encoding Media files Tip: If running Picturall Commander on Windows, it may be needed to disable the firewall to transfer files smoothly. -
Page 36: Import And Encode A File To Awx Format
Tip: Importing media using FTP can slow down the media server. Avoid transferring large files during a show or while making changes to the configuration. To import media through FTP connection, follow these steps: 1. Open an FTP connection to the Picturall Series Media Server. 2. Log in: Username: picmedia Password: aidemcip 3. -
Page 37: Reuse Imported Media Files - Add Server Files To A Media Collection
USER MANUAL 6.2.5 Reuse imported media files - Add server files to a media collection To add media files already present on the server to a media collection, follow these steps: 1. Select a media file in the Server path list. Hold Ctrl or Shift to select multiple files. 2. -
Page 38: Encoding Media To Awx Format Without A Picturall Series Media Server
3. In the Video tab, set video settings and select which AWX codec to use in the Codec dropdown menu. Files encoded to AWX format is ready to be uploaded to a Picturall Series Media Server for playback. Fig. 30 - AWX plugin encoding options... -
Page 39: Edit Server Filenames And Location
6.5 Add web pages and video streams 6.5.1 Add a web page to a media collection Picturall Series Media Servers connected to the internet support web page playback. Multiple web pages can be played at the same time and background transparency is supported. -
Page 40: Import A Web Page Using Ftp
Caution (Risk of server crashing): Do not overwrite files that are playing on the server through an FTP connection. To import a web page through FTP connection, follow these steps: 1. Open an FTP connection to the Picturall Series Media Server. 2. Log in:... -
Page 41: Add A Custom Text
USER MANUAL 6.6 Add a custom text Create a text with custom settings (font, style, size, color and resolution). To add a custom text to a media collection, follow these steps: 1. In the Server path list, under Generators, select Text generator. 2. -
Page 42: Media Crossfade
USER MANUAL 6.8.2 Media Crossfade During a Crossfade, the Media Server starts to play the next media at the same time as the end of the current one for a smooth crossfade. To define the default crossfade setting for one media, click the dropdown in the Crossfade column and select a Crossfade style or right-click a media and select Edit media fading settings. -
Page 43: Displays
USER MANUAL 7 Displays In the Displays menu, configure the displays of the show. Fig. 34 - Picturall Commander Display Menu 1. Select a display from the Display list. 2. At the right of the Display list, there are control panels to adjust the display. Click the tabs (Pos, Proj, etc.) to show or hide the corresponding panels. -
Page 44: Display Menu Icons
USER MANUAL 7.1 Display menu icons Icon Description Show / hide the display list. Select all enabled displays. Enable selected displays. Disable selected displays. Opens the Display wizard to create a group of displays (see Multi-display screen - Display wizard page 46). -
Page 45: Positioning And Grouping Displays
USER MANUAL Test image Description Line width Adjust the line width in a test image using the slide bar. Blue background Show display areas that are not drawn in blue. Use when adjusting Keystone or curved surface correction. Canvas grid Show white continuous grid across the composition. -
Page 46: Multi-Display Screen - Display Wizard
USER MANUAL Tips: - Right-click a parameter and select Edit to enter numerical values. - Position the displays from the same graphics card close to each other to avoid performance loss. - For best performance, disable displays when they are not used. - Copy and paste settings from one display to the other by selecting displays and clicking Copy and Paste buttons. -
Page 47: Reset Display
USER MANUAL 7.4.2 Reset Display Hold Ctrl and click a field to reset the value. Use the Adjustment tab Reset button to reset the corresponding parameter for the selected display. Use the Upper right Reset button to reset all parameters from the selected display. Use the Reset all button to reset all displays. -
Page 48: Edge Blending Panel
USER MANUAL 6. Enable the Display grid test image. 7. Adjust X angle and Y angle controls until the red cross is in the middle of the projection. 7.6.2 Edge Blending panel 1. Open the Test images side panel and enable the Blend areas test image. 2. -
Page 49: Adjust Curved Surface Projection - Warp Correction
USER MANUAL 10. If needed, correct the Gamma and RGB. 11. Open the GPUs menu, click Optimize for best performance. 7.7 Adjust curved surface projection - Warp correction Warp correction transforms the display for curved surface projection or projector lens distortion. There are 16 control points. -
Page 50: Layers
USER MANUAL 8 Layers In the Layers menu, control and program layers. Layers are the elements containing the medias, one layer contains one media. Note: - The Layer menu is not needed if using external controller (lighting consoles or show control systems). - Playing back too many large resolution files may cause playback issues or even a unit crash. -
Page 51: Select And Play A Media - Media Selection
USER MANUAL 8.2 Select and play a media - Media selection In Media Selection, assign a media to a layer and choose playback mode. 1. Go to Layers and select the layer to control in the Layer list. 2. Open the Media panel. 3. -
Page 52: Composition
USER MANUAL 8.2.3.1 Layer Crossfade Select the transition between two media played in the same layer. The Media Server starts to play the next media at the same time as the end of the current one for a smooth crossfade. Crossfade setting Description Layer Crossfade... -
Page 53: Draw Modes
USER MANUAL 8.3.1 Draw modes Draw mode determines how a layer is drawn and how it affects the layers beneath it. The following table describes the different draw modes: Fig. 40 - Draw mode example images Layer 2 (L2) is always on top of Layer 1 (L1). The Draw mode of L1 does not affect L2 (L1 is set to Replace in the following examples). -
Page 54: Graph
USER MANUAL Equation: L1+L2-1 Linear burn Variant of the Subtract mode. The result is a darker image. Equation: 1-(1-L1)x(1-L2) Screen Opposite of the multiply mode. The result is a brighter image. Table 5 - Draw modes 8.3.2 Graph Icon Description Show / hide the layers graph. -
Page 55: Color Correction (Layer)
USER MANUAL 8.4 Color correction (layer) Adjust color correction independently for each layer. 1. Go to Layers and select one or more layers to control in the Layer list. 2. Open the Color Correction panel to set the Gamma, Saturation, Contrast and Brightness levels for each display. -
Page 56: Using Effects
USER MANUAL 8.7 Using Effects In Effect1(Fx1) and Effect2(Fx2), use effects on the media in the layers (keying, blur, waves, glow, etc.). Two effects per layer can be used at the same time and both panels are identical. Note: Effect1 is applied on the layer before Effect2. If Fx1 = Pixelize and Fx2 = 3D Cube, the media is pixelized then rotated with cube effect and vice versa if Fx1 = 3D Cube and Fx2 = Pixelize. - Page 57 USER MANUAL Effect Image Description Reshape the layer into a 3D sphere. Adjust 3D Sphere rotation speed and axes. Uses this layer as the Fill Layer for alpha Alpha Fill keying when using the Alpha Key effect (see Alpha Fill and Alpha Key – Cut & Fill page 63). Uses this layer as the Alpha Key layer for the Alpha Key previous layer (see Alpha Fill and Alpha Key –...
- Page 58 USER MANUAL Effect Image Description Create a color key compositing function with Chromakey inverse inverse values to the Chromakey effect. Reduce the number of colors and hues used Comic in the layer, creating a comic book-like effect. Smear the pixels of the layer into a given Directional blur direction.
- Page 59 USER MANUAL Effect Image Description Detect edges in the layer by adding blur and Edge Laplace subtract the result from the original layer image gradually using the mixing parameter. Detect edges in the layer by adding blur and Edge Laplace add subtracts the result from the original layer image.
- Page 60 USER MANUAL Effect Image Description Modify the layer from continuous colors to Halftone advanced single-colored dots. Adjust dots size, background color and alpha channel. Add a large amount of blur by comparing Heavy blur surrounding pixels with a large radius. Inverse Invert the color values of the layer.
- Page 61 USER MANUAL Effect Image Description Create a luminance key compositing function Lumakey for the layer, making the bright areas transparent. Create a luminance key compositing function Lumakey inverse with inverse values to the Lumakey effect. Mask out or crop the layer so only part of it is Mask displayed.
- Page 62 USER MANUAL Effect Image Description Blur and color the outer border of the layer. Quick border Similar to the Edge blur effect with more parameters. Blur the layer by smearing pixels around the Radial blur center point. Blur the layer by smearing pixels around the Radial blur center point and adjust the position of the advanced...
-
Page 63: Alpha Fill And Alpha Key - Cut & Fill
USER MANUAL Effect Image Description Tiles Create scaled-down, tiled copies of the layer. Add a distortion on the layer resembling a Water ripple ripple on water. Add distortion to the layer to create the Wave impression of waves. Table 6 - Effects descriptions 8.7.1 Alpha Fill and Alpha Key –... -
Page 64: Layer Macro
8.10 Set default show on server boot – Export show Use Export to set the current show as a default show. This show will be loaded every time the Picturall Series Media Server is turned on. When starting with exported show, Playback 1 automatically starts playing assigned cue stack if any is assigned. -
Page 65: Program A Show - Cue
USER MANUAL 9 Program a Show - Cue Fig. 42 - Cues panel In the Cue menu, create presets of Layers (with their parameters) and order them with timing settings. A cue holds visual and non-visual information about the state of one or more layers. A cue is a preset with layers settings to create a specific view on the displays. - Page 66 USER MANUAL Fig. 43 - Cue timing example The previous example shows two cues: Cue 1 and Cue 2. Cue 1 has an intensity value of 100. Cue 2 has an intensity value of 0. The intensity starts at 0 and progressively increases to 100 at the fade of Cue 1. After the end of Cue 1, Cue 2 starts.
-
Page 67: Trigger
USER MANUAL 9.1.3 Trigger A trigger is the transition from one cue to the next inside a cue stack. These are the different types of triggers: Manual: The user must click the Go button to trigger the next cue. Automatic: The next cue is triggered after the previous cue has been completed (wait + fade + hold). -
Page 68: Cue Stacks
USER MANUAL 9.3 Cue Stacks A cue stack is a sequence that runs the cues in ascending order. Create as many stacks as needed. For example, a media show in a music concert might have a cue stack for each song. 9.3.1 Create a cue stack 1. -
Page 69: Timing And Running Cues In Playback
9.4 Timing and Running Cues in Playback Picturall Series Media Servers can run up to eight cue stacks simultaneously using the eight different playback areas in the cue system. Separate playbacks are useful for example to play different sequences of media on different displays. -
Page 70: Example Without Cue Tracking
USER MANUAL 9.5.1 Example without cue tracking Without cue tracking, jumping from Cue 1 to Cue 4 only executes Cue 4 and ignores Cues 2 and 3. The only parameter that changes is the x position. Fig. 48 - Jump from Cue 1 to Cue 4 without cue tracking 9.5.2 Example with cue tracking enabled With cue tracking enabled, when jumping from Cue 1 to Cue 4 the server checks all the changes in between Cue 1 and Cue 4. -
Page 71: Full Tracking
USER MANUAL 9.5.4 Full tracking With full tracking, the server resets the show to the beginning of the playback and jumps to the target cue while applying all changes from the first cue to the target cue of the jump. Full tracking ignores and removes all manual changes that happened during the playback. -
Page 72: Triggering Cues With Timecode
USER MANUAL 9.6 Triggering cues with Timecode The Picturall media server supports many kinds of timecode providers, which can be used timecode, schedule and synchronize several different server functionalities. Supported timecode providers include: Server internal wallclock • • Media layer •... -
Page 73: Set Trigger Timecoded With System Wallclock
USER MANUAL 1. Load a Cue Stack in a playback, then click to open the Timecode provider menu. 2. Select the timecode provider for a cue stack playback. The selected timecode provider appears at the bottom of the playback. 3. Right-click a CSE and select Trigger type > Timecode. 4. -
Page 74: Media Layer & Cue Stack Playback As Timecode Providers
USER MANUAL Fig. 55 - Triggering cues with system wallclock 9.6.3 Media layer & Cue stack playback as timecode providers Media layers can be used as timecode providers for cue stack playbacks. The layers carry the timecode of the currently playing media. If no media is playing, the timecode provider value does not update, and no timecoded trigger can occur. -
Page 75: Timecode Generator
USER MANUAL 9.6.4 Timecode generator Timecode generators can be used to generate timecode and emit it to connected timecode targets. Set the timecode generator by opening the menu below the cues or from the top icon row. Fig. 57 - Timecode generator menu locations A timecode generator can also act as a proxy for another timecode provider. -
Page 76: Linear Timecode (Ltc)
USER MANUAL 9.6.6 Linear timecode (LTC) Linear Timecode (LTC) is an encoding of SMPTE timecode data in an audio signal. LTC inputs can be configured from the web configurator in Configuration > LTC configuration (see 4.1.3 LTC configuration page 18). The defined LTC inputs can be set as timecode provider from the Picturall Commander timecode menu. -
Page 77: Scheduling Cues And Playback
USER MANUAL 9.7 Scheduling cues and playback Using Picturall media servers, both single and occurring events can be scheduled based on date and time. Schedule can be defined for a cue in stack or playback. The server supports various conditions for scheduling cue playback. - Page 78 USER MANUAL Fig. 60 - Scheduling a cue: options menu Note: If the server time settings are not correct check the Time settings from web configurator in Set time. The system automatically suggest the date and time when the menu is opened based on the server time settings.
-
Page 79: Show Example
USER MANUAL Fig. 61 - Scheduling a cue: Time zone warning Note: When scheduling cues to run on different days, the playback view lists cues based on their timecode. Next on the cue list might no longer be the next cue to run if it is scheduled for another day. 9.8 Show example Let us create a simple show in which one media layer is playing in the background and another layer is on top of it with a logo (still image) on it. -
Page 80: Live Show Recommendations
USER MANUAL 9.9 Live show recommendations Here a few tips and recommendations for live show setup: Create a cue with all layers stopped and zero intensity then put it at the beginning of the main showcue stack. This way the programming starts from blackout and there are no surprises when jumping back to start of the show. -
Page 81: Cue Macro
USER MANUAL 9.10 Cue macro A cue macro is an action associated to a Cue or a Cue stack. Note: - Cue macro and Layer macro are different concepts. - A saved show (.pcf file) containing Cue macros can only be loaded on Picturall Commander from version 2.6 and onwards. 9.10.1 Cue macro and Cue stack macro 9.10.1.1 Cue macro A cue macro is associated to a cue and affects all CSEs of this cue. -
Page 82: Cue Macro Actions
USER MANUAL 9.10.2 Cue macro actions Tip: A little “M” appears next to the Cue number (or Cue stack number) to indicate that a Cue macro is enabled. When creating a Cue macro, the following window opens and four macro actions are available: Trigger a specific cue Trigger a specific playback Send a network command... -
Page 83: Edit Or Remove A Cue Macro
USER MANUAL 9.10.2.4 Macro content and Custom macro command When creating a cue macro, the content of the macro is displayed in the Macro content section. Fig. 63 - Macro content Cue macros are written in Lua scripting language, and support complex interactions. For example, a single custom macro can be used to trigger multiple cues and playbacks and send a network command. -
Page 84: Automatic Show Start On System Start Up
USER MANUAL 9.11 Automatic show start on system start up It is possible to start a show (cue stack) on system start up using an entry macro. Create an entry macro for a cue stack which is needed to run immediately after a system has booted up (without separately triggering a cue in Commander). -
Page 85: 0 Miscellaneous
USER MANUAL 1 0 Miscellaneous 10.1 Save a show Save a show to recover it or to reuse it on another computer using Picturall Commander. 1. Run Picturall Commander. 2. Go to File > Save show. 3. Select a folder and enter a filename. 4. -
Page 86: Performance
USER MANUAL 10.3 Performance Fig. 67 - Performance menu In the Performance menu, monitor the performance of the system as graphs. Use the Enabled checkboxes to show/hide the corresponding graphs. Tip: These metrics are useful to show potential problems. Graph Description Average workload. -
Page 87: Toggle View
USER MANUAL 10.3.1 Toggle view On the top left of the Performance tab toolbar are the view buttons: Toggle between graph and table view, or both of them side by side horizontally or vertically. 10.3.2 Refresh On the top right corner, set refresh rate, turn refreshing on/off and manually refresh the graphs. 10.3.3 Color In the Color column in the table, click the […] buttons on every row to set the color scheme of the graph view. -
Page 88: Control Model
USER MANUAL 10.5 Control Model The Control Model is a tree structure of all the control groups, the controls and the attributes in them. Control model can be useful when integrating the server into custom control systems. 1. Open both the Control Model and Properties tab. 2. -
Page 89: 1 User Maintenance And Troubleshooting
Tip: For optimal performance, this air filter must be cleaned by the user regularly (once a year). The Picturall Series Media Server is equipped with a removable air filter at the front of the media server. 11.1.1 Air filter cleaning - Picturall Twin, Quad and Pro Tools: Torx T20 screwdriver, duster or vacuum. - Page 90 USER MANUAL 11.3 Troubleshooting Picturall Commander installation failure Make sure to install the latest version of Picturall Commander as it corrects all known issues Layer control > Advanced: Dropdown menus are not visible Make sure to use the latest version of Picturall Commander as it corrects all known issues Unable to Connect to the Server Verify that the server and the computer running Picturall Commander are using the same netmask.
- Page 91 USER MANUAL APPENDICES Appendix A. DMX chart PICTURALL V3.1 DMX Chart - Layer full LAYER SIZE AND POSITION: Composition canvas has coordinates from 0,0 to 1,1 with 0,0 being the bottom left corner Layer default position is 0.5, 0.5 (32768, 32768 in DMX values). Position coordinate is the layer center point coordinate.
- Page 92 USER MANUAL Default Home/ Name Description Values Values description COARSE FINE Value locate value 31403 4:3 -> 16:9 conversion, 0.75 x 31404 – 32767 Layer downscaling, 0.75 x – 1 x 32768 Layer original aspect ratio, 1 x 32769 - 34587 Layer upscaling, 1 x –...
- Page 93 USER MANUAL Default Home/ Name Description Values Values description COARSE FINE Value locate value 0 – 127 Reduce Red Default 129 – 255 Increase Red Brightness Green 0 – 255 0 – 127 Reduce Green Default 129 – 255 Increase Green Brightness Blue 0 –...
- Page 94 USER MANUAL Default Home/ Name Description Values Values description COARSE FINE Value locate value Reserved Reserved No value No value Reserved Reserved No value No value Reserved Reserved No value No value RANGES: Parameter Value Name Description Draw mode Additive Add layer intensities Replace Replace lower layer...
- Page 95 USER MANUAL EFFECTS: FX NAME Library Index Parameter 1 Parameter 2 Parameter 3 Parameter 4 Parameter 5 Parameter 6 Wave Amplitude Amplitude aspect Frequency Frequency aspect Speed Water Ripple Size Blur Size Heavy blur Blur size Gaussian blur Blur size Radial Blur Size Amount...
- Page 96 USER MANUAL PICTURALL V3.1 DMX Chart - Layer mini LAYER SIZE AND POSITION: Ranges are same as in full layer DMX COARSE DMX FINE NAME Intensity Rotation Scale Aspect Draw mode Media index Media library Media mode Audio Volume Reserved PICTURALL V3.1 DMX Chart - Master Default...
- Page 97 USER MANUAL Default Home/ Name Description Values Values description COARSE FINE Value locate value DN + Control points DN + Selected display grid DN + Layer borders Layer numbers (disables Display numbers) DN + Blue background DN + Canvas grid DN + Canvas lines all (horizontal, vertical, diagonal) DN + Canvas lines only horizontal DN + Canvas lines only vertical...
- Page 98 USER MANUAL PICTURALL V3.1 DMX Chart - Display Default Home/ Name Description Values Values description COARSE FINE Value locate value Display position 0 – 255 Display not affected by setup, keeps previously set values 1 – 254 Display position. Display within grid size is enabled. Display out of grid is disabled.
- Page 99 USER MANUAL Appendix B. BIOS setup Press the Del button on startup to access BIOS settings. Tip: Load default settings and reboot the server before modification (Exit > Load Setup Defaults). Here are the default Pro BIOS settings: Advanced > SATA Configuration > SATA Mode > AHCI Mode Advanced >...
- Page 100 USER MANUAL Appendix C. Optimize GPU resolution and drawing performance This chapter describes how to optimize the GPUs performance when positioning displays. C.a. Definitions GPU Output board consisting of two outputs. Output Physical output connector. Display estination where the picture will be displayed. For example, it could be a single display or a projection surface composed of one or several outputs.
- Page 101 USER MANUAL C.d. Calculating pixels Drawing is done independently on all GPUs and each GPU draws only the part of the canvas that is needed by all the displays connected to that GPU. Then GPU draws one rectangular area that covers all the displays. GPU allocates drawing area that has same resolution as all outputs combined.
- Page 102 USER MANUAL 0.18 GPU_w = 2 _ 1280 = 2560 Then: �������� ���� ���� ℎ ∶ 2560 × = 460 1.00 GPU_h = 1024 0.10 Total_w = 1 ℎ�������� ���� ℎ���� ∶ 1024 × = 365 0.28 Total_h = 0:28 Display 2 w = 0:18 and h = 0:10.
- Page 103 USER MANUAL Appendix D. Picturall Server communication protocol specifications D.a. Locating Pro on network Pro listens to multicast group 224.0.0.180 port 11009. When it receives message "HELLO", it responds with a UDP packet containing following data: /** Structure for Pro identification over network. * All strings use UTF-8 character encoding and are always null terminated if * not otherwise specified.
- Page 104 USER MANUAL D.c. Control model Pro has three layers of control abstractions: objects, controls and parameters. Objects are independent units that implement some parts of Pro’s functionality. Objects usually have some user controllable parameters to control functionality. They are grouped into different controls. Controls contain any number of parameters. Parameters are basic controllable entities and they can be of different types: Int 64bit signed integer Double floating point value...
- Page 105 USER MANUAL "Parameter" text (always the same) Name of the parameter Parameter type Parameter description undefined Default value Minimum value (only for numbers) Maximum value (only for numbers) Table 10 - Fields in parameter descriptions Looking at the above, you can see that there are 7 controls, although you might be interested in only some of them.
- Page 106 USER MANUAL Additive Replace Subtract Darken Lighten Multiply Linear burn Screen Table 12 - Draw modes D.d.b. Playback information When video is playing on any layer, the source for layer actively updates Source / info control. D.d.c. Draw modes Layer draw mode is defined in Composer / draw_mode. Draw modes are described in table 9 D.e.
- Page 107 USER MANUAL D.e.c. Control status Control status message is generated either by directly requesting it by running command ctrl_status or by changing a parameter in control. For example, if you change layer intensity from lighting console, you should get control status message to all clients connected to Pro. Find the object that the controls belong to by translating messages source field from number to object name as specified in section D.E Message contents are strings that lists controls and their current values in a format that is compatible with...
- Page 108 USER MANUAL D.e.e. Object list Object list is result of enum_objects. It lists objects and their object ID:s. It is used to translate object IDs to object names. Message content is list of all the objects in object_number:object_name format separated by \n. Example message (linefeeds added for better readability and message is clipped): MSG(100002, 1, 15, 101:gl_help:\n102:canvas1:\n103:artnet1:\n104:encoder: \n105:mtc:\n140:fx_info:\n175:layer1:\n176:source1:\n180:audio1:\n181:...
- Page 109 USER MANUAL D.f.c. enum_objects This command sends a list of objects defined in the Pro show. The list is sent both as human readable format and as a message. D.f.d. loglevel This command allows the client to specify whether debugging log messages and human readable messages from commands should be sent to this client.
- Page 110 USER MANUAL D.g. system and system_bg These commands execute arbitrary command as Linux shell command. Difference between system and system_bg is that system blocks while the command is running and then gives all of the command output in one message. system_bg on the other hand runs the command on background sending one MSG for each line the command outputs as it is available.
- Page 111 USER MANUAL CONTACT INFORMATION The Americas Europe, Middle East & Africa Asia Pacific Analog Way SAS - Headquarters Analog Way Inc. Analog Way Ltd Tel.: +33 (0)1 81 89 08 60 Tel.: +1 (678) 487 6644 Tel.: +852 2967 0428...
- Page 112 USER MANUAL www.analogway.com...
Need help?
Do you have a question about the Picturall Series and is the answer not in the manual?
Questions and answers