Table of Contents
Advertisement
Advertisement
Table of Contents

Related Manuals for Leica M6


Summary of Contents for Leica M6
- Page 1 LEICA M6 Instruction manual M6/EN/2022/10/1...
-
Page 2: Foreword
Leica M6. Please read this manual thoroughly to familiarize yourself with the full scope of functions your camera has to offer. – Leica M6 You can find all information about the Leica M6 whenever you need – Camera bayonet cover it at https://M6.leica-camera.com. -
Page 3: Replacement Parts / Accessories
Please read the chapters “Legal information”, “Safety remarks”, and “General information” before using your camera for the first Please contact Leica Customer Care or visit the Leica Camera AG time. Knowledge of the content will prevent inadvertent damage website for information on the extensive range of Leica replacement to the product, possible injuries and other risks. -
Page 4: Legal Information
Leica Camera AG. In that respect, Leica Camera AG reserves the right to changes and errors. The im- ages in this manual may depict accessory, special features or other items that are not part of the standard scope of delivery or service. - Page 5 Due to the amount of creativity that has gone mental requirements of applicable EU guidelines. into its design, we ask for your understanding that Leica Camera AG must protect its intellectual property, including patents, trademarks and copyrights, and that possession of the documentation does not...
-
Page 6: Safety Remarks
SAFETY REMARKS • Rubber and plastics are known to expel aggressive chemicals and should therefore not be kept in contact with the camera for extended periods of time. GENERAL INFORMATION • Prevent any sand or dust or water penetration into the camera, e.g. - Page 7 A battery can still be hazardous, FLASH even if it can no longer power the device. • The use of incompatible flash units with your Leica M6 may result FIRST AID in irreparable damage to the camera and/or the flash unit.
-
Page 8: General Information
GENERAL INFORMATION FILM • Ensure that the ISO value of the film is set correctly on the ISO Please read the section about “Care/Storage” for more information setting dial. about what to do in case of problems. • Have your exposed film developed directly. CAMERA/LENS •... -
Page 9: Warranty
In addition to your statutory warranty rights regarding your dealer, you will receive an additional Leica Camera AG product warranty valid from the date of purchase at an authorized Leica retailer. Pre- viously, the product warranty was included with the product in the packaging. -
Page 10: Table Of Contents
TABLE OF CONTENTS REWIND LOCKING LEVER ..................24 IMAGE FIELD SELECTOR ..................25 FOREWORD .................... 2 REPLACING THE FILM PACK ................25 OPENING/CLOSING THE CAMERA................26 SCOPE OF DELIVERY ................2 COCKING THE SHUTTER ..................27 REPLACEMENT PARTS / ACCESSORIES ..........3 REWINDING THE FILM PACK .................27 LEGAL INFORMATION................ - Page 11 LEICA CUSTOMER CARE..............48 LEICA ACADEMY .................49 Definition of the various categories of information found in this manual Note Additional information Important Failure to comply with instructions may result in damage to the camera, the accessories or the recordings Attention Non-compliance may result in personal injury...
-
Page 12: Part Designations
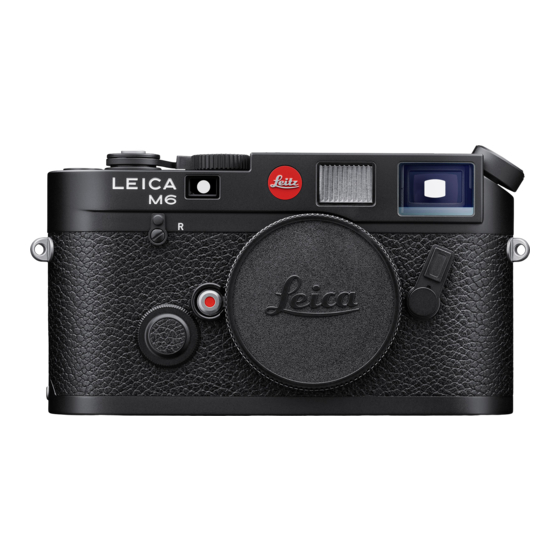
PART DESIGNATIONS PART DESIGNATIONS... - Page 13 LEICA M6 Shutter button Film advance lever Shutter-speed dial with stop positions Alignment point for shutter-speed dial Accessory shoe Fold-out rewind crank Strap lugs Exposure counter Rewind locking lever Rangefinder window Illuminating window for bright-line frame Viewfinder window Image field selector...
- Page 14 LENS* Lens hood Aperture ring with scale Index for aperture values Focus ring Focus tab Fixed ring Alignment point for focusing Depth of field scale Alignment button for lens replacement * Not included in the delivery. Representative image. Technical designs may vary depending on included features.
-
Page 16: Displays
DISPLAYS Bright-line frame Metering field for focusing LED display – Concurrently as light balance for exposure compensation. The triangular LEDs give the direction of rotation of the aperture ring and shutter-speed dial to adjust the exposure. – Warning before the measuring range is undercut (triangular LED on the left) Battery warning indicator DISPLAYS... - Page 17 BATTERY WARNING INDICATOR Die Battery warning indicator in the viewfinder indicates the charge level of the battery while the shutter button is tapped and held. Display Charge level Only the light balance The charge level of the appears. battery/batteries is good.
-
Page 18: Preparation
PREPARATION INSERTING/REMOVING THE BATTERY The Leica M6 requires two silver oxide coin batteries (PX76/SR44) or one lithium battery (DL1/3N) for exposure metering. ATTACHING THE CARRY STRAP Fig. 1 Fig. 2 ▸ Unscrew the cover over the battery compartment in counter-clock-... -
Page 19: Lens
LEICA M LENSES extended, i.e. never attempt to retract the tube while the lens Most Leica M lenses can be used with any lens equipment (with or is attached to the camera. This does not apply for the current without 6-bit encoding in the bayonet). -
Page 20: Changing The Lens
CHANGING THE LENS DETACHING LEICA M LENSES ATTACHING ▸ Hold the lens by the fixed ring ▸ Press and hold the release button on the camera housing ▸ Turn the lens counter-clockwise until the alignment button is op- ▸ Hold the lens by the fixed ring posite the release button ▸... -
Page 21: Diopter Compensation
• Please note the information provided on the Leica homepage for the selection on an appropriate correction lens. • Please note that the default viewfinder setting of the Leica M6 is -0.5 diopter. If you wear eye glasses with 1 diopter, you will need a correction lens with +1.5 diopter. -
Page 22: Camera Operation
CAMERA OPERATION SHUTTER-SPEED DIAL The shutter-speed dial features a stop between the positions 1000 . It clicks into place at each of the engraved positions. Interme- CONTROL ELEMENTS diate positions outside the click positions must not be used. Please read the section “Exposure” (see p. 34) for details about exposure SHUTTER BUTTON settings. -
Page 23: Iso Setting Dial
ISO SETTING DIAL FILM ADVANCE LEVER The sensitivity of the film used must be set to ensure a correct – Film transport to the next exposure exposure metering function. Choose a click value engraved on the – Cocking the shutter release ISO setting dial. -
Page 24: Rewind Crank
REWIND CRANK REWIND LOCKING LEVER – Rewinding the film into the film pack CAMERA OPERATION ▸ CONTROL ELEMENTS... -
Page 25: Image Field Selector
IMAGE FIELD SELECTOR REPLACING THE FILM PACK The inserted film is fully exposed and must be replaced if the shutter can no longer be cocked. Replacing the film pack ▸ Rewinding the exposed film pack (see p. 27) ▸ Removing the exposed film pack (see p. 28) ▸... -
Page 26: Opening/Closing The Camera
OPENING/CLOSING THE CAMERA CLOSE OPEN ▸ Hold the camera with the base facing up ▸ Flip the rear cover closed ▸ Hold the camera with the base facing up ▸ Hook the bottom cover onto the hinge pin on the side of the ▸... -
Page 27: Cocking The Shutter
COCKING THE SHUTTER REWINDING THE FILM PACK The film advance lever has multiple functions: it cocks the shutter ▸ Move the rewind locking lever into the position release, transports the inserted film to the next available exposure ▸ Fold out the rewind crank and moves the counter forward by one. -
Page 28: Removing The Film Pack
REMOVING THE FILM PACK INSERTING THE FILM PACK ▸ Hold the camera with the base facing up ▸ Hold the camera with the base facing up ▸ Open the camera (see p. 26) ▸ Open the camera (see p. 26) ▸... -
Page 29: Advancing To The First Exposure
ADVANCING TO THE FIRST EXPOSURE Important • Do not check the film advance function while the camera is open, ▸ Cock the shutter because the bottom cover is designed to guide the film into the ▸ Shutter release correct position when closed. ▸... -
Page 30: Photography
PHOTOGRAPHY ISO SENSITIVITY The expected shooting conditions and intended use of the images ▸ Ensure that the film sensitivity set on the ISO setting dial matches play a role in choosing the right film sensitivity. the sensitivity of the inserted film –... -
Page 31: Image Composition
The bright-line rangefinder of this camera is not just a very high-quality, large, brilliant and bright viewfinder – it also doubles as a highly precise, lens-coupled rangefinder. All Leica M lenses with focal lengths between 16 and 135 mm are coupled automatically when they are attached to a camera. - Page 32 SHOW ALTERNATIVE IMAGE RANGES/FOCAL LENGTHS 50 mm + 75 mm The relevant bright-line frame will light up in the combinations 35 mm + 135 mm, 50 mm + 75 mm or 28 mm + 90 mm when lenses with a focal length of 28 (Elmarit as of serial number 2 411 001), 35, 50, 75, 90 and 135 mm are used.
-
Page 33: Focusing
FOCUSING SPLIT IMAGE METHOD For an architectural photograph, you might aim the metering field of The rangefinder of this camera is very precise due to its wide and the rangefinder at e.g. the vertical edge or any other clearly defined effective measurement base. -
Page 34: Exposure
EXPOSURE EXPOSURE METERING METHOD The Leica M6 does its exposure metering selectively via the lens with working aperture. The light reflected by a bright round metering dot in the middle of the first shutter curtain is captured and metered by a photodiode. This silicon photodiode with attached converging lens is positioned over the top left of the shutter. -
Page 35: Exposure Metering
EXPOSURE METERING EXPOSURE SETTING Exposure metering is activated by tapping the shutter button. The The correction needed for the right exposure is displayed using the light balance in the rangefinder lights up and continuous measuring light balance consisting of three red LEDs. Only the round LED in the commences. -
Page 36: Challenging Shooting Conditions
CHALLENGING SHOOTING CONDITIONS There are two basic solutions for this problem: – Where possible, carry out exposure metering in another image EXTRA BRIGHT OR DARK OBJECTS section, where the object displays average reflection. Exposure meters are calibrated for a medium gray scale value (18% –... -
Page 37: Objects With Very High Contrast Scope
OBJECTS WITH VERY HIGH CONTRAST SCOPE LONG-TERM EXPOSURE ( The contrast range of an object comprises all levels of brightness setting, the shutter remains open as long as the shutter button from the brightest to the darkest point in the image. The exposure is pressed and held. -
Page 38: Long-Term Exposure
Important the object to the camera. • The use of incompatible flash units with your Leica M6 may result The shortest possible exposure time for shots taken with electronic in irreparable damage to the camera and/or the flash unit. -
Page 39: Attaching Flash Units
ATTACHING FLASH UNITS ATTACHING A FLASH UNIT VIA THE ACCESSORY SHOE Leica M6 offers two flash ports. ATTACHING THE FLASH UNIT – An accessory shoe with center contact for all flash units with a ▸ Switch off the camera and flash unit standard flash shoe is located at the top of the camera. -
Page 40: Care/Storage
CARE/STORAGE • All mechanical bearings and sliding surfaces on your camera are lubricated. Remember to press the shutter button several times We recommend the following if the camera will not be used for an every three months to prevent the lubrication points hardening if extended period of time: the camera will not be used for an extended period of time. - Page 41 • Switch off your camera and leave it to stand at room temperature for around 1 hour if condensation has formed on or in the camera. The condensation will disappear, once the camera temperature has reached room temperature. CARE/STORAGE...
-
Page 42: Index
Battery, notes ................6, 8 B function ..................37 Legal information ................4 Leica Academy ................49 Care ..................... 40 Leica Customer Care ..............48 Carry strap ................7, 18 Lens ..................6, 19, 40 Contact, Leica ................48 Light balance ................35 Customer service ................. - Page 43 Regulatory information ..............5 Repair ................... 48 Replacement parts ................. 3 Rewind crank ................24 Safety remarks ................6 Scope of delivery ................2 Sensitivity, ISO ............... 23, 30 Service ..................48 Shooting mode ................30 Shutter button ................22 Shutter release................
-
Page 44: Technical Data
TECHNICAL DATA 15.2 mm 32.2 mm 34.5 mm 40 mm 79.2 mm 59.4 mm 23.2 mm 68.3 mm 138.6 mm TECHNICAL DATA... - Page 45 Designation Image field limiter: two lit frames: 35 mm + 135 mm, 28 mm + 90 mm, 50 mm + 75 mm (automatic switchover when lens is attached) Leica M6 Optional display of image field frame/bright-line frame Camera type Camera type...
- Page 46 Measuring cell Measuring cell batteries will last for around 100 films with 36 exposures each, which makes for approx. 3600 shots (according to Leica test standards). Silicone photodiode with converging lens at the top left behind the bayonet of the camera...
- Page 48 LEICA CUSTOMER CARE Please contact the Customer Care department of Leica Camera AG for the maintenance of your Leica equipment and for help and advice regarding Leica products and how to order them. You can also con- tact the Customer Care department or the repair service provided by your regional Leica subsidiary for repairs or warranty claims.
- Page 49 LEICA ACADEMY Have a look at our full seminar program with many interesting work- shops on the topic of photography at: https://leica-camera.com/pl-PL/leica-akademie LEICA ACADEMY...
Need help?
Do you have a question about the M6 and is the answer not in the manual?
Questions and answers