Table of Contents
Advertisement
Quick Links
Advertisement
Table of Contents

Related Manuals for Leica M9


Summary of Contents for Leica M9
- Page 1 LEICA M9 Anleitung / Instructions...
- Page 2 1.15 1.14 1.13 1.12 1.12a 1.12b 1.20c 1.20b 1.20a 1.16 1.13a 1.12c 1.26 1.17 1.25 1.18 1.19 1.24 1.23 1.19a 1.22 1.21 1.20 1.10 1.11 1.27 1.28 1.32 1.31 1.29 1.30...
- Page 3 1.39 1.33 1.36 1.35 1.41 1.40 1.42 1.42a 1.37 1.38 1.43 1.44 1.34 1.45...
-
Page 4: Foreword
Foreword 90 / Foreword Dear Customer, Leica would like to thank you for purchasing the LEICA M9 and congratulate you on your choice. With this unique digital view- and rangefinder camera, you have made an excellent selection. We wish you a great deal of pleasure and success using your new LEICA M9. -
Page 5: Fcc Notes
Any changes or modifications not expressly approved by the party responsible for compliance could void the user’s authority to operate this equipment. Trade Name: LEICA Model No.: LEICA M9 Responsible party/ Support contact: Leica Camera Inc. 1 Pearl Count, Unit A Allendale, New Jersey 07401 Tel.: +1 201 995 0051 232... -
Page 6: Table Of Contents
Inserting and removing the memory card ..109 Leica M lenses ......110 Attaching a lens . - Page 7 Flash units ......163 M9 grip....... 163 Correction lenses.
-
Page 8: Warning Messages
Warning messages • Use exclusively recommended accessories to pre- vent faults, short circuits or electric shock. • Do not expose the unit to moisture or rain. • Do not attempt to remove parts of the body (covers); specialist repairs can be carried out only at author- ized service centers. -
Page 9: Scope Of Delivery
Scope of delivery Before using your LEICA M9 for the first time, please check that the accessories supplied are complete. A. Battery B. Charger C. USB connecting cord D. Carrying strap Scope of delivery / 95... -
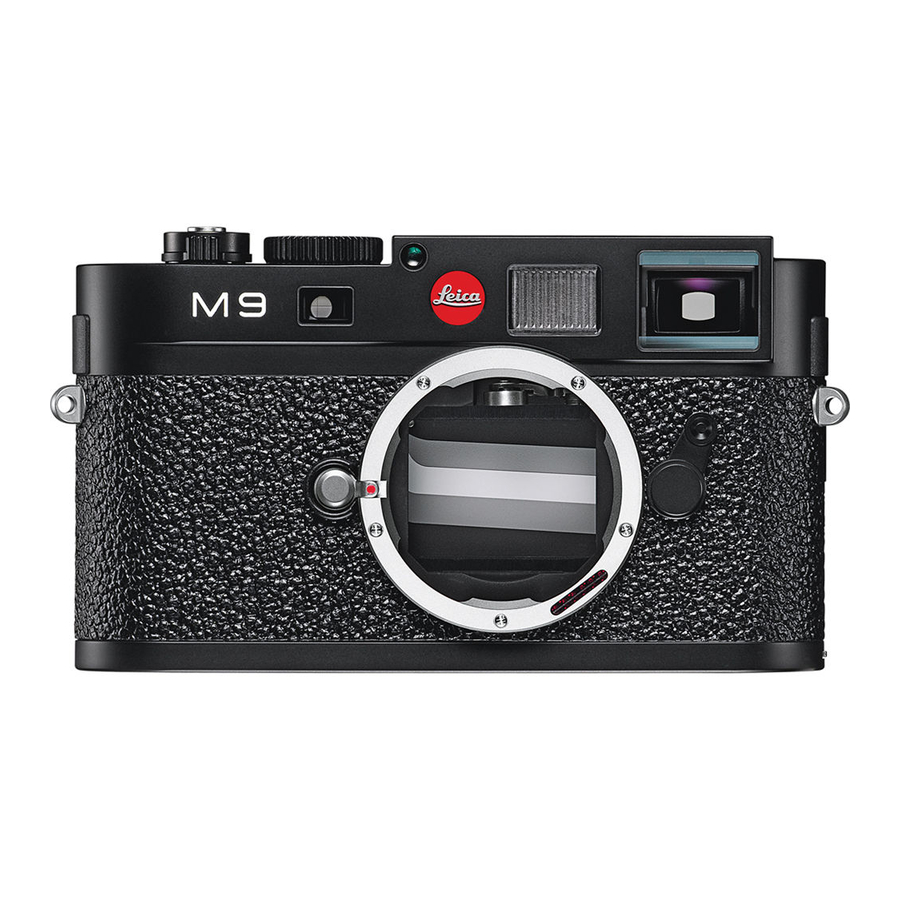
Page 10: Designation Of Parts
1.10 Lens identification sensor 1.11 6-bit lens identification barcode Leica M lenses with viewfinder adapters cover the brightness sensor. Information about the use of these and other lenses can be found in the section “The displays/In the viewfinder”, p. 98, and “Leica M lenses”, p. - Page 11 Rear view 1.21 button for calling up the image parameters menu/calling up sub-menus in the menu system/ saving settings/functions selected in the sub- menus 1.22 INFO button for displaying settings/data in pic- ture mode/image data in review mode 1.23 button for calling up the sensitivity settings 1.24 DELETE button for selecting the delete function...
-
Page 12: Displays In The Viewfinder
Dot below: – Indicates (flashing) that exposure compensa- tion is being used Automatic brightness control is not available for Leica M lenses with viewfinder attachments, as they cover the brightness sensor 1.4, which supplies the information required for this function. In such cases the displays always maintain a constant brightness. -
Page 13: On The Monitor
3.1.1 3.1.2 3.1.3 3.1.4 3.1.5 3.2.1 3.2.2 3.2.3 3.2.4 3.2.5 3.2.6 On the monitor In picture mode (when you press the INFO button, 1.22) 3.1.1 Battery capacity 3.1.2 Remaining memory capacity in MB 3.1.3 Number of pictures remaining 3.1.4 Set/applied shutter speed 3.1.5 Lens type In normal review mode (image/s fill the entire monitor area) - Page 14 Enlargement level or position of section shown (only if set) k. Date/time See “Histogram”, p. 118 Only with the latest Leica M lenses with 6-bit coding, or appropriately modified lenses (see p. 110) or with manual setting in the menu (see p. 124).
-
Page 16: Menu Items
Menu items 102 / Menu items / In the main menu In the main menu (using MENU button, 1.28) Menu item Explanation Lens detection 4.1.1 – 4.1.2 Save user profile User-specific profile (save) Advance 4.1.3 Low vibration shutter release/ Shutter cocking time 4.1.4 Self timer Self timer delay time... -
Page 17: In The Image Parameters Menu
4.2 In the image parameters menu (press SET button, 1.21) Menu item Explanation White balance 4.2.1 – 4.2.2 Compression Compression/file format Resolution 4.2.3 Resolution 4.2.4 Exposure Comp. Exposure compensation (set) 4.2.5 Bracketing Switching on/off User profile 4.2.6 User-specific profile/ snapshot profile (recall) Fixed setting with the snapshot profile Auto... -
Page 18: Quick Guide
Quick guide You will need the following items: – Camera – Battery (A) – Memory card (not supplied) – Battery charger (B) Presets 1. Insert the battery (A) into the charger (see p. 106) 2. Plug in the charger (B), to charge the battery (see p. - Page 19 Viewing pictures For an automatic review of the last picture (when in picture mode): The LEICA M9 is preset for this function – Auto review. Various variations of the function can be selected under this item (4.1.14) in the main menu (see p.
-
Page 20: Detailed Instructions
Attaching the carrying strap 106 / Charging the battery Charging the battery The LEICA M9 is powered by a lithium ion battery (A). Attention: • Only the battery type specified and described in this manual and/or battery types specified and described by Leica Camera AG may be used in the camera. - Page 21 • A new battery only reaches its full capacity after it has been fully charged and – by use in the camera – discharged 2 or 3 times. This discharge process should be repeated every 25 cycles. • To ensure maximum battery service life, it should not be exposed to constant extremes of tempera- ture (e.g.
-
Page 22: Inserting The Battery In The Camera
Inserting/removing the battery into/ from the camera 1. Set the main switch (1.19) to 2. Remove the bottom cover (1.35) of the camera. To do this: a. lift up the toggle (1.36) on the bottom cover, b. turn it to the left, and c. -
Page 23: Inserting And Removing The Memory Card
Inserting and removing the memory card The LEICA M9 saves the picture data on an extremely compact SD (Secure Digital) or SDHC (high capacity) card. SD/SDHC memory cards are small, light and inter- changeable external storage media. SD/SDHC memo- ry cards, particularly those with a high capacity, pro- vide significantly faster read/write times and signifi- cantly faster recording and review of the data. -
Page 24: Leica M Lenses
– Some examples of the Summilux-M 35 mm f/1.4 (not aspherical, manufactured from 1961–1995, Made in Canada) cannot be fitted to the LEICA M9 or will not focus to infinity. Leica Customer Service can modify these lenses so that they can be used on the LEICA M9. -
Page 25: Attaching A Lens
(1.12c) is aligned with the unlocking button. 4. Then pull the lens straight off. Notes: • Since the LEICA M9 should always be protected against ingress of dust etc. into the interior of the camera, it is important always to have a lens or a cap fitted to the camera body. -
Page 26: The Most Important Settings/Controls
Switching the camera on and off/ the main switch 1.19 1.18 The LEICA M9 is switched on and off using the main switch (1.18). This is below the shutter release button (1.19) and is a lever with four detent positions: – Camera switched off This is the inactive position –... -
Page 27: Selecting Picture And Review Modes
Selecting picture and review modes After switching on, the LEICA M9 is always in picture mode, i.e. the monitor (1.32) remains dark once the camera is ready to use (see p. 112). To review the pictures, you can choose between two modes: 1. -
Page 28: Shutter Release Button
Shutter release button 1.19 1.19a The shutter release button (1.19) has three pressure points: 1. Briefly pressing to the first pressure point activates exposure metering and viewfinder displays, and starts a pre-set self timer delay time, if this has been programmed (see p. 157). When you let go of the shutter release button, the metering system and the displays remain activated for around a further 12 s (for more details, refer to... -
Page 29: Series Exposures
Serial exposures As well as taking single pictures - main switch 1.18 set to (S [single]), the LEICA M9 also allows you to take a series of pictures - main switch set to (C [con- tinuous]), e.g. to capture sequences of movements in several stages. -
Page 30: Shutter Speed Setting Dial
116 / Shutter speed setting dial The LEICA M9 shutter speed setting dial is used to select two of the three exposure modes, – Aperture priority mode by setting the position, marked in red (see p. -
Page 31: Monitor
Monitor The LEICA M9 has a large 2.5” liquid crystal color monitor (1.32). This is used for viewing pictures that have been saved on the memory card and reproduces the entire field of the picture plus the selected data and information (see “The displays/In the monitor”, p. -
Page 32: The Histogram
On the Leica M9, you can choose between different versions of the histogram: These are based on either the overall brightness or separately for the three pri-... -
Page 33: Menu Control / 119
Menu control Many settings for the LEICA M9 are controlled using menus (see p. 102/103). In aperture priority and manual exposure modes, two independent menus are available. The main menu is made up of 28 items (4.1.1–28), and there is also a image parameters menu. -
Page 34: Setting The Menu Functions
Setting the menu functions 1. The main menu is called up using the MENU button (1.28); the image parameters menu using the button (1.21). • The first 7 items then appear in the main menu (or all 5 in the snapshot profile) and all items in the image parameters menu. - Page 35 3. To set the relevant function, first press the button – or press it again in the image parameters menu. • The associated multi-line sub-menu, indicated by a red border, appears to the right of the menu item. The item selected at any time is highlighted for identification.
-
Page 36: Presets
Presets Basic camera settings Menu language By factory default, the language used for menu control is English, i.e. all menu items initially appear with their English names. German, French, Spanish, Italian, Jap - anese, Russian and Traditional or Simplified Chinese can all be selected as alternative menu languages. -
Page 37: Automatic Power Off
(1.19). Button acknowledgement and signal tones With the LEICA M9, you can decide whether you want your settings and other functions and warning messages to be acknowledged by an acoustic signal –... -
Page 38: Switching Lens Type Identification On/Off
Basic picture settings Switching lens type identification on/off The 6-bit coding in the bayonet (1.11) on current Leica M lenses allows the LEICA M9 to identify the type of lens. It does this using the sensor in the bayonet flange (1.10), . -
Page 39: Resolution
Resolution The picture data can be recorded in JPEG format with five different pixel settings, i.e. resolutions. This allows you to adjust the setting precisely to the intended use or to the available memory card capa - city. At the highest resolution (which also means the largest data volume), which you should select for optimum quality for larger prints, it is of course possible to save considerably fewer pictures to a card than at the low-... -
Page 40: White Balance
It is based on the LEICA M9 being preset to reproduce a particular color as white. With the LEICA M9, you can choose from ten different settings: – Auto – For automatic control, which delivers neutral results in most situations, –... -
Page 41: For Direct Setting Of Color Temperature
For direct setting of color temperature You can directly set values between 2000 and 13100 ) (from 2000 to 5000 K in increments of 100, from 5000 to 8000 K in increments of 200 and from 8000 to 13,100 K in increments of 300). This provides you with a broad scope, covering almost all color tempera- tures that can occur in practice and within which you can adapt the color reproduction very sensitively to... -
Page 42: Iso Sensitivity
The ISO setting on the LEICA M9 covers a range from ISO 160–2500. Optimum reproduction quality is a - chieved with the ISO 160 setting. Higher sensitivities result in an increasing amount of “picture noise”. -
Page 43: Image Properties/Contrast, Sharpness, Color Saturation
While photo- graphic software – after recording and transfer to a computer – provides great scope for doing this, the LEICA M9 itself allows you to influence three of the most important picture properties even before taking the picture: •... -
Page 44: Working Color Space
(order no. 14 486 black, 14 490 steel gray). • The LEICA M9 is fitted with an integral sensor which detects the position of the camera – horizontal or vertical (both directions) – for each picture. This... -
Page 45: Bright-Line View- And Rangefinder / 131
It has an enlargement factor of 0.68 x. The size of the bright-line frame is optimized for the full format of the LEICA M9 and thus corresponds ap - proximately to the sensor size of 24 x 36 mm with a distance setting of 1 m. -
Page 46: Image Field Selector
132 / Bright-line view- and rangefinder Image field selector The image field selector (1.8) expands the possibilities of the LEICA M9 viewfinder. This built in universal viewfinder allows you to activate bright-lines at any time, which do not belong to the lens currently being used. - Page 47 3 Bilder (Nr. 46-48) wie M8.2, S. 43 50 mm + 75 mm 28 mm+ 90 mm 35 mm + 135 mm Bright-line view and range finder / 133...
-
Page 48: Distance Metering
Distance metering Due to its large effective metering basis, the range - finder on the LEICA M9 is very precise. The benefits of this are particularly noticeable when using wide-angle lenses with their relatively deep depth of field. Mechanical metering basis x viewfinder... -
Page 49: Exposure Metering / 135
Exposure metering On the LEICA M9, exposure metering for the available ambient light is performed through the lens with the working aperture. The light reflected by the bright shutter blades in the first shutter curtain is captured by a photo diode and measured. This silicon photo diode with forward-facing convex lens is positioned at the bottom center, in the case of the camera. -
Page 50: Exposure Modes
Exposure modes The LEICA M9 provides two exposure modes: Aper- ture priority and manual mode. Depending on the sub- ject, situation and your individual preferences, you can thus choose between – the familiar “semi automatic” operation, or – setting a fixed shutter speed and aperture. -
Page 51: Exposure Compensation / 137
EV steps (EV: Expo- sure Value). Setting the function The LEICA M9 provides you with three options for set- ting an exposure compensation. At the same time, you can choose whether you want to make the setting using the menu or the setting dial. - Page 52 Note: An exposure compensation set on the camera only influences the measurement of available light. If you want to simultaneously use compensation of the TTL flash exposure metering in flash mode – in parallel or in the opposite direction, you must make this addition- al setting (on the flash unit).
-
Page 53: Bracketing / 139
In such cases, the bracketing function on the LEICA M9 – in aperture pri- ority mode – allows you to produce several alterna- tives with graduated exposure, i.e. using different shutter speeds. -
Page 54: Manual Exposure Setting
(from around s, dif- fering depending on the other menu settings), the LEICA M9 automatically takes a second “black pic- ture” (taken with the shutter closed). The noise measured in this parallel picture is then digitally “subtracted”... -
Page 55: Setting The Exposure When Using The Snapshot Profile / 141
Setting the exposure when using the snapshot profile In addition to the individual profiles that can be set and saved, the LEICA M9 provides a snapshot profile. In this profile, most menu items have fixed settings that ensure optimum results for the majority of sub- jects. -
Page 56: Exposure Meter Metering Range
Exposure meter metering range The metering range at room temperature, normal humidity and ISO 160/23 is EV 0 to 20 or f/1.0 and 1.2 s to f/ 32 and 1000 142 / Exposure meter metering range/Working above and below the metering range Working above and below the metering range In poor lighting conditions when using manual mode, if the reading is below the exposure meter range, the... -
Page 57: General Information On Flash Exposure Metering And Control
1.20a), can also be used. We recommend the use of modern thyristor-controlled electronic flash units. If flash units not specifically designed for the LEICA M9 are used, the camera white balance will not be automatically adjusted, and setting should be used (see p. 126). As a result, to ensure correct color reproduction you should not use the snapshot profile in such cases. -
Page 58: Attaching The Flash Unit
Attaching the flash unit When attaching a flash unit to the LEICA M9 flash shoe (1.20), you should ensure that the foot of the flash unit is fully inserted and the clamping nut (if fit- ted) is tightened to prevent it accidentally falling out. -
Page 59: Settings For Camera Controlled Automatic Flash Mode
(on the flash unit). • More details of flash use, in particular for other flash units not specially designed for the LEICA M9 and for different flash modes, can be found in the relevant user guides. -
Page 60: In Automatic Flash Mode
The camera is manually set to an shutter speed faster than s. In such cases the LEICA M9 will not fire the flash unit even though it is switched on and ready for use. -
Page 61: Selecting The Sync Speed /Sync Speed Range / 147
Only when using Leica M lenses with 6-bit coding in the bayonet and lens identification enabled in the menu (see p. 102/124/119) 3. down to 1/30s, 4. down to 1/8s and 5. down to 32 s... -
Page 62: Selecting The Firing Moment
(left), which is being overtaken by its own light tracers. The LEICA M9 gives you a choice between this normal flash firing time and synchronization with the end of the exposure, i.e. immediately before the 2 shutter curtain begins to close the frame window again. -
Page 63: Additional Functions
Additional functions User/application specific profiles On the LEICA M9, any combination of all main and image parameters menu settings can be permanently stored, e.g. so that they can be retrieved quickly and easily at any time for recurring situations/subjects. A total of four memory slots are available for such com- binations. -
Page 64: Review Mode
(see p.153/154) is activated • The LEICA M9 stores pictures in line with the DCF standards (Design Rule for Camera File System). • The LEICA M9 can only review pictures taken with cameras of this type. -
Page 65: Viewing More Pictures
B. Enlarging/selecting the section/simultaneous viewing of several reduced pictures With the LEICA M9 it is possible to open an enlarged section of an individual picture in the monitor to study it more closely, with a free choice of section. Con- versely, you can also view up to 9 pictures simultane- ously in the monitor, e.g. - Page 66 Note: You can also switch from an enlarged picture directly to another picture, which will then be shown at the same enlargement. To do this press the left or right PLAY direction button again – keeping the button (1.26) pressed. 152 / Review mode By turning the setting dial to the left (anticlockwise, starting from normal size), you can simultaneously...
-
Page 67: Deleting Pictures
The LEICA M9 also offers you the option of deleting single pictures, or all pictures at the same time, as required. -
Page 68: Protecting Pictures
• If you decide you want to delete them, clear the pro- tection as described below. • Delete protection is only effective for the LEICA M9. • Even protected pictures are deleted if the memory card is reformatted (see next section for details). - Page 69 2. The first step is to decide • whether you want to protect individual pictures Protect Single • all pictures simultaneously Protect • whether you want to clear the existing protec- tion for individual pictures Clear protection Single • for all pictures. Clear protection Note: The following functions cannot be performed and the...
-
Page 70: Additional Functions
As a result, the camera can create a maximum of 999 folders. This counter can be reset at any time. In addition, the LEICA M9 enables you to create new folders and determine their names, i.e. – Reset folder numbers –... -
Page 71: Formatting The Memory Card
Notes: • Do not switch off the LEICA M9 while the memory card is being formatted/overwritten. • If the memory card has been formatted in another device, such as a computer, you should reformat it in the LEICA M9. -
Page 72: Transferring Data To A Computer
2. then select either PTP or Mass storage in the sub- menu. Connecting and transferring data using the PTP protocol Once the LEICA M9 is set to PTP and has been detect- ed by the connected computer, the procedure is as follows: Note:... -
Page 73: With Mac® Os X (10.5)
Mac® OS X (10.5) 1. Use the USB cable supplied (C) to connect the USB socket (1.33) on the LEICA M9 to a free USB port on the computer. To do this, first open the flap (1.25) over the socket on the camera downwards. -
Page 74: Using Dng Raw Data
Adobe Photoshop Lightroom is available as a free download when you register your LEICA M9 on the Leica Camera AG homepage. Further details can be found on the flyer enclosed in the camera packaging. -
Page 75: Installing Firmware Updates
3. Download the firmware file from the Leica M9 site using the “UPDATES” link. 4. Save the file m9-X_xxx.upd at the top level of the card’s folder structure. X_xxx stands for the rele- vant version. 5. Remove the card properly from your card reader, insert the card into the camera and close the bot- tom cover. -
Page 76: System Accessories For The Leica M9
LEICA UV/IR filters specially developed for use on the LEICA M8 and M8.2 should not be used on the LEICA M9, as this can result in color shifts at the edge of pictures, particularly when using wide-angle lenses. 162 / System accessories for the LEICA M9... -
Page 77: Flash Units
LEICA SF 24D flash and other accessories (order no. 14 854 black, 14 855 khaki). System accessories for the LEICA M9 / Replacement parts / 163 Replacement parts Order no. Camera bayonet cover ....14 195 Carrying strap . -
Page 78: Precautions And Care Instructions General Precautions
• If you place the LEICA M9 on or very close to a tel- evision set, its magnetic field could interfere with picture recordings. • The same applies for use in the vicinity of cell phones. -
Page 79: Monitor
Wipe it carefully with a soft dry cloth. • If the LEICA M9 is very cold when switched on, the monitor will initially be slightly darker than normal. It will revert to its normal brightness once it has warmed up. -
Page 80: For Lenses
• Always remove the battery if you will not be using the LEICA M9 for a long period of time. Otherwise, after several weeks the battery could become total- ly discharged, i.e. the voltage is significantly re - duced, as the LEICA M9 uses a low no-load current (to save the date) even when it is turned off. -
Page 81: For The Charger
• Always remove the memory card if you will not be using the LEICA M9 for a long period of time. • Do not touch the connections on the rear of the memory card and keep them free of dirt, dust and moisture. -
Page 82: Cleaning The Sensor
The LEICA M9 can be sent to Leica Camera AG’s Customer Service for the sensor to be cleaned at a cost (address: see p. 177) – this cleaning is not included in the warranty. - Page 83 Important: • Leica Camera AG accepts no liability for damage caused by the user when cleaning the sensor. • Do not attempt to blow dust particles off the sensor cover glass using your mouth;...
-
Page 84: Storage
Storage • If you are not using the LEICA M9 for an extended period of time, we recommend that you: a. switch it off (see p. 112), b. remove the memory card (see p. 109), and c. remove the battery (see p. 122) (after a maxi- mum of 3 months, the time and date will be lost, see p. -
Page 85: Troubleshooting / 171
LEICA M9? Charge the battery or insert a charged battery. 2.2 Is there any condensation? This can occur if the LEICA M9 is moved from a cold place to a warm place. Wait until the condensation clears. 3. The LEICA M9 will not take a picture. -
Page 86: Index
Flash units ......163 M9 grip ....... 163 Universal wide-angle viewfinder M . - Page 87 ISO sensitivity ......128 Lenses, Leica M ......110 Attaching and removing .
-
Page 88: Technical Data And Descriptions
Lens attachment Leica M bayonet with additional sensor for 6-bit coding. Lens system Leica M lenses from 16 to 135mm. Picture format/Image sensor 5270 x 3516 pixels (18.5 MP) CCD chip, active area approx. 23.9 x 35.8 mm 5270 x 3516 pixels (18 MP) (corresponding to usable format of analog Leica M models). - Page 89 On LEICA SF 24D, ± 3 EV in EV- steps with com - puter control, or from 0 to –3EV in 1EV steps/on LEICA SF 58 adjustable in all modes ±3EV in steps. Displays in flash mode Readiness: flash symbol LED in the viewfinder constantly lit;...
- Page 90 Shutter and release Shutter Microprocessor-controlled, exceptionally low-noise metal blade shutter with vertical movement. Shutter speeds For aperture priority ( ) continuous- ly adjustable from 32 s to s. For manual setting 4000 8 s to s in half steps, for long exposures of any 4000 duration (in conjunction with self timer T function, i.e.
-
Page 91: Leica Academy
Fax: +49 (0) 64 42-208-425 la@leica-camera.com Leica on the Internet Current information about products, news, events and the Leica company is available on our homepage on the Internet at: http://www.leica-camera.us http://www.leica-camera.co.uk Leica information service The Leica information service can provide you with an answer to any technical questions relating to the Leica range either in writing, on the telephone or by e-mail. - Page 92 Leica Camera AG / Oskar-Barnack-Str. 11 / D-35606 Solms www.leica-camera.com / info@leica-camera.com Telefon +49 (0) 64 42-208-0 / Telefax +49 (0) 64 42-208-333...
Need help?
Do you have a question about the M9 and is the answer not in the manual?
Questions and answers