Leica M Instruction Manual
A unique digital view and
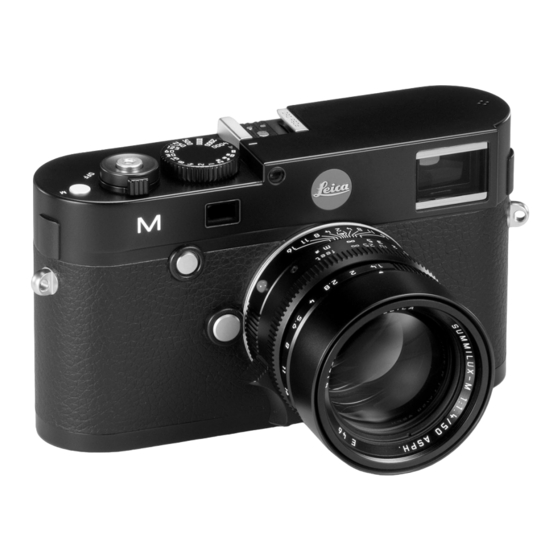
rangefinder camera. leica m lenses with viewfinder attachment cover the brightness sensor.
Hide thumbs
Also See for M:
- Instruction manual (258 pages) ,
- Operating instructions manual (209 pages) ,
- Instructions manual (108 pages)
Table of Contents
Advertisement
Quick Links
Advertisement
Table of Contents

Subscribe to Our Youtube Channel
Related Manuals for Leica M


Summary of Contents for Leica M
- Page 1 LEICA M Instructions...
- Page 4 19. Flash unit shoe Leica M lenses with viewfinder attachment cover the brightness sensor. Information about functions with these and other lenses can be found in the "Displays / In the viewfinder", p. 238, and "Leica M lenses, p. 147 sections.
- Page 6 37. Bottom cover 27. Socket for external electronic viewfinder / microphone adapter (cover removed) (with bottom cover removed) 38. Socket for multifunction M hand grip 28. Brightness sensor for monitor 29. Setting dial 39. Memory card slot – For navigating in the menus 40.
- Page 7 With this unique digital view and to be installed on the camera at a later date. To do this, Leica rangefinder camera, you have made an excellent choice.
- Page 8 LEICA Class B digital device, pursuant to Part 15 of the FCC Rules. These limits are Model No.: LEICA M (Typ 240) designed to provide reasonable protection against harmful interfer ence in a Responsible party/ residential installation. This equipment generates, uses, and can radiate radio Support contact: Leica Camera Inc.
-
Page 9: Table Of Contents
Charging the battery ..............141 Bright line view and range finder ...........171 Replacing the battery and memory card ........144 The monitor ..................173 Leica M lenses ................147 Live view mode ................174 Attaching the lens ..............149 Detaching the lens ..............149 The most important settings / controls ..........150 Turning the camera on and off... - Page 10 Installing firmware updates ............223 Exposure lock .................183 Exposure compensation ............184 Miscellaneous ...................224 Automatic bracketing ..............186 Leica M system accessories ............224 Manual exposure setting ............188 Spare parts ..................227 The B setting / The T function ...........188 Values above and below the metering range .........189 Safety and care instructions ...............228...
-
Page 11: Warning Messages
(conductive, earthed material). You can also avoid soiling and oxidization of the contacts by storing your Leica M in a dry place with the lens or bayonet cover fitted. You should use only the recommended accessories to prevent faults, short circuits or electric shock. -
Page 12: Disposal Of Electrical And Electronic Equipment
DISPOSAL OF ELECTRICAL AND ELECTRONIC EQUIPMENT (Applies within the EU, and for other European countries with segregated waste collection systems) This device contains electrical and/or electronic components and should therefore not be disposed of in general household waste. Instead it should be disposed of at a recycling collection point provided by the local authority. -
Page 13: Quick Guide
QUICK GUIDE YOU WILL NEED THE FOLLOWING ITEMS: – Camera – Battery – Memory card (not supplied) – Charger and mains cable... - Page 14 PREPARATIONS VIEWING PICTURES 1. Charge the battery (see p. 141) The camera is preset to display the last picture automatically for a 2. Insert the battery (see p. 144) short time (see p. 204). 3. Insert the memory card (see p. 146) You can turn on review mode (for an unlimited period) at any time 4.
-
Page 15: Detailed Guide
DETAILED GUIDE ATTACHING THE CARRYING STRAP PREPARATIONS... -
Page 16: Charging The Battery
CHARGING THE BATTERY Note: LED lights up after around 2 hours due to the charging The Leica M is powered by a lithium ion battery. characteristics. The charger should then be disconnected from the mains. There is therefore no risk of overcharging. - Page 17 Only the charger specified and described in this manual (order no. 14 494) is to be used. The use of other chargers not approved by Leica Camera AG can cause damage to the batteries and, in extreme cases, can cause serious or life-threatening injuries.
- Page 18 Even when used in optimum conditions, every battery has a limited service life. After several hundred charging cycles, this becomes The battery should be charged before the Leica M is used for the first time. noticeable as the operating times get significantly shorter.
-
Page 19: Replacing The Battery And Memory Card
REPLACING THE BATTERY AND MEMORY CARD Inserting the battery Set the main switch (1.18) to Important: Do not open the bottom cover or remove the memory card or battery whilst the red LED (33) at the bottom right of the monitor (34) is fl... - Page 20 Charge level displays Compatible memory cards In picture mode, the battery charge level is displayed in the monitor The Leica M saves the pictures on an SD (secure digital), SDHC (high (34) by pressing the button (31). capacity), or SDXC (eXtended capacity) card.
- Page 21 Inserting the memory card Notes: The range of SD/SDHC/SDXC cards is too large for Leica Camera AG to be able to completely test all available types for compatibility and quality. Although using other card types is not likely to damage the camera or the card, some "no name"...
-
Page 22: Leica M Lenses
1961-1995, Made in Canada) cannot be without identifi cation, the Leica M will deliver excellent pictures in fi tted to the Leica M or will not focus to infi nity. The Leica most situations. Customer Care department can modify these lenses so that they To ensure optimum picture quality in these situations, we recommend can be used on the Leica M. - Page 23 2 stops is recommended. Leica M adapter available as an accessory (see p. 224), Leica R By contrast, live view mode (see p. 173) on the Leica M and the lenses can also be used on the Leica M.
-
Page 24: Attaching The Lens
5. Remove the lens. click into place. Notes: Generally: To protect the Leica M against ingress of dust etc. into the interior of the camera, it is important always to have a lens or a cover fi tted to the camera body. -
Page 25: The Most Important Settings / Controls
(see p. 238). Note: The Leica M is turned on and off using the main switch (15). This is After turning on, the camera is ready to use after approx. 1s. below the shutter release (16) and is a lever with four detent... -
Page 26: The Shutter Release
Note: Note: The shutter release button remains blocked If the camera is out of use for an extended period or is stored in a case, always turn it off at the main switch. This prevents any power – if the internal buffer memory is (temporarily) full, e.g. after a series consumption, including that which continues to occur in standby of ≥8 pictures, or mode after the exposure meter is turned off... -
Page 27: Serial Exposures
Serial exposures If review mode (see "Review mode", p. 204) or menu control (see On the Leica M, you can not only take single pictures - by setting the p. 154) was previously active, tapping the shutter release button main switch (15) to ( [single]) - but also series of pictures, by setting immediately switches to picture mode. -
Page 28: Shutter Speed Dial
SHUTTER SPEED DIAL The Leica M shutter speed dial has no stop, i.e. it can be turned in either direction from any position. It detents at all marked positions and at the intermediate values. Values between the detent positions cannot be used. More details on setting the correct exposure can be found in the sections under „Exposure metering”... -
Page 29: Menu Control
MENU CONTROL PICTURE PARAMETERS MENU Many settings on the Leica M are controlled using two separate The picture parameters menu is made up of 8 options. In addition to menus (see p. 246/247). basic picture settings, it contains two options relating to exposure... - Page 30 Setting the menu functions 1. The main menu is called up using the button (21) and the MENU picture parameters menu using the button (20). The first = - page containing the first six options then CAMERA appears in the main menu, and all options in the picture parameters menu.
- Page 31 Notes: 2. You can select the relevant option either using the setting dial (29; turn right = down in menu, turn left = up in menu) or the Using the setting dial is normally not only more convenient but also direction pad (30;...
- Page 32 Note: 4. Select the relevant function option / value, either using the setting dial or by pressing the corresponding direction on the You can exit the menus and sub-menus at any time - without applying direction pad, i.e. the settings made - by pressing the following buttons: –...
-
Page 33: Presets
MENU LANGUAGE SETUP 2. Call up the sub-menu. This is made up of the three options Auto The Leica M is set to English by default. German, French, Spanish, time/time zone Date Time Italian, Russian, Japanese, and Traditional or Simplified Chinese can all be selected as alternative menu languages. - Page 34 For correct time display anywhere in the world: DATE 6. In the same sub-menu select , and There are 3 options available for the sequence of the date. Time zone 7. Select the relevant zone / your current location. The current set difference from Greenwich Mean Time is 3.
-
Page 35: Automatic Power Off
TIME AUTOMATIC POWER OFF The time can either be shown in 24-hour or 12-hour format. This function turns the Leica M off automatically after a preset time. Both the display format and the actual figures are set using the Time... -
Page 36: Signal Tones
SIGNAL TONES With the Leica M, you can decide whether you want warning messages that appear in the monitor and the self-timer countdown to be accompanied by an acoustic signal – two volumes are available - or whether operation of the camera should be largely silent. -
Page 37: Basic Picture Settings
– In addition, the information provided by this 6-bit coding is written The same applies to Leica R lenses, which can be used on the Leica M to the EXIF file for the picture. When displaying extended image with a Leica R adapter M (for further details, refer to the adapter data, the lens focal length is also shown (see p. -
Page 38: Compression Rate/File Format
Using combinations of one of the two JPEG compression rates When using the Leica Tri-Elmar-M 16-18-21mm f/4 ASPH, the set and the set DNG format, i.e. two files are generated per picture. -
Page 39: Resolution
Selecting the DNG compression RESOLUTION 1. In the main menu (see p. 154/246) select The picture data can be recorded in JPEG format at four different DNG compression (page 2, section), and resolutions. This allows you to adjust the setting precisely to the IMAGE 2. -
Page 40: White Balance
Automatic However, if other flash units are used, which are not specially most situations. designed for the Leica M and do not automatically adjust the white – Seven fixed presets for the most frequent light sources: balance, the Flash setting should be used. - Page 41 For direct setting of color temperature 3. Take the picture, making sure that the image field contains a white or neutral gray (reference) surface. You can set values between 2000 and 13100 (K ) directly (from 2000 The monitor shows to 5000K in increments of 100, from 5000 to 8000K in increments of –...
-
Page 42: Iso Sensitivity
ISO SENSITIVITY Setting the function Using the button The ISO setting on the Leica M covers a range of ISO 200 – 6400 in ISO increments, and thus enables you to adapt the shutter speed 1. Press the button (22). - Page 43 To use unrestricted automatic setting When using does not switch to a higher sensitivity 1/Focal length if the shutter speed would fall below the 4. In this sub-menu, select 1/Focal length threshold due to lower brightness, e.g. at slower speeds than By factory default, the automatic setting uses sensitivities up to 1/60s with a 50mm lens.
-
Page 44: Picture Properties / Contrast, Sharpness, Color Saturation
While photographic software – after recording and transfer to a reproduction. computer – provides great scope for doing this, the Leica M itself All three picture properties can be adjusted – independently - to allows you to influence three of the most important picture properties five different levels using the menu, so that you can set the... -
Page 45: Film Styles
FILM STYLES WORKING COLOR SPACE Two of the three film style settings on the Leica M can be used to give The requirements in terms of color reproduction differ considerably your pictures the characteristics of particular earlier film materials, for the various possible uses of digital picture files. Different color e.g. -
Page 46: Bright Line View And Range Finder
The bright-line frame is illuminated by LEDs - with a choice of red or Leica M and thus corresponds to a sensor size of 23.9 x 35.8mm at a white. This enables it to be seen perfectly in all lighting conditions range setting of 2m. - Page 47 Bright-line frames on a viewfi nder camera must be matched to the image angle of the relevant lens focal lengths. However, the nominal image angles change slightly when focusing due to the changing extension, i.e. the distance between the optical system and the sensor plane.
-
Page 48: The Monitor
Notes: With the exception of the menu system (see p. 154) you can The Leica M features a large 3" LCD color monitor (34), protected by (optionally) view all of the displays described in this manual in a glass cover made of exceptionally hard and scratch resistant exactly the same way in an attached electronic viewfinder (the... -
Page 49: Live View Mode
Live view mode is based on the image captured by the sensor. To Live view mode on the Leica M enables you to view the subject in the use it, the shutter must be open and it is closed and re-cocked monitor when taking a picture, with a precise indication of how the when the function is cancelled. -
Page 50: Range Measurement
With the optical range finder The Leica M provides you with various tools for setting the range, Due to its large effective metering basis, the range finder on the Leica M depending on whether you are using the camera's internal optical is very precise. - Page 51 Superimposed image method (double image) Split image method In a portrait, for example, aim the metering field at the eye and turn When taking photographs of architecture, for example, aim the range the distance setting ring on the lens until the contours in the metering finder metering field at the vertical edge or another clearly defined field are brought into line.
-
Page 52: With The Monitor In Live View Mode
For occasional use: The following two functions are also available with Leica R lenses, i.e. 1. Press the focus button (3). not only with Leica M lenses with 6-bit coding and Leica M lenses The monitor image shows selected using the menu. -
Page 53: By Identifying In Focus Subject Details In The Monitor
This function is based on the subject contrast, i.e. light/dark differences. Therefore, subject details that are not completely in In live view mode on the Leica M you can mark subject details with focus but have a high contrast may also be marked. -
Page 54: Turning The Exposure Meter On/Off
TURNING THE EXPOSURE METER ON / OFF Notes: In aperture priority mode, if correct exposure cannot be achieved The exposure meter is turned on by tapping the shutter release (16), using the available shutter speeds, the shutter speed display gives provided the camera is turned on at the main switch (15) and the a warning by flashing (only in the viewfinder, for more details, refer shutter speed dial (18) is not set to... -
Page 55: Exposure Metering Methods
EXPOSURE METERING METHODS Note: In live view mode, the three metering methods are always available, Three metering methods are available on the Leica M: i.e. even if Classic is set. – Strongly center-weighted metering in mode. This method Classic takes account of the entire image field, although the parts of the Selecting the metering method subject situated in the center have more influence on the exposure... - Page 56 Notes: For the metering methods based on the image sensor, the shutter must be open and it is then closed and re-cocked when the function is cancelled. Of course, this is audible and may result in a slight delay in the shutter release. When used frequently, live view mode results in increased power consumption.
-
Page 57: Exposure Modes
– the familiar “semi automatic” operation, or and high ISO values the Leica M automatically takes a second – setting a fixed shutter speed and aperture. “black picture” (taken with the shutter closed). The noise present in this parallel picture is then digitally “subtracted”... -
Page 58: Exposure Lock
However, the brightness. center-weighted metering and spot metering on the Leica M record 2. Press the shutter release button (1.19) to the 1st pressure point predominantly or exclusively an area in the center of the image are to measure and store the value. -
Page 59: Exposure Compensation
In contrast to exposure lock, once set it remains effective until it is reset. On the Leica M, exposure compensation can be set in the range ±3EV in EV increments (EV: Exposure Value). - Page 60 A. Using the menu Important: An exposure compensation set on the camera only influences 1. In the picture parameters menu (see p. 154/246), select metering of the available light, i.e. not flash light (for more information Exposure compensation about flash photography, refer to the sections starting on p. 191). A scale appears in the monitor instead of a sub-menu, with an EV value indicated in red and a white triangle to indicate the Regardless of how the set compensation was originally entered:...
-
Page 61: Automatic Bracketing
Automatic the Leica M enables you to produce several alternatives with below. graduated exposure, i.e. using different shutter speeds. You can then If an exposure compensation is set at the same time, this is select the most suitable picture for further use, or use appropriate indicated by a corresponding value below the scale. - Page 62 Notes: Notes: If the bracketing exceeds the range of ±3EV - due to the The following rule applies when using automatic bracketing: combination of the number of pictures and graduation - the scale The sensitivity determined automatically by the camera for the division changes from ±3EV to ±6EV.
-
Page 63: Manual Exposure Setting
MANUAL EXPOSURE SETTING THE B SETTING / T FUNCTION If the exposure setting is performed entirely manually, the shutter With the setting, the shutter remains open for as long as the shutter speed dial (18) must be clicked to one of the engraved exposure release button is held down (up to a maximum of 60s;... -
Page 64: Values Above And Below The Metering Range
In aperture priority mode, other menu settings) the Leica M automatically takes a second the shutter speed is still displayed. If the required shutter speed is "black picture" (with the shutter closed). The noise present in this less than 60s or more than s, these displays also flash. - Page 65 When using the SCA-3502-M5 adapter, white balance (see p. 165) can be set to Automatic for correct color reproduction. However, if flash units not specially designed for the Leica M are used and do not automatically adjust the white balance on the camera, the setting should be used (see p.
-
Page 66: Flash Mode
Before attaching a flash unit to the flash shoe (19) on the Leica M, In aperture priority mode and with manual setting, the Leica M also –... - Page 67 More details of flash use, in particular for other flash units not the sync speed/the sync speed range", p. 194). The shortest specially adapted to the Leica M and for different flash modes can flash sync speed must be taken into account as this determines be found in the relevant manuals.
- Page 68 A faster shutter speed than s is set manually on the camera. In use: such cases, the Leica M will not fire the flash unit even though it is A faster shutter speed than s is set manually on the camera turned on and ready to use.
- Page 69 1. In the main menu (see p. 154/246), (page 1, Auto Slow Sync. available with the Leica M when using the Leica SF 58 flash unit, with section), and CAMERA all shutter speeds and in aperture priority and manual exposure 2.
- Page 70 SELECTING THE FIRING MOMENT The Leica M allows you to choose between this conventional firing moment and synchronization with the end of the exposure, i.e. Flash photographs are illuminated by two light sources, the available immediately before the 2nd shutter curtain starts to close the image light and the light from the flash.
-
Page 71: Additional Functions
ADDITIONAL FUNCTIONS Distance setting All options described on pages 175-178 VIDEO RECORDINGS Exposure metering methods You can also use the Leica M to produce video recordings. The All options described on page 180 following functions are available: Exposure modes Resolution –... -
Page 72: Sound Recording
1. In the main menu (see p. 154/246) select (page 4, Audio As video recordings on the Leica M are made in 16:9 or (with VGA section). SETUP resolution) in 4:3 format, black strips appear in the monitor. These... -
Page 73: Taking Photographs With The Self-Timer
Manual setting TAKING PHOTOGRAPHS WITH THE SELF-TIMER 3. Set the level using the setting dial (29) - left = lower / right = You can use the self-timer to take a picture with a delay of either 2 or higher - or by pressing up/down on the direction pad (30). This 12s. - Page 74 RECORDING THE LOCATION WITH GPS FOR COPYRIGHT PROTECTION This option is only available if the multifunction hand grip is attached The Leica M enables you to mark your picture files by entering text or (available as accessory, see p. 226). other characters.
- Page 75 Notes on the function: Information for safe use The electromagnetic field generated by the GPS system can influence The GPS aerial is located at the top of the multifunction M hand instruments and measuring equipment. Therefore, make sure the GPS grip.
-
Page 76: Spirit Level
SPIRIT LEVEL USER / APPLICATION SPECIFIC PROFILES Thanks to integrated sensors, the Leica M can represent its alignment On the Leica M, any combination of menu settings can be in the monitor (34). The corresponding display is called up as permanently stored, e.g. - Page 77 SELECTING A PROFILE RENAMING PROFILES 1. In the picture parameters menu (see p. 154/246) select 1. In the picture parameters menu (see p. 154/246) select User User profile profile If user profiles are stored, the profile name appears in gray, 2.
-
Page 78: Resetting All Custom Settings
SAVING PROFILES TO A CARD / RESETTING ALL CUSTOM SETTINGS TRANSFERRING PROFILES FROM A CARD This function allows you to delete all previous custom settings in the 1. In the picture parameters menu (see p. 154/246) select main and picture parameters menus at once, and reset them to the User factory default settings. -
Page 79: Review Mode
REVIEW MODE Notes: Depending on the function previously set, pressing the PLAY To review pictures in the monitor (34) on the Leica M, you can select: button generates different responses: – Review for an unlimited time PLAY Initial situation After pressing the... - Page 80 AUTOMATIC REVIEW OF LAST PICTURE Note: If you have been taking photographs using the picture series function mode, every picture is displayed immediately after it Auto review (see p. 152) in both review modes the last picture in the series or is taken.
- Page 81 Normal review Video review To allow uninterrupted viewing of the pictures, only the information in If a video recording is selected, this is indicated by the header appears in normal review mode If a detail is shown, the header disappears and a corresponding display appears...
- Page 82 To play back a video, press the button (31) to call up the next Select the desired function by pressing right/left on the direction pad INFO view, which contains corresponding control symbols. (30) or using the setting dial (29). It is activated by pressing the button (20), either by pressing it or, for fast forward/rewind, holding it down.
- Page 83 Review with histogram Notes: The histogram is available when viewing both the entire picture and Press the button once (starting from normal review mode), to INFO just one section of it (see p. 208), but not when viewing several display the histogram. It appears in the lower half of the picture. reduced pictures simultaneously (see p.
- Page 84 Review with clipping indicators Setting the function You can use the menu to set the clipping thresholds for displaying 1. In the main menu (see p. 154/246) select Clipping setting both the light and dark areas. (page 3 / section), and SETUP Press the button twice (starting from normal review mode), to...
- Page 85 VIEWING OTHER PICTURES / Review with additional information "SCROLLING" IN THE MEMORY Press the button three times (starting from normal review INFO mode) to display additional picture data and a reduced picture. You can open other saved pictures by pressing left and right on the direction pad (30).
- Page 86 With the Leica M it is possible to open an enlarged section of an individual picture in the monitor to study it more closely, with a free choice of section.
- Page 87 The Leica M allows you to delete single pictures, or all pictures at the By turning the setting dial to the left (starting from normal size), you same time, as required.
- Page 88 Displays after deleting After deleting, the subsequent picture appears. If there are no more pictures saved on the card, the following message appears: Attention No image to display DELETING ALL PICTURES ON THE MEMORY CARD After deleting, the following message appears: Attention No image to .
- Page 89 – or by tapping one of the two shutter release buttons (16/17) to go Protection is only effective on the Leica M. to picture mode. Even protected pictures are deleted if the memory card is reformatted (see next section for details).
- Page 90 Note: Displays after protection / The following functions cannot be performed and the menu text Clearing delete protection appears in dark instead of light gray to indicate this: After completing the process, the original monitor display appears – Protecting a picture that is already protected again, with the corresponding symbol ( ) for protected pictures.
-
Page 91: Additional Functions
, and you can scroll numbering must be reset (see below). through them in an endless loop. On the Leica M you can also create new folders at any time, give them names of your choice and change the file names. - Page 92 CHANGING PICTURE FILE NAMES 4. Confirm your settings - only possible if the eighth character is active - by pressing the button. INFO 1. In the main menu (see p. 154/246) select Image numbering A further sub-menu appears, showing Reset image numbering? (page 4 / section), and SETUP...
-
Page 93: Formatting The Memory Card
If the memory card has been formatted in another device, such as a computer, you should reformat it in the camera. If the memory card cannot be formatted/overwritten, you should ask your dealer or the Leica Information Service (for address, see p. 254) for advice. The X characters are placeholders. -
Page 94: Transferring Data To A Computer
TRANSFERRING DATA TO A COMPUTER USB CONNECTION The Leica M is compatible with the following operating systems: The Leica M allows data to be transferred via a USB cable using two – Microsoft : Windows XP/Vista different standards. It thus takes account of the fact that some ®... - Page 95 OS X (10.5 or higher) ® ® After connecting, a message appears to confirm that the Leica M Once the camera has been successfully connected to the has been detected as new hardware (1st connection only). computer, “USB Connection” appears in the monitor (1.36).
- Page 96 DATA STRUCTURE ON THE MEMORY CARD Note: As long as this function is active, all other camera functions are When the data stored on a card is transferred to a computer, the blocked. following folder structure is used: Important: Up to 9999 pictures can be stored in each of the folders 100LEICA, Use only the USB cable supplied with the hand grip.
-
Page 97: Adobe ® Photoshop ® Lightroom
Leica Image Shuttle is available as a free download when you register your Leica M on the Leica Camera AG home page. Further details can be found in the "Customer Area" under: https://owners.leica-camera.com or on the registration card in the... -
Page 98: Installing Firmware Updates
3. Download the Firmware file from the Leica M site using the “UPDATES” link. 4. Save the file m-X_xxx.upd at the top level of the card's folder structure. X_xxx stands for the relevant version. 5. Remove the card from your card reader and insert it in the... -
Page 99: Miscellaneous
R ADAPTER M EVF2 ELECTRONIC VIEWFINDER The Leica R adapter M allows almost all Leica R lenses to be used on the Leica M, i.e. regardless of the focal length, fixed focal length or The EVF2 delivers almost 100% TTL reproduction of the image field zoom, close up limit, with which actuating cam they are equipped with a resolution of 1.4 megapixels. - Page 100 It can be used without restriction on all analog and digital simplify picture composition when using focal lengths above 35mm. Leica M models and – just like the viewfinder in the camera – uses a They can be used on all Leica M models and magnify the central area reflected bright-line frame to outline the picture area for wide angle...
- Page 101 As a practical accessory, we recommend the M hand grip, which automatically controlled zoom reflector (with coded Leica M lenses, allows you to hold the Leica M extremely steadily and to carry it with see p. 147), an optional second reflector, automatic short one hand.
-
Page 102: Spare Parts
AC ADAPTER FOR MULTIFUNCTION M HAND GRIP lenses. It has enough space for even large lenses and a fitted M hand The mains unit allows the camera to be continuously operated (with grip. -
Page 103: Safety And Care Instructions
If salt water spray gets onto the Leica M, wet a soft cloth with tap monitors, video game consoles, cell phones, radio equipment). water, wring it out thoroughly and wipe the camera with it. Then If you place the Leica M on or very close to a television set, its wipe down thoroughly with a dry cloth. - Page 104 Wipe it carefully with a soft dry cloth. If the Leica M is very cold when it is turned on, the displays may at first appear darker than usual. As soon as it warms up, it will reach its normal level of brightness.
-
Page 105: Care Instructions
FOR THE CAMERA from photographic and optical specialists) that are stored in a Only clean the Leica M with a soft, dry cloth. Stubborn dirt should protective container and can be washed at temperatures of up to first of all be covered with a well-thinned cleaning agent and then 40°C (without fabric softener, never iron!). - Page 106 Leaked fluid can catch fire. Always remove the battery if you will not be using the Leica M for a A safety valve in the battery guarantees that any excess pressure long period of time.
- Page 107 Whilst a picture is being stored or the memory card is being read, it interfere with the reception; make sure there is a distance of at may not be removed, nor may the Leica M be turned off or exposed least 1m between the devices.
- Page 108 Notes: Simple formatting does not cause the data on the card to be irretrievably lost. Only the directory is deleted, which means that the existing files are no longer directly accessible. The data can be accessed again using appropriate software. Only the data that is then overwritten by saving new data is actually permanently deleted.
-
Page 109: Cleaning The Sensor / Dust Detection
SETUP whether cleaning is required. The relevant sub-menu appears. The Leica M can be sent to Leica Camera AG’s Customer Care 2. Select Open shutter department for the sensor to be cleaned at a cost (address: see p. 3. Select . - Page 110 Notes: Important: Generally: To protect the Leica M against ingress of dust etc. into Leica Camera AG accepts no liability for damage caused by the the interior of the camera, it is important always to have a lens or a user when cleaning the sensor.
-
Page 111: Storage
– Is there any condensation? prevent damage to your equipment caused by moisture and any This can occur if the Leica M is moved from a cold place to a warm leather-tanning residue released. place. In this case, wait until To prevent fungal growth during use in hot, humid tropical climates, the condensation has evaporated. - Page 112 – The capacity of the memory card is full. Delete pictures you no longer require before taking new ones. – The Leica M has not been used for a long period, particularly if the battery has been removed. THE MONITOR IS TOO DARK OR TOO BRIGHT.
-
Page 113: Appendix
APPENDIX DISPLAYS IN THE VIEWFINDER... - Page 114 With automatic brightness control adjusted to the ambient brightness. This automatic control is not available for Leica M lenses with viewfinder attachments, since they cover the brightness sensor 1.5 which supplies the information required for their operation. In such cases the frame and displays always maintain a constant...
-
Page 115: Displays
DISPLAYS IN THE MONITOR In live view mode WHEN TAKING A PICTURE Exposure mode Shutter speed Exposure metering method ISO sensitivity Exposure lock Exposure compensation (additional for spot metering) Metering field (in addition to 1-7, for video recordings) Elapsed recording time Recording in progress indicator (flashing) - Page 116 File format / compression / resolution or video format (depending on picture type) Remaining memory capacity / number of pictures or time (depending on picture type) GPS status (only with multifunction M hand grip attached) Self-timer status / delay time Picture histogram (not for video recordings)
- Page 117 In viewfinder mode, by pressing the button INFO (in addition to 1-7/13-21) Battery capacity Memory card capacity...
- Page 118 IN REVIEW MODE (in addition to 24-33, by pressing the button (1.33) for a video Exposure mode INFO recording) Shutter speed Symbol for video playback Exposure metering method Video control symbols Number of picture displayed / Total number of pictures on Elapsed playback time / progress bar memory card ISO sensitivity...
- Page 119 With histogram With clipping displays (as for 24-36, picture areas without marking flash red/blue, (as for 24-36, additional) additional) Histogram (standard or RGB, selectable using menu control) Clipping symbol...
- Page 120 With additional information For menu control (in addition to 28-37, by pressing the button (1.33), INFO Specification of menu, = main menu / MENU reduced picture) = picture parameters menu User profile number / name Specification of menu section (main menu only) Color space Scroll bar with page indication (main menu only) Date...
-
Page 121: Menu Options
MENU OPTIONS MAIN MENU ( button) MENU Section (page 1) (page 3) SETUP CAMERA see p. 173 see p. 162 Monitor Brightness Lens Detection see p. 198 see p. 173 EVF Brightness Selftimer see p. 171 see p. 180 Frameline Color Light Metering Mode see p. - Page 122 PICTURE PARAMETERS MENU ( button) Section (page 5) see p. 167 SETUP see p. 160 see p. 165 Auto Power Off White Balance see p. 158 see p. 163 Date / Time File Format see p. 161 see p. 164 Acoustic Signal JPEG Resolution see p.
-
Page 123: Index
Info Service, Leica ...............254 Depth of field scale ..............136 Interchangeable lenses ............147/224 Designation of parts ..............136 ISO sensitivity ................147 Displays Lenses, Leica M ................247 In the monitor ................240 Attaching and removing..............249 In the viewfinder ................238 Design ..................136 DNG ................... 163/222 Use of older lenses ..............247... - Page 124 Shutter, see Shutter release and Technical data Microphone adapter M ..............227 Monitor ..................173 Shutter release, see also Shutter and Technical data ... 151/252 Multifunction M hand grip ............226 Shutter speed dial ................153 Package contents.................253 Sound recording ................197 Parts, Designation ................136 Sounds (acknowledge (response) tones) ........161...
-
Page 125: Technical Data
Sound recording Mono, Stereo using microphone adapter (see p. 227), choice of Camera type automatic or manual modulation during recording or fixed "Concert" Leica M (Typ 240), compact digital view and range finder system setting, camera. White balance Lens connection ... - Page 126 Leica SF 24D ±3EV in EV increments or from 0 to –3EV in 1EV Exposure mode increments adjustable with computer control / on Leica SF 58 ±3EV Choice of automatic shutter speed control with manual aperture EV increments in all modes.
- Page 127 Split or superimposed image range finder shown as a bright field in linear flash mode possible with all shutter speeds faster than the center of the viewfinder image. (with HSS compatible Leica system flash units). Effective metering basis For video recordings (aperture priority and manual mode): 47.1mm (mechanical measurement basis 69.25mm x viewfinder...
- Page 128 0-40°C Interfaces charging current/voltage: DC, 1100mA/ 8,25V. Charger ISO flash shoe, accessory socket, contact strip for multifunction M Inputs: 100-240V AC, 50/60Hz, automatic switching, or 12V DC, hand grip. Dimensions 1.3A; Output: DC, maximum 8.25V, 1100mA.
-
Page 129: Leica Addresses
LEICA INFO SERVICE We not only manufacture high-performance products for everything The Leica Information Service can provide you with an answer to any from observation to photography, we also offer a special service in technical questions relating to Leica products, including software the form of the Leica Academy, which for many years has been supplied, either in writing, on the telephone or by e-mail. - Page 130 LEICA CUSTOMER SERVICE For servicing your Leica equipment or in the event of damage, the Leica Camera AG Customer Care department or the repair service provided by authorized Leica agents in your country are available (see the warranty card for a list of addresses).
Need help?
Do you have a question about the M and is the answer not in the manual?
Questions and answers