Table of Contents
Advertisement
Quick Links
Advertisement
Table of Contents

Related Manuals for Plustek OpticSlim


Summary of Contents for Plustek OpticSlim
- Page 1 Scanner User’s Guide OpticSlim...
- Page 2 Trademarks © 2022 Plustek Inc. All rights are reserved. No portion of this document may be reproduced without permission. Plustek is a registered trademark of Plustek Inc. OCR processing by ABBYY® FineReader®, © 2022 ABBYY. ABBYY and FineReader are trademarks of ABBYY Software, Ltd.
-
Page 3: Table Of Contents
Table of Contents ....................1 NTRODUCTION How to Use This Guide....................1 Conventions of This Guide ..................2 A Note about Icons ....................... 2 Safety Precautions...................... 2 Minimum System Requirements ................. 3 Box Contents ......................4 The Scanner Overview ....................5 I. -
Page 4: Introduction
NTRODUCTION Thank you for choosing us as your scanner supplier. Your new scanner will improve the professionalism of your day-to-day computing tasks by allowing you to input images and electronic text into your computer system. Like all of our products, your new scanner is thoroughly tested and backed by our reputation for unsurpassed dependability and customer satisfaction. -
Page 5: Conventions Of This Guide
ONVENTIONS OF UIDE Bold —Represents commands or contents on your computer screen. ALL CAPS —Important note or first use of an important term in a chapter. Italic —Represents buttons on your scanner OR important notes. A Note about Icons This guide uses the following icons to point out information that deserves special attention. -
Page 6: Minimum System Requirements
4. Damaged wire could cause fire or electrical shock. Keep the power cord straight and without being twisted, bended, or scraped. 5. Unplug this device if you don’t need to use it for a certain period of time, such as, during night or long weekend, to avoid any risks of causing fire. -
Page 7: Box Contents
ONTENTS 1. Scanner 2. USB Cable 3. AC Adapter 4. Quick Guide 5. Setup/Application CD-ROM Save the box and packing materials in case you need to transport this scanner in the future. The scanner illustration(s) in this manual may appear different than from the actual scanner itself. -
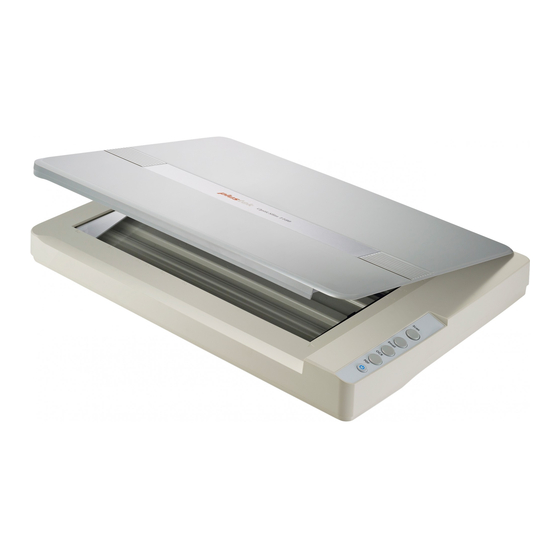
Page 8: The Scanner Overview
CANNER VERVIEW 1. DOCUMENT COVER— Helps keep the paper in place and protects the scanner glass. 2. DOCUMENT PAD— Keeps the paper in place and improves accuracy of image quality. 3. SCANNER GLASS— Where you put items for flatbed scanning. 4. -
Page 9: Chapter I. Installing The Scanner
Your scanner comes with the scanner’s driver and the task management software (Plustek DocAction). All of these software applications use approximately 6 GB of hard disk space after they are installed into your computer. To ensure ample room for the installation, as well as for scanning and saving images, a minimum of 6 GB of hard disk space is recommended. -
Page 10: Installing And Setting Up The Scanner
NSTALLING AND ETTING UP THE CANNER Please follow the step-by-step procedures described below to install the Plustek scanner. Choose a Proper Site First! Always place your scanner on a level, smooth and strong surface before proceeding the scanner setup or any scanning task. Tilted or uneven surface may cause paper-feeding errors, scanner damage or personal injury. -
Page 11: Step 2. Installing The Software
Step 2. Installing the Software 1. Switch on the scanner power from the rear of the scanner. 2. If the USB components on your computer are functioning correctly, they will automatically detect the scanner causing the Add New Hardware Wizard or Found New Hardware Wizard to be launched. -
Page 12: Step 3. Testing The Scanner
b. Click on the Yes button if the User Account Control dialog pops up. Afterwards, please skip to procedure 5. 5. Follow the on-screen instructions to install all software that your new scanner requires. If the pop-up wizard window appears click Next, and click Install this driver software anyway in the Windows Security window then click Finish in the wizard window. -
Page 13: Installing Additional Software
5. Press the File button on the scanner and the scanning starts immediately. You’ll see a scanned image of the document in the default saving folder; your scanner is working properly. NSTALLING DDITIONAL OFTWARE Your scanner is TWAIN compliant and functions with virtually all available TWAIN compatible software. -
Page 14: Chapter Ii. Scanning
II. S HAPTER CANNING Your scanner needs to be driven by certain type of software program. Since all documents or images (whether text or pictures) that are acquired from the scanner are treated by your computer as images, most scanning will probably be done from an image-editing program where you can view, edit, save and output the scanned images. -
Page 15: Scanning Documents
3. Gently close the document cover. CANNING OCUMENTS There are 4 different ways to operate the scanner: 1. By acquiring images from the scanner through our TWAIN interface within any TWAIN-compliant application programs. 2. By scanning from the scan buttons on the scanner. 3. - Page 16 Scan within your TWAIN compatible program: 1. Launch your TWAIN compatible program. If you have more than one scanner or other imaging devices installed on your computer, you need to set this scanner as the default scanning source before you acquire the TWAIN program. Attention Please refer to your TWAIN compatible program manual for more information about the settings.
-
Page 17: Scanning From The Scanner's Panel Or On-Screen Docaction's Execute Menu
may perform the image editing tasks. Click the Help button within the TWAIN window for more information about the settings. Scanning from the Scanner’s Panel or On-screen DocAction's Execute Menu The settings for each button on the scanner's panel are configured through DocAction. -
Page 18: Scanning From The Icon In The Left Side Of The Docaction Window
Place only text documents for OCR purposes. Do not scan a photo using the OCR button. Attention 2. Do one of the following to start scanning: Press the button from the scanner's panel. Right-click the icon in the Windows system tray, and then choose Execute in the pop-up menu that opens. - Page 19 2. Check current button settings by viewing the Button Configuration window. If needed, you may also modify settings to meet your current needs. 3. Double-clicking the desired icon in the left side of the DocAction window. The scanner starts to scan immediately and carry out the corresponding action according to settings you have set up in the Button Configuration window.
-
Page 20: Maintenance
III. C HAPTER ARE AND AINTENANCE Your scanner is designed to be maintenance-free. However, constant care and maintenance can keep your scanner working smoothly. LEANING THE CANNER Paper powder, dust, ink and toner from paper being scanned may make the scanner glass dirty, which leads to poor image quality or document-feeding errors. -
Page 21: Cleaning The Flatbed
Cleaning the Flatbed 1. Open the document cover. 2. Gently wipe the following areas with the cloth dampened with the cleaner. Clean Document Pad & Scanner Glass: Document Scanner Glass 3. Wait for cleaned areas to dry completely. 4. Gently close the document cover. OWER To save power consumption, when the scanning process is finished, the scanner light source will turn itself off and the scanner will enter a lower-power mode without... -
Page 22: Chapter Iv. Troubleshooting
IV. T HAPTER ROUBLESHOOTING If you encounter problems with your scanner, please review the installation and scanning instructions contained in this guide. Before you ask for customer service or repair, please refer to the information in this chapter in which you can find useful self troubleshooting information. CANNER ONNECTION The first step to take when troubleshooting connection problems with your scanner... -
Page 23: Appendix
A: S PPENDIX PECIFICATIONS Plustek OpticSlim 550 Image Sensor Light Source Optical Resolution 600 dpi Hardware Resolution 600 x 600 dpi Color: 48-bit input, 24-bit output Scan Modes Grayscale: 16-bit input, 8-bit output B/W: 1-bit Scanning Speed 3.4 sec (Color Mode, 200dpi, A5) Scanning Area (W x L) 216 mm x 150 mm (8.5”... - Page 24 Plustek OpticSlim 550 Plus Image Sensor Light Source Optical Resolution 1200 dpi Hardware Resolution 1200 x 1200 dpi Color: 48-bit input, 24-bit output Scan Modes Grayscale: 16-bit input, 8-bit output B/W: 1-bit Scanning Speed 1.5 sec (Color Mode, 300 dpi, A5) Scanning Area (W x L) Max.
-
Page 25: Appendix B: Customer Service And Warranty
PPENDIX USTOMER ERVICE AND ARRANTY Visit our website www.plustek.com for more customer service information. To avoid delays, please have the following information available: Scanner name and model number Scanner serial number (located at the bottom of the scanner) Scanner CD version and part number... -
Page 26: Statement Of Limited Warranty
TATEMENT OF IMITED ARRANTY This Statement of Limited Warranty applies only to the options you originally purchase for your use, and not for resale, from an authorized reseller. The manufacturer warranty includes all parts and labor, and is not valid without the receipt of original purchase. -
Page 27: Fcc Radio Frequency Statement
Some jurisdictions do not allow the exclusion or limitations of incidental or consequential damages, so the above limitation or exclusion may not apply to you. This Limited Warranty gives you specific legal rights, and you may also have other rights that vary from jurisdiction to jurisdiction. FCC R ADIO REQUENCY...
Need help?
Do you have a question about the OpticSlim and is the answer not in the manual?
Questions and answers