
Related Manuals for Beko BBIE22300XFP


Summary of Contents for Beko BBIE22300XFP
- Page 1 Built-in Oven User Manual BBIE22300XFP 385441874/ EN/ R.AA/ 19/04/2022 15:50 7757883876...
-
Page 2: Table Of Contents
General Warnings About Cooking Table of Contents in the Oven ........1 Safety Instructions ......6.1.1 Pastries and oven food....25 Intended Use ........ 6.1.2 Meat, Fish and Poultry....27 Child, Vulnerable Person and Pet 6.1.3 Grill..........28 Safety ........... 6.1.4 Test foods ........ - Page 3 Welcome! Dear Customer, Thank you for choosing the Beko product. We want your product, manufactured with high quality and technology, to offer you the best efficiency. Therefore, carefully read this manual and any other documentation provided before using the product.
-
Page 4: Safety Instructions
1 Safety Instructions • This section includes the Intended Use safety instructions necessary • This product is designed to be to prevent the risk of personal used at home. It is not suitable injury or material damage. for commercial use. •... -
Page 5: Electrical Safety
they are supervised or trained • When the door is open, do not about the safe use and haz- put any heavy objects on it or ards of the product. allow children to sit on it. You • Children should not play with may cause the oven to tip over the product. - Page 6 • The product must not be • If the power cable is dam- plugged into the outlet during aged, it must be replaced by installation, repair, and trans- the manufacturer, an author- portation. ized service or a person to be •...
-
Page 7: Transportation Safety
Transportation • Do not install the product near Safety heat sources (radiators, stoves, etc.). • Disconnect the product from • Keep the surroundings of all the mains before transporting ventilation ducts of the the product. product open. • The product is heavy, carry •... -
Page 8: Temperature Warnings
• Flammable objects kept in the • During operation, the product cooking area may catch fire. may become hot. Care should Never store flammable objects be taken to avoid touching hot in the cooking area. parts, inside of the oven and •... -
Page 9: Maintenance And Cleaning Safety
• Food waste, oil, etc. in the oven. The accumulated heat cooking area may catch fire. might damage the bottom of Before cooking, remove such the oven. coarse dirt. • Close the oven door during • Food Poisoning Hazard: Do grilling. -
Page 10: High Temperature Self-Cleaning (Pyrolysis)
• Always keep the control panel • During self-cleaning, smoke clean and dry. A damp and will be released due to the dirty surface may cause prob- burning of food residues. lems in operating the func- Ventilate your kitchen well dur- tions. -
Page 11: Recommendations For Energy Saving
Regulations. Do not dispose of the pack- • In the oven, use dark or enamelled con- aging waste with the household or other tainers that transmit heat better. wastes, take it to the packaging material col- • If specified in the recipe or user’s manual, lection points designated by the local author- always preheat. -
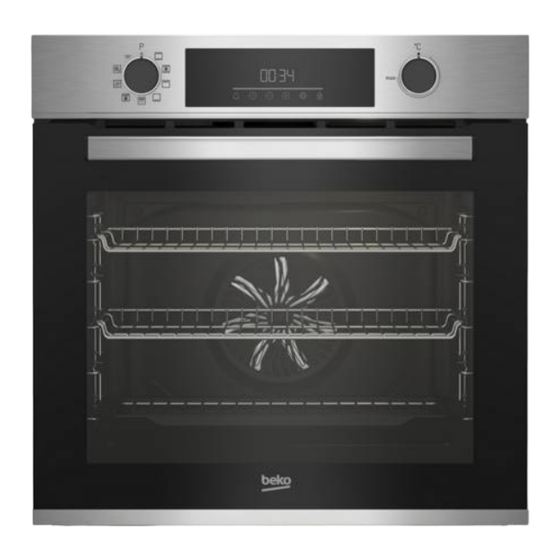
Page 12: Your Product
3 Your product 3.1 Product Introduction 1 Control panel 2 Lamp 3 Wire shelves 4 Fan motor (behind the steel plate) 5 Door 6 Handle 7 Lower heater (under the steel plate) 8 Shelf positions 9 Upper heater 10 Ventilation holes 3.2 Product Control Panel Intro- Varies depending on the model. -
Page 13: Control Panel
3.2.1 Control Panel 1 Function selection knob 2 Timer 3 Temperature selection knob If there are knob(s) controlling your product, Timer in some models this/these knob(s) may be so that they come out when pushed (buried knobs). For settings to be made with these knobs, first push the relevant knob in and pull out the knob. -
Page 14: Product Accessories
set for these functions are shown. The order of the operating modes shown here may dif- fer from the arrangement on your product. Function Temperature Function description Description and use symbol range (°C) Oven lamp No heater works in the oven. Only the oven lamp lights up. The oven is not heated. -
Page 15: Use Of Product Accessories
3.5 Use of Product Accessories Cooking shelves There are 5 levels of shelf position in the cooking area. You can also see the order of the shelves in the numbers on the front frame of the oven. On models with wire shelves : Wire grill It is used for frying or placing the food to be baked, fried and stewed on the desired... - Page 16 On models without wire shelves : It is also crucial to place the trays on the side shelves properly. The tray has one direction when placing it on the shelf. While placing the tray on the desired shelf, its side de- signed for holding must be on the front.
- Page 17 On models without wire shelves : Proper placement of the wire grill and tray on the telescopic rails-On models with wire shelves and telescopic models Thanks to telescopic rails, trays or the wire grill can be easily installed and removed. When using trays and wire grills with the telescopic rail, care should be taken that the pins on the front and back of the telescopic...
-
Page 18: Technical Specifications
3.6 Technical Specifications General specifications Product external dimensions (height/width/depth) (mm) 595 /594 /567 Oven installation dimensions (height / width / depth) (mm) 590 - 600 /560 /min. 550 Voltage/Frequency 220-240 V ~; 50 Hz Cable type and section used/suitable for use in the product min. H05VV-FG 3 x 1,5 mm2 Total power consumption (kW) Fuse (min.) 13 A... -
Page 19: First Use
4 First Use Before you start using your product, it is re- If the first timer is not set, “12:00” commended to do the following stated in the symbol continue to flash and following sections respectively. your oven will not start. For your oven to function, you must confirm 4.1 First Timer Setting the time of day by setting the time of... -
Page 20: Using The Oven
NOTICE: During the first use, smoke and odour may come up for several hours. This is normal and you just need good ventilation to remove it. Avoid directly inhaling the smoke and odours that form. 5 Using the Oven 5.1 General Information on Using 5.2 Operation of the Oven Control the Oven Unit... - Page 21 When the temperature inside the oven : Cooking end time symbol * reaches the set temperature the sym- : Alarm symbol bol disappears and it gives you an aud- : Meat probe symbol * ible warning. The 3-line animation ap- : Key lock symbol pearing on the display stops and the C : Temperature symbol...
-
Page 22: Settings
The cooking time increases by 1 minute in the first 15 minutes and by 5 minutes after 15 minutes. d. Put your food in the oven and set the temperature with the temperature knob. ð Your oven will start operating imme- diately at the selected function and ð... - Page 23 b. Set the alarm time with the keys. b. Set the desired level with the keys. (b-01-b-02-b-03) ð After setting the alarm time, the ð Touch the symbol remains lit and the alarm key for confirmation or time starts to countdown on the wait without touching any key.
-
Page 24: General Information About Cooking
a. Touch the key until the symbol ap- pears on the display. b. Set the time of day by touching the keys. d. Touch the keys to set the minute. c. Touch key to activate the minutes field. e. Confirm the setting by touching the key. -
Page 25: Pastries And Oven Food
Tips for baking cakes 6.1.1 Pastries and oven food • If the cake is too dry, increase the temper- General Information ature by 10°C and shorten the baking • We recommend using the accessories of time. the product for a good cooking perform- •... - Page 26 Food Accessory to be Operating func- Shelf position Temperature (°C) Cooking time used tion (min) (approx.) Round cake mould, 26 cm in Top and bottom Sponge cake diameter with 30 … 40 heating clamp on wire grill Round cake mould, 26 cm in Sponge cake diameter with Fan Heating...
-
Page 27: Meat, Fish And Poultry
Suggestions for cooking with two trays Food Accessory to be Operating func- Shelf position Temperature (°C) Cooking time used tion (min) (approx.) On models with On models with wire shelves : 25 2-Standard tray * wire shelves :150 … 40 Small cakes Fan Heating 2 - 4... -
Page 28: Grill
Preheating is recommended for all food. *These accessories may not be included with your product. **These accessories are not included with your product. They are commercially available accessories. The key points of the grill 6.1.3 Grill • Prepare foods of similar thickness and Red meat, fish and poultry meat quickly weight as much as possible for the grill. -
Page 29: Test Foods
Fan assisted low grill Food Accessory to be Operating func- Shelf position Temperature (°C) Cooking time used tion (min) (approx.) Fan assisted low Fish Wire grill 30 … 35 grill Fan assisted low Chicken pieces Wire grill 25 … 35 grill Meatball (veal) - 12 Fan assisted low... -
Page 30: Maintenance And Cleaning
Food Accessory to be Operating func- Shelf position Temperature (°C) Cooking time used tion (min) (approx.) Round cake mould, 26 cm in Sponge cake diameter with Fan Heating 30 … 40 clamp on wire grill Round black metal mould, 20 cm in Top and bottom Apple pie 50 …... - Page 31 • Do not use steam cleaning products for • For difficult stains, an oven and grill cleaning. cleaner recommended on the website of • Some detergents or cleaning agents your product brand and a non-scratching cause damage to the surface. Unsuitable scouring pad can be used.
-
Page 32: Cleaning Accessories
• Discolorations and stains on the glass sur- Cleaning the side walls of the oven face are normal and not defects. The side walls in the cooking area can only be covered with enamel or catalytic walls. It Plastic parts and painted surfaces varies by model. - Page 33 General warnings e. When the pyrolysis function starts, “P2:00” lights up and starts counting Hot surfaces cause burns! down. The pyrolysis time (2 hours) is Do not touch the product during shown on the display. This time is un- self-cleaning and keep children away changeable.
-
Page 34: Cleaning The Oven Door
b. Before starting the cleaning, clean the After the pyrolysis function is com- outer surfaces of the oven and the food pleted, the door lock will be active residues inside the oven with soapy cloth. until the oven cools to the appropri- ate temperature. - Page 35 Illustration 1: Hinges - closed position Illustration 4: Hinges - open position f. (C) type hinge is available in soft opening/ closing door types. Illustration 2: Hinges - open position e. (B) type hinge is available in soft closing door types. Illustration 5: Hinges - closed position Illustration 3: Hinges - closed position Illustration 6: Hinges - open position g.
-
Page 36: Removing The Inner Glass Of The Oven Door
h. Pull the removed door upwards to re- c. As shown in the figure, gently lift the in- lease it from the right and left hinges and nermost glass (1) towards “A” and then, remove it. remove it by pulling towards “B”. To reattach the door, the proced- ures applied when removing it must be repeated from the end to the be-... -
Page 37: Cleaning The Oven Lamp
c. If your oven lamp is type (A) shown in the 7.8 Cleaning the Oven Lamp figure below, rotate the oven lamp as In the event that the glass door of the oven shown in the figure and replace it with a lamp in the cooking area becomes dirty;... -
Page 38: Troubleshooting
e. Refit the glass cover and wire shelves. 8 Troubleshooting If the problem persists after following the in- • No electricity. >>> Ensure the mains is op- structions in this section, contact your erational and check the fuses in the fuse vendor or an Authorized Service. - Page 39 Error codes/reasons and possible solutions Error codes Error reasons Possible solutions Contact the authorized service to be able to cook again with the meat probe. Remove the meat probe and set the Meat probe communication er- Er 5 function selection knob to off (0) to be able to cook nor- mally without the meat probe in the oven.
- Page 40 EN / 40...
- Page 41 EN / 41...
- Page 42 EN / 42...
- Page 43 EN / 43...
- Page 44 EN / 44...
- Page 45 EN / 45...
Need help?
Do you have a question about the BBIE22300XFP and is the answer not in the manual?
Questions and answers
I cannot set the time. with the 12:00 flashing, I press the increase key and H appears on the display. also the door lock symbol is showing. doesnt matter what I press, I cant get rid of this
To set the time on a Beko BBIE22300XFP oven when "12:00" is flashing and the door lock symbol is on, follow these steps:
1. Touch the time setting key.
2. Use the increase (/) and decrease (/) keys to set the correct time.
3. Touch the time setting key again or wait for a few seconds to confirm the time.
If the door lock symbol prevents setting the time, ensure the key lock feature is deactivated by touching the key lock key until the symbol disappears.
This answer is automatically generated