Advertisement
Available languages
Available languages
Quick Links
Advertisement

Subscribe to Our Youtube Channel
Related Manuals for BEARWARE 304475


Summary of Contents for BEARWARE 304475
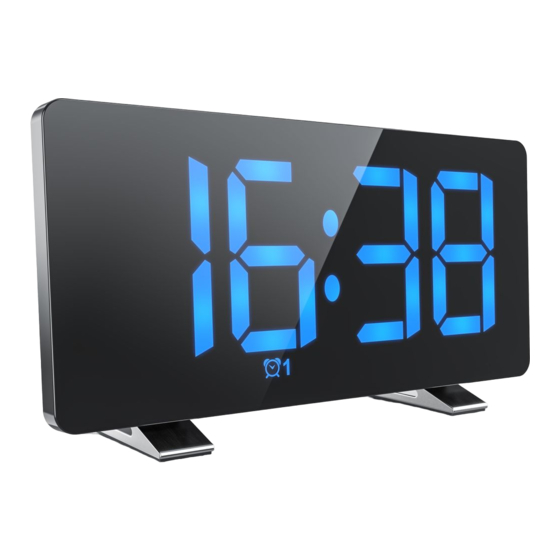
- Page 1 Radio Alarm Clock Mod.-Nr.: 304475...
-
Page 2: Table Of Contents
Table of contents 1. Deutsch ....................... 3 2. English ....................... 12 3. Français ......................22 4. Italiano ......................29 5. Español ......................38... -
Page 3: Deutsch
Vielen Dank, dass Sie sich für ein Produkt von Bearware entschieden haben. Damit Sie auch Freude mit dem erworbenen Gerät haben werden, lesen Sie sich bitte die nachfolgende Bedienungsanleitung aufmerksam durch. Prüfen Sie vor Inbetrieb- nahme der gelieferten Ware, ob diese vollständig, fehlerfrei und unbeschädigt ist. - Page 4 4. Produktdetails 9 10 Deutsch...
- Page 5 Nummer Bezeichnung Bedienelemente Uhrzeitanzeige Standfuß “DOWN”-Taste “VOL”-Taste “Radio/Sleep”-Taste “SNOOZE/DIMMER”-Taste “SET”-Taste “AL”-Taste “UP”-Taste 5. Inbetriebnahme Entnehmen Sie das Gerät aus der Verpackung und entfernen Sie jegliches Verpa- ckungsmaterial. Legen Sie eine “CR2032”-Batterie in das Batteriefach auf der Rück- seite ein. Achten Sie hierbei auf die richtige Polung der Kontakte. Diese Batterie dient zum Speichern eines Backups für die Uhrzeit und des Alarms.
- Page 6 Drücken Sie die „SET“-Taste, um die Einstellungen abzuschließen, oder warten Sie ca. 20 Sekunden. Hinweis: Wenn Sie die 12-Stunden Anzeige ausgewählt haben, erscheint die „PM“- LED im Display zu den entsprechenden Uhrzeiten. 7. Einstellung der Weckzeit Drücken Sie die “AL”-Taste. Die Alarmzeit 1 erscheint im Display und die Stundenazeige blinkt.
- Page 7 9. Schlummerfunktion Sobald der Weckton ertönt, drücken Sie auf die “SNOOZE/DIMMER”- Taste, um den Alarmton zu einem späteren Zeitpunkt zu verschieben. Der Alarmton bzw. der Radioweckton ertönt dann erneut. Die länge der Schlummerfunktion wird mit der Uhrzeiteinstellung eingestellt. Der Standardwert ist 9 Minuten, kann aber zwischen 5 und 60 Minuten ausgewählt werden.
- Page 8 2. Im Anschluss erscheint im Display „MEM“ und “01” beginnt zu blinken. Wählen Sie die gewünschte Voreinstellung (01-15) mit den Tasten “UP” und “DOWN” aus und bestätigen Sie mit der “SET”-Taste. Wiederholen Sie diesen Vorgang, um weitere Radiosender zu den Voreinstellungen hinzuzufügen. 3.
- Page 9 14. Ladeausgang An der Rückseite des Weckers befindet sich neben dem microUSB-Stromanschluss ein USB Typ-A-Ladeausgang. An diesem Ladeausgang können Sie z.B. das Ladekabel Ihres Smartphones an- schließen und Ihr Smartphone daran aufladen. Beachten Sie, dass nur der USB-Typ-A Ausgang als Ladeausgang gedacht ist und der microUSB-Anschluss ausschließlich zur Stromversorgung des Weckers dient.
- Page 10 Setzen Sie das Gerät keinen plötzlichen Temperaturwechseln oder starken Vibrati- onen aus, da dies die Elektronikteile beschädigen könnte. Prüfen Sie vor der Ver- wendung das Gerät auf Beschädigungen. Das Gerät sollte nicht benutzt werden, wenn es einen Stoß abbekommen hat oder in sonstiger Form beschädigt wurde. Beachten Sie bitte die nationalen Bestimmungen und Beschränkungen.
- Page 11 WEEE Richtlinie 2012/19/EU WEEE Register-Nr: DE 67896761 Hiermit erklärt die Firma WD Plus GmbH, dass sich das Gerät 304475 in Übereinstimmung mit den grundlegenden Anforderungen und den übrigen einschlägigen Bestimmungen der Richtlinie 2014/53/EU befindet. Eine vollständige Konformitätserklärung erhalten Sie bei: WD Plus GmbH, Wohlenbergstraße 16, 30179 Hannover;...
-
Page 12: English
Thank you for choosing a Bearware product. Please read the following user man- ual carefully so as to get the most from the product you have purchased. Before using the product, first check that the delivered item is complete, accurate and undamaged. - Page 13 4. Product details 9 10 English...
- Page 14 Number Name Operating controls Time display Stand "DOWN” button "VOL” button “Radio/Sleep" button "SNOOZE/DIMMER" button "SET" button "AL” button "UP” button 5. Initial use Take the device out of the package and remove all the packaging material. Insert one "CR2032" batteries into the battery compartment on the rear side. Pay atten- tion to the correct polarity of the contacts.
- Page 15 7. Setting the alarm Press the "AL" button. The alarm time 1 is shown on the display and the hour display flashes. To do this, once again press the "UP" and "DOWN" buttons to set the alarm. Confirm your entry using the "AL" button. The setting cycle is as follows: 1.
- Page 16 10. Radio function Press the "Radio/Sleep" button to activate the radio function. Use the "UP" and "DOWN" buttons to increase or decrease the frequency. Hold down one of the buttons to start the automatic station search. The radio tunes to the next available station automatically and plays it.
- Page 17 To dim the clock display, press and hold the "SNOOZE/DIMMER" button for about 2 seconds. "OFF" appears in the display. Press the "SNOOZE/DIMMER" button re- peatedly to select between the different dimming levels. Note: If you want to activate this function, then you should not be in the radio mode.
- Page 18 • Never try to insert wires, pins or other similar objects into the venting slits or openings of the device. 16. Safety instructions and disclaimer Never try to open the device to repair or make modifications. Avoid contact with the mains voltage. Do not short-circuit the product. The device is not waterproof, hence please use it only in dry surroundings.
- Page 19 WEEE directive 2012/19/EU WEEE Register no.: DE 67896761 The company WD Plus GmbH hereby certifies that the device 304475 complies with the fun- damental requirements and all other relevant stipulations of the directive 2014/53/EU. A complete conformity statement can be obtained from: WD Plus GmbH, Wohlenbergstraße 16, 30179 Hannover;...
- Page 20 Nous vous remercions d'avoir choisi un produit Bearware. Pour que vous puissiez profiter longtemps de l'appareil acquis, veuillez lire attentivement le mode d'em- ploi suivant. Avant la mise en service du produit livré, vérifiez s'il est complet, sans défauts et intact.
- Page 21 4. Détails du produit 9 10 Français...
-
Page 22: Français
Numéro Désignation Éléments de commande Affichage de l'heure Pied Touche « DOWN » Touche « VOL » Touche « Radio/Sleep » Touche « SNOOZE/DIMMER » Touche « SET » Touche « AL » Touche « UP » 5. Mise en service Sortez l'appareil de l'emballage et retirez tout matériau d'emballage. - Page 23 Appuyez sur la touche « SET » pour terminer le réglage, ou attendez env. 20 secondes. Remarque : Si vous avez choisi l’affichage 12 heures, la LED « PM » apparait sur l'écran aux heures correspondantes. 7. Réglage des l'heure de réveil Appuyez sur la touche «...
- Page 24 9. Fonction de répétition Une fois que le ton de réveil retentit, appuyez sur la touche « SNOOZE/DIMMER », afin de déplacer l'alarme à un moment ultérieur. L'alarme ou la radio réveil retentit alors de nouveau. La durée de la fonction de délai de répétition d’alarme est réglée avec le réglage de l’heure.
- Page 25 tionnez la position souhaitée (01-15) avec les touches « UP » et « DOWN » et confirmez avec la touche « SET ». Répétez cette procédure pou ajouter d'autres stations radio aux préréglages. 3. Pour naviguer entre les stations préréglées, appuyez plusieurs fois sur la touche «...
- Page 26 14. Sortie de charge Une sortie de charge USB de type A se trouve à côté de la prise de courant microUSB à l'arrière du réveil. Vous pouvez connecter par exemple le câble de charge de votre smartphone à cette sortie de charge et charger votre smartphone. Veuillez noter que seul le port USB de type A est conçu comme sortie de charge et que le port microUSB sert uniquement à...
- Page 27 16. Consignes de sécurité et clause de non responsabilité N'essayez jamais d’ouvrir l’appareil pour effectuer des réparations ou des trans- formations. Évitez le contact avec les tensions du secteur. Ne court-circuitez pas le produit. L'appareil n'est pas étanche à l'eau, veuillez l’utiliser uniquement au sec. Protégez-le d'une humidité...
- Page 28 Directive DEEE 2012/19/UE Numéro de registre DEEE : DE 67896761 Par la présente, WD Plus GmbH déclare que l'appareil 304475 est conforme aux exigences essentielles et aux autres dispositions pertinentes de la directive 2014/53/UE. Pour obtenir une déclaration de conformité complète, adressez-vous à : WD Plus GmbH, Wohlenbergstraße 16, 30179 Hanovre ;...
-
Page 29: Italiano
Grazie per aver scelto un prodotto di Bearware. Per utilizzare con soddisfazione il prodotto acquistato, si prega di leggere attentamente le seguenti istruzioni per l'uso. Prima della messa in funzione della merce consegnata, verificare che sia in- tegra, esente da difetti e non danneggiata. - Page 30 4. Dettagli del prodotto 9 10 Italiano...
- Page 31 Numero Descrizione Elementi di comando Visualizzazione ora Base Tasto "DOWN” Tasto "VOL” Tasto “Radio/Sleep” Tasto “SNOOZE/DIMMER” Tasto "SET" Tasto "AL” Tasto "UP” 5. Messa in funzione Rimuovere il prodotto dall'imballaggio e togliere qualsiasi materiale d'imballaggio. Inserire una batteria “CR2032” nel vano batterie sul retro. Prestare attenzione alla corretta polarità...
- Page 32 Nota: Se avete selezionato la visualizzazione 12 ore, sul display viene visualizzato il LED “PM“ al rispettivo orario. 7. Impostazione dell'ora di sveglia Premere il tasto "AL". L’ora dell’allarme viene visualizzato sul display e l’orario lam- peggia. Utilizzare di nuovo il tasto “UP” e “DOWN” per impostare l'ora di sveglia. Con- fermare l'immissione con il tasto "AL".
- Page 33 La durata della funzione sonnellino viene impostata mediante l’orario. Il valore standard è di 9 minuti, può tuttavia essere selezionato tra 5 e 60 minuti. 10. Funzione radio Premere il tasto “Radio/Sleep” per attivare la funzione radio. Utilizzare il tasto “UP e “DOWN”...
- Page 34 12. Dimmeraggio del display Premere e tenere premuto il tasto “SNOOZE/DIMMER” nella modalità orario per ca. 2 secondi. Sul display appare “AU” (modalità automatica) o “OFF” (modalità manuale). Per attivare il dimmeraggio automatico, tenere premuto il tasto “SNOOZE/DIM- MER” per ca. 2 secondi, fino a quando appare la scritta “AU”. La modalità dimme- raggio è...
- Page 35 15. Istruzioni di sicurezza supplementari per questo apparecchio • Non collocare eventuali fonti di fiamme sul dispositivo, per esempio le candele. • Non posizionare il prodotto in una libreria chiusa senza ventila- zione adeguata. • Le aperture di ventilazione non devono essere ostacolate o bloccate.
- Page 36 Il dispositivo può essere utilizzato solo da persone che hanno letto e compreso le presenti istruzioni. Le specifiche dell'apparecchio possono cambiare senza preav- viso. 17. Indicazioni per lo smaltimento Secondo la direttiva europea RAEE, le apparecchiature elettriche ed elettroniche non possono essere smaltite con i rifiuti domestici. I loro componenti devono es- sere consegnati separatamente al centro di riciclaggio o smaltimento, in quanto gli eventuali componenti tossici e pericolosi possono inquinare permanentemente l'ambiente in caso di smaltimento improprio.
- Page 37 Direttiva RAEE 2012/19/UE Numero reg. RAEE: DE 67896761 Con la presente la ditta WD Plus GmbH dichiara che il dispositivo 304475 è conforme ai req- uisiti essenziali e alle rimanenti disposizioni in materia come stabilito dalla direttiva 2014/53/ UE. Una dichiarazione di conformità completa è disponibile presso: WD Plus GmbH, Wohlen- bergstraße 16, 30179 Hannover;...
-
Page 38: Español
Gracias por escoger un producto de Bearware. Para que pueda disfrutar de su ad- quisición, le rogamos que lea atentamente las siguientes instrucciones de uso. An- tes de ponerlo en marcha, compruebe que el producto suministrado no presenta defectos ni daños. - Page 39 4. Detalles del producto 9 10 Español...
- Page 40 Número Denominación Elementos de mando Indicador de la hora Botón «DOWN» Botón «VOL» Botón «Radio/Sleep» Botón «SNOOZE/LIGHT» Botón «SET» Botón «AL» Botón «UP» 5. Puesta en marcha Saque el aparato del embalaje y retire todo el material de embalaje. Coloque una pila «CR2032»...
- Page 41 Indicación: Si ha seleccionado la visualización en 12 horas, el LED «PM» aparecerá cuando corresponda en la pantalla. 7. Ajustar la hora del despertador Pulse el botón «AL». La hora de alarma 1 aparece en la pantalla y las horas parpa- dean.
- Page 42 9. Función de repetición de alarma En cuanto suene el despertador, pulse el botón «SNOOZE/ DIMMER» para retrasar el despertador. El tono de la alarma o de la radio sonará de nuevo. La duración de la función de repetición de alarma se ajusta en la configuración. El valor estándar es de 9 minutos, pero se puede configurar entre 5 y 60 minutos.
- Page 43 procedimiento para añadir otras emisoras de radio a las configuraciones predeterminadas. 3. Para cambiar entre las emisoras predeterminadas, pulse en el modo Radio el botón «SET» varias veces. 12. Regular la iluminación de la pantalla Pulse y mantenga pulsado el botón «SNOOZE/DIMMER» durante unos 2 segun- dos en el modo hora.
- Page 44 Tenga en cuenta que solo se está concebida como salida de carga la salida USB de tipo A y que la conexión microUSB solo sirve para alimentar el despertador. 15. Indicaciones adicionales de seguridad para este aparato • No coloque ninguna llama abierta como, p. ej., velas sobre el aparato.
- Page 45 17. Indicaciones de eliminación Los dispositivos eléctricos y electrónicos no deben eliminarse con los residuos do- mésticos según la directiva europea WEEE. Los componentes deben reciclarse o eliminarse por separado porque una eliminación indebida de las piezas tóxicas y peligrosas puede dañar de forma significativa el medio ambiente. Como usuario, está...
- Page 46 Directiva WEEE 2012/19/UE Número de registro WEEE: DE 67896761 La empresa WD Plus GmbH declara por la presente que el aparato 304475 satisface los req- uisitos esenciales y el resto de disposiciones pertinentes según lo establecido en la directiva 2014/53/UE. Solicite una declaración de conformidad completa en: WD Plus GmbH, Wohlen- bergstraße 16, 30179 Hannover;...
- Page 47 Notes...
- Page 48 DOWNLOADS & MANUALS WD Plus GmbH • Wohlenbergstraße 16 • D 30179 Hannover V1.0...
Need help?
Do you have a question about the 304475 and is the answer not in the manual?
Questions and answers