Met One Instruments BAM 1020 Operation Manual
Particulate monitor
Hide thumbs
Also See for BAM 1020:
- Operation manual (90 pages) ,
- Manual addendum (13 pages) ,
- Addendum (9 pages)
Table of Contents
Advertisement
Quick Links
Met One Instruments, Inc.
1600 NW Washington Blvd.
Grants Pass, OR 97526
Telephone: (541) 471-7111
Facsimile: (541) 471-7116
www.metone.com
BAM 1020 Particulate Monitor Operation Manual - ©
worldwide. No part of this publication may be reproduced, transmitted, transcribed, stored in a retrieval system, or translated into any
other language in any form without the express written permission of Met One Instruments, Inc.
BAM 1020
P
ARTICULATE
O
PERATION
BAM 1020-9805 R
Copyright 2020 Met One Instruments, Inc. All Rights Reserved
M
ONITOR
M
ANUAL
A
EV
Advertisement
Table of Contents

Subscribe to Our Youtube Channel
Related Manuals for Met One Instruments BAM 1020


Summary of Contents for Met One Instruments BAM 1020
- Page 1 Copyright 2020 Met One Instruments, Inc. All Rights Reserved worldwide. No part of this publication may be reproduced, transmitted, transcribed, stored in a retrieval system, or translated into any other language in any form without the express written permission of Met One Instruments, Inc.
-
Page 2: Table Of Contents
Site Selection and Inlet Positioning Criteria ................. 10 Mounting Options in a Walk-In Shelter ................. 10 BAM 1020 Installation Instructions ..................11 BAM 1020 Power and Electrical Service ................19 Configuring External Sensors ....................20 2.7.1 Configuring the BX-597A / BX-598 Sensor ................20 2.7.2... - Page 3 3.5.19 Touch Calibration ......................... 54 3.5.20 Set Language ........................54 Alarms Menu ........................55 INITIAL SETUP OF THE BAM 1020 Power Up ..........................56 Warm-up Period ........................56 The Main Operate Screen ....................56 Filter Tape Loading ......................57 Self-Test..........................58 Initial Setup Settings Considerations ...................
- Page 4 BAM 1020 Error and Alarm Descriptions ................76 6.4.1 Alarm Relay ......................... 78 Comparison of BAM 1020 Data to Integrated Filter Sampler Data ........79 Power Up Problems and Electrical Safety Considerations ........... 80 Basic Problem and Cause/Solution Table ................81 Nozzle Component Service and O-ring Replacement ............
-
Page 5: Introduction
Electronic versions of this manual are also available. This manual is periodically revised for maximum accuracy, and to incorporate new features or updates. Below is a brief description of the BAM 1020 manual revision history: Released... -
Page 6: Technical Service
1600 NW Washington Blvd. Grants Pass, OR 97526 All BAM 1020 monitors have a serial number on the label on the back panel, embossed on the two metal NRC tags, and printed on the calibration certificate. This number is needed if contacting the technical service department to request information about repairs or updates for the BAM 1020. -
Page 7: Beta Radiation Safety Statement
Limit” of 100 µCi as determined by the United States Nuclear Regulatory Commission (US-NRC). The owner or operator of the BAM 1020 is not required to have a license to possess or operate the equipment under US-NRC regulations. The owner may however elect to return the monitor to Met... -
Page 8: Bam 1020 Specifications
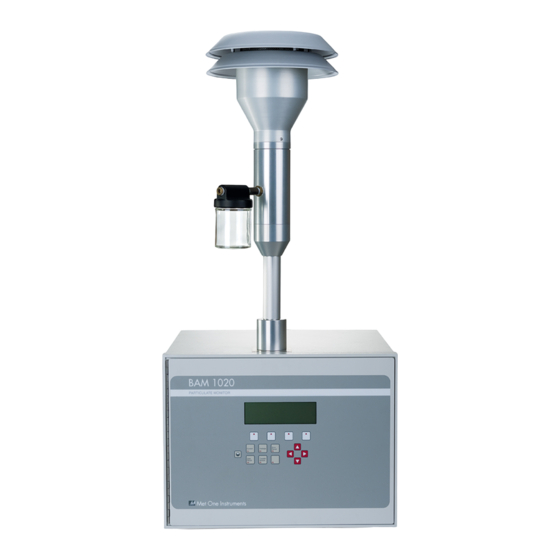
19 kg (42 lbs) without external accessories Unit Dimensions H x W x D = 36.2cm x 48.3cm x 46.7cm (14.25” x 19” x 18”). Specifications may be subject to change without notice. Page 8 BAM 1020-9805 Manual Rev A.docx... -
Page 9: Site Selection And Installation
BAM 1020 on a test bench if desired. The BAM 1020 is shipped with one or two white foam rings and a white plastic shim inside the front of the BAM 1020, which prevent the moving parts of the tape control assembly from being damaged during transit. -
Page 10: Site Selection And Inlet Positioning Criteria
2.4 Mounting Options in a Walk-In Shelter When the BAM 1020 is to be located in a walk-in shelter, it may be installed in either an equipment rack or on a bench top. Take the following into account when planning the mounting: ... -
Page 11: Bam 1020 Installation Instructions
1020. If the BAM 1020 is to be mounted in a rack, it will be necessary to leave extra room above the BAM 1020 in the rack for the heater, or to make the hole in the top of the rack larger in order to clear the heater diameter. - Page 12 830 smart inlet heater (used on most BAM 1020 monitors) must be installed onto the tube. Lift the inlet tube out of the top of the BAM 1020, and pass the tube through the hole in the heater body (the cable end is the bottom). Then re-insert the inlet tube into the BAM. Position the bottom of the smart heater unit two inches above the top of the inlet receiver on the BAM, and securely tighten the two set screws in the heater to fasten it to the tube.
- Page 13 The BX-597A sensor attaches directly to the inlet tube with a supplied U-bolt. Connect the cable to the Sensor Network on the back panel of the BAM 1020 as follows. BX-597A Temp/RH/Pressure...
- Page 14 “CHASSIS” ground connection on the back of the BAM 1020. It should measure only a couple of Ohms or less if a good connection is made with the set screws. If not, remove the set screws and run a ¼-20 tap through the holes.
- Page 15 Figure 2-1 Typical BAM 1020 Installation in a Walk-in Shelter BAM 1020-9805 Manual Rev A.docx Page 15...
- Page 16 Figure 2-2 Typical BAM 1020 Installation in a BX-902 Mini Enclosure Page 16 BAM 1020-9805 Manual Rev A.docx...
- Page 17 Figure 2-3 BAM 1020 Mounting Dimensions BAM 1020-9805 Manual Rev A.docx Page 17...
- Page 18 Figure 2-4 BAM 1020 Rear Panel Connections Page 18 BAM 1020-9805 Manual Rev A.docx...
-
Page 19: Bam 1020 Power And Electrical Service
A dedicated 15 Amp electrical circuit is generally adequate to run a single complete BAM 1020 system, unless a large air conditioner is on the same circuit. Consult a qualified electrician if unsure. A summary of some worst-case loads is given below:... -
Page 20: Configuring External Sensors
2.7.1 Configuring the BX-597A / BX-598 Sensor The BAM 1020 requires the sensor at address 1 of its serial network to begin sampling. Once the physical connections are made (see section 2.5), the sensor is programmed using the Digital Link screen located in the Test Menu 2 (see section 3.5). - Page 21 Remember that the 597A /598 must be configured for address number 1 and if an optional wind sensor is connected, it will need to be set to number 2. BAM 1020-9805 Manual Rev A.docx Page 21...
-
Page 22: User Interface
The BAM 1020 user interface is a touchscreen display used to control almost all of the features and functionality of the BAM 1020. It is mounted on the back side of the front door assembly with access to the display granted through a cutout on the door panel as shown in Figure 3-1. -
Page 23: Main Operating Screen
In addition to the last hourly concentration reading, this screen shows the current real-time values being measured and the operational state of the BAM 1020. The upper left image in Figure 3-2 is the screen that will normally be displayed. - Page 24 Internal Filter Pressure after the filter tape Inlet Heater Current operating percentage of the inlet heating element MSO / AIO 2 wind speed sensor reading MSO / AIO 2 wind direction sensor reading Table 3-1 Main Display Parameter Descriptions Page 24 BAM 1020-9805 Manual Rev A.docx...
-
Page 25: Menu Hierarchy And Navigation
3.2 Menu Hierarchy and Navigation The BAM 1020 menu structure is outlined in the following table. Main Menu Sub Menu Options Overview Operate Load Filter Tape Load and properly tension the filter tape See Section 3.3 Transfer Data Download stored data to a USB memory stick... - Page 26 X icon located in the upper right corner of all sub menu screens. This icon can clearly be seen in the Set Clock screen image in Figure 3-5. Figure 3-5 Set Clock Screen Page 26 BAM 1020-9805 Manual Rev A.docx...
-
Page 27: The Operate Menu
3.3 The OPERATE Menu Selecting the Operate Menu from the menu selection drop list (see Figure 3-3) provides access to the most commonly used areas for normal operation of the BAM 1020 monitor. This will not interrupt the sample if already running. -
Page 28: Transfer Data
(flash drive). Figure 3-9 The Transfer Data Screen The BAM 1020 can copy data files directly to a user-supplied USB flash drive. This drive must be installed in the USB Type A port located on the upper right- hand corner of the transport plate. This USB port is not used for any other purpose. -
Page 29: About
3.3.4 Conc Chart This screen shows a chart of the previous 24 hourly concentration measurement. This makes it easy for operators to see any trends in recent concentration levels. Figure 3-12 The Conc Chart Display BAM 1020-9805 Manual Rev A.docx Page 29... -
Page 30: The Test Menu System - Overview
The TEST Menu System – Overview The BAM 1020 Test menus provide a means for testing the overall operational health of the monitor. They are used for performing diagnostic checks on the BAM 1020 sub-systems and can be invaluable for troubleshooting purposes. The following sections provide an overview of the screens used to perform calibrations and audits of various sensors, as well as some advanced diagnostics to resolve failures and errors. -
Page 31: Ambient Temperature
Figure 3-16 The Ambient Pressure Screen 3.4.4 Flow Calibration The Flow Calibration menu is where the important flow audits, checks, and calibrations are performed on the BAM 1020. See Section 6.3.7 for detailed instructions. Figure 3-17 The Flow Calibration Screens BAM 1020-9805 Manual Rev A.docx... -
Page 32: Self Test
Figure 3-19 The Filter Sensors Screens These screens provide the options and indications needed to default, verify, and calibrate the filter temperature, filter humidity, and filter pressure sensors. See Section 6.2 for detailed instructions. Page 32 BAM 1020-9805 Manual Rev A.docx... -
Page 33: Span Membrane
Compare the Measured Mass value from this test with the Span Membrane value on the calibration sheet for the BAM 1020. The values must match within 5% and will typically match within just a few micrograms. If not, the most common cause is a dirty membrane foil, which can be carefully cleaned with canned air or clean water rinse. -
Page 34: Tape Sensors
The states of the five photosensors that monitor all of the mechanical movement in the BAM 1020 tape transport assembly are displayed here. This is useful if the BAM 1020 has failed some of the Self-Test parameters. The sensors on this screen provide the following information: Latched: This sensor shows the status of the pinch roller latch. -
Page 35: Inlet Heater
Each count test will show the number of beta particles being counted as they accumulate. The final count total will stay on the display after the counting is finished. Figure 3-24 The Beta Counter Screen BAM 1020-9805 Manual Rev A.docx Page 35... -
Page 36: Membrane Sensors
The total four-minute dark count value should be less than 10 counts. If the total is more than 50 counts, contact the Met One Instruments service department for assistance (see Section 1.2). -
Page 37: Digital Link
Figure 3-27 The Digital Link Screen 3.4.14 Relay Outputs This screen is used to test the Alarm relay on the back of the BAM 1020. The relay contact is Normally Open (NO). Verify that the contact closure output on the back panel terminals responds accordingly using an Ohm-meter. -
Page 38: Analog Calibration
Between them is the Set Out field, which will update with the expected output based on the concentration selected in the Conc Output field. Verify the output on the back of the BAM 1020 matches the Set Out value shown using a voltmeter. -
Page 39: Setup Menu Description
0.985mg. See Section 3.5.13. 3.5 Setup Menu Description The BAM 1020 uses a comprehensive system of setup menus which contain all of the settings and parameters needed to perform the measurement and operation of the BAM 1020. Most of these settings are set at factory default values, although some settings may be altered by the operator. -
Page 40: Clock
Figure 3-33 The Sample Screen Inlet Type: This setting helps users identify whether the BAM 1020 is collecting TSP, PM , PM or PM data. Whichever option is selected sets the corresponding label to be displayed at the top of the main menu screen. -
Page 41: Flow
Setting the BAM SAMPLE value too long may cause the total measurement cycle to overlap into the next hour, so that the BAM 1020 only collects the concentration every second hour. -
Page 42: Inlet Heater
3.5.5 Inlet Heater This menu is used to configure the settings used by the BAM 1020 to control the Smart Inlet Heater. The BAM 1020 uses an RH sensor located below the filter tape in the sample air stream to monitor the conditions of the air as it is being sampled. -
Page 43: Units
This is the relative humidity level that the filter will be regulated at or below by the inlet heater. This value must be set to 35% for the version of the BAM 1020 employing the smart heater when operated as a PM US-EPA designated federal equivalent method. -
Page 44: Clear Memory
The default password is 0. Setting the password to 0 means no password is used. Met One Instruments, Inc. does not recommend changing the default password unless absolutely necessary. Contact the Met One Instruments service department (see Section 1.2) for instructions if the password is lost or forgotten. -
Page 45: Reports
3.5.9 Reports The BAM 1020 offers three different CSV report types (comma-separated values); Standard, Generation 2, and China HJ 653. The Standard report is accessed from the serial ports or the USB flash drive. The Generation 2 and China HJ 653 reports are only available from the serial port when the Protocol Type is set to Generation 2. - Page 46 The average filter temperature for the BAM Sample period. FRH(%) The average filter RH for the BAM Sample period. Memb(mg/cm2) The Span Membrane measurement during the BAM Sample period. Status The Alarm status (Section 6.4) for the MET Sample period. Page 46 BAM 1020-9805 Manual Rev A.docx...
- Page 47 Protocol Type is set to Generation 2. These reports are available for backward compatibility to the previous BAM 1020 (Generation 2). Press the VIEW button to show the GENERATION 2 or CHINA HJ 653 report format.
- Page 48 65535 over a fixed concentration range of 10000 ug/m3. The reported concentration resolution is Concentration Range divided by Dynamic Range. For example, the resolution of 10000 / 4095 is 2.4 ug/m3. The resolution of 10000 / 65535 is 0.15 ug/m3. Page 48 BAM 1020-9805 Manual Rev A.docx...
- Page 49 3.5.9.5 Logger Setup The channels of the Logger Setup represent the analog inputs on the rear panel or software assignments of the Generation-2 BAM 1020. The channel assignments shown are typical for a Generation-2 BAM 1020. The XXXXX(XXX) report parameter represents a log channel selection of NONE.
-
Page 50: Alarms
The word ERROR will be displayed in place of the concentration value on the Main Operate screen. The word ERROR will also be printed in place of the concentration value in the CSV data reports. Page 50 BAM 1020-9805 Manual Rev A.docx... -
Page 51: Station Id
There are 14000 records available in the memory. The memory capacity is shown below. When the memory gets full the BAM 1020 overwrites the oldest data. It is recommended that the MET SAMPLE period is set at the default value of 60 minutes unless a faster average is required for a particular met sensor application. -
Page 52: Analog Outputs
3.5.14 Serial Ports There are serial connections on the back of the BAM 1020. Each one serves a unique purpose in the communication options available for the monitor and each one is configured separately. The RS-232 port will typically be used for direct connection to a PC or other RS-232 compatible device. -
Page 53: Modbus
IT department. Figure 3-55 The Ethernet Screen It is recommended to configure the BAM 1020 with a fixed IP address if using Ethernet communications. However, if needed, setting the IP address to 0.0.0.0 will configure the monitor for DHCP operation. The IP address port will always be 7500. -
Page 54: Sound Volume
Setup menu. Figure 3-58 The Touch Calibrate Screen 3.5.20 Set Language The BAM 1020 provides language options for its interface display. Use this screen to set a preferred language supported. Figure 3-59 The Set Language Screen Page 54 BAM 1020-9805 Manual Rev A.docx... -
Page 55: Alarms Menu
The most recent alarm will be displayed first. Use the up and down arrow keys located at the bottom of the screen to scroll through the alarm log. Figure 3-60 The Alarms Menu BAM 1020-9805 Manual Rev A.docx Page 55... -
Page 56: Initial Setup Of The Bam 1020
It is assumed that the BAM 1020 is already installed and sited as described in Section 2. In some cases, it is useful to first set up the BAM 1020 on a test bench before deployment or installation in order to explore the functions and perform setups. -
Page 57: Filter Tape Loading
4.4 Filter Tape Loading A roll of Met One glass fiber filter tape must be loaded into the BAM 1020 for sampling. A roll of tape will last more than 60 days under normal operation. It is important to have spare rolls available to avoid data interruptions. -
Page 58: Self-Test
The BAM 1020 has a built-in self-test function which automatically tests most of the tape control and flow systems of the BAM 1020. The self-test should be run right after each time the filter tape is changed, and it can also be used if the operator suspects a problem with the BAM 1020. More detailed diagnostic test menus are also available in the BAM, and those are described in the troubleshooting Section 6. -
Page 59: Initial Setup Settings Considerations
(beginning) of the next hour and will continuously operate until commanded to stop. The BAM 1020 will stop if the operator enters certain Test or Setup menus, but users will be provided a warning screen first. The BAM 1020 will also stop itself if a non-correctable error is encountered, such as broken filter tape or failed air flow. -
Page 60: The Measurement Cycle
This timeline applies if the BAM 1020 is set for a COUNT TIME of 8 minutes, which is required for all EPA and EU designated PM configurations. -
Page 61: Automatic Span Checks During The Cycle
5.2 Automatic Span Checks During The Cycle While the vacuum pump is on and pulling air through the filter tape as described above the BAM 1020 performs a span check. The user may set up the BAM 1020 to perform the span check hourly, once per day, or not at all. -
Page 62: Filter Tape Use
The BAM 1020 positions the filter spots very close to one another so as not to waste filter tape. Once each day at midnight, the BAM 1020 will skip a spot (there will not be a spot where one is expected to be). -
Page 63: Maintenance, Diagnostics And Troubleshooting
6 MAINTENANCE, DIAGNOSTICS and TROUBLESHOOTING This section provides information about routine maintenance, identifying errors and alarms, and performing diagnostic tests on the BAM 1020. The TEST menu functions are also described in this section. Met One Instruments, Inc. also publishes a comprehensive array of technical bulletins that covers additional information about subsystem troubleshooting, upgrades, and repairs. -
Page 64: Filter Sensor Tests
See Section 3.4.6 for a brief description and location of the menu. When this screen is entered, the BAM 1020 will automatically turn on the pump and raise the nozzle to allow the filter sensors to equilibrate to ambient room conditions. -
Page 65: Filter Humidity Sensor Tests
RH value can be obtained. Enter the Test > Filter Sensors menu, select REL HUMIDITY, and allow the sensor to equilibrate for at least five minutes, then compare the BAM 1020 reading on the display to the reference RH device. To calibrate the sensor, enter the reference value into the Reference field on the display and press CALIBRATE to change the BAM value to match. -
Page 66: Flow System And Flow Calibrations
6.3.1 Flow System Diagram The BAM 1020 is designed to operate with an air flow rate of 16.67 liters per minute (L/min or LPM). The flow rate must be maintained at this value in order for the commonly used the EPA PM... -
Page 67: About Leak Checks, Nozzle Cleaning, And Flow Checks
This could cause the total volume of air sampled through the inlet to be incorrect, and the resulting concentration data could be unpredictably biased. The BAM 1020 cannot automatically detect a leak at the tape/nozzle interface because the airflow sensor is located downstream of the filter tape. - Page 68 The presence of abnormalities indicates debris build up at that location of the nozzle / vane interface. These indicate areas of the interface that may require additional cleaning. Note that in low concentrations the sample spot may not be easily located. Page 68 BAM 1020-9805 Manual Rev A.docx...
- Page 69 If the basic leak check detailed in Section 6.3.5.1 fails, the following procedures will isolate the problem. Required Tools: Leak Check Valve (Met One Instruments Part No. BX-305 or BX-302) Nozzle Seal Tool (Part No. 7440) Figure 6-4 7440 Leak Isolation Shim 6.3.5.2.1...
- Page 70 1. If running, press the PUMP OFF button to turn off the pump. Then, press the NOZZLE UP button to raise the nozzle. 2. Rotate the Nozzle Seal Tool so that the solid portion of the tool is positioned beneath the nozzle. See Figure 6-6. Page 70 BAM 1020-9805 Manual Rev A.docx...
- Page 71 Figure 6-5). If this is not the case, press the NOZZLE UP button to raise the nozzle (if needed), position the sealing tool in this configuration, and then lower the nozzle. 4. Press the PUMP ON button to start the pump. BAM 1020-9805 Manual Rev A.docx Page 71...
-
Page 72: Nozzle And Vane Cleaning Procedure
We recommended that the nozzle and vane be inspected monthly for tape build up. Some sites may require a more frequent inspection and cleaning interval. BAM 1020 monitors operated in hot, humid environments may require more frequent nozzle and vane cleaning. When the nozzle and vanes are not regularly cleaned filter tape debris may build up. - Page 73 Figure 6-8 shows the difference between good and bad filter tape spots. The tape on the left is from a properly operated BAM 1020 with a clean nozzle and vane. The dust spots have crisp edges, are perfectly round, and are evenly distributed.
-
Page 74: Field Calibration Of The Flow System
(see Section 3.4.2). Use the following steps to verify and calibrate the ambient temperature sensor. 1. Make certain that the BAM 1020 has warmed up for at least 60 minutes prior to performing calibrations. Also, allow the calibration transfer standard (CTS) to equilibrate to ambient conditions for a minimum of 30 minutes. - Page 75 Use the following steps to verify and calibrate the BAM 1020 flow sensor. 1. Make certain that the BAM 1020 has warmed up for at least 60 minutes prior to performing calibrations. Also, allow the calibration transfer standard (CTS) to equilibrate to ambient conditions for a minimum of 30 minutes.
-
Page 76: Bam 1020 Error And Alarm Descriptions
BAM 1020 Error and Alarm Descriptions In the event a measured parameter or sequence is not within design specification, the BAM 1020 will generate an alarm. These alarms can be monitored via the alarm log, output files or the alarm relay. - Page 77 These alarms do not prevent the BAM from storing a valid concentration for the sample hour because the particulate mass is a completely separate measurement, but the alarm should be investigated and resolved in order to ensure proper beta detector operation. BAM 1020-9805 Manual Rev A.docx Page 77...
-
Page 78: Alarm Relay
Contact tech service if the left/right shuttle slide action is not smooth. 6.4.1 Alarm Relay There is an output relay connection provided on the rear panel of the BAM 1020. This can be connected to an external data logger as a second method of indicating alarms between the BAM and the logger. -
Page 79: Comparison Of Bam 1020 Data To Integrated Filter Sampler Data
Nozzle leaks can lead to poor correlation between the BAM 1020 and the reference standard. Improper inlet tube insulation or placing the BAM 1020 directly in the path of an air conditioner vent during operation under hot, humid conditions can lead to poor correlation with the reference standard and unpredictable levels of multiplicative and additive bias. -
Page 80: Power Up Problems And Electrical Safety Considerations
Power Up Problems and Electrical Safety Considerations The BAM 1020 must be at a state where it can be powered on before any other testing or diagnosis can be performed: Ensure the external 12V DC power supply (100-240VAC at 50-60Hz) AC power cord is plugged in and the power supply output cable is properly connected to the BAM 1020 power jack on the rear panel. -
Page 81: Basic Problem And Cause/Solution Table
The BAM 1020 is programmed not to start a sample cycle until the beginning of an hour. Make sure the clock is set correctly. The BAM 1020 will wait until the beginning of a new hour before it starts, even if the Main Operate screen Status is ON. - Page 82 A stuck nozzle is sometimes caused by a misaligned inlet tube. Make sure it is straight up and perpendicular to the top of the BAM 1020. Problem: The BAM 1020 has flow leaks, even after cleaning the nozzle and vane. Cause/Solution: The nozzle may be sticking as described above. Verify that the nozzle up/down ...
- Page 83 Problem: The display shows “MISSING AT SENSOR” message. Cause/Solution: The BAM 1020 requires a BX-597A or BX-598 sensor to provide ambient temperature data. If no sensor is attached to the Sensor Network RS485 terminals on the rear panel, this message will appear.
-
Page 84: Nozzle Component Service And O-Ring Replacement
Figure 6-9 BAM 1020 Inlet and Nozzle Components 1. Remove the filter tape and the main BAM 1020 case cover. The sample nozzle must be in the down position. Lower it using the Test > Nozzle Sensors menu, if needed. Lift the nozzle up and down against its spring using thumb pressure and note the action feel. -
Page 85: Performing The 72-Hour Zero Filter Background Test
QA/QC program, the frequency of which is up to the user. When the BAM 1020 is set up for the first time, a minimum of 48-72 valid 1-hour zero-test data points should be collected in order to accurately determine the Background value. Subsequent, periodic zero tests may be performed with fewer 1-hour values, but this will result in a less accurate Background calculation. - Page 86 BX-302 zero filter assembly should be mounted inside the shelter. Replace the standard inlet tube , with the short 1.5 foot long inlet tube (this tube is included with each BAM 1020 to sample room air). Mount the smart-heater and the BX-302 zero filter assembly on this shorter tube inside the shelter.
-
Page 87: Data Collection And Communications
7 DATA COLLECTION AND COMMUNICATIONS 7.1 Back Panel Connections Figure 7-1 Back Panel Connections BAM 1020-9805 Manual Rev A.docx Page 87... -
Page 88: External Data Logger Interface System
In most applications where the Conc Offset is set to -15, and the Conc Range is set to 1000 ug/m the BAM 1020 analog output will be scaled as 0.000v to 1.000v equals -0.015 mg to 0.985 mg. It is... -
Page 89: Early Cycle Mode Option For Analog Data Collection
The BAM 1020 has a special EARLY cycle mode (Section 3.5.2) which causes the BAM 1020 to start and finish the measurement a few minutes early in order to output the concentration voltage for the last five minutes of the hour which was just sampled. -
Page 90: Interfacing A Digital Data Logger With The Bam 1020
If the logger must have the BAM concentration before the top of the hour, then the BAM can be set for early cycle mode, and the BAM clock will have to be synchronized to the logger. Some BAM 1020 users leave the BAM in standard cycle mode and set their digital logger to synchronize the BAM clock at minute 59 of the hour. -
Page 91: Digital Communications And Data Retrieval
Comet software that comes with the BAM. 7.3.1 Direct Serial Port Connections and Settings The RS-232, RS-485, USB Type B, and Ethernet ports allow for data transfer from the BAM 1020. All data can be accessed from any port. RS-232 Connection: Most older desktop and laptop computers have a standard 9-Pin serial port available for communications. -
Page 92: Using Met One Comet Communications Software
Install the program on the computer, then run it from the Programs directory. Create a new station for the BAM 1020 and then use it to retrieve the data from the BAM 1020 monitor. The Comet program has a “Terminal” button which provides access to the BAM just as when using any other terminal program as described in Section 5. -
Page 93: Downloading Data Using Simple Terminal Programs
Note: Before using the USB Type B port, ensure an existing RS-232 connection is disconnected. 2. Open HyperTerminal and it will request a name for the connection. Type “BAM 1020” or any other name that makes sense for the application and then click “OK”. -
Page 94: Help Menu And Command Descriptions Using A Terminal Program
Note: There are many more commands not listed in the Help Menu. Refer to the BAM 1020 User 7500 document for a complete list with expanded description. It is located on the Met One web site. - Page 95 Command 1 – Settings Report This report shows the BAM 1020 settings and calibration values. This is useful for verifying the setup parameters and will most likely be requested by the factory if service is required. This report is subject to change with firmware updates.
- Page 96 No parameter prints all the data Print the new data 1 to 2000 Print from the previous n-hours YYYY-MM-dd HH:mm:ss Print from the timestamp value YYYY-MM-dd HH:mm YYYY-MM-dd HH YYYY-MM-dd YYYY-MM YYYY Response Time,Conc(ug/m3),ConcS(ug/m3),Qtot(m3),QtotS(m3),Flow(lpm),WS(m/s),WD(Deg),AT(C),RH(%), BP(mmHg),FT(C),FRH(%),Memb(mg/cm2),Status 2020-06-05 18:00:00,+00003.0,+00003.0,0.698,0.698,+16.65,00.0,000,+024.4,032,792.7,+026.2,024, 0.856,00000 Page 96 BAM 1020-9805 Manual Rev A.docx...
- Page 97 The 9-command will report starting from the last record reported. Use the PR 5 ts command to start a report from the given ts. Response 5-Minute Flow Report 2020-06-08 17:07:34 Station, 9, A14540 Time,Flow(lpm),AT(C),BP(mmHg),FP(mmHg) 2020-06-05 17:13:39,16.70,24.4,792.7,501.6 2020-06-05 17:18:39,16.68,24.4,792.7,501.8 BAM 1020-9805 Manual Rev A.docx Page 97...
- Page 98 This command will report the model number, firmware part number, and revision string. Instruments with more than one processor or programmable devices will include more than one part number and revision on the next subsequent lines. Response BAM 1020, 83347, R9.0.0 Display, 82451, R1.1 Page 98 BAM 1020-9805 Manual Rev A.docx...
-
Page 99: Modem Option
This is found on the COMET Installation Disk Met One part number 80248. It can also be found at this Weblink: https://www.silabs.com/products/development-tools/software/usb-to-uart-bridge-vcp-drivers. The BAM 1020 RS-232 port baud rate must be set to 115200 (Setup > Serial Ports > RS-232 Baud). The BAM 1020 Flow Control-232 must be set to NONE (Setup > Serial Ports > Flow Control-232). -
Page 100: Accessories And Parts
The following parts are available from Met One for maintenance, replacement, service, and upgrades. If unsure which part is needed, please contact the Service department and provide the serial number of the BAM 1020. Some of these parts require technical skills or special considerations before use or installation. - Page 101 Flow Sensor, Mass, 0-20 LPM, Internal Assembly 80324 Automatic Flow Controller 8776 Filter Assembly, Pisco In-line 580291 Filter Element Only, Pisco In-line 580292 Filter RH Sensor Replacement Only 9278 Filter Temperature Sensor Replacement Only 81493 BAM 1020-9805 Manual Rev A.docx Page 101...
- Page 102 Valid for PM2.5 FEM monitoring Inlet Roof Mounting Kit – includes roof top flange, BX-801 sealing gland, braces, and standard 8 foot inlet tube. Waterproof Inlet Tube Sealing Gland Only 8119 Roof Top Flange Weldment Only 8120 Page 102 BAM 1020-9805 Manual Rev A.docx...
- Page 103 Cable assembly for AIO 2 sensor (specify length) 10624 Met Station One MSO-485 Communications Options & Accessories Description Part Number Graphic Cellular/IP Modem Kit for BAM 1020 BX-911 COMET Cloud Service Modem CCS Modem 2 CCS Modem Communication Cable 82956 BAM 1020-9805 Manual Rev A.docx Page 103...
- Page 104 Mfg by Ekto. 2000 BTU A/C. Mini Enclosure, Heated and Air Conditioned. BX-904 Mfg by Ekto. 4000 BTU A/C. Enclosure, Dual Unit, Heated and Air Conditioned. BX-906 Mfg by Ekto. 4000 BTU A/C. Page 104 BAM 1020-9805 Manual Rev A.docx...
-
Page 105: Theory Of Operation
The same membrane whose known mass density is used to determine is built into the instrument and subsequently used to challenge the same BAM 1020 on an hourly basis to ensure that the original span calibration is being held. BAM 1020-9805 Manual Rev A.docx... -
Page 106: Converting Data Between Epa Standard And Actual Conditions
The collocated monitors then sample and measure the same aerosol (smoke) for 24 hours. A linear regression of the hourly output of the BAM 1020 under test against the transfer standard BAM 1020 will provide a slope “ ” is used to set the final calibration. This is shown in the equation below.
Need help?
Do you have a question about the BAM 1020 and is the answer not in the manual?
Questions and answers