Table of Contents
Advertisement
Quick Links
Advertisement
Chapters
Table of Contents

Related Manuals for MSI MEG PROSPECT 700RL


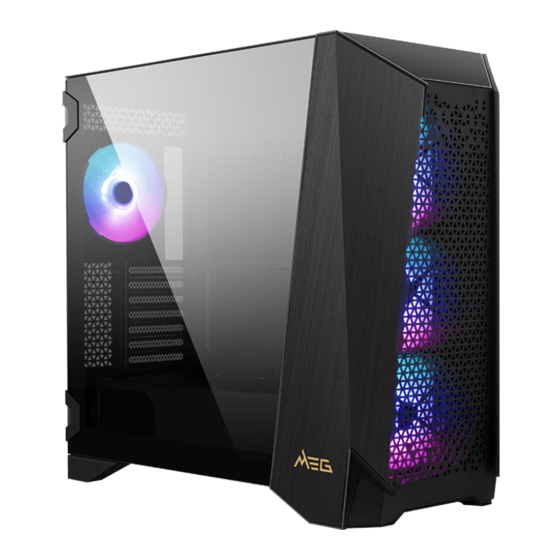
Summary of Contents for MSI MEG PROSPECT 700RL
- Page 1 MEG PROSPECT 700RL PC Case User Guide 使用手冊 Manuel d’utilisation...
- Page 2 English 繁體中文 Français...
- Page 3 MEG PROSPECT 700RL PC Case User Guide...
-
Page 4: Table Of Contents
Contents Accessories �����������������������������������������������������������������������������������������������������������������3 Specification ����������������������������������������������������������������������������������������������������������������5 Case Features �������������������������������������������������������������������������������������������������������������6 Side & Front View �������������������������������������������������������������������������������������������������������7 IO Panel �����������������������������������������������������������������������������������������������������������������������8 SSD, HDD Installation �������������������������������������������������������������������������������������������������9 Side Covers Removal ������������������������������������������������������������������������������������������������10 Front Bezel Removal ������������������������������������������������������������������������������������������������12 Water Cooling Radiator Installation �������������������������������������������������������������������������13 Back Cable Cover Replacement �������������������������������������������������������������������������������16 E-ATX Motherboard Bracket Replacement ��������������������������������������������������������������17 Motherboard Installation ������������������������������������������������������������������������������������������18 Horizontal Graphics Card Installation ����������������������������������������������������������������������19 Vertical Graphics Card Installation ��������������������������������������������������������������������������20... -
Page 5: Accessories
Accessories Item Name / Q’ty Used for 1 to 3 fan splitter cable Connect fans Cable ties Cable management Securing vertical L-shaped Screwdriver graphics card & holder Screw M3 5mm Motherboard / SSD / PCIe riser cable Screw #6-32 5mm Securing E-ATX motherboard bracket Screw #6-32 6mm... - Page 6 Item Name / Q’ty Used for Vertical graphics card Installing holder kit graphics card Back cable cover Replacing the side fan bracket Securing E-ATX motherboard E-ATX motherboard bracket * Support E-ATX motherboard up to 310mm x 304�8mm�...
-
Page 7: Specification
Specification Size Mid-Tower Fan LED Controller 1 to 6 ARGB (3 pin) Control Board Front: 3x 140 mm ARGB fans Pre-Installed Fan Rear: 1x 140 mm ARGB fan Top Panel: Steel Chassis: Steel (SPCC 0�8 mm) Material Right Side Panel: Steel Left Side Panel: Tempered glass Front Bezel: Plastic + Mesh + Steel Front, Top, Side: Metal vents + Magnetic frame dust filter ABS mesh... -
Page 8: Case Features
Case Features... -
Page 9: Side & Front View
Side & Front View 257mm 585mm... -
Page 10: Io Panel
1. Short press the LED switch once to switch the LED effect. 2. The LED will flash white once when you press and hold the LED switch for 3 seconds, and then the MSI motherboard Mystic Light synchronization mode will be enabled� Short press once to return the Hub control mode�... -
Page 11: Ssd, Hdd Installation
SSD, HDD Installation 45°... -
Page 12: Side Covers Removal
Side Covers Removal Left side cover Continued on next page... - Page 13 Continued from previous page Right side cover...
-
Page 14: Front Bezel Removal
Front Bezel Removal Remove the left and right side covers first, before opening the front bezel. -
Page 15: Water Cooling Radiator Installation
Water Cooling Radiator Installation Top water cooling radiator ⚠ Note Water cooling radiators must be purchased sepa- rately� For more informa- tion, please refer to water cooling radiator user guide� Continued on next page... - Page 16 Continued from previous page...
- Page 17 Side water cooling radiator...
-
Page 18: Back Cable Cover Replacement
Back Cable Cover Replacement Side fan bracket - Securing liquid cooling radiator or system fan� Back cable cover... -
Page 19: E-Atx Motherboard Bracket Replacement
E-ATX Motherboard Bracket Replacement Front cable cover - Cable management E-ATX motherboard bracket - Support E-ATX motherboard up to 310mm x 304�8mm�... -
Page 20: Motherboard Installation
Motherboard Installation... -
Page 21: Horizontal Graphics Card Installation
Horizontal Graphics Card Installation... -
Page 22: Vertical Graphics Card Installation
Vertical Graphics Card Installation Continued on next page... - Page 23 Continued from previous page Connect to motherboard PCIe Riser Cable must be purchased separately...
-
Page 24: Psu Installation
PSU Installation... -
Page 25: Cable Connection
Cable Connection SATA Power HDAUDIO JFP1 JAUD1 JUSB JUSB (USB 3�2 Gen2) (USB 3�2 Gen1) -
Page 26: Control Board Specification
50 x 30 Dimensions (mm) Support LED Type DC5V Addressable RGB LED 1x LED switch connector 1x SATA power connector Connectors 1x MSI motherboard JRAINBOW connector 6x 3-pin ARGB LED connectors ARGB Pin Definition Ground Data LED effect cycle: 1� Rainbow 2�... -
Page 27: Argb Fan Connection
ARGB Fan Connection ARGB Fan ARGB Fan ARGB Fan SYS_FAN SYS_FAN SYS_FAN Connect to the MSI motherboard JRAINBOW connector 1 to 6 ARGB Control Board LED Switch SATA Pqwer SYS_FAN SYS_FAN SYS_FAN ARGB Fan ARGB Fan ARGB Fan ⚠ Note ∙... - Page 28 繁體中文 MEG PROSPECT 700RL PC Case User Guide 使用手冊...
- Page 29 Contents / 目錄 Accessories / 配件 ������������������������������������������������������������������������������������������������������3 Specification / 產品規格 ����������������������������������������������������������������������������������������������5 Case Features / 機殼特色 �������������������������������������������������������������������������������������������6 Side & Front View / 側面和前面 ����������������������������������������������������������������������������������7 IO Panel / IO 面板 ��������������������������������������������������������������������������������������������������������8 SSD, HDD Installation / 安裝 SSD 和硬碟 ������������������������������������������������������������������9 Side Covers Removal / 移除側板 ������������������������������������������������������������������������������10 Front Bezel Removal/ 移除前面板...
-
Page 30: Accessories
Accessories / 配件 Item 項目 Name 名稱 / Q’ty 數量 Used for 用途 1 to 3 fan splitter cable Connect fans 1 對 3 風扇分接線 連接風扇 Cable ties Cable management 束線帶 整線 Securing vertical L-shaped Screwdriver graphics card & holder L 型螺絲起子... - Page 31 Item 項目 Name 名稱 / Q’ty 數量 Used for 用途 Vertical graphics card Installing holder kit graphics card 垂直顯示卡支架套件 安裝顯示卡 Back cable cover Replacing the 後遮線檔版 side fan bracket 替換側風扇支架 Securing E-ATX motherboard 固定 E-ATX 主機板 E-ATX motherboard bracket E-ATX 主機板支架 * Support E-ATX motherboard up to 310mm x 304�8mm�...
-
Page 32: Specification / 產品規格
Specification / 產品規格 Size Mid-Tower 尺寸 Fan LED Controller 1 to 6 ARGB (3 pin) Control Board 風扇 LED 控制板 Pre-Installed Fan Front: 3x 140 mm ARGB fans 預裝風扇 Rear: 1x 140 mm ARGB fan Top Panel: Steel ( 鋼板 ) Chassis: Steel (SPCC 0.8 mm) ( 鋼板外框... -
Page 33: Case Features / 機殼特色
Case Features / 機殼特色... -
Page 34: Side & Front View / 側面和前面
Side & Front View / 側面和前面 257mm 585mm... -
Page 35: Io Panel / Io
1. Short press the LED switch once to switch the LED effect. 2. The LED will flash white once when you press and hold the LED switch for 3 seconds, and then the MSI motherboard Mystic Light synchronization mode will be enabled� Short press once to return the Hub control mode�... -
Page 36: Ssd, Hdd Installation / 安裝 Ssd 和硬碟
SSD, HDD Installation / 安裝 SSD 和硬碟 45°... -
Page 37: Side Covers Removal / 移除側板
Side Covers Removal / 移除側板 Left side cover 左側板 Continued on next page 下頁繼續... - Page 38 Continued from previous page 接續前頁 Right side cover 右側板...
-
Page 39: Front Bezel Removal/ 移除前面板
Front Bezel Removal/ 移除前面板 Remove the left and right side covers first, before opening the front bezel. 移除面板前,請先移除左右側板。... -
Page 40: Water Cooling Radiator Installation/ 安裝水冷排
Water Cooling Radiator Installation/ 安裝水冷排 Top water cooling radiator 頂部水冷排 ⚠ Note / 注意 Water cooling radiators must be purchased separately� For more information, please refer to water cooling radiator user guide� 水冷排需另外購買,詳細 安裝方式請參考水冷排使 用手冊。 Continued on next page 下頁繼續... - Page 41 Continued from previous page 接續前頁...
- Page 42 Side water cooling radiator 側邊水冷排...
-
Page 43: Back Cable Cover Replacement / 替換後遮線檔版
Back Cable Cover Replacement / 替換後遮線檔版 Side fan bracket -Securing liquid cooling radiator or system fan� 側風扇支架 - 固定水冷排或系統風扇 Back cable cover 後遮線擋板... -
Page 44: E-Atx Motherboard Bracket Replacement
E-ATX Motherboard Bracket Replacement / 替換 E-ATX 主機板支架 Front cable cover - Cable management 前遮線檔版 - 整線 E-ATX motherboard bracket - Support E-ATX motherboard up to 310mm x 304�8mm� E-ATX 主機板支架 - E-ATX 主機板尺寸最大可支 援 310mm x 304.8mm . -
Page 45: Motherboard Installation / 安裝主機板
Motherboard Installation / 安裝主機板... -
Page 46: Horizontal Graphics Card Installation / 安裝橫式顯示卡
Horizontal Graphics Card Installation / 安裝橫式顯示卡... -
Page 47: Vertical Graphics Card Installation / 安裝直立式顯示卡
Vertical Graphics Card Installation / 安裝直立式顯示卡 Continued on next page 下頁繼續... - Page 48 Continued from previous page 接續前頁 Connect to motherboard 連接到主機板 PCIe Riser Cable must be purchased separately PCIe 轉接線需另外購買...
-
Page 49: Psu Installation / 安裝電源供應器
PSU Installation / 安裝電源供應器... -
Page 50: Cable Connection / 連接接頭
Cable Connection / 連接接頭 SATA Power HDAUDIO JFP1 JAUD1 JUSB JUSB (USB 3�2 Gen2) (USB 3�2 Gen1) -
Page 51: Control Board Specification / 控制板規格
支援 LED 種類 1x LED switch connector (LED 按鈕接頭 ) 1x SATA power connector (SATA 電源接頭 ) Connectors 1x MSI motherboard JRAINBOW connector ( 微星主機板 接頭 JRAINBOW 接頭 ) 6x 3-pin ARGB LED connectors (3 針 ARGB LED 接頭 ) ARGB Pin Definition ARGB 針腳定義... -
Page 52: Argb Fan Connection / 連接 Argb
ARGB Fan Connection / 連接 ARGB 風扇 ARGB Fan ARGB Fan ARGB Fan ARGB 風扇 ARGB 風扇 ARGB 風扇 SYS_FAN SYS_FAN SYS_FAN Connect to the MSI motherboard JRAINBOW connector 1 to 6 ARGB 連接到微星主機板 Control Board JRAINBOW 接頭 1對6 ARGB 控制板 LED Switch LED 按鈕... - Page 53 MEG PROSPECT 700RL Boîtier PC Guide d’utilisation...
- Page 54 Table des matières Accessoires �����������������������������������������������������������������������������������������������������������������3 Caractéristiques ���������������������������������������������������������������������������������������������������������5 Caractéristiques du boîtier �����������������������������������������������������������������������������������������6 Vue de face et de côté �������������������������������������������������������������������������������������������������7 Panneau E/S ���������������������������������������������������������������������������������������������������������������8 Installation du SSD et du disque dur ��������������������������������������������������������������������������9 Retrait des panneaux latéraux ���������������������������������������������������������������������������������10 Retrait du panneau avant �����������������������������������������������������������������������������������������12 Installation du radiateur de refroidissement par eau ���������������������������������������������13 Remplacement du couvercle de câble arrière ���������������������������������������������������������16 Remplacement du support de carte mère E-ATX ����������������������������������������������������17 Installation de la carte mère ������������������������������������������������������������������������������������18...
-
Page 55: Accessoires
Accessoires Élément Nom / Quantité Utilisé pour Câble répartiteur de venti- Connecter les ventila- lateur 1 à 3 teurs Attaches de câble Gestion des câbles Fixer la carte Tournevis en forme de L graphique et le support vertical Vis M3 5 mm Carte mère / SSD / Câble montant PCIe Vis #6-32 5 mm... - Page 56 Élément Nom / Quantité Utilisé pour Kit de support vertical de Installer la carte gra- carte graphique phique Cache-câble arrière Remplacer le support de ventilateur latéral Fixer la carte mère E-ATX Support de carte mère E-ATX * Support de la carte mère E-ATX jusqu’à...
-
Page 57: Caractéristiques
Caractéristiques Taille Moyen Tour Contrôleur LED du venti- Panneau de contrôle 1 à 6 ARGB (3 broches) lateur Avant : 3 x ventilateurs ARGB de 140 mm Ventilateurs préinstallés Arrière : 1 x ventilateur ARGB de 140 mm Haut : Acier Châssis : Acier (SPCC 0,8 mm) Matériau Panneau latéral droit : Acier... -
Page 58: Caractéristiques Du Boîtier
Caractéristiques du boîtier... -
Page 59: Vue De Face Et De Côté
Vue de face et de côté 257 mm 585 mm... -
Page 60: Panneau E
2� Lorsque vous appuyez sur l’interrupteur LED et maintenez-le pendant 3 secondes, la LED clignotera une fois en blanc, puis le mode de synchronisation Mystic Light de la carte mère MSI sera activé� Appuyez brièvement une fois pour revenir au mode de contrôle Hub�... -
Page 61: Installation Du Ssd Et Du Disque Dur
Installation du SSD et du disque dur 45°... -
Page 62: Retrait Des Panneaux Latéraux
Retrait des panneaux latéraux Panneau latéral gauche Suite à la page suivante... - Page 63 Suite de la page précédente Panneau latéral droit...
-
Page 64: Retrait Du Panneau Avant
Retrait du panneau avant Retirez d’abord les panneaux latéraux gauche et droit avant d’ouvrir le panneau avant�... -
Page 65: Installation Du Radiateur De Refroidissement Par Eau
Installation du radiateur de refroidissement par eau Radiateur de refroidissement par eau supérieur ⚠ Remarque Les radiateurs de refroidis- sement par eau doivent être achetés séparément� Pour plus d’informations, veuillez vous référer au guide d’utilisation du radiateur de refroidissement par eau� Suite à... - Page 66 Suite de la page précédente...
- Page 67 Radiateur de refroidissement par eau latéral...
-
Page 68: Remplacement Du Couvercle De Câble Arrière
Remplacement du couvercle de câble arrière Support de ventilateur latéral - Fixer le radiateur de refroidissement liquide ou le ventilateur du système� Cache-câble arrière... -
Page 69: Remplacement Du Support De Carte Mère E-Atx
Remplacement du support de carte mère E-ATX Cache-câble avant - Gestion des câbles Remplacement du support de carte mère E-ATX - Support de la carte mère E-ATX jusqu’à 310 mm x 304,8 mm�... -
Page 70: Installation De La Carte Mère
Installation de la carte mère... -
Page 71: Installation Horizontale De La Carte Graphique
Installation horizontale de la carte graphique... -
Page 72: Installation Verticale De La Carte Graphique
Installation verticale de la carte graphique Suite à la page suivante... - Page 73 Suite de la page précédente Connecter à la carte mère Le câble montant PCIe doit être acheté séparément...
-
Page 74: Installation Du Bloc D'alimentation
Installation du bloc d’alimentation... -
Page 75: Connexion Du Câble
Connexion du câble SATA Power HDAUDIO JFP1 JAUD1 JUSB JUSB (USB 3�2 Gen 2) (USB 3�2 Gen 1) -
Page 76: Caractéristiques Du Panneau De Contrôle
Type de LED LED RGB adressable DC5V 1 x connecteur de l’interrupteur LED 1 x connecteur d’alimentation SATA Connecteurs 1 x connecteur JRAINBOW de la carte mère MSI 6 x connecteurs LED ARGB à 3 broches Définition des broches ARGB Ground Data Cycle de l’effet de LED :... -
Page 77: Connexion Du Ventilateur Argb
Connexion du ventilateur ARGB Ventilateur ARGB Ventilateur ARGB Ventilateur ARGB SYS_FAN SYS_FAN SYS_FAN Connecter au connecteur JRAINBOW de la carte mère Panneau de contrôle 1 à 6 ARGB Interrupteur LED SATA Power SYS_FAN SYS_FAN SYS_FAN Ventilateur ARGB Ventilateur ARGB Ventilateur ARGB ⚠...
Need help?
Do you have a question about the MEG PROSPECT 700RL and is the answer not in the manual?
Questions and answers