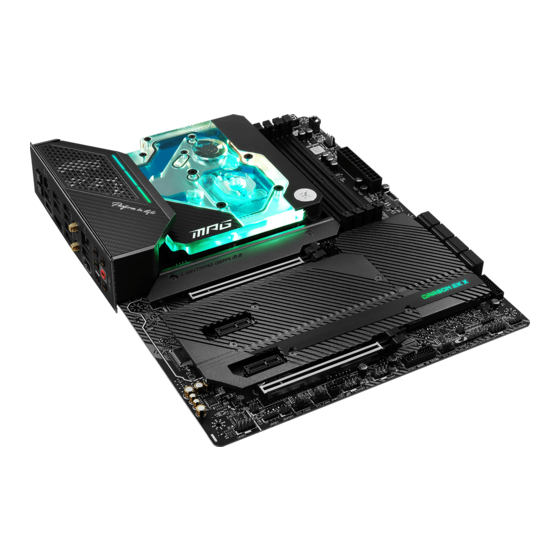
MSI MPG X570S Carbon EK X User Manual
Monoblock
Hide thumbs
Also See for MPG X570S Carbon EK X:
- Quick start manual (196 pages) ,
- User manual (67 pages) ,
- User manual (375 pages)
Table of Contents
Advertisement
Advertisement
Table of Contents

Related Manuals for MSI MPG X570S Carbon EK X


Summary of Contents for MSI MPG X570S Carbon EK X
- Page 1 MSI MPG X570S Carbon EK X MONOBLOCK USER GUIDE...
- Page 2 This product is intended for installation only by expert users. Please consult with a qualified technician for installation. Improper installation may result in damage to your equipment. EK Water Blocks assumes no liability whatsoever, expressed or implied, for the use of these products, nor their installation. The following instructions are subject to change without notice.
-
Page 3: Table Of Contents
TABLE OF CONTENT BOX CONTENTS PREPARING YOUR MOTHERBOARD REMOVING FACTORY PROVIDED BACKPLATE REMOVING STOCK COOLER REMOVING OF THE ORIGINAL PLASTIC HOLD-DOWN AND THE FACTORY BACKPLATE APPLYING THERMAL COMPOUND CUTTING THERMAL PADS PLACING THERMAL PADS ON THE MOTHERBOARD PLACING THE BLOCK ON TO MOTHERBOARD ATTACHING BLOCK ON THE MOTHERBOARD CONNECTING THE D-RGB LED STRIP REQUIRED TOOLS... -
Page 4: Box Contents
BOX CONTENTS Universal Mounting Mechanism – You may not need every screw from this package. M2.5 x 5 AX1 Screw (5 pcs) M2.5 PVC Washer (5 pcs) EK-Quantum Momentum Aorus X570S Carbon EK X Allen Key 2mm (1 pc) M2.5 Adhesive Washer (5 pcs) Thermal Grease (1 pc) M3 x 10 DIN7984 (5 pcs) Thermal PAD F 1.0 mm - (120x16mm) (2 pcs) -
Page 5: Preparing Your Motherboard
PREPARING YOUR MOTHERBOARD MOSFET SCREWS REMOVING STOCK COOLER Remove all encircled screws. There are four (4) MOSFET screws on the back of the motherboard that needs to be removed. Additional three (3) screws needs to be removed to remove the plastic I/O cover. Store the screws for later use. You can attach the I/O cover back, after you mount the Monoblock. -
Page 6: Removing Of The Original Plastic Hold-Down And The Factory Backplate
REMOVING OF THE ORIGINAL PLASTIC HOLD- DOWN AND THE FACTORY BACKPLATE UNC 6-32 SCREWS Using Philips-head screwdriver remove the four (4) UNC 6-32 screws securing the original plastic hold-down clamps around the socket as shown on the sketch. Remove the original backplate and the hold- down clamps. FACTORY BACKPLATE - 6 -... -
Page 7: Applying Thermal Compound
APPLYING THERMAL COMPOUND Thermal PAD F 1.0 mm (120 x 16 mm) Apply thermal compound on CPU heat spreader (IHS) with enclosed EK-TIM Ectotherm thermal grease. The quantity of about two rice grains is just about right. There is no need to cover the whole IHS. Applying too much thermal 120 mm 1 mm grease will have negative impact on the cooling performance! -
Page 8: Placing The Block On To Motherboard
PLACING THE BLOCK ON TO MOTHERBOARD STEP 1 M2.5 SELF ADHESIVE PVC WASHER Install four (4) M2.5 self adhesive PVC washers under marked standoffs as shown on the picture below. STEP 1 STEP 2 Place the EK-Quantum Momentum X570 Aorus Master Monoblock series water block to the motherboard or vice versa (as shown on the photo). -
Page 9: Attaching Block On The Motherboard
ATTACHING BLOCK ON THE MOTHERBOARD M2.5x5 AX1 SCREW PVC WASHER STEP 1 M3x10 DIN7984 Prior to fastening the screws please make sure the mounting holes on the BACKPLATE motherboard’s circuit board are aligned with the water block. INSULATOR Mosfet part: Use three (3) M2.5 x 5 AX1 Screws with PVC washers. Tighten the screws evenly. -
Page 10: Connecting The D-Rgb Led Strip
CONNECTING THE D-RGB LED STRIP Plug the 3-pin connector from Monoblock D-RGB LED strip to the motherboard. Please ensure that the arrow indicated on the connector is plugged into the +5V line as indicated on your motherboard. Failure to do so will damage your motherboard or LED strip. -
Page 11: Support And Service
SUPPORT AND SERVICE In case you need assistance or wish to order spare parts or a new mounting mechanism, please contact: https://www.ekwb.com/customer- support/ For spare parts orders, refer to the page with “TECHNICAL SPECIFICATIONS AND PRODUCT PARTS” where you can find the EAN number of each part you might need.
Need help?
Do you have a question about the MPG X570S Carbon EK X and is the answer not in the manual?
Questions and answers