
Related Manuals for Makita GLC03


Summary of Contents for Makita GLC03
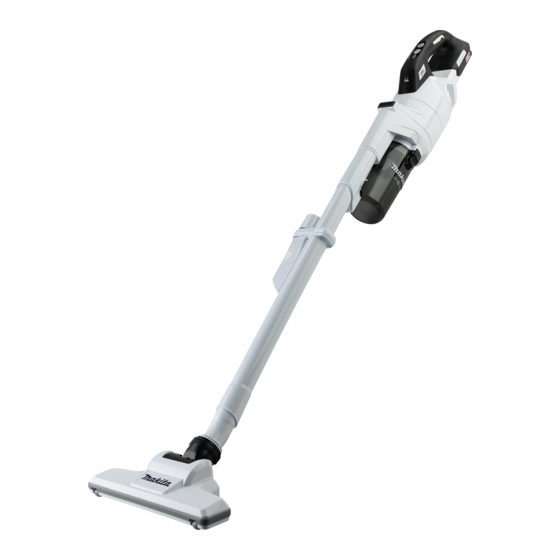
- Page 1 INSTRUCTION MANUAL MANUAL DE INSTRUCCIONES Cordless Cleaner Aspiradora Inalámbrica GLC03 IMPORTANT: Read Before Using. IMPORTANTE: Lea antes de usar.
-
Page 2: Specifications
ENGLISH (Original instructions) SPECIFICATIONS Model: GLC03 Capacity 250 mL (0.07 gal.) Continuous use 1 (Quiet mode) Approx. 80 min (with battery BL4025) 2 (Normal speed mode) Approx. 40 min 3 (High speed mode) Approx. 25 min 4 (Max speed mode) Approx. -
Page 3: Additional Safety Rules
Do not put any object into openings. Under abusive conditions, liquid Do not use with any opening blocked; may be ejected from the battery; keep free of dust, lint, hair, and any- avoid contact. If contact acciden- thing that may reduce air flow. tally occurs, flush with water. - Page 4 Do not vacuum the following: Do not bring close to stoves or other heat sources. Flammable liquid (kerosene, • gasoline, solvents such as ben- Do not block the intake hole or vent zine, thinner, etc.) holes. Hot substances that are burn- SAVE THESE •...
- Page 5 Please also observe possibly more have been altered, may result in the battery bursting detailed national regulations. causing fires, personal injury and damage. It will also void the Makita warranty for the Makita tool and Tape or mask off open contacts and charger. pack up the battery in such a man-...
-
Page 6: Battery Protection System
Charge the battery(ies) or replace it/them with recharged battery(ies). Let the tool and battery(ies) cool down. If no improvement can be found by restoring protection system, then contact your local Makita Service Center. Indicating the remaining battery capacity Press the check button on the battery cartridge to indi- cate the remaining battery capacity. - Page 7 Lighting up the lamp Indicator lamps Remaining capacity CAUTION: Do not look in the light or see the Lighted Blinking source of light directly. 75% to 100% To turn on the lamp, push the suction power change button. The lamp goes off in approximately 10 seconds. 50% to 75% While the cleaner is running, the lamp turns on.
-
Page 8: Parts Description
PARTS DESCRIPTION Fig.6 250 mL (0.07 gal.) dust Mesh filter Cyclone body High performance case filter (Filter frame in gray color) (Optional accessory) HEPA filter (Filter frame Sponge sheet Cleaner body Hand strap (Country in white color) (Optional specific) accessory) When using attachment with lock ASSEMBLY function To install attachment, insert it to the suction inlet of the CAUTION: Always be sure that the tool is... -
Page 9: Operation
To remove attachment, pull it off the cleaner while Cleaning (Suction) pressing and holding the arms of the release button. Nozzle Attach the nozzle to clean off tables, desks, furniture, etc. The nozzle slips on easily. Fig.8 ► 1 . Release button 2. Arm of release button 3. Attachment with lock function 4. Suction inlet When using attachment without lock function Fig.10 ► 1 . - Page 10 You can store the corner nozzle in the nozzle holder. For picking up dust on a floor in a standing position, it is convenient to attach the extension wand (straight pipe) to the cleaner. Fig.13 ► 1 . Nozzle holder 2. Corner nozzle CAUTION: Be careful not to trap finger(s) between the corner nozzle and the nozzle holder. Fig.16 Trapping finger(s) may cause injury.
-
Page 11: After Use
NOTICE: Never use gasoline, benzine, thinner, alcohol or the like. Discoloration, deformation or cracks may result. To maintain product SAFETY and RELIABILITY, repairs, any other maintenance or adjustment should be performed by Makita Authorized or Factory Service Centers, always using Makita replacement parts. 11 ENGLISH... - Page 12 Cyclone unit and filters NOTE: Dust may fly out when the cyclone unit is disassembled. It is recommended to place a garbage NOTICE: Dust off and clean out inside the bag underneath the cyclone unit. cyclone unit and filters, when suction perfor- mance becomes less effective regardless of the Dust off inside the cyclone unit and filter. amount of dust collected in the dust case. NOTICE: After washing filters, dry them thor- oughly before use. Insufficiently dried filters may...
- Page 13 High performance filter Hold the mounting end of high performance filter and squeeze it back into the cleaner body. Optional accessory Disassemble the cyclone unit from the cleaner body. Hold the mounting end of high performance filter and pull it apart from the cleaner body. Fig.29 ► 1 . High performance filter 2. Cleaner body HEPA filter Fig.26 Optional accessory ► 1 . High performance filter 2.
- Page 14 Wipe and shake dust off the high performance Hold the mounting end of HEPA filter (covered with prefilter and HEPA filter by hand. high performance prefilter) and squeeze it back into the cleaner body. Fig.32 Fig.35 Wash the high performance prefilter and HEPA ► 1 . HEPA filter (covered with the high performance filter in soapy water. Rinse and dry them thoroughly in prefilter) 2. Cleaner body the shade before use. Sponge sheet Disassemble the cyclone unit from the cleaner body. Hold the mounting end of filter and pull it apart from the cleaner body. Fig.36 Fig.33 ► 1 . Filter 2. Cleaner body NOTE: Avoid fastening the attachment end (rubber sealing ring) of HEPA filter when hanging it up for Pull the sponge sheet off from the suction...
- Page 15 Wipe and shake dust off the sponge sheet by Place the sponge sheet back in the original hand. position. Make sure that the left and right edges of the sponge sheet are secured with stoppers and no gap between the sponge sheet and suction opening. Fig.38 Wash the sponge sheet in soapy water when it is clogged with dust and dirt.
- Page 16 Disassemble the mesh filter into three compo- Condition-based maintenance nents: prefilter, tubular sponge filter and mesh pipe. Squeeze the guide stoppers on top of the mesh NOTICE: Clean the mesh filter in the cyclone pipe together. unit when they become clogged. Continued use in Pass the guide stoppers down through the guide the clogged condition may result in heating or motor hole on top of the prefilter.
- Page 17 Wash the filters and mesh pipe in soapy water Attach the mesh filter back into the cyclone body when they are clogged with dust and dirt. Dry them out aligning the hooks on the mesh filter with the ports on thoroughly in the shade before use. the suction outlet of the cyclone body. Turn the mesh filter as shown in the figure until the hooks are locked with a click. Make sure that the mesh filter is installed securely. Fig.46 Reassemble the mesh filter. Insert the tubular sponge filter into the prefilter. Insert the mesh pipe into the tubular sponge filter Fig.48 and prefilter, passing the guide stoppers on top of the mesh pipe through the guide hole on top of the prefilter. ► 1 . Mesh filter 2.
- Page 18 Press and hold the guide stopper on the inlet pipe Insert the inlet pipe back in place until it is securely down through the locking hole on the cyclone body locked. using the hand tool with a point. Then detach the inlet pipe from the cyclone body. Fig.52 ► 1 . Inlet pipe 2. Cyclone body 3. O-ring 4. Flap valve Fig.50 ► 1 . Inlet pipe 2.
-
Page 19: Troubleshooting
CAUTION: These accessories or attachments most current warranty terms applicable to this product. are recommended for use with your Makita tool If annexed warranty sheet is not available, refer to the specified in this manual. The use of any other warranty details set forth at below website for your accessories or attachments might present a risk of respective country. -
Page 20: Especificaciones
ESPAÑOL (Instrucciones originales) ESPECIFICACIONES Modelo: GLC03 Capacidad 250 ml (0,07 gal.) Uso continuo 1 (Modo silencioso) Aprox. 80 min (con batería BL4025) 2 (Modo velocidad normal) Aprox. 40 min 3 (Modo velocidad alta) Aprox. 25 min 4 (Modo velocidad máxima) Aprox. - Page 21 No lo utilice con una batería dañada. Recargue sólo con el cargador Si el aparato no está funcionando especificado por el fabricante. Un como debiera, se ha dejado caer, se cargador que es adecuado para un ha dañado, se ha dejado a la intem- solo tipo de paquete de baterías puede perie o ha caído sobre agua, llévelo generar riesgo de incendio al ser utili-...
-
Page 22: Reglas De Seguridad Adicionales
Pida que el servicio lo realice un técnico Polvo fino conductor y solidi- • en reparaciones calificado y que utilice ficante (polvo metálico o de únicamente piezas de repuesto idénti- carbono) cas a las originales. Esto garantizará que Deshumidificador • se mantenga la seguridad del producto. - Page 23 Utilice las baterías únicamente No toque los terminales con con los productos especificados ningún material conductor. por Makita. Instalar las baterías Evite guardar el cartucho de en productos que no cumplan con batería en un cajón junto con los requisitos podría ocasionar un otros objetos metálicos, tales...
-
Page 24: Descripción Del Funcionamiento
Makita para la herramienta y el lesiones a la persona. cargador Makita. Consejos para alargar al máximo la vida útil de la batería... - Page 25 Apague la herramienta, y luego enciéndala nueva- mente para reiniciarla. Cargue la(s) batería(s) o reemplácela(s) con batería(s) recargada(s). Deje que la herramienta y la(s) batería(s) se enfríen. Si no hay ninguna mejora al restaurar el sistema de protección, comuníquese con su centro local de servi- cio Makita. 25 ESPAÑOL...
-
Page 26: Descripción De Las Piezas
Accionamiento del interruptor NOTA: Puede cambiar la potencia de succión antes de encender la aspiradora. NOTA: La aspiradora inicia la operación con la misma potencia de succión que la última operación. Encendido de la lámpara PRECAUCIÓN: No mire a la luz ni vea a la fuente de luz directamente. -
Page 27: Montaje
Para quitar el accesorio, sáquelo de la aspiradora MONTAJE mientras presiona y sostiene los brazos del botón de liberación. PRECAUCIÓN: Asegúrese siempre de que la herramienta esté apagada y el cartucho de batería haya sido extraído antes de realizar cualquier trabajo en la misma. -
Page 28: Operación
Boquilla para esquinas OPERACIÓN Coloque la boquilla para esquinas para aspirar esqui- nas y huecos en autos y muebles. PRECAUCIÓN: No ponga la cara cerca de la abertura de ventilación cuando utilice la aspira- dora. Si las partículas sopladas se introducen en los ojos, podrían causar lesiones. - Page 29 Aspirado sin boquilla Deseche el polvo acumulado de la siguiente manera, antes de que exceda la línea indicadora de eliminación Puede aspirar el polvo sin el uso de la boquilla. de polvo. Apunte el cabezal de la aspiradora hacia abajo, sujete la caja para polvo firmemente y luego sepárela del cuerpo ciclónico mientras presiona y mantiene presionados los botones de liberación a ambos lados de la caja para polvo.
-
Page 30: Mantenimiento Regular
Para mantener la SEGURIDAD y CONFIABILIDAD del producto, las reparaciones y cualquier otro manteni- Fig.21 miento o ajuste deben ser realizados por los centros de servicio autorizados por Makita o de fábrica, utilizando Unidad ciclónica y filtros siempre repuestos Makita. Después del uso AVISO: Quite el polvo y limpie el interior de la unidad ciclónica y los filtros, cuando el desem-... - Page 31 Unidad ciclónica Sacuda el polvo dentro de la unidad ciclónica y del filtro. Golpee la unidad ciclónica varias veces con la mano para eliminar el polvo adherido a la superficie interna de la unidad ciclónica y el filtro. Fig.24 Coloque la unidad ciclónica nuevamente sobre Fig.22 el cuerpo de la aspiradora, alineando el indicador de la unidad ciclónica con el del cuerpo de la aspiradora.
- Page 32 Filtro de alto rendimiento NOTA: Evite sujetar el extremo del accesorio (anillo de sellado de goma) del filtro de alto rendimiento Accesorio opcional cuando lo cuelgue para secarlo. Desmonte la unidad ciclónica del cuerpo de la aspiradora. Sostenga el extremo de montaje del filtro de alto rendimiento, y métalo nuevamente dentro del cuerpo de Sostenga el extremo de montaje del filtro de alto la aspiradora. rendimiento, y sepárelo del cuerpo de la aspiradora. Fig.29 Fig.26 ► 1 . Filtro de alto rendimiento 2. Cuerpo de la ► 1 .
- Page 33 Desmonte el prefiltro de alto rendimiento del filtro Coloque el prefiltro de alto rendimiento sobre el HEPA girándolo con la mano. filtro HEPA. Fig.31 Fig.34 ► 1 . Prefiltro de alto rendimiento 2. Filtro HEPA ► 1 . Prefiltro de alto rendimiento 2. Filtro HEPA Limpie y sacuda el polvo del prefiltro de alto rendi- Sostenga el extremo de montaje del filtro HEPA miento y el filtro HEPA manualmente. (cubierto con el prefiltro de alto rendimiento), y métalo nuevamente dentro del cuerpo de la aspiradora. Fig.32 Fig.35 Lave el prefiltro de alto rendimiento y el filtro ► 1 . Filtro HEPA (cubierto con el prefiltro de alto rendi- HEPA en agua enjabonada. Enjuague y déjelos secar miento) 2. Cuerpo de la aspiradora por completo a la sombra antes de usarlos.
- Page 34 Retire la lámina de esponja de la abertura de Vuelva a colocar la lámina de esponja en su posi- succión. ción original. Asegúrese de que los bordes izquierdo y derecho de la lámina de esponja estén asegurados con topes, y que no haya espacios entre la lámina de esponja y la abertura de succión. Fig.37 ► 1 . Lámina de esponja 2. Abertura de succión Limpie y sacuda el polvo de la lámina de esponja con la mano. Fig.40 ► 1 . Lámina de esponja 2. Tope 3. Abertura de succión Sostenga el extremo de montaje del filtro, y Fig.38...
- Page 35 Desmonte el filtro de malla en tres componentes: Mantenimiento según la condición prefiltro, filtro de esponja tubular y tubo de malla. Apriete juntos los topes de guía de la parte supe- AVISO: Limpie el filtro de malla de la unidad rior del tubo de malla. ciclónica cuando se obstruya. El uso continuo en la Pase los topes de guía hacia abajo a través del condición obstruida podría provocar su calentamiento orificio guía de la parte superior del prefiltro. o avería del motor. iii Tire del prefiltro a lo largo del filtro de esponja Debe realizarse una limpieza profunda y puntual de...
- Page 36 Lave los filtros y el tubo de malla con agua enja- Vuelva a colocar el filtro de malla en dentro del bonada cuando estén obstruidos con polvo y suciedad. cuerpo ciclónico, alineando los ganchos del filtro de Déjelos secar por completo a la sombra antes de malla con los puertos de la salida de succión del cuerpo usarlos. ciclónico. Gire el filtro de malla como se muestra en la figura hasta que los ganchos se bloqueen con un clic. Asegúrese de que el filtro de malla se instale firmemente. Fig.46 Vuelva a montar el filtro de malla. Inserte el filtro de esponja tubular dentro del prefiltro. Fig.48 Inserte el tubo de malla dentro del filtro de esponja tubular y el prefiltro, pasando los topes de guía de la ► 1 . Filtro de malla 2. Cuerpo ciclónico 3. Gancho parte superior del tubo de malla a través del orificio 4.
- Page 37 Presione y mantenga presionado el tope de guía Inserte el tubo de entrada de nuevo en su lugar del tubo de entrada hacia abajo a través del orificio de hasta que quede bloqueado de forma segura. bloqueo del cuerpo ciclónico usando la herramienta manual con punta. Luego, desmonte el tubo de entrada del cuerpo ciclónico. Fig.52 ► 1 . Tubo de entrada 2. Cuerpo ciclónico 3. Junta tórica 4.
-
Page 38: Detección Y Solución De Problemas
Estos accesorios o aditamen- Consulte la hoja de la garantía anexa para ver los tos están recomendados para utilizarse con su términos más vigentes de la garantía aplicable a este herramienta Makita especificada en este manual. producto. En caso de no disponer de esta hoja de El empleo de cualquier otro accesorio o aditamento garantía anexa, consulte los detalles sobre la garantía puede conllevar el riesgo de lesiones personales. - Page 40 Para reducir la exposición a estos productos químicos: trabaje en un área bien ventilada y póngase el equipo de seguridad indicado, tal como las máscaras contra polvo que están especialmente diseñadas para filtrar partículas microscópicas. Makita Corporation 3-11-8, Sumiyoshi-cho, Anjo, Aichi 446-8502 Japan 885966A940...
Need help?
Do you have a question about the GLC03 and is the answer not in the manual?
Questions and answers