Table of Contents
Advertisement
Quick Links
Dell™ SP1908FP Flat Panel Monitor User's Guide
About Your Monitor
Front View
Back View
Side View
Bottom View
Monitor Specifications
Cleaning Your Monitor
Using Your Adjustable Monitor Stand
Attaching the Stand
Organizing Your Cables
Using the Tilt
Removing the Stand
Setting Up Your Monitor
Connecting Your Monitor
Using the Front Panel
Using the OSD
Setting the Optimal Resolution
Using the Dell Soundbar (Optional)
Notes, Notices, and Cautions
NOTE: A NOTE indicates important information that helps you make better use of your computer.
NOTICE: A NOTICE indicates either potential damage to hardware or loss of data and tells you how to avoid the problem.
CAUTION: A CAUTION indicates a potential for property damage, personal injury, or death.
Information in this document is subject to change without notice.
© 2006-2007 Dell Inc. All rights reserved.
Reproduction in any manner whatsoever without the written permission of Dell Inc. is strictly forbidden.
Trademarks used in this text: Dell, the DELL logo, Inspiron, Dell Precision, Dimension, OptiPlex, Latitude, PowerEdge, PowerVault, PowerApp, and Dell OpenManage are trademarks of Dell
Inc; Microsoft, Windows, and Windows NT are registered trademarks of Microsoft Corporation; Adobe is a trademark of Adobe Systems Incorporated, which may be registered in
certain jurisdictions. ENERGY STAR is a registered trademark of the U.S. Environmental Protection Agency. As an ENERGY STAR partner, Dell Inc. has determined that this product
meets the ENERGY STAR guidelines for energy efficiency.
Other trademarks and trade names may be used in this document to refer to either the entities claiming the marks and names or their products. Dell Inc. disclaims any
proprietary interest in trademarks and trade names other than its own.
Model SP1908FP
July 2007 Rev. A01
Great user manuals database on
UserManuals.info
Solving Problems
Troubleshooting Your Monitor
General Problems
Product Specific Problems
USB Problems
Troubleshooting Your Soundbar
Appendix
Safety Information
FCC Notice (U.S. Only)
Contacting Dell
Your Monitor Setup Guide
Advertisement
Table of Contents

Subscribe to Our Youtube Channel
Related Manuals for Dell SP190SFP


Summary of Contents for Dell SP190SFP
- Page 1 ENERGY STAR guidelines for energy efficiency. Other trademarks and trade names may be used in this document to refer to either the entities claiming the marks and names or their products. Dell Inc. disclaims any proprietary interest in trademarks and trade names other than its own.
-
Page 2: About Your Monitor
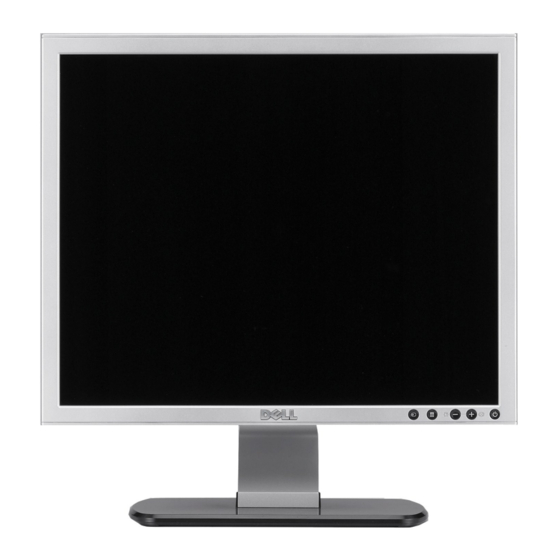
Back to Contents Page About Your Monitor Dell™ SP1908FP Flat Panel Monitor User's Guide Front View Back View Bottom View Side View Monitor Specifications Cleaning Your Monitor Front View Video input select OSD menu / select button Brightness & Contrast / Down (-) button... -
Page 3: Bottom View
Use to mount the monitor. attached base plate) 2 Barcode serial number label Refer to this label if you need to contact Dell for technical support. 3 Security lock slot Use a security lock with the slot to help secure your monitor. - Page 4 The following table shows the power consumption and signaling of this automatic power saving feature: VESA Modes Horizontal Sync Vertical Sync Video Power Indicator Power Consumption Normal operation (with Dell Soundbar and USB active) Active Active Active Green...
-
Page 5: Universal Serial Bus (Usb) Interface
DDC data H-sync V-sync DDC clock 24-pin Digital-only DVI Connector NOTE: Pin 1 is at the top right. The following table shows pin assignments in the DVI connector: Pin Signal Assignment Pin Signal Assignment Pin Signal Assignment T.M.D.S. Data 2- T.M.D.S. -
Page 6: Video Supported Modes
Screen type Active matrix - TFT LCD Screen dimensions 19 inches (19-inch viewable image size) Preset display area: Horizontal 380 mm (14.96 inches) Vertical 300 mm (11.81 inches) Pixel pitch 0.294 mm Viewing angle 160° (vertical) typ, 160° (horizontal) typ Luminance output 300 CD/m ²(typ) Contrast ratio 800 to 1 (typ) Faceplate coating... -
Page 7: Cleaning Your Monitor
Analog: Detachable, D-Sub, 15pins, shipped attached to the monitor Dimensions (with stand): Height 16.56 inches (420.5 mm) Width 16.15 inches (410.1 mm) Depth 7.17 inches (182.0 mm) Dimensions: (without stand) 13.31 inches (338.1 mm) Height 16.15 inches (410.1 mm) Width 2.59 inches (65.9 mm) Depth... - Page 8 Back to Contents Page Great user manuals database on UserManuals.info...
-
Page 9: Fcc Notice (U.s. Only)
2 This device must accept any interference received, including interference that may cause undesired operation. NOTICE: The FCC regulations provide that changes or modifications not expressly approved by Dell Inc. could void your authority to operate this equipment. These limits are designed to provide reasonable protection against harmful interference in a residential installation. However, there is no guarantee that interference will not occur in a particular installation. -
Page 10: Contacting Dell
NOTE: Toll-free numbers are for use within the country for which they are listed. NOTE: In certain countries, support specific to Dell XPS™ portable computers is available at a separate telephone number listed for participating countries. If you do not see a telephone number listed that is specific for XPS portable computers, you may contact Dell through the support number listed and your call will be routed appropriately. - Page 11 Customer Service toll-free: 1300-662-196 Austria (Vienna) Online Support support.euro.dell.com tech_support_central_europe@dell.com International Access Code: 900 Technical Support for XPS computers only 0820 240 530 81 Home/Small Business Sales 0820 240 530 00 Country Code: 43 Home/Small Business Fax 0820 240 530 49 Home/Small Business Customer Service...
- Page 12 Technical Support Fax 592 818 1350 City Code: 592 Technical Support – XPS computers only toll-free: 800 858 0540 Technical Support – Dell™ Dimension™ and Dell Inspiron™ toll-free: 800 858 2969 Technical Support – Dell OptiPlex™, Dell Latitude™, and Dell toll-free: 800 858 0950 Precision™ Technical Support – Servers and Storage toll-free: 800 858 0960...
- Page 13 Technical Support – XPS computers only 00852-3416 6923 Technical Support – Dimension and Inspiron 00852-2969 3188 Country Code: 852 Technical Support – OptiPlex, Latitude, and Dell Precision 00852-2969 3191 Technical Support – Servers and Storage 00852-2969 3196 Technical Support – Projectors, PDAs, Switches, Routers, 00852-3416 0906...
- Page 14 Country Code: 81 Technical Support outside of Japan – Dimension and 81-44-520-1435 Inspiron City Code: 44 Technical Support – Dell Precision, OptiPlex, and Latitude toll-free:0120-198-433 Technical Support outside of Japan – Dell Precision, 81-44-556-3894 OptiPlex, and Latitude Technical Support – Dell PowerApp, Dell PowerEdge, Dell toll-free: 0120-198-498...
- Page 15 Technical Support – XPS computers only toll-free: 1 800 885 784 International Access Code: 00 Technical Support – Dell Precision, OptiPlex, and Latitude toll-free: 1 800 880 193 Technical Support – Dimension, Inspiron, and Electronics toll-free: 1 800 881 306 Country Code: 60...
- Page 16 toll-free: 1800 394 7464 Country Code: 65 Technical Support – Dimension, Inspiron, and Electronics toll-free: 1800 394 7430 and Accessories Technical Support – OptiPlex, Latitude, and Dell Precision toll-free: 1800 394 7488 Technical Support – PowerApp, PowerEdge, PowerConnect, toll-free: 1800 394 7478 and PowerVault Customer Service...
- Page 17 toll-free: 0080 165 1228 Corporate Sales toll-free: 0080 165 1227 Thailand Online Support support.ap.dell.com Technical Support (OptiPlex, Latitude, and Dell Precision) toll-free: 1800 0060 07 International Access Code: 001 Technical Support (PowerApp, PowerEdge, PowerConnect, toll-free: 1800 0600 09 and PowerVault) Country Code: 66...
- Page 18 la-techsupport@dell.com Technical Support, Customer Service, Sales toll-free: 000-413-598-2521 U.S.A. (Austin, Texas) toll-free:1-877-DELLTTY Dell Services for the Deaf, Hard-of-Hearing, or Speech- Impaired International Access Code: 011 (1-877-335-5889) Fax toll-free:1-800-727-8320 Country Code: 1 Technical Support support.dell.com XPS toll-free:1-800-232-8544 Home and Home Office toll-free:1-800-624-9896...
-
Page 19: Setting Up Your Monitor
Dell™ SP1908FP Flat Panel Monitor User's Guide Connecting Your Monitor Using the Front Panel Using the OSD Menu Setting the Optimal Resolution Using the Dell Soundbar (Optional) Connecting Your Monitor CAUTION: Before you begin any of the procedures in this section, follow the safety instructions. 1. Turn off your computer and disconnect the power cable. -
Page 20: Using The Front Panel
NOTE: The floating 'Dell Self-test Feature Check' dialog appears on a black background if the monitor cannot sense a video signal. Using the input select button, select the desired input to be tested either Analog Input or Digital Input. Disconnect the video cable from the video card and the Dell Self-test Feature Check dialogue box will appear if the display is operating correctly. -
Page 21: Using The Osd Menu
NOTE: Auto Adjust does not occur if you press the button while there are no active video input signals or attached cables. Use the power button to turn the monitor on and off. The green light indicates the monitor is on and fully functional. An amber light indicates power save mode. Power Button and Indicator Using the OSD Menu NOTE: If you change the settings and then either proceed to another menu, or exit the OSD menu, the monitor automatically saves those changes. The changes are also saved if you change the settings and then wait for the OSD menu to disappear. 1. Push the Menu button to open the OSD menu and display the main menu. Main Menu for Auto Detect Analog (VGA) Input ... - Page 22 NOTE: Auto Adjust, Positioning and Image Settings are only available when you are using the analog (VGA) connector. 2. Push the - and + buttons to move between the setting options. As you move from one icon to another, the option name is highlighted. See the table below for a complete list of all the options available for the monitor.
- Page 23 NOTE: When using DVI source, the Positioning option is not available. Auto Adjust Even though your computer recognizes your monitor on startup, the Auto Adjustment function optimizes the display settings for use with your particular setup. Select to activate automatic setup and adjustment. The following dialog appears on a black screen as the monitor self-adjusts to the current input: Auto Adjust In Progress Auto Adjustment allows the monitor to self-adjust to the incoming video signal.
- Page 24 You can select to have the audio on or off when the monitor is in power saving mode. (optional) Yes — enables audio No — disables audio (default) NOTE: When the Dell Soundbar is not properly connected to the monitor, the audio menu is not available. Great user manuals database on UserManuals.info...
- Page 25 Factory Reset the OSD menu options to the factory preset values. Reset: Exit — Select to exit out of Reset to Factory Settings menu without resetting any OSD options. Position settings only — Change the settings for Image Position back to original factory settings. Color settings only — Change the Red, Green, and Blue settings back to their original factory settings and set the default setting for Normal Preset. All settings — Change all the user-adjustable settings including color, position, brightness, contrast and OSD hold time to the factory defaults.
-
Page 26: Osd Warning Messages
If you do not see 1280 x 1024 as an option, you may need to update your graphics driver. Depending on your computer, complete one of the following procedures. If you have a Dell desktop or portable computer: Go to support.dell.com, enter your service tag, and download the latest driver for your graphics card. ¡ If you are using a non-Dell computer (portable or desktop): Go to the support site for your computer and download the latest graphic drivers. - Page 27 Using the Dell Soundbar (Optional) The Dell Soundbar is a stereo two channel system adaptable to mount on Dell flat panel displays. The Soundbar has a rotary volume and on/off control to adjust the overall system level, a blue LED for power indication, and two audio headset jacks.
-
Page 28: Solving Problems
3. Turn on the monitor. NOTE: The floating 'Dell Self-test Feature Check' dialog box should appear on a black background if the monitor cannot sense a video signal. Using the input select button, select the desired input to be tested either Analog Input or Digital Input. Disconnect the video cable from the video card and the Dell Self-test Feature Check dialogue box will appear if the display is operating correctly. -
Page 29: General Problems
Optimum Resolution 1280 x1024 60Hz Optimum Resolution 1280 x1024 60Hz This means that the monitor cannot synchronize with the signal that it is receiving from the computer. Either the signal is too high or too low for the monitor to use. -
Page 30: Usb Problems
NOTE: Image Burn-in is not covered by your warranty. Product Specific Problemss SPECIFIC SYMPTOMS WHAT YOU EXPERIENCE POSSIBLE SOLUTIONS Screen image is too small Image is centered on screen, but does not fill Perform monitor reset on "All Settings." entire viewing area. Cannot adjust the monitor with the OSD does not appear on the screen. - Page 31 Back to Contents Page Great user manuals database on UserManuals.info...
-
Page 32: Attaching The Stand
Back to Contents Page Using Your Adjustable Monitor Stand Dell™ SP1908FP Flat Panel Monitor User's Guide Attaching the Stand Organizing Your Cables Using the Tilt Removing the Stand Attaching the Stand NOTE: The stand is detached when the monitor is shipped from the factory. 1. Fit the groove on the monitor to the two tabs on the stand. -
Page 33: Removing The Stand
NOTE: Stand is detached when the monitor is shipped from the factory. Removing the Stand NOTE: After placing the monitor panel on a soft cloth or cushion, complete the following step to remove the stand. 1. Press the stand release button. 2.
Need help?
Do you have a question about the SP190SFP and is the answer not in the manual?
Questions and answers